| Oracle® Database Express Edition 2 Day Plus .NET Developer Guide 10g Release 2 (10.2) Part Number B25312-01 |
|
|
View PDF |
| Oracle® Database Express Edition 2 Day Plus .NET Developer Guide 10g Release 2 (10.2) Part Number B25312-01 |
|
|
View PDF |
This chapter explains how to connect to the Oracle database. You will be using the application you will build in this chapter as a starting point for work in all subsequent chapters.
This chapter contains the following sections:
Follow these steps to start a project in Visual Studio .NET 2003:
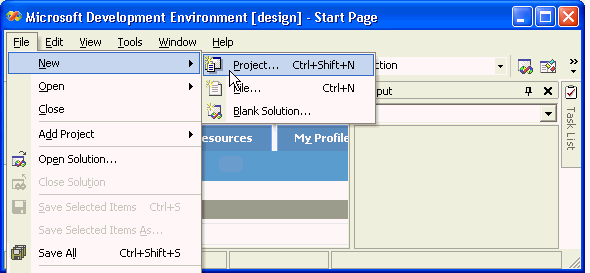
Click the New Project button. Alternatively, from the File menu, select New, and then select Project.
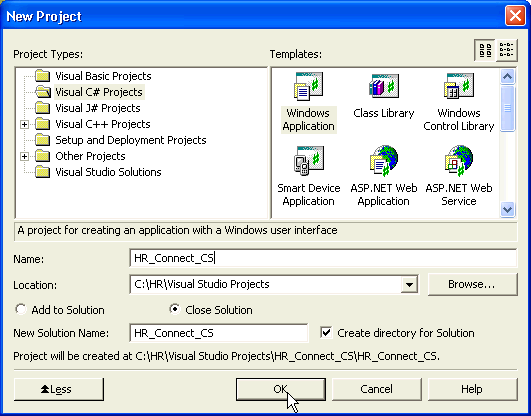
On the left side of the New Project dialog box under Project Types, select Visual C# Projects.
On the right side of the New Project dialog box under Templates, select Windows Application.
For Name, enter HR_Connect_CS.
For Location, enter C:\HR\Visual Studio Projects.
Check the Create Directory for Solution box.
For New Solution Name, enter HRApplication. A solution can contain several projects; when it contains only one project, you can use the same name for both.
Click OK.
If you wish to create project in Visual Basic, select Visual Basic Projects in Project Types instead, and enter HR_Connect_VB under Name.
To connect the project to an Oracle database, you must add a reference to the Oracle.DataAccess.dll, which contains the data provider.
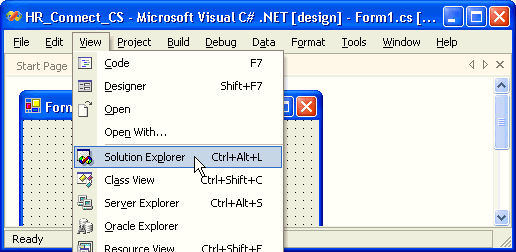
If it is not already active, start the Solution Explorer; from the View menu, select Solution Explorer.
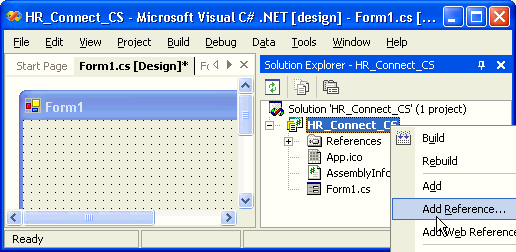
In the Solution Explorer, select the References node, right click and select Add Reference. Alternatively, select Add Reference from the Project menu.
Scroll down the list of references (under Component Name), and select Oracle.DataAccess.dll.
Click the Select button.
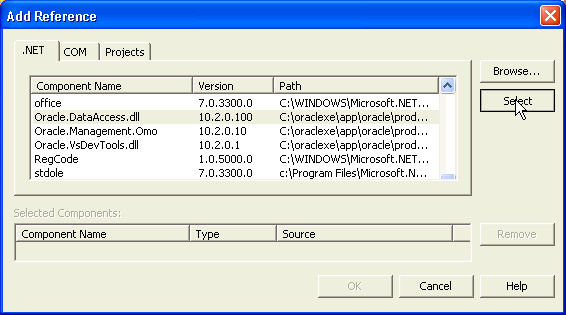
Click the OK button to add the Oracle Data Provider for .NET to your project.
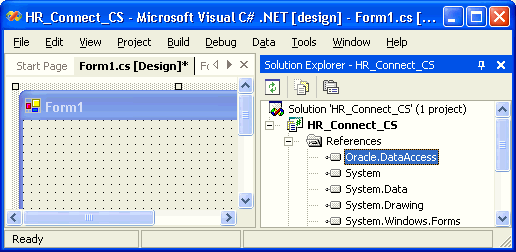
Note that the Solution Explorer window now shows Oracle.DataAccess in the References folder.
C# using statements and Visual Basic Imports statements allow you to refer to database objects without using lengthy, fully qualified names. By convention, these statements appear at or near the top of a code file, before the namespace or class declaration.
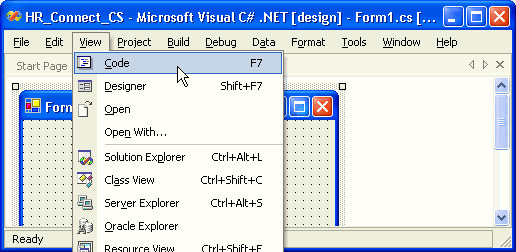
With Form1 active, in View menu select Code, or use the F7 keyboard shortcut.
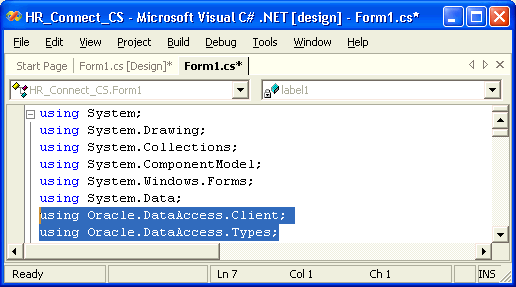
Add the statements in Example 3-1 or Example 3-2 to the top of the file.
Example 3-1 Adding Initial Programmatic Statements: C#
using Oracle.DataAccess.Client;
using Oracle.DataAccess.Types;
Example 3-2 Adding Initial Programmatic Statements: VB
Imports Oracle.DataAccess.Client
Imports Oracle.DataAccess.Types
Save the changes using the Save icon near the top of the window. Alternatively, from the File menu, select Save, or use the Ctrl+S keyboard shortcut.
To create a connection interface, you must add the necessary data entry elements to the design form.
With Form1 active, change to design view: from the View menu, select Designer. Alternatively, use the Shift+F7 keyboard shortcut. You may also wish to close the Solution Explorer at this time.
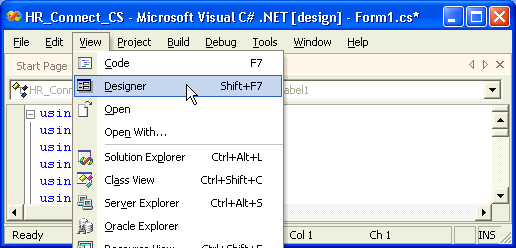
From the View menu, select Toolbox.
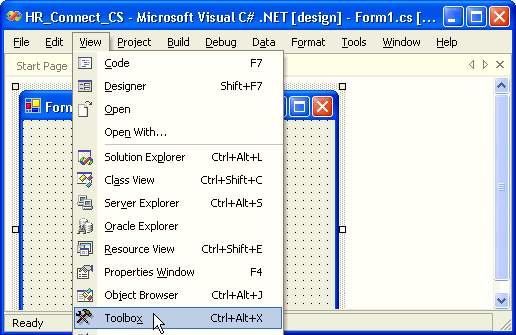
From the Toolbox, under Windows Forms, select a Label and drag it onto Form1.
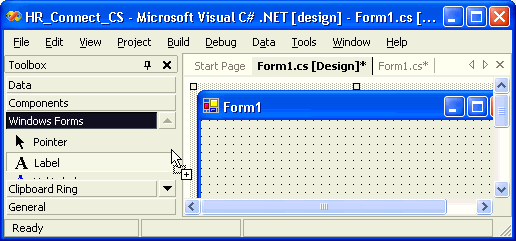
A new label, label1, appears on the form.
Repeat Step 3 twice, adding two more labels to the form (label2 and label3).
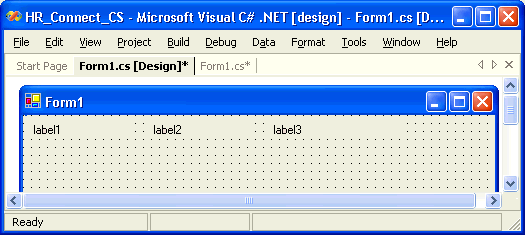
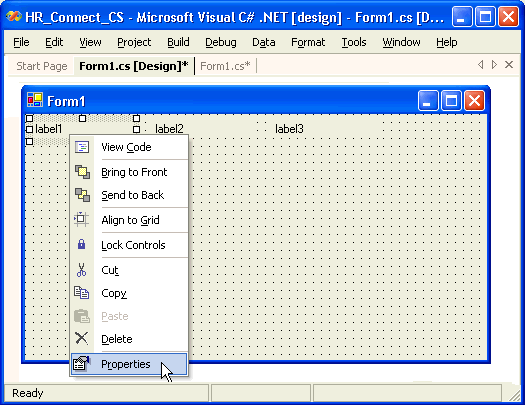
Right-click label1, and select Properties.
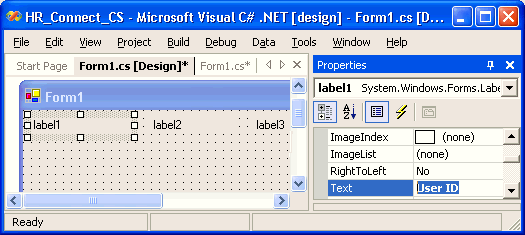
Change the Text property from label1 to User ID.
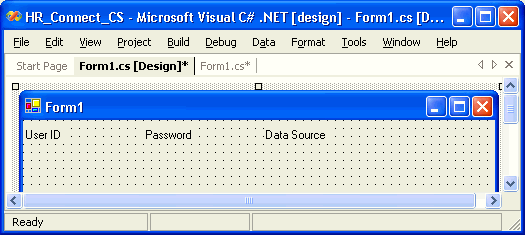
Repeat Steps 5 and 6 for the other two labels, changing the text to Password and Data Source, respectively.
From the View menu, select Toolbox. From the Toolbox, under Windows Forms, select a Text Box and drag it onto Form1.
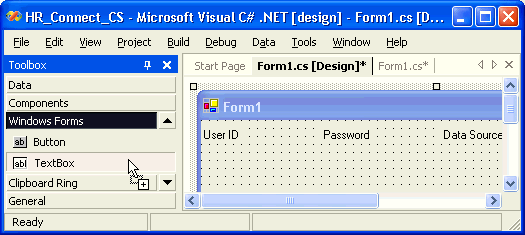
A new text box, textBox1, appears on the form.
Repeat Step 8 twice, adding two more text boxes (textBox2 and textBox3).
Right-click textBox1, and select Properties.
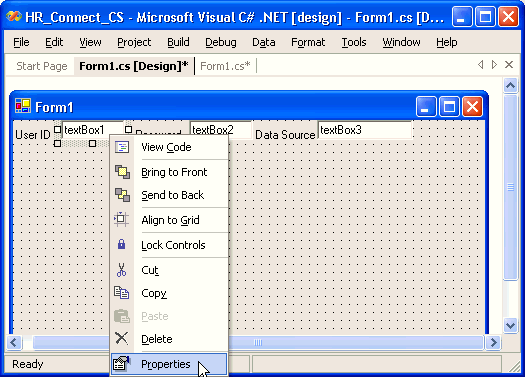
In Properties, under Appearance, remove the text in the Text property.
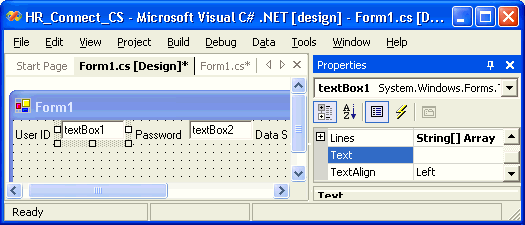
In Properties, under Design, change the value of (Name) to userID.
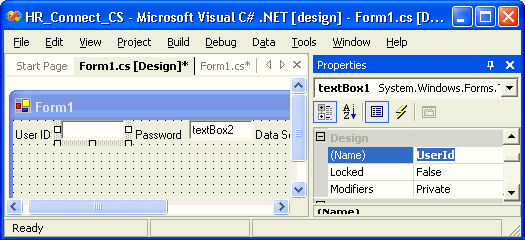
Repeat Steps 10 through 12 twice, changing textBox2 into password and textBox2 into dataSource.
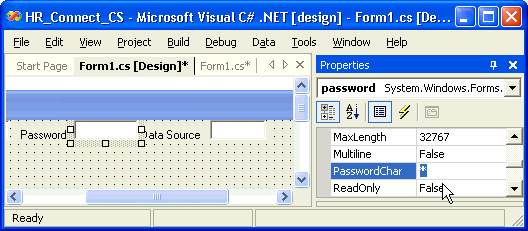
For the password text box, under Behavior category, change the value of PasswordChar property to *. This will hide the password when it is entered.
From the View menu, select Toolbox. In the Toolbox, under Window Forms, select Button and drag it onto Form1.
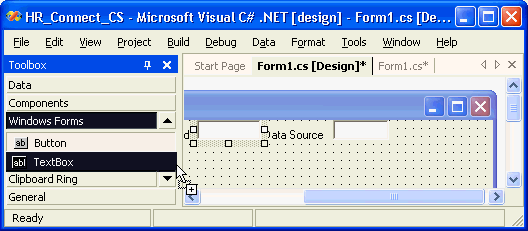
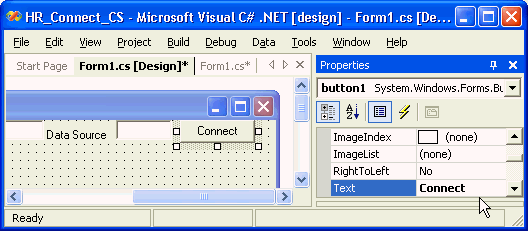
Right-click button1, and select Properties. The Properties window appears.
In the Properties window, change the Text property to Connect.
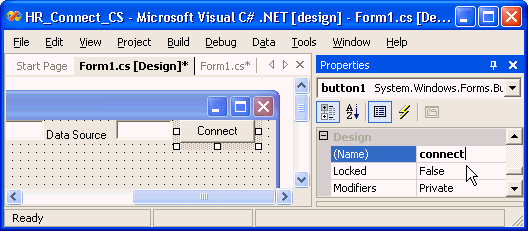
Under Design, change the (Name) property to connect.
Save the changes using the Ctrl+S keyboard shortcut.
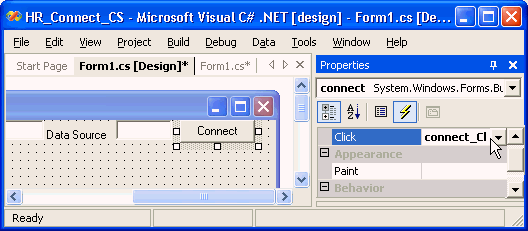
Click the lightning icon (Events) at the top of the Properties window.
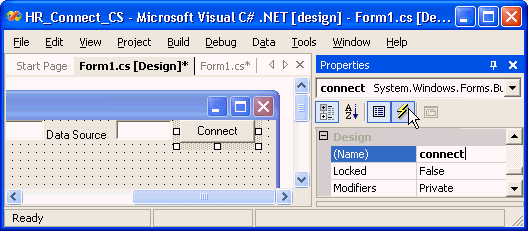
Ensure that the Click event is called connect_Click. Save changes.
The OracleConnection object specifies the Oracle Database used by the application.
The Easy Connect naming method enables application clients to connect to a database without using any configuration files, simply by specifying the data source attribute through syntax shown in Example 3-3:
Example 3-3 Easy Connect Naming Method Syntax for Data Source
user id=id;password=psswd;data source=host:port/service_name
Where:
psswd is the password; in this book, we use hr password for the HR schema.
host is the DNS name of the server machine to which the XE client will make the connection, such as hr-server in the following example of valid connections.
port [optional], if not specified, uses the default value of 1521, which is the server port number from which the client connects to the database.
service_name [optional], if not specified, the EZ Connect Adapter for XE client will connect to the default service on the host, preconfigured as XE in the listener.ora file on the XE server.
Note that the default service is a new feature for Oracle Database XE. If you used other Oracle client software, such as Instant Client for Oracle Database Enterprise Edition, you must supply the service name.
Some valid connection strings include:
user id=hr;password=hr;data source=hr-server
user id=hr;password=hr;data source=hr-server:1521
user id=hr;password=hr;data source=hr-server:1521/XE
Example 3-4 and Example 3-5 show how to instantiate a database connection string.
Example 3-4 Creating an OracleConnection Object: C#
Add this class variable after the GUI elements you created in the previous section.
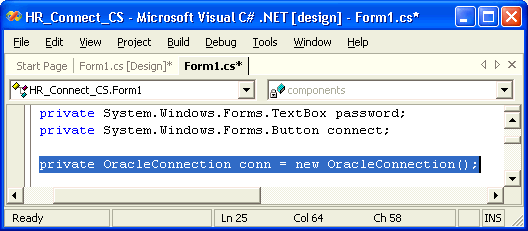
private OracleConnection conn = new OracleConnection();
Example 3-5 Creating an OracleConnection Object: VB
Add this class variable after the line that starts as Inherits, near the top of the file, in the Form1 class declaration.
Dim conn As New OracleConnection
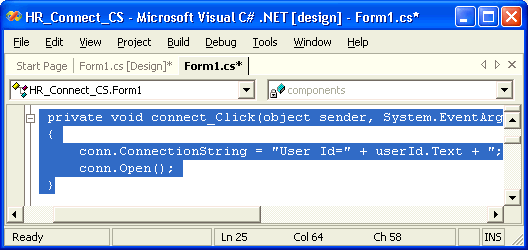
Before a connection can be open, it must be built from user input for the User ID, Password, and Data Source. Add the code in Example 3-6 or Example 3-7 to your application. Note that the Open() method makes the actual connection. Add this code into the connect_Click() method (for C#) or subroutine (VB).
Example 3-6 Building and Opening a Connection: C#
conn.ConnectionString = "User Id=" + userId.Text + ";Password=" + password.Text +
  ";Data Source=" + dataSource.Text + ";";
conn.Open();
Example 3-7 Building and Opening a Connection: VB
conn.ConnectionString = "User Id=" + userId.Text + ";Password=" + & _
  password.Text + ";Data Source=" + dataSource.Text + ";"
conn.Open()
As part of good programming practice, add the code in Example 3-8 and Example 3-9 after the Open() call of Form1. This will disable the Connect button after a connection is successfully made.
Save the application.
The following steps show how to run the application created in the previous sections.
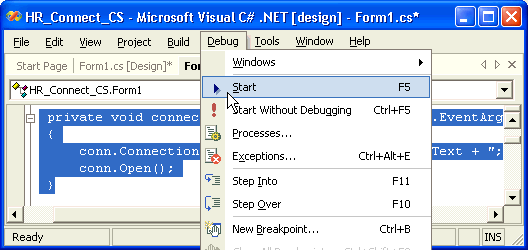
With Form1 active, from the Debug menu, select Start. Alternatively, use the F5 keyboard shortcut.
After the application is built successfully, the Form1 window appears.
Enter the user ID, the password, and the data source information, and click Connect. If you are using a local database, located on the same machine as the .NET client, you may leave the data source field blank.

Note that after a successful connection, the Connect button is disabled.

Oracle Data Provider for .NET contains three classes for error handling and support:
The OracleError class represents a warning or an error reported by Oracle.
An OracleErrorCollection class represents a collection of all errors that are thrown by the Oracle Data Provider for .NET. In fact, it is a simple ArrayList that holds a list of OracleErrors.
The OracleException class represents an exception that is thrown when the Oracle Data Provider for .NET encounters an error. Each OracleException object contains at least one OracleError object in the Error property that describes the error or warning.
The .NET languages use Try-Catch-Finally structured error handling. Change the code in Form1, as indicated in Example 3-10 and Example 3-11, which are simple implementations of the Try-Catch-Finally syntax.
Before testing this code, stop the database. From the Start button, select All Programs, then select Oracle Database 10g Express Edition, and select Stop Database.

The database will begin to shut down. You should see a Stop Database window. Do not proceed with the following steps until it indicates that the "OracleServiceXE service was stopped successfully".

Run the application again, as described in section "Running the Application", and attempt to connect. The error caught when the database is unavailable appears as "ORA-12560: TNS:protocol adapter error".
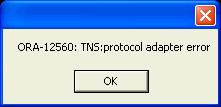
While this approach will capture errors encountered when connecting to the database, the message is not very informative for the end user.
Add another catch statement to trap common database errors and to display these errors in a more user-friendly manner. Insert Example 3-12 or Example 3-13 code before the generic catch statement.
Example 3-12 Catching Common Database Error Messages: C#
catch (OracleException ex)
{
  switch (ex.Number)
  {
    case 1:
      MessageBox.Show("Error attempting to insert duplicate data.");
      break;
    case 12560:
      MessageBox.Show("The database is unavailable.");
      break;
    default:
      MessageBox.Show("Database error: " + ex.Message.ToString());
    break;
  }
}
Example 3-13 Catching Common Database Error Messages: VB
Catch ex As OracleException ' catches only Oracle errors
  Select Case ex.Number
    Case 1
      MessageBox.Show("Error attempting to insert duplicate data.")
    Case 12560
      MessageBox.Show("The database is unavailable.")
    Case Else
      MessageBox.Show("Database error: " + ex.Message.ToString())
  End Select
The Case statements should be ordered from most specific to most general. If there are no OracleExceptions, the first Catch statement branch (Example 3-12 or Example 3-13) is skipped. The second Catch statement (in Example 3-10 or Example 3-11) catches all other Exceptions.
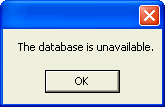
Run the application again, as described in section "Running the Application". After implementing Example 3-12 or Example 3-13, the ORA-12560 error appears as "The database is unavailable.":
The Finally code block is always executed. If the connection object's Dispose() method call is in the Finally code block, the database connection will always be closed after the Try-Catch-Finally block is complete. Attempting to close a closed database connection does not cause an error. If the database is unavailable, the database connection is not opened, so the Finally code block attempts to close a connection that does not exist, making these calls irrelevant. However, placing Dispose() in the Finally code block guarantees that the connection is closed.
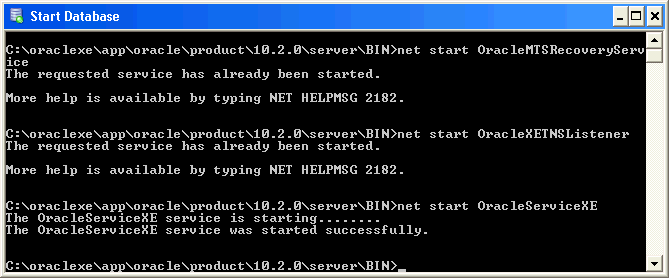
Before proceeding, restart the database. From the Start button, select All Programs, then select Oracle Database 10g Express Edition, and select Start Database.

The database services will begin to start. You should see a Start Database window. Do not proceed with the following steps until it indicates that the "OracleServiceXE service was started successfully".
A connection Dispose() method closes and disposes the connection, as shown in Example 3-14 and Example 3-15.
C# has an alternative syntax that disposes of a connection when it goes out of scope, through the using keyword, as shown in Example 3-16.