| Oracle® Web Services Manager Quick Start Guide 10g (10.1.3.1.0) Part Number B32126-01 |
|
|
View PDF |
| Oracle® Web Services Manager Quick Start Guide 10g (10.1.3.1.0) Part Number B32126-01 |
|
|
View PDF |
The Oracle Web Services Manager Quick Start Guide can be used with Oracle Web Services Manager either as a standalone installation or as part of a basic installation of Oracle Application Server 10g Release 3 (10.1.3.1.0).
This chapter provides basic installation procedures for installing Oracle Web Services Manager as part of a basic installation of Oracle Application Server 10g Release 3 (10.1.3.1.0). If you are installing Oracle Web Services Manager as a standalone product, refer to Oracle Web Services Manager Installation Guide for installation instructions.
Before you begin installing Oracle Web Services Manager, ensure that you have read both Chapter 2, "Requirements" and Chapter 3, "Things You Should Know Before Starting the Installation" in the installation guide for your platform (Oracle Application Server Installation Guide for Microsoft Windows or Oracle Application Server Installation Guide for Linux x86). These chapters contain important information with which you must be familiar before you begin the installation so you can avoid potential problems during the installation.
Follow the instructions for starting the Oracle Universal Installer for your platform.
Log in to the computer as a user who is a member of the Windows Administrators group.
Insert the disk.
CD-ROM users: Insert Oracle Application Server Disk 1 into the CD-ROM drive.
DVD-ROM users: Insert Oracle Application Server DVD-ROM into the DVD-ROM drive.
If your computer supports the auto-run feature the installer launches automatically.
If your computer does not support the auto run features, you have to start up the installer manually:
CD-ROM users: Double-click setup.exe.
DVD-ROM users: Double-click setup.exe in the application_server directory.
This launches Oracle Universal Installer, through which you install Oracle Application Server.
If your computer does not mount CD-ROMs or DVDs automatically, you need to set the mount point manually. See "Setting the Mount Point for the CD-ROM or DVD-ROM" in Oracle Application Server Installation Guide for Linux x86 for details.
Log in as the oracle user.
CD-ROM users: Insert Oracle Application Server Disk 1 into the CD-ROM drive.
DVD-ROM users: Insert the Oracle Application Server DVD-ROM into the DVD-ROM drive.
Run the Oracle Universal Installer using the command shown after the notes:
|
Notes:
|
prompt> cd
prompt> mount_point/10.1.3disk1/runInstaller
prompt> cd
prompt> mount_point/application_server/runInstaller
This launches Oracle Universal Installer, through which you install Oracle Application Server.
To install Oracle Web Services Manager as part of the Oracle Application Server installation, perform the following steps:
Start Oracle Universal Installer.
For more information, refer to "Starting the Oracle Universal Installer".
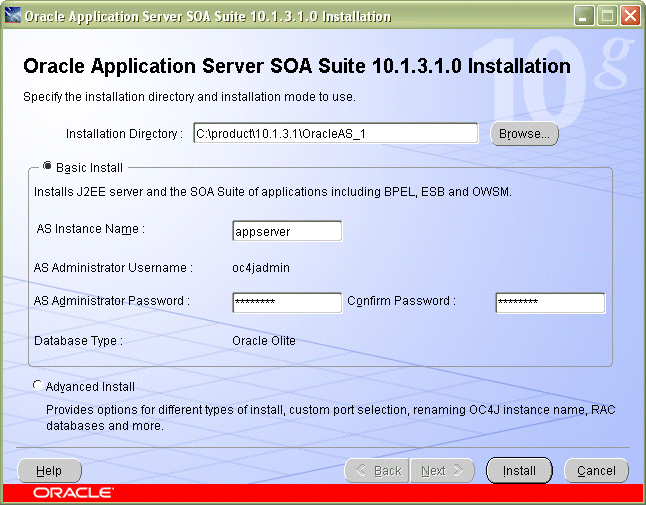
Oracle Application Server SOA Suite 10.1.3.1.0 Installation Screen (Figure 1-1.)
Installation Directory: Enter the directory where you want install Oracle Application Server.
Select Basic Installation Mode.
AS Instance Name: The instance name identifies this Oracle Application Server instance. If you have more than one Oracle Application Server instance on the same host, the instances must have unique names.
AS Administration Username: The administration username for Oracle Application Server instances is set to oc4jadmin and cannot be changed. To manage Oracle Application Server instances using Oracle Enterprise Manager 10g, log in as the oc4jadmin user.
AS Administration Password and Confirm Password: Enter the password for the oc4jadmin user.
Database Type: An Oracle Olite Database is installed with the basic installation. If you want to use another Oracle database, you must perform an advanced installation.
Click Install.
Figure 1-1 Oracle Application Server 10g 10.1.3.1.0 Installation Screen

Oracle Universal Installer: Install Screen (Figure 1-2).
This screen shows the progress of installation.
Figure 1-2 Oracle Universal Installer: Install Screen

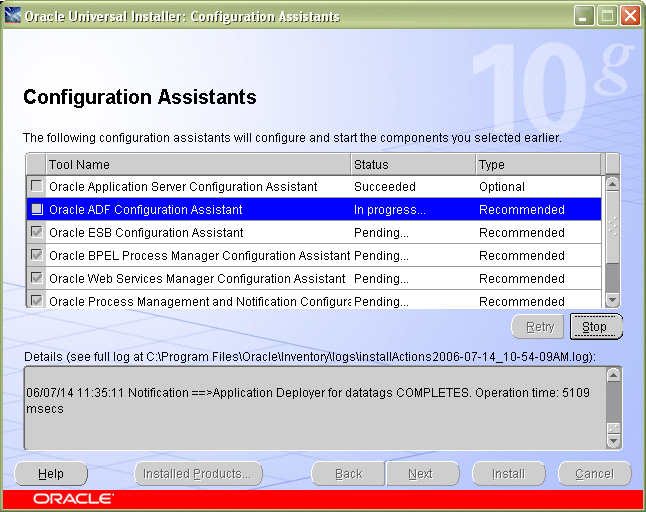
Oracle Universal Installer: Configuration Assistants Screen (Figure 1-3).
This screen shows the progress of the configuration assistants.
Figure 1-3 Oracle Universal Installer: Configuration Assistants Screen

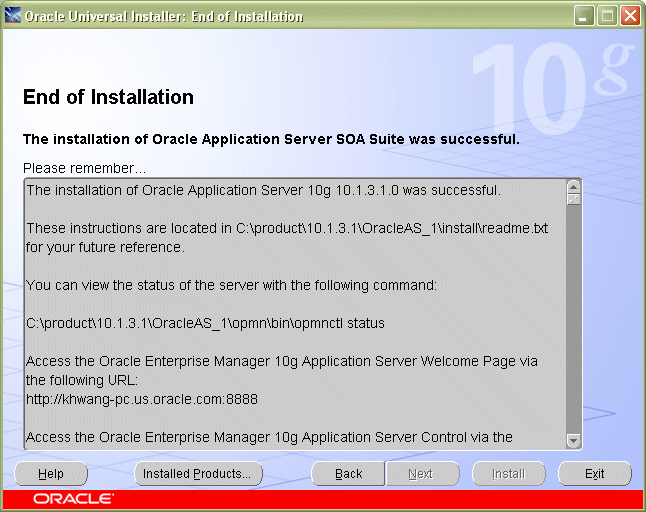
Oracle Universal Installer: End of Installation Screen (Figure 1-4).
This screen tells you whether or not your installation was successful, and provides links to various documentation, such as the product release notes and installation log, as well as links to various Oracle Application Server pages such as the Welcome Page or Application Server Control Console.
Figure 1-4 Oracle Universal Installer: End of Installation Screen

Now that you have successfully installed Oracle Web Services Manager, continue with Chapter 2, "Using Oracle Web Services Manager to Secure Your Web Services".