| Oracle® Retail Omnichannel Cloud Data Service Installation Guide Release 19.1.000 F32768-04 |
|

 Previous |
 Next |
| Oracle® Retail Omnichannel Cloud Data Service Installation Guide Release 19.1.000 F32768-04 |
|
Previous |
Next |
This chapter describes the process to deploy the configured 19.2 ords.war file onto the OCDS domain.
The prerequisites and steps outlined in the OCDS Schemas chapter have been completed.
The target WebLogic Admin Server and Managed Server should be running.
The JAVA_HOME environment variable must be set.
The OCDS Web Services leverage Oracle REST Data Services (ORDS). Perform the following procedure to prepare for the installation of ORDS.
Unzip ocds-ords-deployment.zip.
Copy the configured 19.2 ords.war file into the /dist folder.
|
Note: This ords.war file should have the config dir set to the correct /config folder. Otherwise set the location of the ORDS configuration files using:
|
Copy /config folder that was used when setting up ORDS in the database itself (see ”Configured ORDS 19.2 for the OCDS database”). It should contain /config/ords that has url-mapping.xml, <pdb_name>_pu.xml and other config files created when setting up the database.
Perform the following procedure to deploy the ORDS web application onto a WebLogic Domain:
Configure conf/ords-deployment-env-info.json file with the database and WebLogic domain details. This file is used by the deployment script.
Edit the Middleware Server definitions for OrdsAppServer.
webLogicDomainName: WebLogic domain name.
webLogicDomainHome: WebLogic domain home directory.
webLogicDomainAdminServerUrl: Server URL information.
webLogicDomainAdminServerHost: Server host.
webLogicDomainAdminServerPort: Admin Server port.
webLogicDomainTargetManagedServerName: Managed Server name.
Stop and restart the Managed Server and the Admin Server.
With the WebLogic Admin Server and the Managed Server running, change to the ocds-ords-deployment/bin folder and execute the version ords-deployer script for the o/s using the switches:
-setup-credentials -deploy-ords-app
On Linux:
./ords-deployer.sh -setup-credentials -deploy-ords-app
On Windows:
ords-deployer.cmd -setup-credentials -deploy-ords-app
There will be one prompt for WebLogic user credentials:
Enter username for alias (OcdsAppServerAdminServerUserAlias):
Enter the WebLogic Admin Server credentials.
There will be one prompt to create the OCDS Integration User:
Enter the credentials for the OCDS Integration user. These credentials will enable an Omnichannel application, such as the Xstore Suite, to communicate with OCDS.
|
Note: Password must not start with a number. |
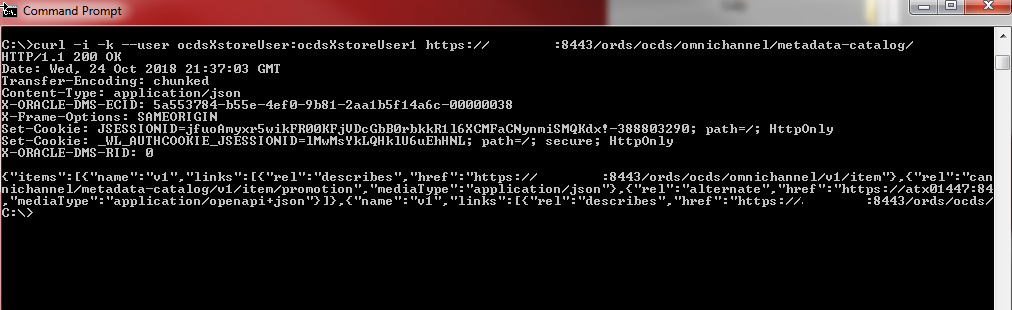
If the OCDS web services have been successfully installed then you should be able to request a JSON response from one of the OCDS REST resources.
Test by invoking a REST endpoint using a tool like curl (or SOAPUI, and so on). Curl is used for demonstration purposes.
URL http[s]://host[:port]/ords/<path-prefix>/omnichannel/metadata-catalog/
where
<path-prefix> is the prefix (defined in a previous step) that must occur at the start of the request path
curl -i -k --user ocdsXstoreUser:ocdsXstoreUser1 https://example:8443/ords/ocds/omnichannel/metadata-catalog/