| Oracle® Retail Omnichannel Cloud Data Service Installation Guide Release 19.1.000 F32768-04 |
|

 Previous |
 Next |
| Oracle® Retail Omnichannel Cloud Data Service Installation Guide Release 19.1.000 F32768-04 |
|
Previous |
Next |
This chapter describes the procedure to install and deploy the OCDS (RIB) Injector application on a WebLogic domain.
The target WebLogic Admin Server and Managed Server should be running.
The JAVA_HOME environment variable must be set.
Perform the following procedure to install the OCDS (RIB) Injector Application:
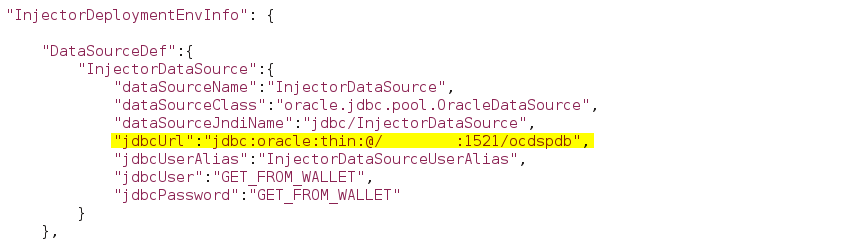
Configure the conf/bdi-job-admin-deployment-env-info.json file with the database and WebLogic domain details. This file is used by the deployment script.
Edit the Datasource definitions for InjectorDataSource.
jdbcUrl: This is the jdbc URL needed to connect to the OCDS Transactional schema. The OCDS Transactional (ocds_txn) schema was created during the prerequisite step: OCDS Database: Database Creation.
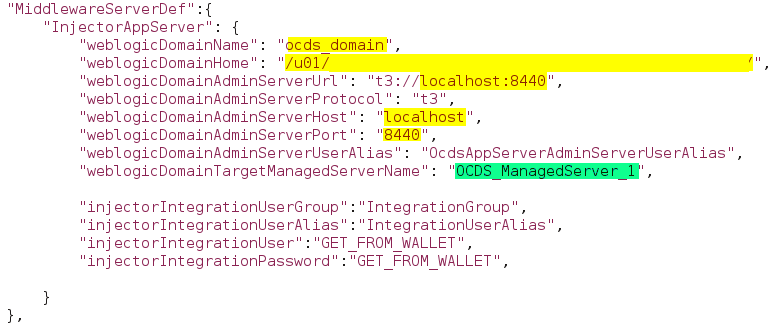
Edit the Middleware Server definitions for InjectorAppServer.
webLogicDomainName: WebLogic domain name.
webLogicDomainHome: WebLogic domain home directory.
webLogicDomainAdminServerUrl: Server URL information.
webLogicDomainAdminServerHost: Server host.
webLogicDomainAdminServerPort: Admin Server port.
webLogicDomainTargetManagedServerName: Managed Server name.
Perform the following procedures to install and deploy the Injector application.
Change to the ocds-injector-deployment/bin folder and execute the version of injector-deployer script for the o/s using the switches:
-setup-credentials -deploy-injector-app
On Linux:
./injector-deployer.sh -setup-credentials -deploy-injector-app
On Windows:
injector-deployer.cmd -setup-credentials -deploy-injector-app
There will be one prompt for WebLogic user credentials:
Enter username for alias (OcdsAppServerAdminServerUserAlias):
Enter the WebLogic Admin Server credentials.
There will be one prompt to create the Integration User:
Enter username for alias (IntegrationUserAlias):
Enter credentials for the integration user. These credentials will enable RIB to communicate with OCDS.
|
Note: Password must not start with a number. |
There will be one prompt for database user credentials.
Enter username for alias (InjectorDataSourceUserAlias):
Enter the credentials for the OCDS Transactional schema user. The username must be ocds_txn. The password was defined as a prerequisite in Chapter 3, "OCDS Schemas".
If the OCDS (RIB) Injector application has been successfully deployed then you should be able to verify the application is reported with an OK health status, and invoke a SOAP Web Service call from a tool like SOAP UI.
Verify the OCDS Injector Application (injector.war) is deployed and has a status of Active on the WLS Console.
The injector deployment can be more thoroughly verified by using the SOAP UI (http://www.soapui.org). Out of the box, the Injector is secured with RGBU PolicyA.
To configure SOAP UI to make SOAP requests:
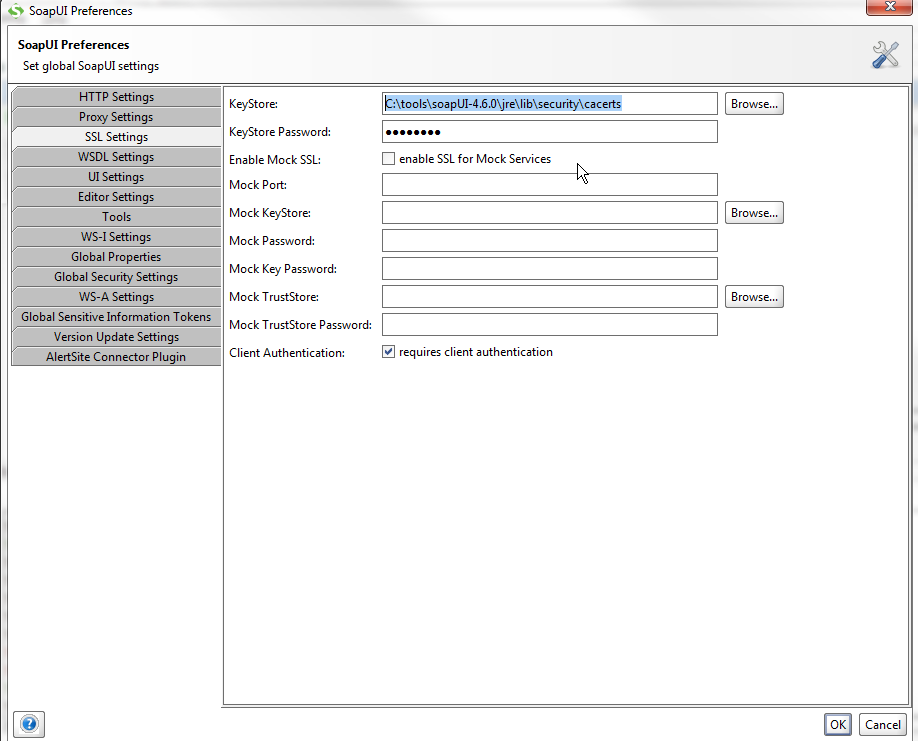
Add trusted SSL certificate to SOAPUI truststore. See SOAPUI preferences for location of truststore.
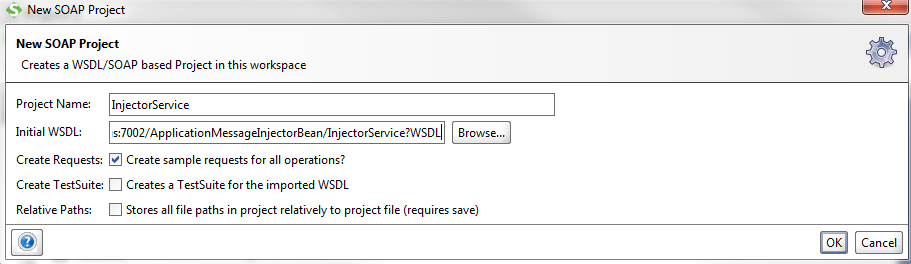
Create a new SOAP Project.
The WSDL location is https://<host>:<port>/ /ApplicationMessageInjectorBean/InjectorService?WSDL.
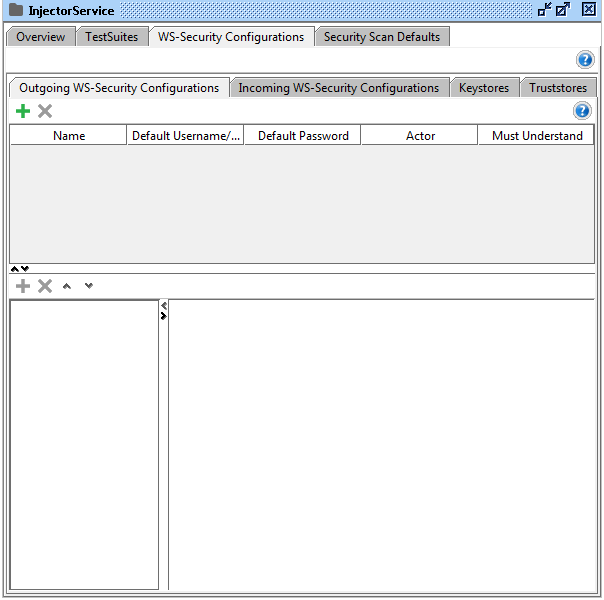
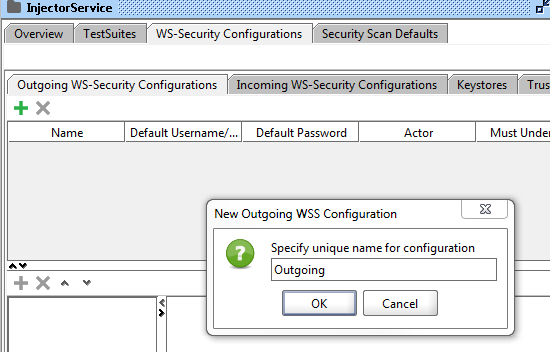
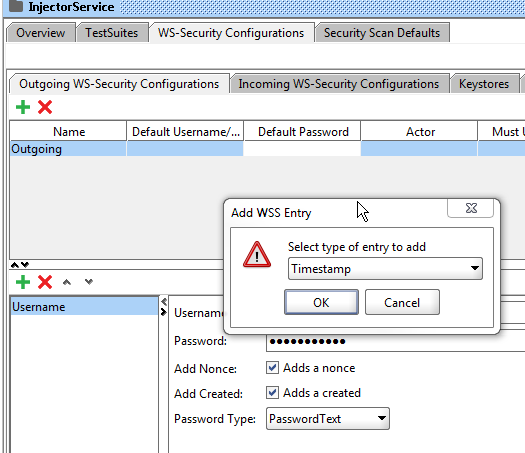
Create an outgoing WS-Security Configuration (from Show Project View).
Click the Plus sign to specify a unique name.
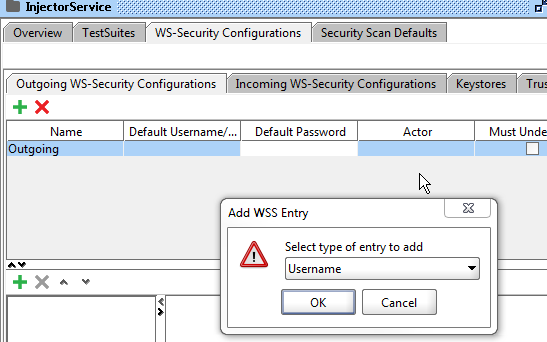
Click the Plus sign in lower section to add user name WSS Entry.
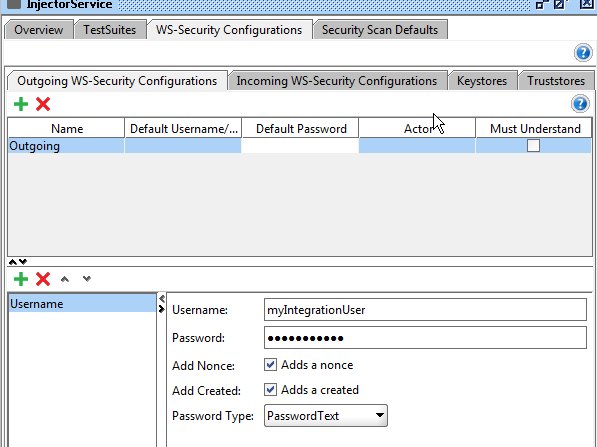
Enter the Integration user's username and password for the integration user and set the Password Type to PasswordText. (The user was defined when deploying the Injector.)
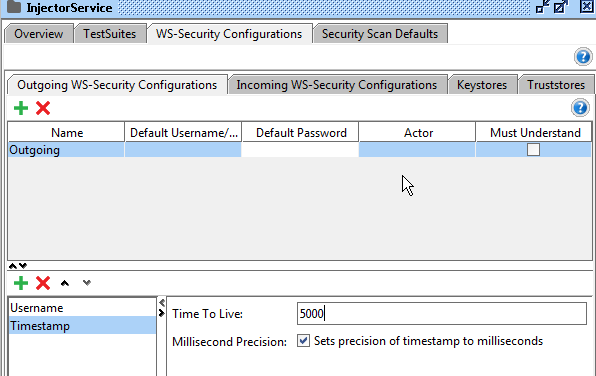
Click the Plus sign in the lower section to create a timestamp WSS entry.
Set the time to live to a large enough number to account for any network latency.
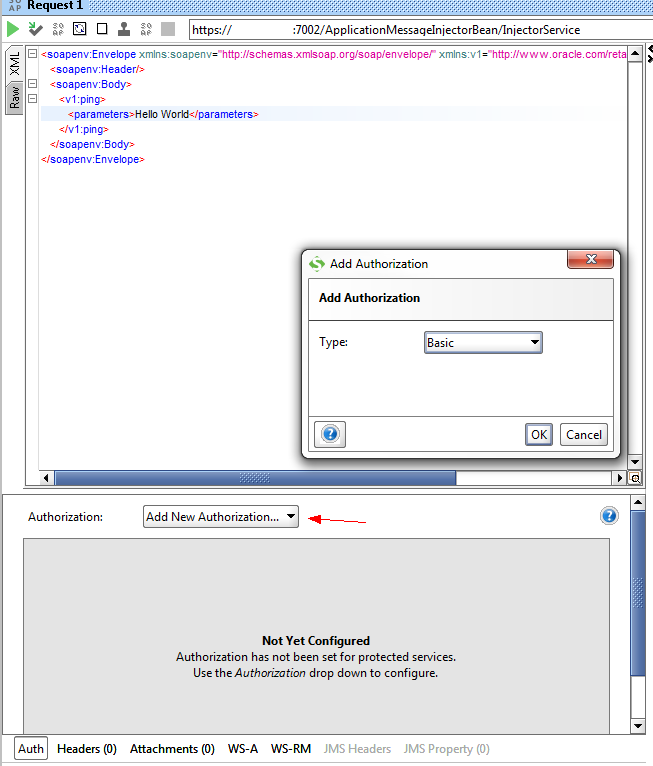
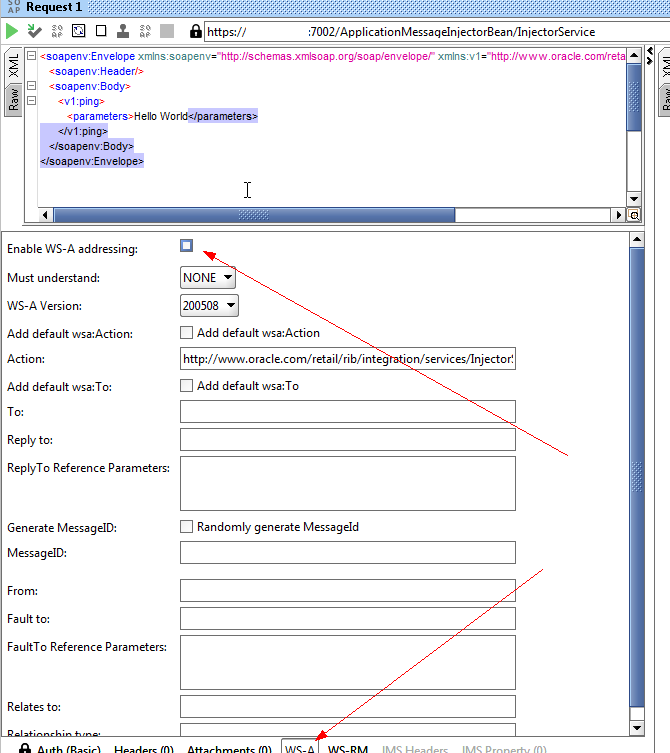
The Inject Service has two operations. For each Operations' Request.
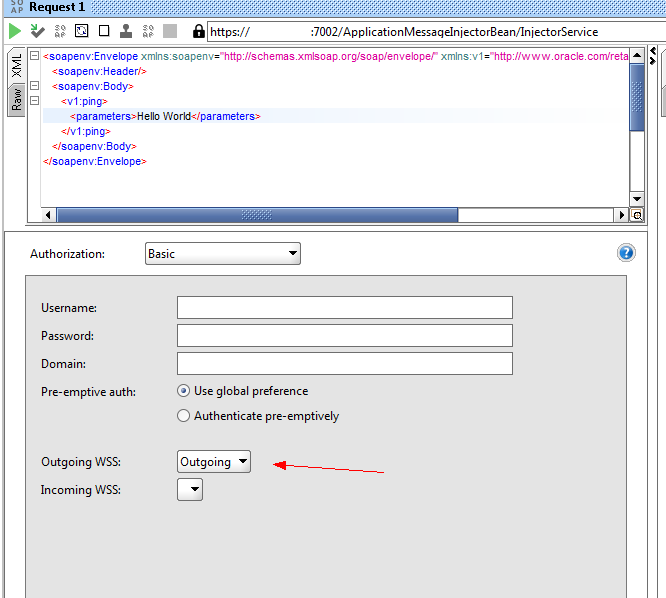
Add a New Authorization: Basic
Select the name you used for the Outgoing WSS.
On the WS-A tab make sure Enable WS-A addressing is not selected.
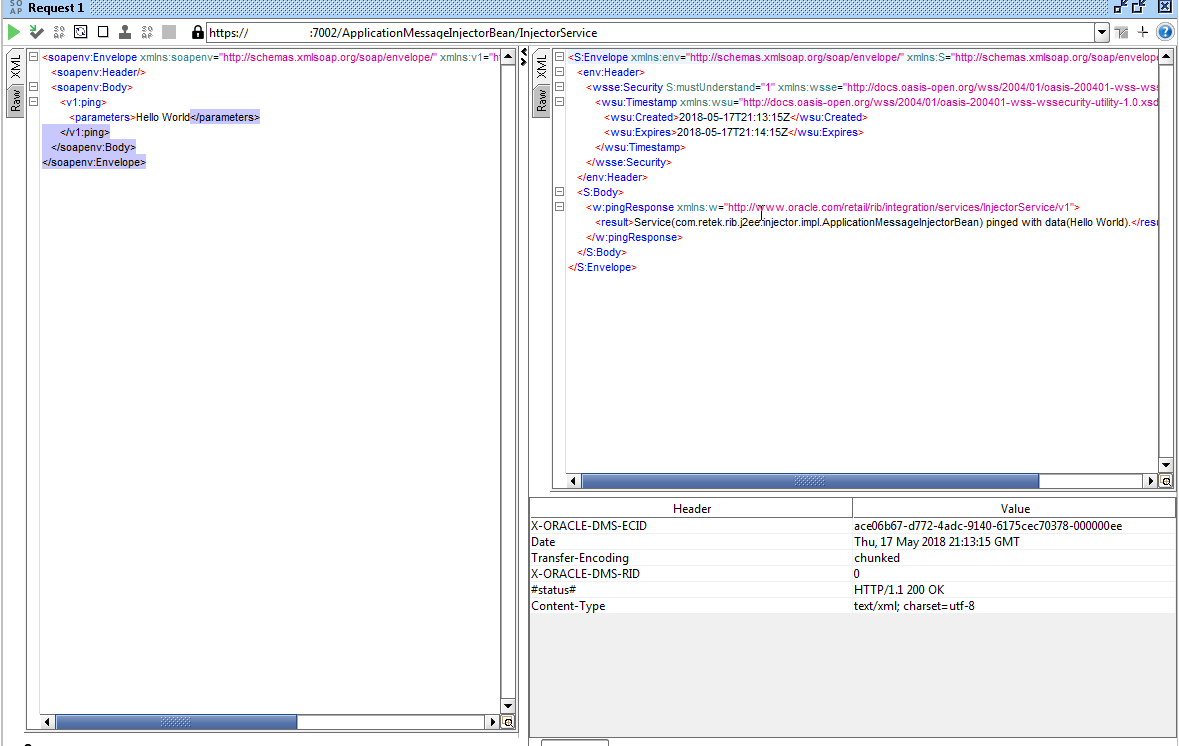
Create a valid request and send it. The request is now using policy A.