|
Siebel Marketing Installation and Administration Guide > Configuring Marketing Module Metadata > Setting Up Marketing Segmentation Metadata >
Setting Up Cache for Target Levels
This topic discusses the following topics about setting up cache for target levels:
About Marketing SQL Files and Cache
In the Siebel Analytics install directory, there is a directory named schema. This directory contains the preconfigured Marketing SQL files: MKTG.DB2.sql, MKTG.MSSQL.sql, and MKTG.Oracle.sql. These files contain the DDL (data definition language) statements for creating the cache and the saved result set tables. Depending on the database that you use for segmentation, open the appropriate file and execute the statements against the database. For more information about the SQL files and cache, see About Marketing SQL Files and Saved Result Sets. The following guidelines apply to using the Marketing SQL files with cache:
Building a Marketing Business Model
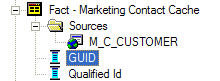
This topic contains guidelines for building your marketing business model in the Business Model and Mapping layer of the Analytics Administration Tool. Figure 6 is an example to help you build your business model.
Figure 6. Example of a Mapped Fact Table
|
The following examples describe the business model structure that appears in Figure 6:
- Mapping Fact Tables. Use the following convention, or a similar convention, when naming fact tables:
Fact - Marketing <target level> Cache
For example, for the target level Contact, a table might be named Fact - Marketing Contact Cache.
- Building a join in the business model. After mapping a fact table, you must set up a join only in the Business Model and Mapping layer as described in the following example:
The corresponding logical dimension table for the target level is joined to the Fact - Marketing <target level> Cache. The join must be a logical 1:M join starting from the target level logical dimension table (1) and going to the Fact - Marketing <target level> Cache logical table (M).
Creating and Mapping Marketing Presentation Catalogs
Create a marketing presentation catalog by performing the following tasks:
- Create a folder named Cache.
- Create a marketing presentation table. Name the Cache presentation table using the following convention:
<target level> Cache (This identifies the cache that belongs to each target level.)
- Add columns to the marketing presentation table. For example, add the GUID column and the Qualified-ID column to the <target level> Cache folder by dragging them from the Fact - Marketing <target level> Cache logical table, shown in Figure 6.
- Associate cache metadata with a target level.
NOTE: Any Marketing user who writes a cache entry or saves a result set needs to be assigned the POPULATE privilege for the target database. Typically, Marketing users are associated with a group and this group is granted the privilege. Go to Manage->Security and open the Permissions dialog for either a user or group. Select the Query Limits tab and set the Populate Privilege to Allow for Marketing data warehouses. For more information, see the topic about assigning populate privilege to a User or Group in Siebel Analytics Server Administration Guide.
To associate the cache metadata with a target level
- In the Administration Tool, open your repository in Offline mode, using Administrator/<password>.
- From the toolbar, choose Manage > Marketing.
- In the left pane, select Qualified List Items and double-click the primary QLI of the target level to enable for caching.
- Click the Cache Information tab and perform the following steps:
- Click the Cache Catalog ellipsis button and select the presentation catalog that has the presentation table for the Cache table for the target level.
- Click the GUID column ellipsis button and select the presentation column that has the GUID information.
- Click the Qualified Id column ellipsis button and select the presentation column that has the qualified ID for the target level.
The columns and catalogs selected are the same as those that you mapped. The physical table and connection pool information is automatically selected.
- Verify that the information is correct. If not correct, verify that you selected the correct presentation catalog and columns as instructed in Step 4.
- Click Default SQL.
A statement that is similar to the following appears:
DELETE FROM M_C_<target level> WHERE GUID = '@{guid}'
NOTE: Make sure that the syntax of this statement is correct for your database. The table name might need to be fully qualified. Test this statement by inserting some value in the database table and using the delete statement to delete it.
- Click OK, and then check the Marketing metadata for consistency.
Setting Up the Web Administrator for Managing Cache and Saved Result Sets
Some queries issued by the segmentation engine require the use of the Execute Physical stored procedure. These queries include delete statements on the cache, delete statements on the saved result sets, and insert statements for the cache and saved result set. The Execute Physical stored procedure must be run by a user with administrator privileges. The administrator user is setup in the instanceconfig.xml file. NOTE: The Analytics Administrator password and login parameters are case sensitive.
To set up the administrative user in the instanceconfig.xml file
- Start the Siebel Analytics Web service, and then open your Siebel Analytics URL.
For example, http://localhost/analytics/saw.dll?EncryptString&String=<type Siebel Analytics Administrator password>
- Log in as the Administrator.
- Copy the encrypted string in the browser window to a text file.
- Navigate to the instanceconfig.xml file at the following default location, and then open it using a text editor:
SiebelAnalyticsData\Web\Config\
CAUTION: Do not open in Explorer or double-click the instanceconfig.xml file name.
- Scroll down to the <WebConfig> section that is at the bottom of the file.
NOTE: The instanceconfig.xml file contains two sections. The Top section is commented out. Do not modify the first set of comments.
The <WebConfig> in your file should be similar to the file in the following example.
<WebConfig>
<ServerInstance>
<AdministrativeLogin>Administrator</AdministrativeLogin>
<AdministrativePassword>1d0f03a35f062ba39e024b20aabf2bce8a03</AdministrativePassword>
</ServerInstance>
</WebConfig>
|
- Replace the information in this section, using the following example as a guide.
<WebConfig>
<ServerInstance>
<AdministrativeLogin>Siebel Analytics Admin User</AdministrativeLogin>
<AdministrativePassword>Replace with the encrypted string that you obtained in the steps above</AdministrativePassword>
</ServerInstance>
</WebConfig>
|
- Make sure that you remove any blank spaces or new lines at the end of the encrypted password string. Your Login and Password information is similar to the following example:
<AdministrativeLogin>SADMIN</AdministrativeLogin>
<AdministrativePassword>2fdsjhf344..........</AdministrativePassword>
- Save the instanceconfig.xml file and exit.
- Restart the Siebel Analytics Web service.
Testing the Administrative User Setup
For additional information about creating segments, see Siebel Marketing User Guide. For more information about the Manage Marketing Jobs feature, see Managing Marketing Jobs.
- Log in Siebel Analytics as a non-administrator user.
- Create a simple segment, cache the criteria block, and Run Update counts.
- The operation should execute successfully.
- Check the NQQuery.log file for a POPULATE statement that is populating the M_C_<target level> table.
- Log in Siebel Analytics as an administrator and click the Admin link.
- Click Manage Marketing Jobs.
- In the Database Cache section, verify that there is an entry for the criteria block that you cached.
- Click Purge for that entry.
- After approximately five minutes, check the log file for the execution of an appropriate DELETE statement. Verify that this statement is similar in syntax to the statement in the Administration Tool in the Cache Information tab of the primary QLI.
|