| Oracle® Retail Store Inventory Management User Guide Release 14.1 E53429-01 |
|


 Previous |
 Next |
| Oracle® Retail Store Inventory Management User Guide Release 14.1 E53429-01 |
|
Previous |
Next |
Use the Product Group Scheduler to create schedules for these types of product groups:
Auto Ticket Print product groups
Unit stock count product groups
Unit and Amount stock count product groups
Problem Line stock count product groups
Item Request product groups
Shelf Replenishment product groups
Wastage product groups
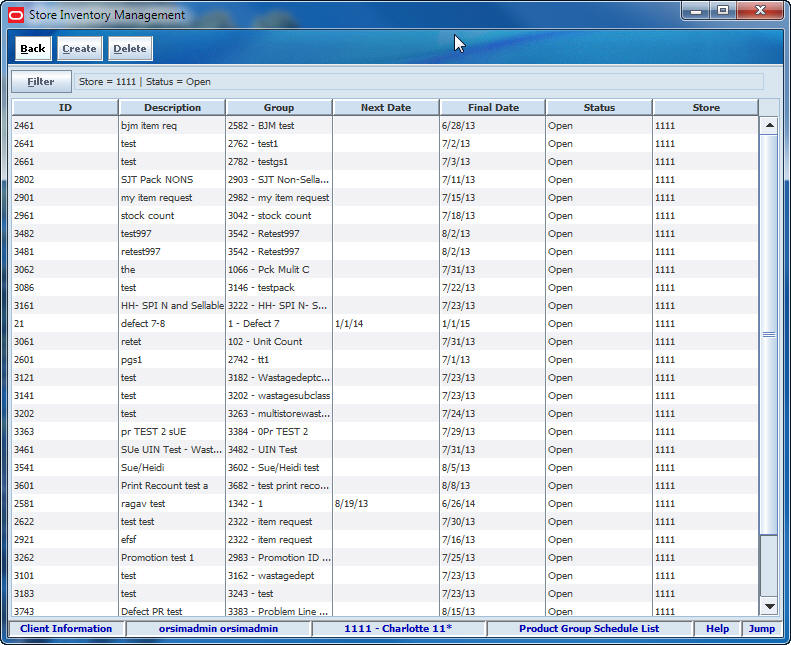
Product Group Schedule List Window
Navigate: Main Menu > Admin > Product Group Scheduler. The Product Group Schedule List window opens.
From the Product Group Schedule List window, you can do the following:
From the Product Group Schedule List window, click Back to return to the Admin menu.
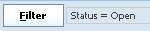
At any time while the Product Group Schedule List window is open, you can change how the list is filtered. Current filtering is displayed next to the Filter button. If no filtering is displayed, all product group schedules are currently selected and listed.
Navigate: Main Menu > Admin > Product Group Scheduler. The Product Group Schedule List window opens.
To filter the product group schedules listed, follow these steps:
Click Filter. The Product Group Schedule Filter window opens.
Enter or select search values as needed to specify the product group schedules that you want to list. All values are optional. If you leave a field blank or select All, all values are included in the search.
Date Filters – You can select records based on Next Schedule Date, Final Schedule Date, or both.
|
Note: Selection by date does not select records within a data range. The records selected are those that match the Next Schedule Date or Final Schedule Date (or both) that you enter. This selection step is intended to find schedules for specific days. For example, you may want to find all records that are scheduled for tomorrow, so that you can plan staffing as needed. |
Data filtering works as follows:
If you enter a value for Next Scheduled Date, the search finds only the records where the next scheduled extraction date is the specified date.
If you enter a value for Last Scheduled Date, the search finds only the records where the final scheduled extraction date is the specified date.
If you enter values for both Next Scheduled Date and Last Scheduled Date, the search returns only records where both dates match the dates you enter.
Additional Filters – Enter or select values for these fields:
Type – Select the type of product group, or All (default).
Description – Enter the description of the product group. The search will find all product groups for which the description contains the value you enter.
Store – Defaults to store currently logged in, contains all stores for user.
Status – Select All, Open (default), or Closed.
Click Apply. You return to the Product Group List window, where your filter has been applied.
Navigate: Main Menu > Admin > Product Group Scheduler. The Product Group Schedule List window opens.
To create a new product group schedule, follow these steps:
Click Create. The Product Group Schedule Detail window opens.
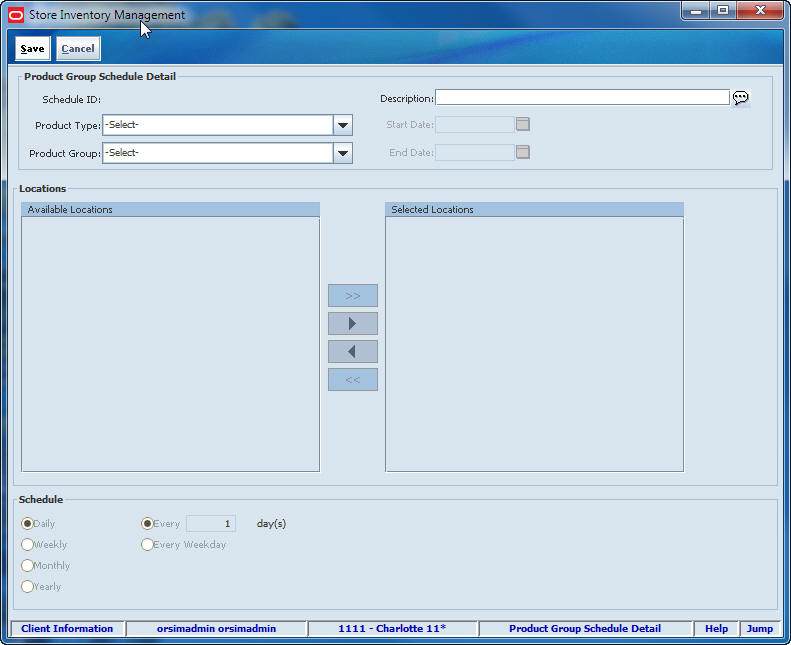
In the Description field, enter a brief explanation of the schedule.
Select values for the following fields:
Product Type – Select the type of product group (Auto Ticket Print, Item Request, Problem Line, Unit, Unit and Amount, Wastage, Shelf Replenishment).
Product Group – Select the product group for this schedule.
Enter or select dates for the following fields:
Start Date – Select the date on which you want the schedule to begin.
End Date – Select the date on which you want the schedule to stop.
|
Note: For a unit and amount stock count product group, no End Date value is set and the field is disabled. For unit stock count, item request, and problem line stock count groups, if the start date is set for today, you have the option to extract the event immediately. |
In the Available Locations list, select the locations to include in the schedule.
|
Note: If the selected product group uses third-party stock counts, only stores that are set up to allow third-party stock counts are displayed in the Available Locations list. This list contains multiple stores only if you have privileges for multiple stores. |
Click the right-arrow button to move the selected locations to the Selected Locations list.
If you want to select all locations, click the double-right-arrow button.
To remove locations from the Selected Locations list, use the left-arrow or double-left-arrow button.
Under Schedule, select a radio button to schedule a daily, weekly, monthly, or yearly count, a count performed every weekday, or a count performed on some other schedule you specify.
For unit and amount or problem line stock count groups, the only option is Daily.
Click Save to return to the Product Group Schedule List window, where the new schedule is displayed.
You can edit details of any product group schedule with a status of Open. You can view schedules with status Closed, but you cannot edit them.
Navigate: Main Menu > Admin > Product Group Scheduler. The Product Group Schedule List window opens.
To edit a product group schedule, follow these steps:
Double-click on the schedule that you want to edit.
Update any enabled fields as needed to change the description, dates, locations, or schedule.
See Create a Product Group Schedule for more information about product group schedule fields.
Click Save to return to the Product Group Schedule List window, where the revised schedule is displayed.
Delete product group schedules that are no longer needed.
Navigate: Main Menu > Admin > Product Group Scheduler. The Product Group Schedule List window opens.
To delete product group schedules, follow these steps:
Select the product group schedules that you want to delete.
Click Delete. A message is displayed: ”Are you sure you want to delete the selected schedule?”
Click Yes. The selected product group schedules are deleted.