| Oracle® Retail Warehouse Management System UI User Guide Release 14.1 E58327-01 |
|


 Previous |
 Next |
| Oracle® Retail Warehouse Management System UI User Guide Release 14.1 E58327-01 |
|
Previous |
Next |
An appointment is an arrangement to receive merchandise into the distribution center at a specified time and place. A valid appointment consists of the following details: date, time, and receiving door. Advanced shipment notices (ASN) or purchase orders with items and unit quantities are associated with appointments.
The receiving window (of opportunity), for an appointment is based on the Deliver Not Before and Deliver Not After dates found on a purchase order. Only one trailer may be assigned to an appointment, but one trailer may contain merchandise from multiple purchase orders or some of the merchandise from one purchase order.
The system tracks the status of an appointment from the moment it is entered into the system. The status may be:
Unscheduled (Unsc): The appointment was entered into the system without one or more of the following: date, time, or receiving door. A receiving package is not generated for unscheduled appointments.
Scheduled (Schd): The appointment appears on the calendar. The merchandise to be received may or may not be known.
Pending (Pend): A receiving package was printed in anticipation of the arrival of the expected merchandise.
Open (Open): The trailer that is associated with the appointment is being unloaded.
Unreconciled (Unrc): The appointment has some discrepancies concerning what was received. The appointment must be reconciled. The door, however, is available for another appointment.
Received (Rcvd): The expected merchandise was received during the appointment.
Business Process
An appointment may be entered into the system with minimal information. If the date, time, and receiving door are entered, the appointment appears on the calendar. Otherwise, it is held in the system as an unscheduled appointment.
The details of an appointment are entered from purchase orders or ASNs. Purchase orders and items are received from the host system. Purchase orders may also be created automatically in RWMS via store to DC transfers. ASNs may be received from an external source or entered manually.
Several types of appointments may be entered into the system:
Flexible Pallet Receiving with Details: Appointment details are created by attaching valid purchase orders and the desired items from those purchase orders. The Casepack for each item is specified on the purchase orders. Generic pallet labels are applied during the receiving process.
Flexible Pallet Receiving without Details: Appointment details are created by attaching valid purchase orders but the items being received are not specified on the appointment. The item details are captured during the RF receiving process. The items being received must exist on the attached purchase orders. Generic pallet labels are applied during the receiving process.
PO: Appointment details are created by attaching valid purchase orders and the desired items from those purchase orders. The Casepack for each item is specified on the purchase orders. Formatted/generic labels are produced by the system and applied during the receiving process.
ASN: Appointment details are created by attaching downloaded ASNs. The Casepack is known for container type and tare type ASNs but unknown for PO type ASNs.
NSC: Appointment details are created by attaching valid purchase orders and the desired items/quantities from those purchase orders. The Casepack is unknown.
ASN/NSC: Appointment details are created by attaching valid purchase orders or valid ASNs. The Casepack is unknown.
As you set up an appointment, you can indicate whether quality assurance or vendor audit checks should be made on the merchandise when it is received. In such cases, you can indicate the sampling percentages and number of containers at the style level.
Unscheduled appointments (those without a date, time, or receiving door) can be scheduled when the missing details are known. You can access schedules for receiving doors in order to:
Schedule unscheduled appointments
Change existing schedules
Block or unblock access to doors
View a bar chart that shows utilization percentages by door for a specified date
You can look up appointments, ASNs, and purchase orders in the Appointments module.
This chapter contains the following topics:
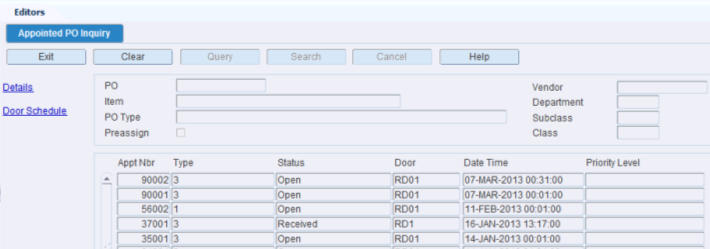
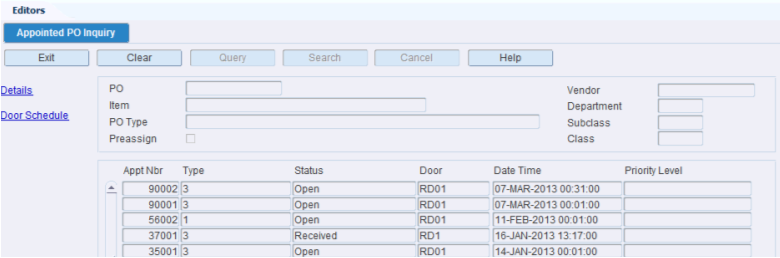
The Appointed PO Inquiry Editor allows you to view purchase orders that have an existing appointment against them. You can access the PO Detail window in order to view the items on a purchase order.
From the main menu, select Appointments > Appointed PO Inquiry. The Appointed PO Inquiry editor opens.
Display all Appointments
In Appointment PO Inquiry editor, click the Search button to view all appointments.
Display a Subset of the Appointments
If any appointments are currently displayed, click the Clear button.
Click the Query button. An LOV is displayed next to all the available fields such as PO, Vendor, Item, Department, PO Type, Subclass, and Class.
In one or more of the query fields, enter the desired criteria.
Click the Search button. The appointments that match the criteria are displayed.
View the Details of an Appointment
On the Appointment PO Inquiry tab, select the appointment that you want to view in detail.
Click Details. The details appear in the Appointment Detail editor.
Click the Exit button to close the Appointment Detail editor and return to the Appointed PO Inquiry editor.
View a Door Schedule
On the Appointment PO Inquiry tab, select the appointment that you want to view the door schedule for.
Click the Door Schedule link. The details are displayed in the Door Schedule Screen editor.
Click the Exit button to close the Door Schedule editor and return to the Appointed PO Inquiry editor.
Exit the Appointed PO Inquiry Window
Click the Exit button to close the window.
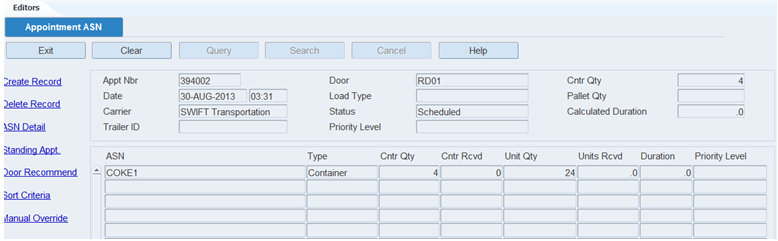
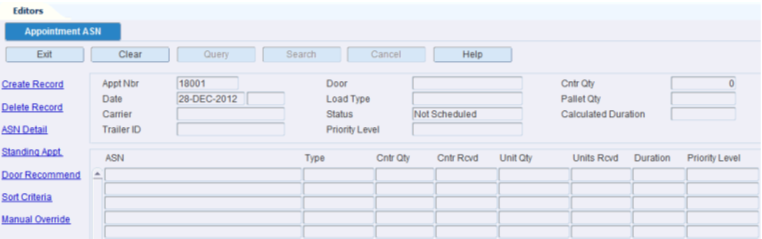
The Appointment ASN Editor allows you to maintain the advanced shipment notices (ASN) that are associated with an ASN type of appointment. You can add or delete ASNs on appointments which have a status of Unscheduled (Unsc) or Scheduled (Schd).
You can access the ASN Detail Inquiry window in order to view the details of an ASN. You can also access the Door Schedule window in order to view and maintain scheduling at the receiving doors
From the main menu, select Appointments > Appointment ASN. The Appointment ASN editor opens.
|
Note: You can access the Appointment ASN window from the Appointment Schedule, Appointment ASN, and PO Inquiry windows. You can also choose Appointments > Appointment ASN from the main menu. |
Display Appointment ASN
If any ASNs are currently displayed, click the Clear button.
Click the Query button. An LOV is displayed next to the Appt Nbr field.
Select a number from the Appt Nbr LOV or search for an appointment that has an ASN and the NSC check box cleared.
Click the Search button. The ASNs that match the criteria appear.
Add an ASN to an Appointment
|
Note: Only Container type ASNs may be added. |
Search for an unscheduled appointment by entering a number in the Appt Nbr field. The ASN that match the criteria is displayed.
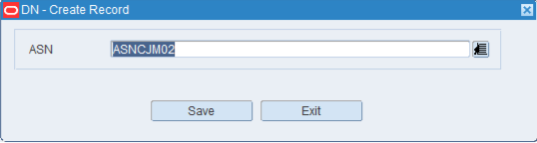
Click the Create Record link. The Create Record window is displayed.
Enter an ASN number in the ASN field or select an ASN from the LOV.
Click Save. A new ASN record is created and displayed in the table.
View the Details of an ASN
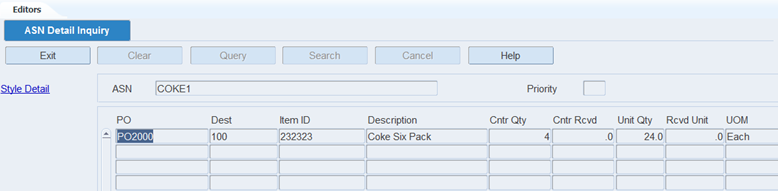
The ASN Detail Inquiry Editor allows you to view the details of an advanced shipment notice (ASN). You can access the Style Detail window in order to view sampling percentages by style for quality assurance and vendor audits.
On the Appointment ASN editor, select the ASN that you want to view.
Click the ASN Detail link. The ASN Detail Inquiry editor opens with details.
|
Note: To view a style associated with the ASN, click the Style Detail link in the ASN Detail Inquiry editor. The Style Detail link is enabled only for appointments where the VA or QA check boxes are selected. |
Click Exit to close the ASN Detail Inquiry editor.
Add a Standing Appointment
On the Appointment ASN editor, select the ASN that you want to add.
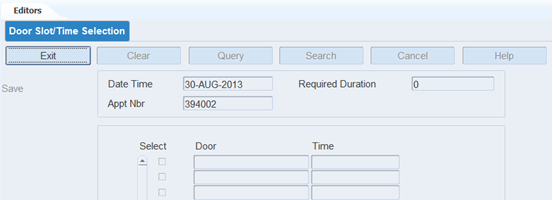
Click the Standing Appt link. The Door Slot/Time Selection editor opens.
Select a door.
Click Save to save the changes.
Click Exit to close the Door Slot/Time Selection editor.
Receive a Door Recommendation
On the Appointment ASN editor, select the ASN that you want to receive.
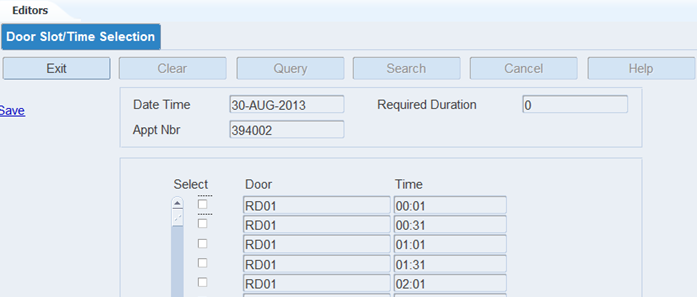
Click Door Recommendation. The Door Slot/Time Selection editor opens.
Select a door.
Click Save to save the changes.
Click Exit to close the Door Slot/Time Selection editor.
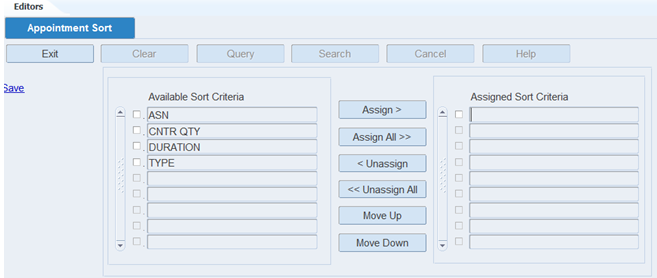
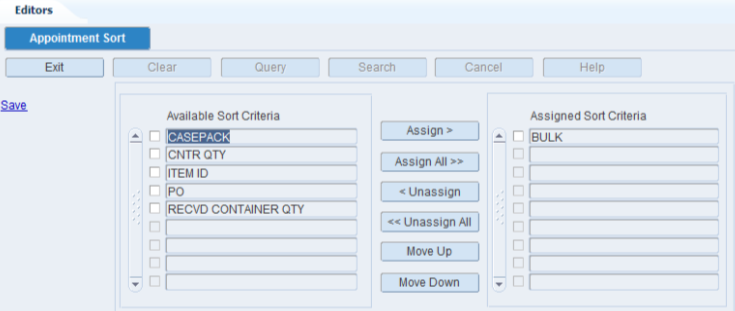
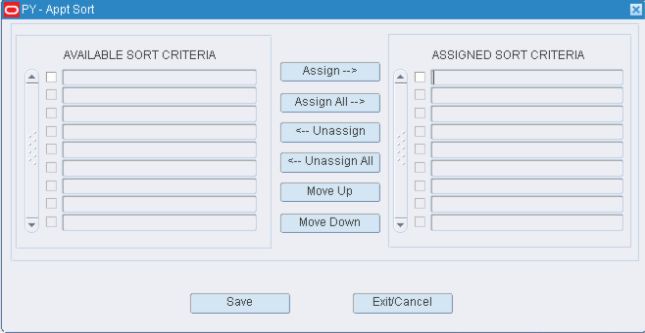
Sort Appointment Criteria
On the Appointment ASN window, select the ASN that you want to sort.
Click Sort Criteria. The Appointment Sort editor opens.
To assign processes:
Select the check box next to the desired processes on the Available Sort Criteria table.
Click Assign. The selected processes are moved to the Assigned Sort Criteria table.
To remove assigned processes:
Select the check box next to the desired processes on the Assigned Sort Criteria table.
Click Unassign. The selected processes are moved to the Available Sort Criteria table.
To resequence the assigned criteria:
Select the criteria to be moved.
To move the criteria closer to the top of the list, click Move Up.
To move the criteria closer to the bottom of the list, click Move Down.
Click Save to save the changes.
Click Exit to close the Appointment Sort editor.
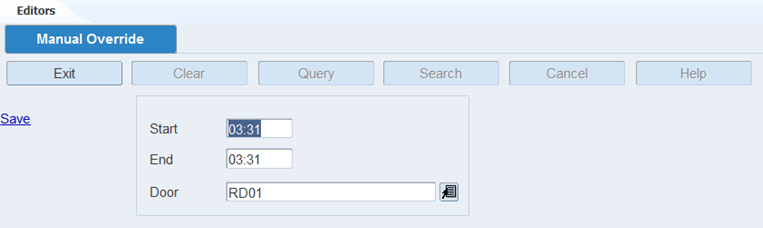
Set a Manual Override
On the Appointment ASN editor, select the ASN that you want to set.
Click Manual Override. The Manual Override editor opens.
Select a time or a door.
Click Save to save the changes.
Click Exit to close the Manual Override editor.
Delete an ASN from an Appointment
On the Appointment ASN editor, select the ASN that you want to delete.
Click Delete Record.
When prompted to delete the record, click Yes.
Exit the Appointment ASN Window
Click the Exit button to close the editor.
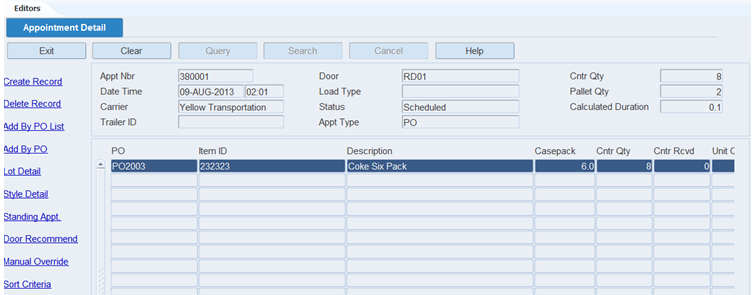
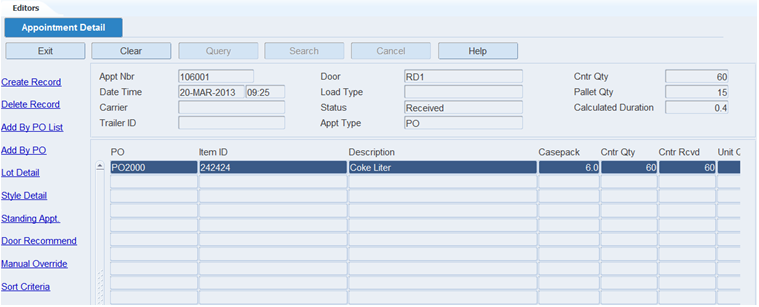
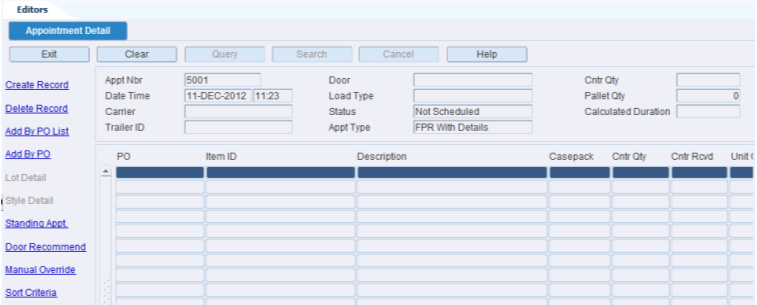
The Appointment Detail Editor allows you to view, add, or delete appointment details for PO and FPR with Details type of appointments. Once the appointment details have been added to the appointment, the Schedule Door link allows you to select a door and time slot for the appointment and the appointment moves to scheduled status.
From the main menu, select Appointments > Appointment Detail. The Appointment Detail editor opens.
|
Note: You can access the Appointment Detail window from the Appointment Schedule, Appointment ASN, and PO Inquiry windows. You can also choose Appointments > Appointment Detail from the main menu. |
Edit a PO/Line Item on an Appointment
On the Appointment Detail window, double-click the PO/line item that you want to edit. You can only edit a Not Scheduled PO/Line Item. The Modify window opens.
Edit the enabled fields as necessary.
Click Save to save any changes and close the Modify window.
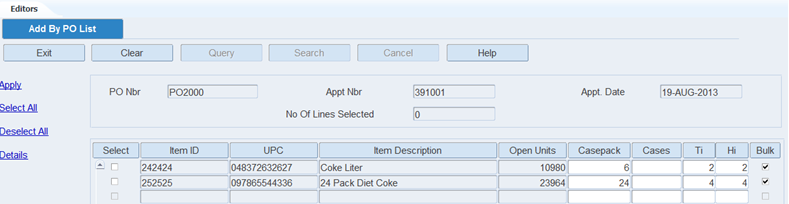
Add a PO List to an Appointment
The Add by PO List screen allows you to specify a PO number and then display all line items on that PO. At that time, you can select all or select specific line items.
On the Appointment Detail editor, click Add by PO List. The Add by PO List window opens.
|
Note: In the Brazil localized environment, on the Appointment Detail editor, Add by PO List and Add by PO links are not available for PO and NSC appointments. |
Click the Query button. An LOV is displayed next to the PO Nbr field.
In the PO Nbr field, enter the purchase order number, or click the LOV button and select the purchase order.
Click Select All. All the rows under the Select column are selected. In addition the Cases column is populated with the current values in the Open Cases Quantity for all the rows that were not previously selected. This option is applied only to the rows that are not selected. Any rows that were already selected before pressing this button are not affected. This is to preserve any value entered by the user in the Cases field.
|
Note: Open Cases Quantity is determined by OPEN UNITS/CASEPACK. The Open Units = PO ordered units minus (PO detail received units + all open appointment unreceived units). |
|
Note: If an Open Cases Quantity calculation results in a non-whole number of cases, the default quantity is always corrected to a lower number. For example, if the calculation for open cases quantity yields 23.8, the default quantity that is displayed would be 23. When this happens, the number is displayed in blue font on the screen. |
If the user-entered value in the Cases column (overrides the default) exceeds the open cases quantity plus the allowable tolerance, an error message is displayed. The warning is either a hard stop or soft warning and depends on the SCP.recv_tolerance_unit parameter. If it is a soft warning, the entered quantity is displayed in red font. The amount of tolerance is configured on the Item Supplier table (tolerance_pct column). In case, the user-entered quantity in the Cases column (overrides the default) exceeds the open cases quantity, an error message is displayed and the quantity is displayed in red font.
Click Deselect All to set the values in the Cases column to Null. Also the Casepack column is reset to its original value (PO_DETAIL.ordered_casepack).
Select the Select check box to change/enter the value for the items in the Cases column.
The only fields that can be edited are: Select, Casepack, Cases, Ti, Hi, and Bulk flag. If the items are to be received as the bulk pallets, select the Bulk check box.
Click Apply to include the item/items in the appointment. Click Apply to add the items to the appointment for the current PO before adding another PO to the appointment.
Add a PO/Line Item to an Appointment
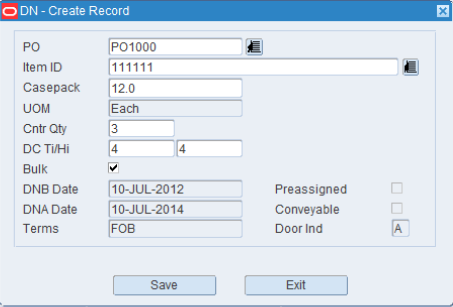
On the Appointment Detail window, click Create Record. The Create Record window opens.
In the PO field, enter the purchase order number, or click the LOV button and select the purchase order.
In the Item ID field, enter the ID of the item, or click the LOV button and select the item.
In the Casepack field, enter the number of units per container.
In the Cntr Qty field, enter the container quantity.
If the item is received on bulk pallets, select the Bulk check box.
Click Save to save the changes and close the Create Record window.
Add a Purchase Order to an Appointment
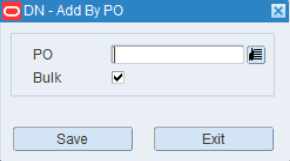
On the Appointment Detail window, click Add by PO. The Add by PO window opens.
In the PO field, enter the purchase order number, or click the LOV button and select the purchase order.
If the items are received on bulk pallets, select the Bulk check box.
Click Save to save the changes and close the Add by PO window.
Delete a PO/Line Item from an Appointment
On the Appointment Detail window, select the PO/line item that you want to delete.
Click Delete Record.
When prompted to delete the record, click Yes.
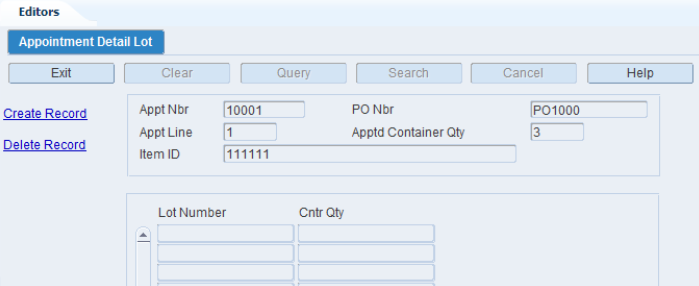
Add Lot Numbers to an Appointment
On the Appointment Detail window, select the PO/line item that you want to edit.
Click Lot Detail. The Appointment Detail Lot editor opens.
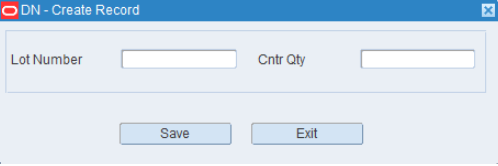
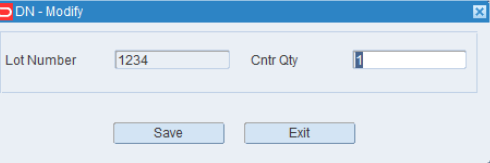
Click Create Record. The Create Record window opens.
In the Lot Number field, enter the lot number.
In the Cntr Qty field, enter the number of containers that you want to associate the lot number with.
Click Save to save the changes and close the Create Record window.
Click the Exit button to close the Appointment Detail Lot window.
Edit a Lot Number on an Appointment
On the Appointment Detail window, select the PO/Line item that you want to edit.
Click Lot Detail. The Appointment Detail Lot window opens.
Double-click the lot number that you want to edit. The Modify window opens.
Edit the container quantity as necessary.
Click Save to save any changes and close the Modify window.
Click the Exit button to close the Appointment Detail Lot window.
Delete a Lot Number from an Appointment
On the Appointment Detail editor, select the PO/line item that you want to edit.
Click Lot Detail. The Appointment Detail Lot editor opens.
Select the lot number that you want to edit.
Click Delete Record.
When prompted to delete the record, click Yes.
Click the Exit button to close the Appointment Detail Lot editor.
Exit the Appointment Detail Window
Click the Exit button to close the editor.
Add a Standing Appointment
On the Appointment Detail editor, select the PO/line item that you want to add.
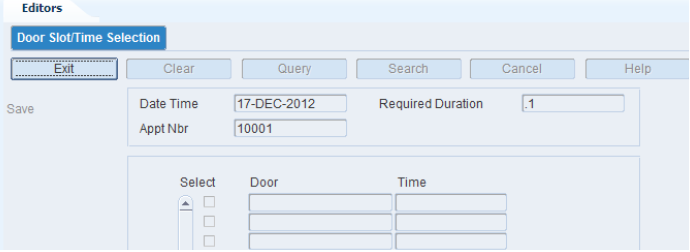
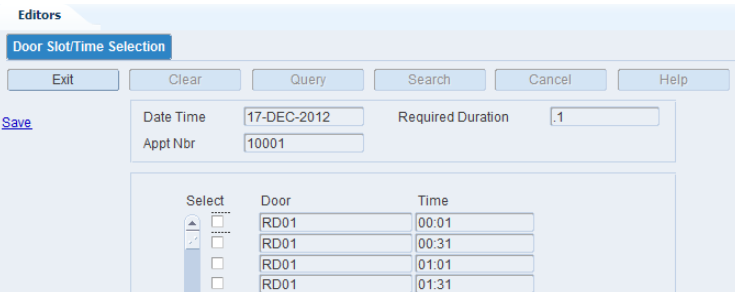
Click Standing Appt. The Door Slot/Time Selection editor opens.
Select a door.
Click Save to save the changes and close the Door Time Slot Selection window.
Receive a Door Recommendation
On the Appointment Detail editor, select the PO/line item that you want to receive.
Click Door Recommendation. The Door Slot/Time Selection editor opens.
Select a door.
Click Save to save the changes and close the Door Slot/Time Selection editor.
Set a Manual Override
On the Appointment Detail editor, select the PO/line item that you want to set.
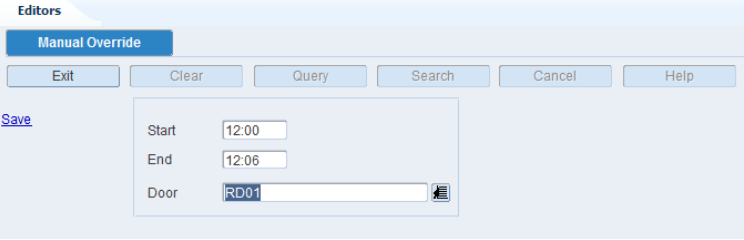
Click Manual Override. The Manual Override editor opens.
Enter the Start and End time.
Select a door.
Click Save to save the changes and close the Door Slot/Time Selection editor.
Sort Appointment Criteria
On the Appointment Detail window, select the PO/line item that you want to sort.
Click Sort Criteria. The Appt Sort window opens.
To assign processes:
Select the check box next to the desired processes on the Available Sort Criteria table.
Click Assign. The selected processes are moved to the Assigned Sort Criteria table.
To remove assigned processes:
Select the check box next to the desired processes on the Assigned Sort Criteria table.
Click Unassign. The selected processes are moved to the Available Sort Criteria table.
To resequence the assigned criteria:
Select the criteria to be moved.
To move the criteria closer to the top of the list, click Move Up.
To move the criteria closer to the bottom of the list, click Move Down.
Click Save to save the changes and close the Appointment Detail Sort Criteria window.
Exit the Appointment Detail Window
Click the Exit button to close the window.
Style Detail
The Style Detail screen allows you to maintain the sampling percentages and quantities by style for quality assurance and vendor audits.
This screen is accessible from appointment detail windows if an appointment is marked for quality assurance and vendor audits.
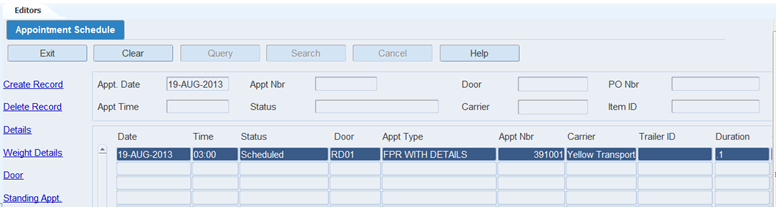
The Appointment Schedule Editor allows you to schedule inbound trailers for all appointment types (ASN, PO, NSC, FPR with Details, and FPR without Details).
Depending on the type of appointment, you can access one of the following windows in order to maintain appointment details:
Appointment ASN: Enter details from ASNs. Casepack quantities are known.
Appointment Detail: Enter details from purchase orders. Casepack quantities are known.
NSC Appointment Detail: Enter details from ASNs and/or purchase orders. Casepack quantities are not known for PO type ASNs.
FPR PO Details: Enter the details from FPR without Details. The PO line items and casepacks are not specified in this screen, only the valid Purchase orders for the appointment.
|
Note: For Brazil installations, RWMS requires a schedule number to process an appointment. The schedule numbers are downloaded from the Oracle Retail Fiscal Management (ORFM) system.RWMS can create an appointment without a schedule number and the details of the appointment are uploaded to ORFM. The Distribution Center, however, cannot open any appointment or print any labels unless it has a schedule number included in the record. When ORFM downloads the Schedule Number, the Appointment is updated with the Schedule Number and the existing appointment details are deleted and replaced with the details attached to the Schedule number. The Appointment now can be opened. |
From the main menu, select Appointments > Appointment Schedule. The appointments for the current date appear in the Appointment Schedule editor.
Display Appointments by Date
If any appointments are currently displayed, click the Clear button.
Click the Query button. An LOV is displayed next to all the fields.
In the Appt. Date query field, enter a date or click the calendar button and select the date. The appointments for the selected date appear.
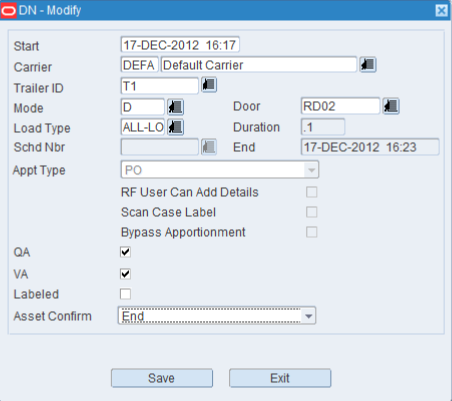
Add an Appointment
On the Appointment Schedule window, click Create Record. The Create Record window opens.
In the Start field, edit the default date and time as necessary.
|
Note: If you do not enter a receiving door, the appointment is saved as an unscheduled appointment. |
In the Carrier field, enter the carrier code, or click the LOV button and select the carrier.
In the Trailer ID field, enter the ID of the trailer, or click the LOV button and select the trailer.
|
Note: If you enter a new trailer ID, it is automatically added to the system. |
In the Mode field, enter the ID of the receiving door, or click the LOV button and select the door.
In the Load Type field, enter the load type for the trailer from the list of values.
In the Schd Nbr field, select the schedule number from the list of values. This field is enabled only if recv_schedule_nbr is set to Y.
In the Appt Type field, select the appointment type from the drop down list. You can select one of the following types of appointments:
FPR with details: To create appointments with PO/Item details using the Flexible Pallet Receiving workflow.
FPR without details: To create appointments using only the PO numbers using the Flexible Pallet Receiving workflow.
|
Note: The FPR without details option is not supported in a Brazilian installation. |
PO: To create a PO based appointment.
ASN: To create an ASN based appointment.
NSC: To create an appointment for non-specified casepacks.
ASN/NSC: To create an ASN based appointment for non-specified casepacks.
Select the RF User Can Add Details, Scan Case Label and Bypass Apportionment check boxes as necessary.
RF User Can Add Details - When this attribute is applied to the FPR process and user the system allows the RF user to receive items on the Purchase Order being received which are not included in the appointment details. This attribute only applies to FPR with Detail appointments.
Scan Case Label - When this attribute is applied to the FPR process it checks the Scan Case Label flag on the create appointment header screen. You have the ability to toggle the flag for each appointment. When checked, the system requests the RF user to scan each individual container (Case) during the receiving process.
Bypass Apportionment - When this attribute is applied to the FPR process the Bypass Apportionment flag is automatically set to yes in the create FPR appointment header screen. You have the ability to toggle the flag for each appointment. This flag must be checked when receiving merchandise from trusted vendors who deliver complete shipments. When checked, the number of sub-pallets created by pre-distribution is significantly reduced saving labor.
|
Note: For FPR without details type of appointment, the RF User Can Add Details check box is checked by default and you cannot update it. |
If quality assurance or vendor audit checks are to be performed on the appointment at the style level, select the QA and VA check boxes.
|
Note: You can enter the sampling percentages when you edit the details of an appointment. If the check boxes are not selected, the vendor's default sampling percentages are used by the system. |
In the Labeled field, select the check box.
From the Asset Confirm field, select Start, During, or End.
Click Save to save the changes and close the Create Record window.
Edit an Appointment
|
Note: You cannot edit an appointment which is in Received status. |
On the Appointment Schedule window, double-click the appointment that you want to edit. The Modify window opens.
Edit the enabled fields as necessary.
|
Note: You can add a schedule number to an existing ASN appointment. The system compares the total units for each PO/line item from ASN details to the total units for each PO/line item on the schedule number. If they do not match, you must delete the ASN appointment and create a Non ASN appointment. |
Click Save to save any changes and close the Modify window.
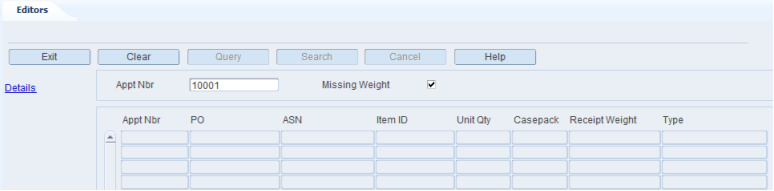
Enter Appointment Weight Details
The Appointment Weight Detail Editor allows you to view the weight of specific containers on received shipments.
|
Note: This window can also be accessed from the main menu, select Appointments > Appointment Weight Detail. |
On the Appointment Schedule window, select the appointment that you want to weight details for.
Click Weight Details. The Appointment Weight Detail window opens.
Double click the record you want to update. The Modify window opens.
In the Receipt Weight field, enter the weight of the item.
Click Save to save the changes and close the window.
Click the Exit button to close the window.
View Door Schedules
Please refer to the section on Maintaining Door Schedules.
View Standing Appointment Editor
Please refer to the section on Maintaining Standing Appointment Editor.
Delete an Appointment
An appointment may be deleted, if the labels have not been printed or the merchandise has been received and reconciled for the appointment.
When the system control parameter recv_schedule_nbr is enabled, when you try to delete an appointment on which nothing has been received, the appointment is deleted and the schedule number is available to create another appointment. You cannot delete the appointment on which items have been received.
On the Appointment Schedule window, select the appointment that you want to delete.
Click Delete Record.
When prompted to delete the record, click Yes.
Exit the Appointment Schedule Window
Click the Exit button to close the window.
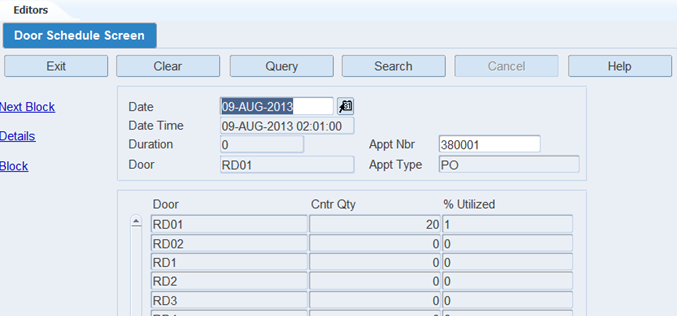
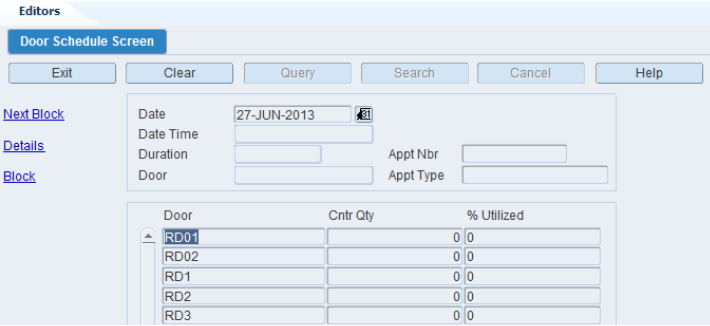
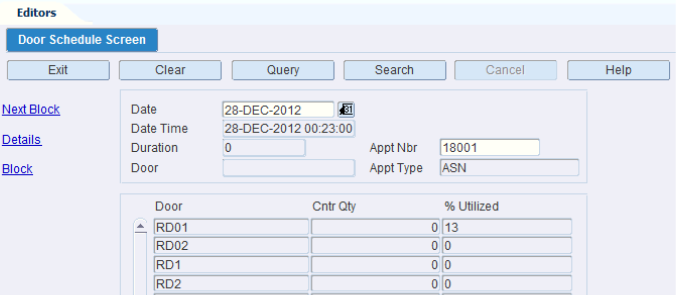
The Door Schedule Screen allows you to schedule and maintain appointments at receiving doors. Enough time should be allotted to unload the trailer that is assigned to the door. A warning opens if the time period is too short, but you can override the warning.
The window is divided into the following areas:
Depending on how the window is accessed, the top part of the window may display details for a scheduled or unscheduled appointment. You can access the Modify window in order to edit the schedule.
The bottom part of the window displays the door ID, number of containers, and utilization percentages for the selected date. You can access the Appointments for Door window in order to view the day's activity for a specific door.
You can block out a period of time at a door. This block is viewed by the system as a scheduled hold. Appointments cannot be scheduled and merchandise cannot be received during the blocked out time period.
You can display a bar graph of the day's utilization percentages by door.
From the main menu, select Appointments > Door Schedule Screen. The Door Schedule editor opens.
|
Note: You can also access this window from the following windows: Appointed PO Inquiry, Appointment Detail, Appointment ASN, NSC Appointment Detail, Appointment Schedule, and Unscheduled Appointment Inquiry. |
Display Doors by Date
If any doors are currently displayed, click the Clear button.
In the Date field, enter a date or click the calendar button and select the date.
Click the Query button. The door activity for the specified date is displayed.
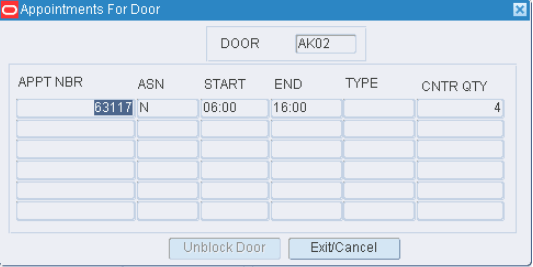
View the Appointments Assigned to a Door
On the Door Schedule tab, click Next Block to place the cursor in the bottom part of the window.
Select the door that you want to view.
Click Details. The day's appointments for the selected door appear in the Appointments for Door window.
Click Exit to close the Appointments for Door window.
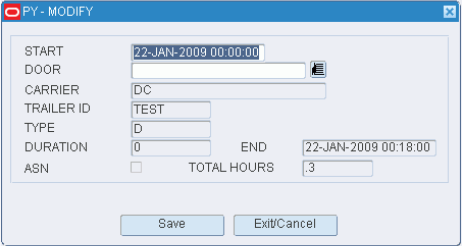
Edit a Door Schedule
|
Note: You can edit the schedule if the fields in the top part of the window are filled in. Whether data appears in that area depends on how you access the window. |
On the Door Schedule tab, click Next Block to place the cursor in the top part of the window.
Double-click the Date Time field. The Modify window opens.
Edit the enabled fields as necessary.
Click Save to save any changes and close the Modify window.
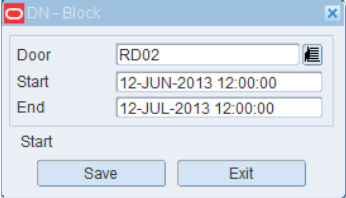
Block a Door
On the Door Schedule tab, click Block. The Block window opens.
In the Door field, enter the ID of the door, or click the LOV button and select the door.
In the Start field, enter start date (DD-MON-YYYY) and time (HH:MM:SS) for the block.
In the End field, enter the end date (DD-MON-YYYY) and time (HH:MM:SS) for the block.
Click Save to save the changes or click Exit to close the Block window.
Remove a Block
On the Door Schedule tab, click Next Block to place the cursor in the bottom part of the window.
Select the door that you want to edit.
Click Details. The day's appointments for the selected door appear in the Appointments for Door window.
Select a record where the type is B (Blocked).
Click Delete Appt.
When prompted to delete the record, click Yes.
Click Exit to close the Appointments for Door window.
Delete an Appointment from the Door Schedule
On the Door Schedule tab, click Next Block to place the cursor in the bottom part of the window.
Select the door that you want to edit.
Click Details. The day's appointments for the selected door appear in the Appointments for Door window.
Select the appointment that you want to delete from the door schedule.
Click Delete Appt.
When prompted to delete the record, click Yes.
Click Exit to close the Appointments for Door window.
Exit the Door Schedule Tab
Click the Exit button to close the window.
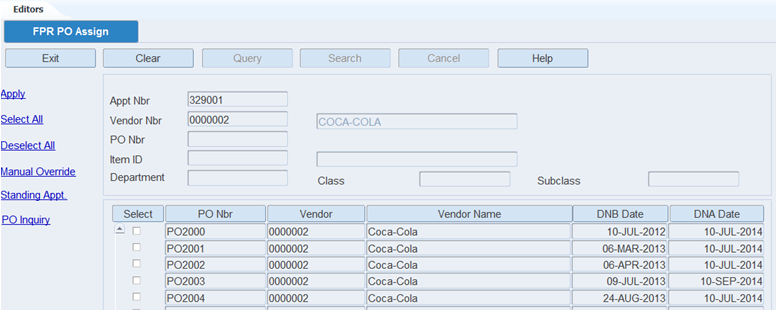
The FPR PO Assign editor is used to assign POs to FPR Without Details appointment types. For this appointment type, the vendor has only communicated the POs included on the appointment but has not indicated the items on the shipment. The items are identified during the actual receiving process.
From the main menu, select Appointments > FPR PO Assign.
Display Open Purchase Orders
If any appointments are currently displayed, click the Clear button.
Click the Query button. An LOV is displayed next to all the fields.
Use all of the query fields (Appt Nbr, Vendor Nbr, PO Nbr, item ID, and so on) to populate the screen with the POs on the inbound trailer.
Adding Purchase Orders to Appointment
Use the Query criteria to populate the screen with the desired POs for this appointment.
If all of the purchase orders on the screen are included on the inbound trailer press the Select All button. If you have made a mistake, you can clear all of the selected records by pressing the Deselect All button.
If you want to select specific POs from the list, you can accomplish this in two ways:
Press Select All and then deselect individual POs by clicking the box in the select column for that PO.
Click the box in the select column for the desired POs.
When the desired POs are selected press Apply to assign these POs to the appointment.
|
Note: Brazil Specific Notes:The FPR without Details Appointment type is not supported in a Brazilian installation since details are always provided within a Schedule. |
Exit the FPR PO Assign Editor
Click the Exit button to close the window.
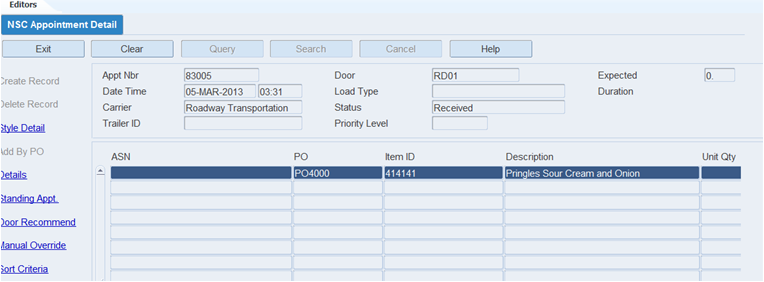
The NSC Appointment Detail allows you to view, add, and delete Purchase Order and item details for NSC (non-specified casepack) type appointments.
From the main menu, select Appointments > NSC Appointment Detail.
|
Note: You can access the NSC Appointment Detail window from the Appointment Schedule, PO Inquiry, and Appointment Details windows. Alternatively, you can access NSC Appointment Detail window from the main menu. Select Appointments > NSC Appointment detail. |
Add an ASN to NSC Appointment
|
Note: ASNs may be added to an appointment that is marked as an NSC type appointment. |
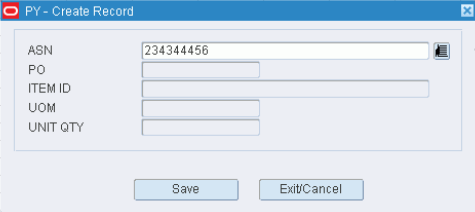
On the NSC Appointment Detail window, click Create Record. The Create Record window opens.
In the ASN field, enter the ASN number, or click the LOV button and select the ASN.
Click Save to save the changes and close the Create Record window.
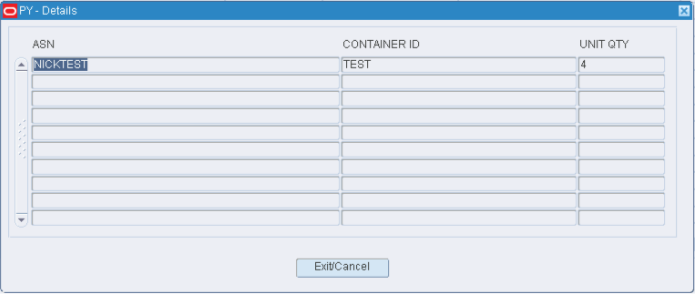
View Container Details on an Appointment
On the NSC Appointment Detail window, select the ASN that you want to view in detail.
Click Details. The details of the selected ASN appear in the Details window.
Click Exit/Cancel to close the Details window.
Delete an ASN from an Appointment
|
Note: Several records may refer to the same ASN. If you select and delete any one of the ASN records, all the records containing the same ASN are deleted. |
On the NSC Appointment Detail window, select the ASN that you want to delete.
Click Delete Record.
When prompted to delete the record, click Yes.
Add a PO/Line Item to an Appointment
On the NSC Appointment Detail window, click Create Record. The Create Record window opens.
In the PO field, enter the PO number, or click the LOV button and select the PO.
In the Item ID field, enter the ID of the item, or click the LOV button and select the item.
In the Unit Qty field, enter the number of units.
Click Save to save the changes and close the Create Record window.
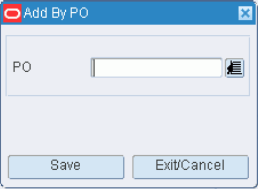
Add a Purchase Order to an Appointment
On the NSC Appointment Detail window, click Add by PO. The Add by PO window opens.
In the PO field, enter the PO number, or click the LOV button and select the PO.
Click Save to save the changes and close the Add by PO window.
Edit a PO/Line Item on an Appointment
On the NSC Appointment Detail window, double-click the PO/line item that you want to edit. The Modify window opens.
Edit the unit quantity as necessary.
Click Save to save the changes and close the Modify window.
Delete a PO/Line Item from an Appointment
On the NSC Appointment Detail window, select the PO/line item that you want to delete.
Click Delete Record.
When prompted to delete the record, click Yes.
On the NSC Appointment Detail window, select the Appt Nbr.
Select the ASN line that you want to sort.
Click Sort Criteria. The Appt Sort window opens.
To assign processes:
Select the check box next to the desired processes on the Available Sort Criteria table.
Click Assign. The selected processes are moved to the Assigned Sort Criteria table.
To remove assigned processes:
Select the check box next to the desired processes on the Assigned Sort Criteria table.
Click Unassign. The selected processes are moved to the Available Sort Criteria table.
To resequence the assigned criteria:
Select the criteria to be moved.
To move the criteria closer to the top of the list, click Move Up.
To move the criteria closer to the bottom of the list, click Move Down.
Click Save to save the changes and close the Appt Sort window.
Exit the NSC Appointment Detail Window
Click the Exit button to close the window.
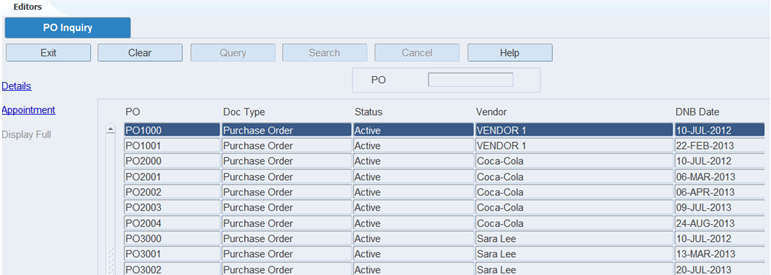
The PO Inquiry allows you to view all downloaded purchase orders. You can access the PO Detail window in order to view the items on a purchase order. You can also access the Appointed PO Inquiry window in order to view any appointments that are associated with a purchase order.
From the main menu, select Appointments > PO Inquiry. The PO Inquiry tab opens.
Display one Purchase Order
If any purchase orders are currently displayed, click the Clear button.
Click the Query button. An LOV is displayed next to the PO field.
In the PO field, enter a purchase order number, or click the LOV button and select the purchase order.
Click the Search button. The selected purchase order opens.
Display all Purchase Orders
Click the Search button.
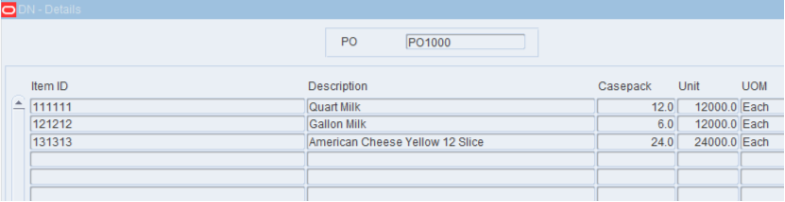
View the Details of a Purchase Order
On the PO Inquiry window, select the purchase order that you want to view in detail.
Click Details. The items appear in the Detail window
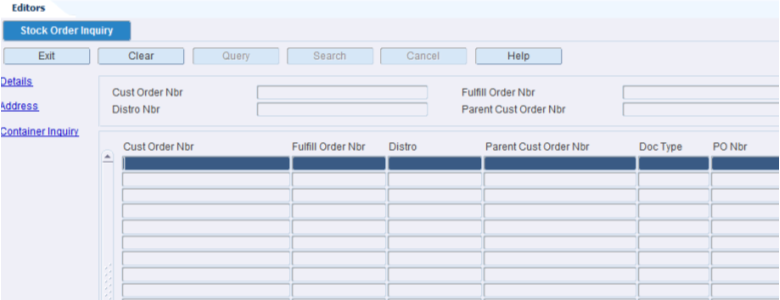
To view the items on the purchase order:
Click the Details button. The Stock Order Inquiry editor opens.
Click Exit to close the Stock Order Inquiry tab and Details window.
To view appointments that are associated with the purchase order:
Click Appointment. The appointments appear in the Appointed PO Inquiry editor.
Click the Exit button to close the Appointed PO Inquiry tab.
Exit the PO Inquiry Window
Click the Exit button to close the window.
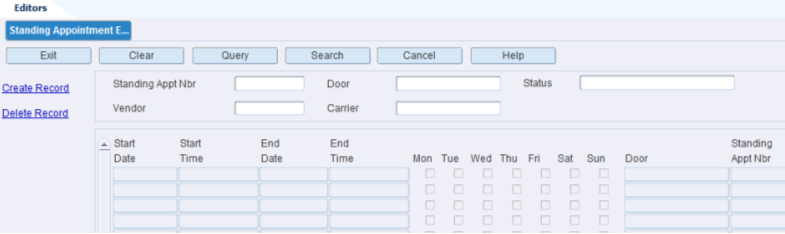
The Standing Appointment editor allows you to define and view standing appointments. These are appointments created for the future that occur on a routine basis at the same day and same time.
The start and end dates specify the length of time that the standing appointment is used.
The start and end times specify the expected duration of these appointments.
The check boxes for day of the week specify which days are used for these weekly appointments. (Multiple days may apply, for example, Monday, Wednesday, and Friday every week from noon until 1 p.m.)
Vendor is a required field and must be selected.
Carrier is optional; but if specified, the standing appointment is available only for that vendor/carrier combination.
New standing appointments created are always active, but this field can be used to deactivate them prior to expiration.
From the main menu, select Appointments > Standing Appointment Editor. The Standing Appointment Editor opens.
Display All Item Fields
Click the Query button.
Display a Standing Appointment
If any item fields are currently displayed, click the Clear button.
Click the Query button. An LOV is displayed next to each field, respectively.
Enter the search criteria.
Click the Search button. The appointment that matches the search criterion opens.
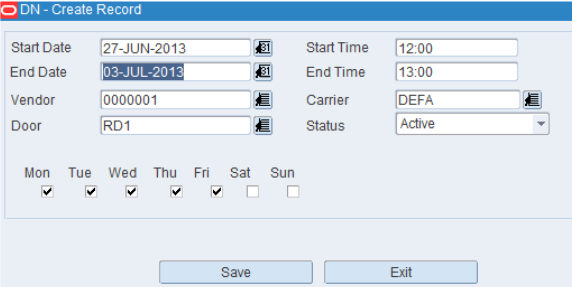
Create a Record
To create a standing appointment:
On the Standing Appointment Editor window, click Create Record button. The Create Record window opens.
Enter required fields.
Click Save.
Delete a Record
To delete a standing appointment:
On the Standing Appointment Editor window, select the item that you want to delete.
Click Delete Record.
When prompted to delete the record, click Yes.
Exit the Standing Appointment Editor Window
Click the Exit button to close the window.
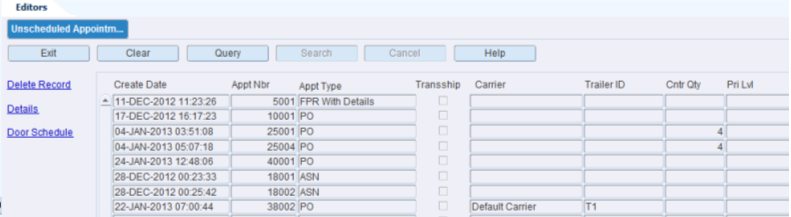
The Unscheduled Appointment Inquiry allow you to view unscheduled appointments and then make the determination to schedule or delete them. An unscheduled appointment is an appointment that was entered into the system without one or more of the following details: date, time, or receiving door.
From the main menu, select Appointments > Unschedule Appointments Inquiry. All unscheduled appointments appear in the Unschedule Appointments Inquiry tab.
Edit the Details of an Appointment
On the Unschedule Appointments Inquiry tab, select the appointment that you want to edit.
Click Details. If an ASN is associated with the appointment, the Appointment ASN tab opens; else, the Appointment Detail tab opens.
Edit the details as necessary.
Click the Exit button to close the detail window.
On the Unschedule Appointments Inquiry window, select the appointment that you want to schedule.
Click Door Schedule. The Door Schedule Screen tab opens.
Click Next Block, if necessary, to place the cursor in the top part of the window.
Double-click the Date Time field. The Modify window opens.
Enter the missing details as necessary.
Click Save to save the changes and close the Modify window.
Click the Exit button to close the Door Schedule window.
Delete an Appointment
On the Unscheduled Appointment Inquiry window, select the appointment that you want to delete.
Click Delete Record.
When prompted to delete the record, click Yes.
Exit the Unscheduled Appointment Inquiry Window
Click the Exit button to close the window.