| Oracle® Retail Warehouse Management System Security Guide Release 15.0 E68107-01 |
|

 Previous |
 Next |
| Oracle® Retail Warehouse Management System Security Guide Release 15.0 E68107-01 |
|
Previous |
Next |
Oracle Retail applications use the Oracle database as the backend data store for applications. In order to ensure complete environment security the database should be secured.
This chapter describes the post installation steps for secured setup of Retail infrastructure in the Database.
The following topics are covered in this chapter:
Secure Sockets Layer (SSL) is the standard protocol for secure communications, providing mechanisms for data integrity and encryption. This can protect the messages sent and received by the database to applications or other clients, supporting secure authentication and messaging. Configuring SSL for databases requires configuration on both the server and clients, which include application servers.
This section covers the steps for securing Oracle Retail Application Clusters (RAC) database. Similar steps can be followed for single node installations also.
The following steps are one way to configure SSL communications on the database server:
Obtain an identity (private key and digital certificate) and trust (certificates of trusted certificate authorities) for the database server from a Certificate Authority.
Create a folder containing the wallet for storing the certificate information. For Real Application Cluster (RAC) systems, this directory can be shared by all nodes in the cluster for easier maintenance.
mkdir -p /oracle/secure_wallet
Create a wallet in the path. For example,
orapki wallet create -wallet /oracle/secure_wallet -auto_login
Import each trust chain certificate into the wallet as shown in the following example:
orapki wallet add -wallet /oracle/secure_wallet -trusted_cert -cert <trust chain certificate>
Import the user certificate into the wallet, as shown in the following example:
orapki wallet add -wallet /oracle/secure_wallet -user_cert -cert <certificate file location>
Update the listener.ora by adding a TCPS protocol end-point first in the list of end points
LISTENER1=
  (DESCRIPTION=
     (ADDRESS=(PROTOCOL=tcps)(HOST=<dbserver>)(PORT=2484))
     (ADDRESS=(PROTOCOL=tcp)(HOST=<dbserver>)(PORT=1521)))
Update the listener.ora by adding the wallet location and disabling SSL authentication.
WALLET_LOCATION =
 (SOURCE=
  (METHOD=File)
  (METHOD_DATA=
   (DIRECTORY=wallet_location)))
SSL_CLIENT_AUTHENTICATION=FALSE
Update the sqlnet.ora with the same wallet location information and disabling SSL authentication.
WALLET_LOCATION =
 (SOURCE=
  (METHOD=File)
  (METHOD_DATA=
   (DIRECTORY=wallet_location)))
SSL_CLIENT_AUTHENTICATION=FALSE
Update the tnsnames.ora to configure a database alias using TCPS protocol for connections.
<dbname>_secure=
  (DESCRIPTION=
   (ADDRESS_LIST=
    (ADDRESS=(PROTOCOL=TCPS)(HOST=<dbserver>)(PORT=2484)))
   (CONNECT_DATA=(SERVICE_NAME=<dbname>)))
Restart the database listener to pick up listener.ora changes.
Verify the connections are successful to the new <dbname>_secure alias
At this point either the new secure alias can be used to connect to the database, or the regular alias can be modified to use TCPS protocol.
Export the identity certificate so that it can be imported on the client systems
orapki wallet export -wallet /oracle/secure_wallet -dn <full dn of identity certificate> -cert <filename_to_create>
The following steps are one way to configure SSL communications on the database client:
Create a folder containing the wallet for storing the certificate information.
mkdir -p /oracle/secure_wallet
Create a wallet in the path. For example,
orapki wallet create -wallet /oracle/secure_wallet -auto_login
Import each trust chain certificate into the wallet as shown in the following example:
orapki wallet add -wallet /oracle/secure_wallet -trusted_cert -cert <trust chain certificate>
Import the identity certificate into the wallet, as shown in the following example:
orapki wallet add -wallet /oracle/secure_wallet -trusted_cert -cert <certificate file location>
|
Note: On the client the identity certificate is imported as a trusted certificate, whereas on the server it is imported as a user certificate. |
Update the sqlnet.ora with the wallet location information and disabling SSL authentication.
WALLET_LOCATION =
(SOURCE=
(METHOD=File)
(METHOD_DATA=
(DIRECTORY=wallet_location)))
SSL_CLIENT_AUTHENTICATION=FALSE
Update the tnsnames.ora to configure a database alias using TCPS protocol for connections.
<dbname>_secure=
(DESCRIPTION=
(ADDRESS_LIST=
(ADDRESS=(PROTOCOL=TCPS)(HOST=<dbserver>)(PORT=2484)))
(CONNECT_DATA=(SERVICE_NAME=<dbname>)))
Verify the connections are successful to the new <dbname>_secure alias.
At this point either the new secure alias can be used to connect to the database, or the regular alias can be modified to use TCPS protocol.
The following steps are one way to configure SSL communications for a Java Database Connectivity (JDBC) thin client:
Create a folder containing the keystore with the certificate information.
mkdir -p /oracle/secure_jdbc
Create a keystore in the path. For example,
keytool -genkey -alias jdbcwallet -keyalg RSA -keystore /oracle/secure_jdbc/truststore.jks -keysize 2048
Import the database certificate into the trust store as shown in the following example:
keytool -import -alias db_cert -keystore /oracle/secure_jdbc/truststore.jks -file <db certificate file>
JDBC clients can use the following URL format for JDBC connections:
jdbc:oracle:thin:@(DESCRIPTION= (ADDRESS= (PROTOCOL=tcps) (HOST=<dbserver>) (PORT=2484)) (CONNECT_DATA= (SERVICE_NAME=<dbname>)))
|
Note: The <dbname> would be replaced with service name in case of multitenant database (12c). |
You need to set the properties as shown in Table 2-1, either as system properties or as JDBC connection properties.
Wallets can be used to protect sensitive information, including usernames and passwords for database connections. The Oracle Database client libraries have built-in support for retrieving credential information when connecting to databases. Oracle Retail applications utilize this functionality for non-interactive jobs such as batch programs so that they are able to connect to the database without exposing user and password information to other users on the same system.
For information on configuring wallets for database access, see the Appendix Setting Up Password Stores with Oracle Wallet in the product installation guide.
Oracle Database includes robust functionality to enforce policies related to passwords such as minimum length, complexity, when it expires, number of invalid attempts, and so on. Oracle Retail recommends these policies are used to strengthen passwords and lock out accounts after failed attempts.
For example, to modify the default user profile to lock accounts after five failed login attempts, run the following commands as a database administrator:
Query the current settings of the default profile
select resource_name,limit,resource_type from dba_profiles where profile='DEFAULT';
Alter the profile, if failed_login_attempts is set to unlimited:
alter profile default limit FAILED_LOGIN_ATTEMPTS 5;
|
Note: Many other profile settings are available for increased security. For more information, see the Oracle Database Security Guide. |
This section covers the steps for securing Oracle data Integrator (ODI) and communication over HTTPS Protocol.
See the following steps to configure SSL communications for ODI:
Set the environment variable for JAVA_HOME as follows:
$ export JAVA_HOME=/oracle/oracle_linux/jdk1.7 64bit
$ export PATH=$JAVA_HOME/bin:$PATH
Create a Self Signed Keystore. Run the command to generate the keystore as shown in the following example:
$ keytool -genkey -keyalg RSA -alias selfsigned -keystore keystore.jks -storepass password -validity 360 -keysize 2048
What is your first and last name?
  [Unknown]:  <Hostname>
What is the name of your organizational unit?
  [Unknown]:  <Organization Unit>
What is the name of your organization?
  [Unknown]:  <SomeORG>
What is the name of your City or Locality?
  [Unknown]:  <IN>
What is the name of your State or Province?
  [Unknown]:  <MSP>
What is the two-letter country code for this unit?
  [Unknown]:  <US>
Is CN= <Hostname>, OU=<Organization Unit>, O=<SomeORG>, L=<IN>, ST=<MSP>, C=<US> correct?
  [no]:  yes
Enter key password for <selfsigned>
        (RETURN if same as keystore password):
Re-enter new password:
Export the certificate from the keystore created above into the file, server.cer:
keytool -export -alias selfsigned -storepass password -file server.cer -keystore keystore.jks
For example:
$ keytool -export -alias selfsigned -storepass password -file server.cer -keystore keystore.jks
Certificate stored in file <server.cer>
Create the trust-store file, cacerts.jks, and add the server certificate to the trust-store. For example,
$ keytool -import -v -trustcacerts -alias selfsigned -file server.cer -keystore cacerts.jks -keypass password -storepass password
For Example -
$ keytool -import -v -trustcacerts -alias selfsigned -file server.cer -keystore cacerts.jks -keypass password -storepass password
Owner: CN=<Hostname>, OU=<Organization Unit>, O=<SomeORG>, L=<IN>, ST=<MSP>, C=<US>
Issuer: CN=<Hostname>, OU=<Organization Unit>, O=<SomeORG>, L=<IN>, ST=<MSP>, C=<US>
Serial number: 1f5717fd
Valid from: Fri Aug 01 02:12:50 CDT 2014 until: Mon Jul 27 02:12:50 CDT 2015
Certificate fingerprints:
         MD5:  6E:67:FE:FA:4F:6C:E7:E8:C5:5F:17:97:18:E6:62:7E
         SHA1: 48:B7:66:58:24:C9:BD:A9:F9:E1:FB:08:70:94:35:9A:B0:44:DF:D6
         SHA256: 6A:88:40:E1:A7:2F:67:13:6A:F7:12:D0:F1:47:6C:D7:E8:68:45:73:C3:04:36:24:8A:41:18:3D:22:8A:DD:5F
         Signature algorithm name: SHA256withRSA
         Version: 3
Extensions:
#1: ObjectId: 2.5.29.14 Criticality=false
SubjectKeyIdentifier [
KeyIdentifier [
0000: 2E A6 E1 80 12 33 70 4C   72 FA DF ED 98 BB 33 DF  .....3pLr.....3.
0010: 81 6B 40 A4                                        .k@.
]
]
Trust this certificate? [no]:  yes
Certificate was added to keystore
[Storing cacerts.jks]
Encode the password used by Keystore and Truststore as follows:
$ cd $ODI_HOME/oracledi/agent/bin
$ ./encode.sh <password>
For Example -
$ ./encode.sh password
       fDyp8qdXcuuYUbBcg0Jr
After configuring repository connection information of the odiparams.sh file, configure and modify the following sections of the file and save it:
$ vi odiparams.sh
Modify the following entries:
ODI_KEYSTORE_ENCODED_PASS=fDyp8qdXcuuYUbBcg0Jr
ODI_KEY_ENCODED_PASS=fDyp8qdXcuuYUbBcg0Jr
ODI_TRUST_STORE_ENCODED_PASS=fDyp8qdXcuuYUbBcg0Jr
ODI_JAVA_OPTIONS="-Djava.security.policy=server.policy -Doracle.security.jps.config=./jps-config.xml -Djavax.net.ssl.keyStore=<KEYSTORE_LOCATION>/keystore.jks -Djavax.net.ssl.trustStore=<KEYSTORE_LOCATION>/SSL/cacerts.jks $ODI_PARAMS_JAVA_OPTION"
|
Note: The encoded password is the one that you generated by running./encode.sh script. |
Add the following lines to odi.conf before SetJavaHome Environment Variable in the file and save. This will set up ODI Studio for HTTPS.
$cd $ODI_HOME/oracledi/agent/bin
Append the odi.conf file with below entries:-
AddVMOption -Djavax.net.ssl.trustStore=<KEYSTORE_LOCATION>/cacerts.jks
AddVMOption -Djavax.net.ssl.trustStorePassword=password
For example
$ vi odi.conf
#Keystore Details
AddVMOption -Djavax.net.ssl.trustStore=/u03/odi/product/11.1.1.7/SSL/cacerts.jks
AddVMOption -Djavax.net.ssl.trustStorePassword=password
|
Note: The password is the actual password used while encoding. This is not the encoded password. |
Configure ODI STUDIO with New Agent.
Go to the following location:
$ cd $ODI_HOME/oracledi/client
Run the following:
$ ./odi.sh
Oracle Data Integrator 11g
Copyright (c) 1997, 2012, Oracle and/or its affiliates. All rights reserved
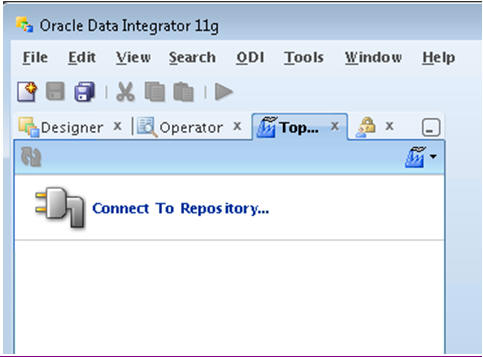
The Connect to Repository Window appears:
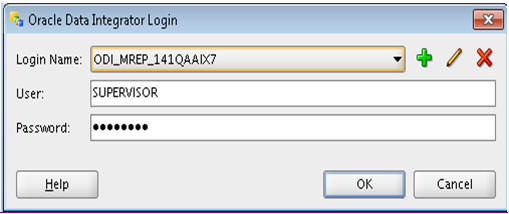
Once Connect to Repository Window appears, click Connect to Repository. The Oracle Data Integrator Login screen appears.
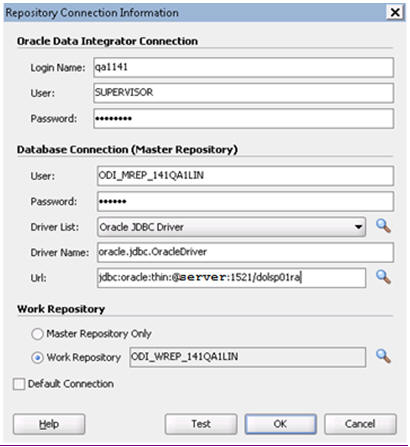
Click the + symbol and provide the Repository Connection Information.
|
Note: The URL in Figure 2-4 is an example for Pluggable Database. If it is a non-container database, specify the following URL:jdbc:oracle:thin:@server:1521/<dbname> |
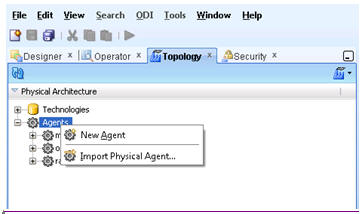
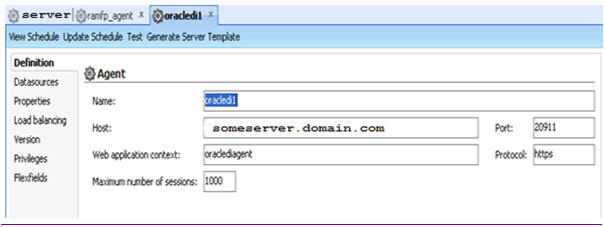
Configure the New Agent by right clicking Agents and select New Agent.
Specify all the details and make sure you are using an HTTPS protocol.
Finally start the ODI Agent to listen on HTTPS port:
$ $ODI_HOME/oracledi/agent/bin> ./agent.sh "-PROTOCOL=HTTPS" "-PORT=20911" "-NAME=oracledi1"
Enter password for TrustStore:
2014-08-01 03:18:45.854 NOTIFICATION ODI-1128 Agent oracledi1 is starting. Container: STANDALONE. Agent Version: 11.1.1.7.0 - 02/03/2013. Port: 20911. JMX Port: 21911.
2014-08-01 03:18:51.209 NOTIFICATION ODI-1111 Agent oracledi1 started. Agent version: 11.1.1.7.0 - 02/03/2013. Port: 20911. JMX Port: 21911.
2014-08-01 03:18:51.210 NOTIFICATION ODI-1136 Starting Schedulers on Agent oracledi1.
2014-08-01 03:18:52.040 NOTIFICATION ODI-1137 Scheduler started for work repository ODI_WREP_141QA1LIN on Agent oracledi1
The retail tablespaces can be encrypted in container databases using the following method:
Update the SQLNET.ORA file with the following encryption details:
Configure the sqlnet.ora File for a Software Keystore Location.
ENCRYPTION_WALLET_LOCATION=
(SOURCE=
(METHOD=FILE)
(METHOD_DATA=
(DIRECTORY=path_to_keystore)))
Restart the listener.
Set up the Tablespace Encryption in the Container Database.
Create Software Keystores as follows:
SQL> ADMINISTER KEY MANAGEMENT CREATE KEYSTORE '/u03/wallet_cdb' IDENTIFIED BY "val1ue#";
Keystore altered.
Create an Auto-Login Software Keystore as follows:
SQL> ADMINISTER KEY MANAGEMENT CREATE AUTO_LOGIN KEYSTORE FROM KEYSTORE
'/u03/wallet_cdb' identified by "val1ue#'; Keystore altered.
|
Note: The auto-login software keystore can be opened from different computers from the computer where this keystore resides. However, the [local] auto-login software keystore can only be opened from the computer on which it was created. |
Open the Software Keystore as follows:
SQL> ADMINISTER KEY MANAGEMENT SET KEYSTORE OPEN IDENTIFIED BY "val1ue#" Container=ALL;
Keystore altered.
Set the Software TDE Master Encryption Key as follows:
SQL> ADMINISTER KEY MANAGEMENT SET KEY IDENTIFIED BY "val1ue#" WITH BACKUP USING 'TDE_ENCRYPTION' Container=all;
Keystore altered.
|
Note: One can set the Encryption KEY only for particular PDB if required, by specifying the CONTAINER=<PDB>. |
Create the ENCRYPTED TABLESPACE in PDB as follows:
SQL> conn sys/D0ccafe1@QOLRP01APP as sysdba
Connected.
SQL> create tablespace test datafile '+DATA1' size 100m ENCRYPTION DEFAULT STORAGE (ENCRYPT);
Tablespace created.
Verify the Encryption:
SQL> select * from v$encryption_wallet
| WRL_TYPE | WRL_PARAMETER | STATUS | WALLET_TYPE | WALLET OR | FULLY BAC | CON ID |
|---|---|---|---|---|---|---|
| FILE | /u03/wallet_cdb | OPEN | PASSWORD | SINGLE | NO | 0 |
For more information on Configuring Transparent Data Encryption (TDE), see
http://docs.oracle.com/database/121/ASOAG/asotrans_config.htm#ASOAG9529
Other useful information may be useful during maintenance activity.
Close the Encryption Wallet as follows:
SQL> ADMINISTER KEY MANAGEMENT SET KEYSTORE Close IDENTIFIED BY "val1ue#" Container=ALL;
For more information on the subjects covered in this section as well as information on other options that are available to strengthen database security, see the Oracle Database Security Guide 12c Release 1.
The Oracle Advanced Security Option provides industry standards-based solutions to solve enterprise computing security problems, including data encryption and strong authentication. Some of the capabilities discussed in this guide require licensing the Advanced Security Option.
For more information, see the Oracle Database Advanced Security Administrator's Guide 12c Release 1.