| Oracle® Retail Warehouse Management System UI User Guide Release 15.0 E66766-01 |
|


 Previous |
 Next |
| Oracle® Retail Warehouse Management System UI User Guide Release 15.0 E66766-01 |
|
Previous |
Next |
The activity history log allows you to track historical information about activities within a distribution center. You can choose which data should be tracked and specify the sources of that data.
Some basic reports and simple query functionality are provided within RWMS. It is recommended that more extensive manipulation of the data be performed with data warehousing tools.
As containers pass through distribution center, historical records are kept in RWMS. You can use this information to track a container's progress.
Business Process
There are three phases to setting up the activity history log in RWMS:
A system option must be set to turn on the logging function.
You must indicate how many days worth of data to retain for each table. Data older than the set number of days are purged from the log.
You must select the fields against which activity is logged. You can select those fields by window or by table/field. Some activities, however, are always logged. These activities involve users overriding certain defaults and skipping activities.
Simple queries can be run on the data from within RWMS.
System Administration
For activities to be logged, the activity history log functionality must be turned on. The setting for the system parameter, ahl_log, may be:
0 (zero): The functionality is turned off.
1: The functionality is turned on. Activities are written to the ACTIVITY_LOG table.
2: The functionality is turned on. Activities are written to an Oracle database queue. Customization is required to write the data to the ACTIVITY_LOG table.
This chapter contains the following topics:
Automatic Overrides and Skips
The following user actions are always recorded in the activity history log:
During the putaway process, a suggested putty location is overridden.
During bulk picking or bulk replenishment picking, a suggested pick from location or quantity is overridden.
During container picking, a suggested location or quantity is overridden.
During container replenishment picking, a suggested location is overridden.
During put-to-store picking, a suggested location is overridden.
During cycle counting, a location marked for counting is skipped.
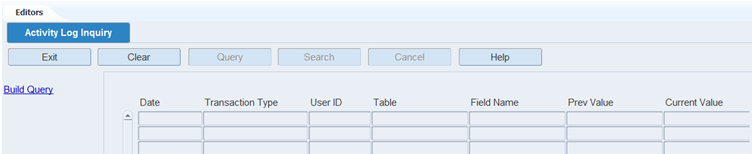
From the main menu, select Activity History Log > Activity Log Inquiry. The Activity Log Inquiry window opens.
Query the Activity History Log
On the Activity Log Inquiry window, click Build Query. The Build Query window opens.
If a query opens, click Clear Query.
To load a query:
Click Load Query. The Load Query window opens.
Select the query that you want to use.
Click Load Query. The query opens on the Build Query window.
Click Run Query. The query is run and the results appear on the Activity Log Inquiry window.
Build a Query
On the Activity Log Inquiry window, click Build Query. The Build Query window opens.
In the Column field, select a limiting element.
In the Operator field, select a relational operator.
In the Value field, enter the value of the element selected in the Column field.
In the Logical field, enter the logical operator used to join two or more conditions.
Enter additional conditions as necessary.
To save a query:
Click Save Query. The Save Query window opens.
In the Save field, enter a name for the query.
Click Save to save the query and close the Activity Log Queries window.
On the Build Query window, click Run Query to run the query or click Exit/Cancel to close the Build Query window.
Delete a Query
On the Activity Log Inquiry window, click Build Query. The Build Query window opens.
Click Delete Query. The Delete Query window opens.
Select the query that you want to delete.
Click Delete Query.
When prompted to delete the record, click Yes. The query is deleted and you are returned to the Build Query window.
Click Exit/Cancel to close the Build Query window.
Exit the Activity History Log Window
Click Exit to close the window.
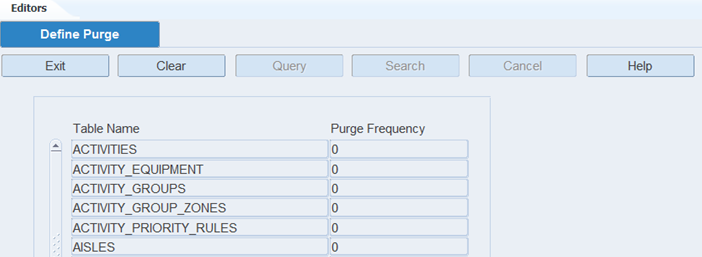
From the main menu, select Activity History Log > Define Purge. The current purge settings appear in the Purge Define window.
Edit Purge Frequencies
On the Purge Define window, double-click the table that you want to edit. The Modify window opens.
In the Purge Frequency field, edit the number of days for which you want to retain data.
Click Save to save any changes and close the Modify window.
Exit the Purge Define Window
Click Exit to close the window.
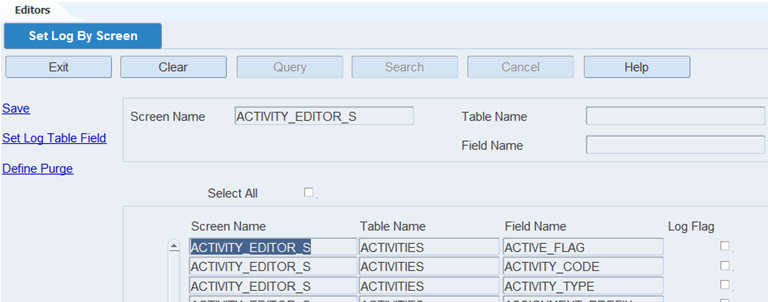
From the main menu, select Activity History Log > Set Log by Screen. The Set Log by Screen window opens.
Display Tables and Fields for All Screens
|
Note: Due to the large volume of fields that would be retrieved, it is recommended that you enter criteria in order to restrict the results. |
Click Search.
Display a Subset of Screens
If any screens are currently displayed, click Clear.
Click Query.
To display tables and fields by screen (or window), enter the screen name in the Screen Name field, or click the LOV button and select the Screen. To display screens by table or field, enter the table name or field name in the appropriate fields, or click the LOV buttons and select the table or field.
Click Search. The screens, tables, and fields that match the criteria appear.
Set Screen Level Activity Logs
On the Set Log by Screen window, select the Log Flag check box next to each screen/table/field that you want to include in the activity history log.
|
Note: The Log Flag for a screen can be selected only if Purge Days are defined for the screen in Define Purge window. |
Clear the Log Flag check box next to each screen/table/field that you do not want to log.
|
Note: To select or clear the Log Flag check boxes for all the currently displayed screen/table/field records, select or clear the Select All check box.The Select All check box can used only if the table associated to the windows has Purge Days defined. If Purge Days are not defined for the table, then selecting the Select All check box triggers a warning message to define the Purge days on the table. |
Click Save to save any changes.
Exit the Set Log by Screen Window
Click Exit to close the window.
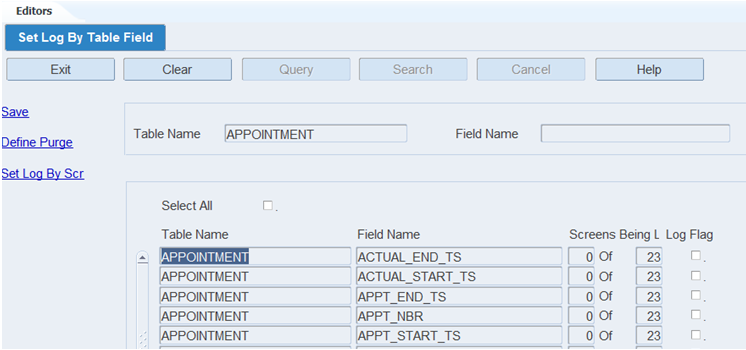
From the main menu, select Activity History Log > Set Log by Table/Field. The Set Log by Table/Field window opens.
Display All Tables and Fields
|
Note: Due to the large volume of fields that would be retrieved, it is recommended that you enter criteria in order to restrict the results. |
Click Search.
Display a Subset of Tables and Fields
If any tables and fields are currently displayed, click Clear.
Click Query.
Enter criteria in one or both of the text fields.
Click Search. The tables and fields that match the criteria appear.
Set Table/Field Level Activity Logs
On the Set Log By Table Field window, select the Log Flag check box next to each table/field that you want to include in the activity history log.
Clear the Log Flag check box next to each screen/table/field that you do not want to log.
|
Note: To select or clear the Log Flag check boxes for all the currently displayed table/field records, select or clear the Select All check box.Select All check box can used only if the table associated to the screens has Purge Days defined. If Purge Days are not defined for the table, then selecting the Select All check box triggers a warning message to define the Purge days on the table. |
Click Save to save any changes.
Exit the Set Log By Table/Field Window
Click Exit to close the window.