| Oracle® Retail Warehouse Management System UI User Guide Release 15.0 E66766-01 |
|


 Previous |
 Next |
| Oracle® Retail Warehouse Management System UI User Guide Release 15.0 E66766-01 |
|
Previous |
Next |
Warehouse outbound activities can be broadly classified into the following:
Shipping
Trailer Management
Shipping
Many of the shipping tasks are performed using a hand-held, truck mounted, or wrist mounted radio frequency (RF) device. The RF device can be used when loading and unloading trailers, and to indicate the status of a trailer. Information from the RF device is transmitted to RWMS, where it can be monitored.
In RWMS, you can estimate the total weight and volume of a stock order or shipment so you can better plan your routes. You can plan the amount of physical space needed in the trailer and the best order to load the trailer for the route. You can send the estimates to a third party system to determine optimal trailer loading. The third party system communicates that information back to RWMS and to the warehouse.
You can monitor the loading progress at shipping doors. The status of a door may be:
Available: The door is not blocked or in use. A trailer may be assigned to the door for loading.
Busy: Either a trailer is being loaded or the door is blocked and cannot be used.
Trailer Management
The Trailer Management module allows you to track and manage the status of inbound and outbound trailers. RWMS tracks the status of all trailers in the fleet. The status may be:
Arrived Inbound: The trailer is checked in and is either staged at a receiving door or assigned to a yard location.
Checked out: The trailer is checked out.
Loaded: The trailer is loaded for outbound transit.
Out of service: The trailer is not usable.
Scheduled: The trailer has a designated appointment time, but has not yet been checked in to the yard.
Shipped: The trailer is loaded with outbound merchandise and in-transit to its destinations.
Unloaded: The trailer is unloaded and released, but still in the yard. Outbound arrivals are given this status when they are checked in.
Unloading: The trailer is being unloaded at the receiving door.
|
Note: Check in the trailer to change the status of a trailer from Scheduled to Arrived Inbound or from Checked out to Unloaded. |
You can look up the contents of any inbound or outbound trailer. The details can be displayed by item, destination, or container.
This chapter contains the following topics:
To query shipment volume and weight, navigate to Outbound -> Ship Cube Inquiry. The Ship Cube Inquiry window opens.
Run a Query
If a query opens, click Clear Query.
To load a query:
To run a ship cube query, click Load Ship Cube Query.
To run a stock order query, click Load Stock Order Query.
Select a query and click Load Query.
On the Build Query window, click Run Query.
When prompted to continue, click Yes. The results appear on the Query Results window.
Route the Query Results
On the Query Results window, click Route.
The Create Routing File window opens.
In the Ship Date field, enter the date the shipment should be sent.
Click Route to save your changes and close the window.
Build a Query
In the Column fields, select a limiting element.
In the Operator fields, select a relational operator.
In the Value fields, enter the value of the element selected in the Column field.
In the Logical field, enter the logical operator used to join two or more conditions.
Enter additional conditions as necessary.
You can add the following criteria to restrict your query:
Table 11-1 Criteria to Restrict Queries
| Criteria | Restriction |
|---|---|
|
Requested Units |
The query includes all requested units ordered, regardless of distributed status. |
|
Distributed Units |
The query includes only units that have been distributed |
|
Undistributed Units |
The query includes only units that are not yet distributed. |
|
Include Crossdock & Appointment Date |
The query includes units on crossdock orders, after the appointment date is specified. |
To save a query:
Click Save Query. The Save Shipping Query window opens.
In the Save field, enter the name of the query.
|
Note: You can only save a shipping query. You can maintain stock order queries in the Stock Order windows. |
Click Save Query to save your changes and close the window.
Delete a Query
On the Build Query window, click Delete Query. The Delete Query window opens.
Select the query that you want to delete.
Click Delete Query.
When prompted to delete the record, click Yes. The query is deleted and you are returned to the Build Query window.
Exit the Build Query Windows
Click Exit to close the window.
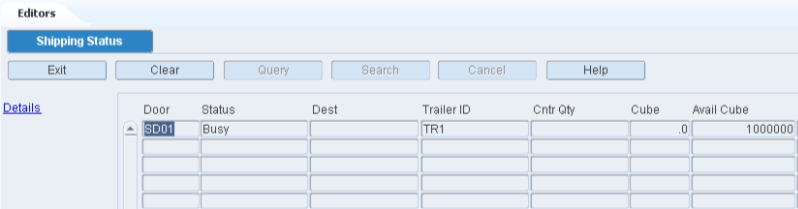
The Shipping Status window allows you to view all shipping doors and see the status of the door (available, busy), the outbound trailer in the door, and the destination ID.
To view statuses of all shipping doors, navigate to Outbound -> Shipping Status. The statuses of all shipping doors appear in the Shipping Status window.
View a Trailer Manifest
On the Shipping Status window, select the trailer that you want to view in detail.
Click Details. The trailer manifest opens in the Destinations for Trailer window.
Click Exit to close the window.
Exit the Shipping Status Window
Click Exit to close the window.
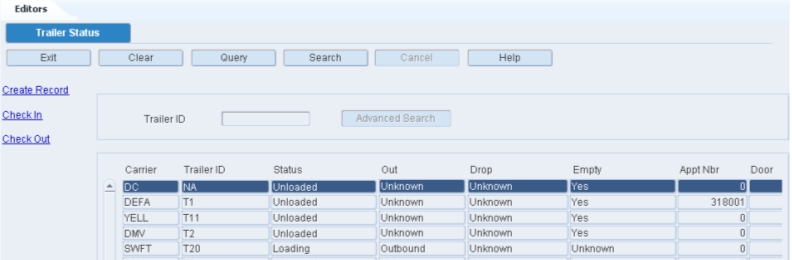
The Trailer Status window allows you to view the status of inbound and outbound trailers. You can add trailers to RWMS from this window. You can check-in and check-out trailers and you can generate the Trailer Status report. The report displays the status and additional details for all trailers, both inbound and outbound. Appointment numbers appear for inbound trailers.
To view trailer status, navigate to Outbound -> Trailer Status. The Trailer Status window opens.
Display All Trailers
Click Search.
Display a Subset of Trailers
If any trailers are currently displayed, click Clear.
Click Query.
Click Advance Search. The Advanced Search window opens.
In the criteria fields, enter a partial ID, or click the LOV button and select the criterion.
Click Search. The trailers appear on the Trailer Status window.
Add a Trailer
On the Trailer Editor window, click Create Record. The Create Record window opens.
In the Trailer ID field, enter the ID of the trailer.
In the Carrier field, enter the code for the carrier, or click the LOV button and select the carrier.
In the Location ID field, enter the ID of the yard location, or click the LOV button and select the location.
The Appt Nbr field is disabled. This value is populated when a trailer is associated to an appointment in the Appointment Schedule window.
The Mode field is disabled. This value is populated when the mode is defined while associating the trailer to the appointment.
Click Save to save the changes and close the Create Record window.
Edit the Status of a Trailer
On the Trailer Status window, select the trailer that you want to edit.
Click Check In to change the status of a trailer from Scheduled to Arrived Inbound or from Checked-out to Unloaded.
Click Check Out to change the status of a trailer from Shipped or Unloaded to Checked Out.
Exit the Trailer Status Window
Click Exit to close the window.
The Trailer Tracking window allows you to view details about the merchandise loaded on both inbound and outbound trailers. You can view items, destinations, and container details.
Inbound details are pulled from the appointments that are associated with a trailer. Outbound details are pulled from the bills of lading that are associated with a trailer.
You can choose to view details by item, by destination, or by container.
To view merchandise in trailers, navigate to Outbound -> Trailer Tracking. The Trailer Tracking window opens.
Display All Trailers
Click Search.
Display a Subset of Trailers
If any trailers are currently displayed, click Clear.
Click Query. The Advanced Search button is enabled.
Click Advanced Search. The Advanced Search window opens.
In the criteria fields, enter a partial ID, or click the LOV button and select the criterion.
Click Search. The trailer or trailers that match the selected criteria appear.
Display a Trailer
If any inbound and outbound trailers are currently displayed, click Clear.
Click Query.
In the Trailer ID field, enter the trailer ID, or click the LOV button and select the trailer.
Click Search. The details of the selected trailer appear.
View Details by Item
On the Trailer Tracking window, click Next Block to move the cursor to either the Inbound Statistics or Outbound Statistics table.
Select the trailer that you want to view in detail.
Click Detail by Item. The Detail by Item window opens. The details are sorted by item ID.
Click Exit to close the window.
View Details by Location
On the Trailer Tracking window, click Next Block to move the cursor to either the Inbound Statistics or Outbound Statistics table.
Select the trailer that you want to view in detail.
Click Detail by Dest. The items and locations for the selected trailer appear. The details are sorted by location ID.
Click Exit to close the window.
View Details by Container
On the Trailer Tracking window, click Next Block to move the cursor to either the Inbound Statistics or Outbound Statistics table.
Select the trailer that you want to view in detail.
Click Container Inq. The Container Inq Window opens.
Click Exit to close the window.
Exit the Trailer Tracking Window
Click Exit to close the window.
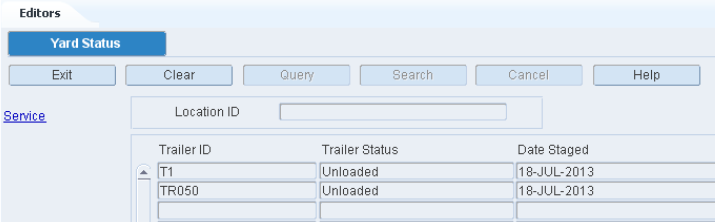
The Yard Status window allows you to view the status of trailers at yard locations. You can toggle the status of the trailer between Unloaded and Out of Service.
To maintain trailer statuses in the yard, navigate to Outbound -> Yard Status. The Yard Status window opens.
Display Trailers at All Yard Locations
Click Search.
Display Trailers by Yard Location
If any trailers are currently displayed, click Clear.
Click Query.
In the Location ID field, enter the ID of the yard location, or click the LOV button and select the location.
Click Search. The trailers at the selected yard location are displayed.
Edit the Status of a Trailer
On the Yard Status window, select the trailer that you want to edit.
Click Service to toggle the status from Unloaded to Out of Service or from Out of Service to Unloaded.
Exit the Yard Status Window
Click Exit to close the window.