| Oracle® Retail Predictive Application Server Installation Guide Release 14.1.2 E70811-01 |
|

 Previous |
 Next |
| Oracle® Retail Predictive Application Server Installation Guide Release 14.1.2 E70811-01 |
|
Previous |
Next |
The RPAS Classic Client can be deployed through traditional installation or through Web-based environments. This chapter describes the RPAS Web deployment installation process.
|
Note: Accessing RPAS through a Web-based deployment is different from the RPAS Fusion Client. For more information on the Fusion Client, refer to Chapter 5, "Installing the RPAS Fusion Client". |
Web-based deployment allows you to perform the following:
Use a Web browser to install the RPAS Classic Client application to the user's computer.
Launch the RPAS Classic Client when it has already been installed.
Reinstall the RPAS Classic Client when an updated version is available.
Use the RPAS Web Launch applet to facilitate In-Context Launch integration.
For the supported components used for web deployment of the Classic Client, refer to Table 1-2, "RPAS Classic Client Hardware and Software Requirements".
These instructions assume that the previously specified software has been properly installed and configured. Consult the documentation of each component for installation and configuration information, as well as hardware and software requirements.
For the RPAS Web deployment to function properly, users must have sufficient access to their PCs (typically administrator rights) which allow them to install software, unless the administrator configures the applet to launch only preinstalled RPAS Classic Client. Specifically, they need permission to write into the Windows Registry.
The following is an overview of the process that must be followed to install RPAS for Web deployment.
Install the RPAS Web Application. This installation is completed onto the Web server and involves two components that are included with the RPAS archive (RPAS.war or RPAS_osso.war, and RPASWebData.tar).
Install multiple versions of RPAS Classic Client files on Web server (as needed).
Configure the RPAS Servlet by using the deployment descriptor web.xml to specify servlet properties.
Configure Oracle SSO for RPAS Web application (if Oracle SSO is used).
Start the RPAS Web Configuration Utility. Using the URL of the RPAS Web Launch application, administrators and users follow this process to log in to the system.
Perform other Web client administration activities. Once the Web deployment environment is prepared, additional configuration and administration activities, such as domain configuration and managing administrative users, may need to be performed.
Installing the RPAS Web Application consists of the following procedures:
Installing the necessary files and configuring the environment based on your type of installation. Different processes may be used for RPAS Web deployment:
Installing on Apache Tomcat (a standalone server that is not part of the SSO infrastructure)
Perform the following procedure to prepare your environment to install t he RPAS web application.
Log in to the UNIX server and determine where the RPAS Web files will be installed. A minimum of 50 MB disk space available is required for the application installation files. More space may be needed if multiple versions of RPAS Classic Client are supported on the Web server.
Copy the RPAS Web files (RPAS.war or RPAS_osso.war, and RPASWebData.tar), located in [RPAS Installation]/Web/ directory, to a newly created staging directory on the UNIX server. This directory will be referred to as STAGING_DIR.
Extract the RPASWebData.tar to the appropriate location. This location is referred to as [RPAS_WEB_DATA_DIR] in this document. If the Web server is running in a load balance environment with multiple servers, the RPASWebData files must be deployed to a network drive accessible to all Web server instances. A new directory RPASWebData/ and three subdirectories (client/, db/, and logs/) are created. Verify that the client directory has read permissions and that the db and logs directories have read and write permissions.
For each release of RPAS Classic Client, there are two files: buildNumber.txt and client.zip. These files are not part of RPAS Web files. They generally come with RPAS release package. The default installation location for the files is [RPAS_WEB_DATA_DIR]/RPASWebData/client. If multiple client versions are to be supported, both files of each version must be placed under [RPAS_WEB_DATA_DIR]/RPASWebData/client/[VERSION] where [VERSION] is the version number of that release (for example, 13.3, 12.0.10).
Perform the necessary procedures based on your type of implementation.
Perform the following procedure if you are implementing RPAS Web on a WebLogic server with SSO support. This process consists of these steps:
This SSO configuration is the same as it is for SSO for the RPAS Fusion Client. Follow the procedure as described in the section, Set Up Single Sign-On (SSO). Ensure that a location directive for the RPAS Web context root has been added to the mod_wl_ohs_conf file. The context root is defined in Step 4: Deploy the WAR File.
Configure the Oracle Access Manager using the following steps:
Log in to the OAM console.
Under Policy configuration in the left pane, select Shared Components > Authentication Schemes > Select LDAP Scheme.
The LDAP Scheme window opens in the right pane.
In the Challenge Parameter field, enter: ssoCookie=disablehttponly.
Perform the following procedure to set up and deploy the WAR file to the WebLogic Server.
Configure the Application for the OSSO Identity Asserter.
The WebLogic Server supports adding multiple authentication-methods. If you are setting up an OSSO Identity Asserter in the WebLogic Application Console, the Web application using the OSSO Identity Asserter must have its auth-method set to CLIENT-CERT. After deploying the application on the WebLogic Server, all web.xml files in the application EAR file must include CLIENT-CERT in the element auth-method for the appropriate realm. To edit web.xml for the OSSO Identity Asserter:
Locate the web.xml file in the application WAR file. For example:
WEB-INF/web.xml
Locate the auth-method for the appropriate realm and enter CLIENT-CERT. For example:
<login-config>
  <auth-method>CLIENT-CERT</auth-method>
  <realm-name>myrealm</realm-name>
</login-config>
Save the file.
Create a new weblogic.xml file with the following contents (replace [CONTEXT_ROOT] with the actual context root):
<?xml version='1.0' encoding='UTF-8'?>
<weblogic-web-app xmlns="http://xmlns.oracle.com/weblogic/weblogic-web-app" xmlns:xsi="http://www.w3.org/2001/XMLSchema-instance" xsi:schemaLocation="http://xmlns.oracle.com/weblogic/weblogic-web-app http://xmlns.oracle.com/weblogic/weblogic-web-app/1.0/weblogic-web-app.xsd">

<context-root>[CONTEXT_ROOT]</context-root>

<security-role-assignment>
     <role-name>RPAS_ADMIN_ROLE</role-name>
     <principal-name>RPAS_ADMIN_ROLE</principal-name>
</security-role-assignment>

<security-role-assignment>
     <role-name>RPAS_USER_ROLE</role-name>
     <principal-name>RPAS_USER_ROLE</principal-name>
</security-role-assignment>

</weblogic-web-app>
Save the weblogic.xml file to the same location of the web.xml file in the WAR file.
Configure the RPAS Web Launch - To configure RPAS Web Launch, you need to modify one property file (propfile) located within the WEB-INF/config directory of the RPAS_osso.war file.
Locate the following information in propfile and replace [RPAS_WEB_DATA_DIR] with the actual location and [HOSTNAME] with the host name of the server)
dbPath=[RPAS_WEB_DATA_DIR]/RPASWebData/db
clientSourceDir=[RPAS_WEB_DATA_DIR]/RPASWebData/client
webLogFile=[RPAS_WEB_DATA_DIR]/RPASWebData/logs/rpasPortal.[HOSTNAME].log
isOSSO=true
debug=false
classicMode=false
launchPreinstalledOnly=false
supportMultipleVersions=true
|
Note: TheisOSSO flag must be set to true. Set launchPreinstalledOnly to true if only pre-installed RPAS Classic Client can be launched. Set classicMode to true to support RPAS Classic Client release 9.4. To support multiple versions of RPAS Classic Client, set supportMultipleVersions to true. |
Save the file and the WAR archive.
Perform the following procedure to deploy the WAR file to the WebLogic Server:
Log on to the WebLogic Administration Console.
Under the Domain Structure (left navigation pane), select Deployments. The Summary of Deployments window opens.
On the Summary of Deployments window, click Install. The Install Application Assistant window opens.
On the Install Application Assistant window, navigate to the location where you extracted the RPAS_osso.war ([STAGING_DIR]/RPAS_osso.war), select the file, and click Next.
Click the Install this deployment as an application option and then click Next. The next window displays optional settings. You can choose to set them up or accept the default values and proceed.
Optional. Enter relevant information for the optional settings.
Click Finish. The WAR file is deployed and it appears listed in the Summary of Deployments window.
On the Summary of Deployments window, click the deployment you added. The Settings for <deployment-name> window opens.
On the Configuration tab, under General, enter a relevant value in the Context Root field. You can choose to type RPAS or any other context root. This name is referred to as [CONTEXT_ROOT] in this document.
Click Save. The Save Deployment Plan Assistant window opens.
Enter or select a location for the deployment plan, and click OK.
Restart your deployment for the changes to take effect.
There are two types of roles for RPAS Web Launch users: RPAS_ADMIN_ROLE and RPAS_USER_ROLE.
Both roles can launch the RPAS Classic Client and connect to a domain. Only RPAS_ADMIN_ROLE has the privilege to access the ADMIN interface.
It is recommended that RPAS_USER_ROLE be assigned to most OSSO users (such as planner) and RPAS_ADMIN_ROLE be assigned for a few power users (such as executive). This needs to be performed on the LDAP server storing the OSSO user information.
The roles can be created manually by using the OID DAS application. The oidadmin application or LDIF scripts may also be used to create users and roles. For more details, refer to the OID documentation.
Use the following procedure to use the DAS application to create the RPAS_USER_ROLE and RPAS_ADMIN_ROLE accounts.
Access the DAS application.
The DAS application is found in the following location:
where <host> and <port> are the infrastructure or Oracle Identity Management OAS.
Click login and log in as orcladmin or another privileged user.
On the right-side of the page, select the Directory tab, and on the left side, select the Groups link.
Click Create.
Enter the name of the group to create (for example, RPAS_ADMIN_ROLE), the Display name, and a description.
Make sure the Group Visibility option is set to Public.
If you would like, add additional users. Scroll to the Members section and click Add User to add users to this group. You can also nest other groups as well. Members can be added at a later time as needed.
When all members have been added, click Submit.
Alternatively, you can create the groups using an LDIF script. A template is shown in Example 7-1. Note that the following token @BASE_REALM_DN@ needs to be replaced with installation specific value of the Realm Distinguished Name. Also, this script creates the group with a single member, orcladmin, as part of the group. Additional members may be added with more uniquemember attributes. You can run the script with the ldapadd command supplied with the Oracle Identity Management infrastructure OAS server.
Example 7-1 LDIF Script
# The LDIF template for creating RPAS_ADMIN_ROLE and RPAS_USER_ROLE groups in OID.
# RPAS_USER_ROLE
dn: cn=RPAS_USER_ROLE,cn=groups,@BASE_REALM_DN@
objectclass: top
objectclass: groupOfUniqueNames
objectclass: orclGroup
cn: RPAS_USER_ROLE
displayname: RPAS user role
description: RPAS user role
orclisvisible: true
owner: cn=orcladmin,cn=users,@BASE_REALM_DN@
uniquemember: cn=orcladmin,cn=users,@BASE_REALM_DN@

# RPAS_ADMIN_ROLE
dn: cn=RPAS_ADMIN_ROLE,cn=groups,@BASE_REALM_DN@
objectclass: top
objectclass: groupOfUniqueNames
objectclass: orclGroup
cn: RPAS_ADMIN_ROLE
displayname: RPAS Administrator role
description: RPAS Administrator role
orclisvisible: true
owner: cn=orcladmin,cn=users,@BASE_REALM_DN@
uniquemember: cn=orcladmin,cn=users,@BASE_REALM_DN@
Once the RPAS groups have been created with the LDIF script, you could use the OID DAS application to add more members to them.
For more information about SSO, refer to .
Perform the following procedure if you are implementing RPAS Web on a WebLogic Server instance without SSO Support. This process consists of several steps:
To configure RPAS Web Launch, you need to modify one property file (propfile) located within the WEB-INF/config directory of the RPAS.war file.
Locate the following information in propfile and replace [RPAS_WEB_DATA_DIR] with the actual location and [HOSTNAME] with the host name of the server).
dbPath=[RPAS_WEB_DATA_DIR]/RPASWebData/db
clientSourceDir=[RPAS_WEB_DATA_DIR]/RPASWebData/client
webLogFile=[RPAS_WEB_DATA_DIR]/RPASWebData/logs/rpasPortal.[HOSTNAME].log
isOSSO=false
debug=false
classicMode=false
launchPreinstalledOnly=false
supportMultipleVersions=true
|
Note: TheisOSSO flag must be set to false. Set launchPreinstalledOnly to true if only pre-installed RPAS Classic Client can be launched. Set classicMode to true to support RPAS Classic Client release 9.4. Set supportMultipleVersions to true to support multiple versions of RPAS Classic Client. |
Save the file and WAR archive.
Perform the following procedure to deploy the WAR file to the Oracle Application Server without SSO.
Log on to the WebLogic Administration Console.
Under the Domain Structure (left navigation pane), select Deployments. The Summary of Deployments window opens.
On the Summary of Deployments window, click Install. The Install Application Assistant window opens.
On the Install Application Assistant window, navigate to the location where you extracted the RPAS.war ([STAGING_DIR]/RPAS.war), select the file, and click Next.
Click the Install this deployment as an application option and then click Next. The next window displays optional settings. You can choose to set them up or accept the default values and proceed.
Optional. Enter relevant information for the optional settings.
Click Finish. The WAR file is deployed and it appears listed in the Summary of Deployments window.
On the Summary of Deployments window, click the deployment you added. The Settings for <deployment-name> window opens.
On the Configuration tab, under General, enter a relevant value in the Context Root field. You can choose to type RPAS or any other context root. This name is referred to as [CONTEXT_ROOT] in this document.
Click Save. The Save Deployment Plan Assistant window opens.
Enter or select a location for the deployment plan, and click OK.
Restart your deployment for the changes to take effect.
Perform the following procedure if you are deploying RPAS Web launch on a standalone Apache Tomcat server, which implies a non-SSO environment.
Installing RPAS Web Launch on Apache Tomcat consists of two steps:
Refer to your Apache Tomcat documentation for more details of how to deploy a Web archive.
Log on to the Tomcat Web server URL: http://server:port/manager/html.
Scroll to Deploy directory or WAR file located on server section.
In the Context Path field, type /RPAS (or anything else you choose).
This location is referred to (without the ”/”) as [CONTEXT_ROOT] in this document.
In the WAR or Directory URL field, type [STAGING_DIR]/RPAS.war.
Click Deploy.
The display name should show RPAS Web Launch for a successful deployment. In the event you need to a re-deploy RPAS Web Launch, it is recommended that the following be performed:
Undeploy the Web application.
Restart the Web server to clear any caching.
Re-deploy the Web application.
To configure RPAS Web Launch, you need to modify one property file (propfile). This file is located in the following path; where [TOMCAT_INSTALL_DIR] is the installation location of the Tomcat Web server. If the Web server is running in a load balance environment with multiple servers, this file must be modified for all Web server instances:
[TOMCAT_INSTALL_DIR]/webapps/[CONTEXT_ROOT]/WEB-INF/config
Locate the following information in propfile and replace [RPAS_WEB_DATA_DIR] with the actual location and [HOSTNAME] with the host name of the server.
dbPath=[RPAS_WEB_DATA_DIR]/RPASWebData/db
clientSourceDir=[RPAS_WEB_DATA_DIR]/RPASWebData/client
webLogFile=[RPAS_WEB_DATA_DIR]/RPASWebData/logs/rpasPortal.[HOSTNAME].log
isOSSO=false
debug=false
classicMode=false
launchPreinstalledOnly=false
supportMultipleVersions=true
|
Note: TheisOSSO flag must be set to false. Set launchPreinstalledOnly to true if only pre-installed RPAS Classic Client can be launched. Set classicMode to true to support RPAS Classic Client release 9.4. Set supportMultipleVersions to true to support multiple versions of RPAS Classic Client. |
Restart the RPAS Web Launch application.
If you have been running an older version of RPAS Web Launch, here are the steps to migrate old data to the new deployment.
Migrate client binary:
Copy buildNumber.txt and client.zip files to the location specified by property clientSourceDir. If multiple versions are supported, they should be copied to clientSourceDir/[ VERSION] where [VERSION] is the version number of that release (12.1.2, 11.1.15, and so on).
Migrate admin user data:
Copy userdata.dat file to the location specified by property dbPath.
Migrate domain registration data:
Copy domaindata.dat to the location specified by property dbPath.
Restart Web application RPAS Web Launch.
|
Note: After the migration, if an admin user fails to log on, that would indicate that theuserdata.dat file is corrupt. Remove the file, and log on the administration interface using default user, adm (default password adm), and re-create all admin users. |
The class for the RPAS servlet is com.retek.mdap.servlet.ServletManager. The servlet properties have been configured in the deployment descriptor web.xml that is originally archived in RPAS_osso.war or RPAS.war.
This deployment descriptor provides two sets of initialization parameters to the RPAS servlet.
|
Note: The deployment descriptor should not be modified. |
After the servlet is configured, load it into your Web server. You might be required to reload your Web server to activate the new servlet.
The following topics provide information on accessing the RPAS Web Administration console to perform administrative tasks such as defining the RPAS enterprise configuration, and adding, modifying and deleting domain configurations.
Perform the following procedure to start the RPAS Web Configuration utility.
To access the RPAS Web configuration utility, start a Web browser and go to the following location; where WEB_SERVER_ADDRESS is the address you use to access your Web server andCONTEXT_NAME is the value you defined for the Context Root field as described in each of the three installation processes listed in the Installing the RPAS Web Application section:
http://[WEB_SERVER_ADDRESS]/[CONTEXT-NAME]/web
|
Note: The Web application support internationalization. It uses the locale from the browser to determine the appropriate language to display in the Web interface. The default language is English. |
Example: http://rpasweb.oracle.com:13085/RPAS/web
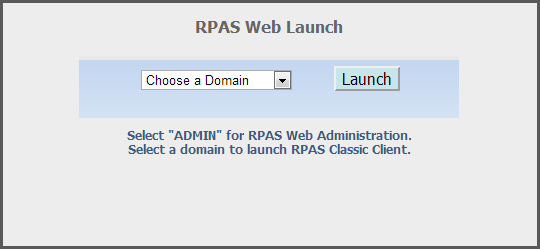
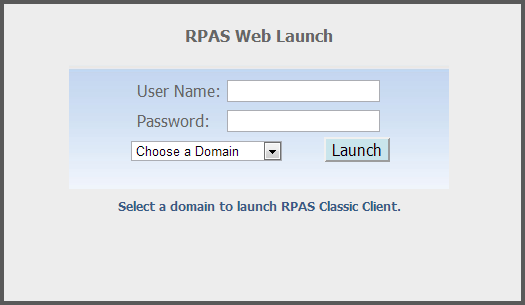
Depending the type of RPAS deployment being implemented (with SSO or without SSO), one of the following windows opens.
|
Note: If there is a very long list of domains, use URLhttp://[WEB_SERVER_ADDRESS]/[CONTEXT-NAME]/web?app=[AppID] to filter domains on the login page. Only domains with an application ID field matching AppID will be displayed in the list. |
Perform one of the following:
If you are using an SSO environment, select ADMIN as the domain and click Login to access the Administration Console.
If you are not using an SSO environment, enter an Administrator user name and password (the initial administration user name is adm and the password is adm). Select ADMIN as the domain and click Login to access the Administration Console.
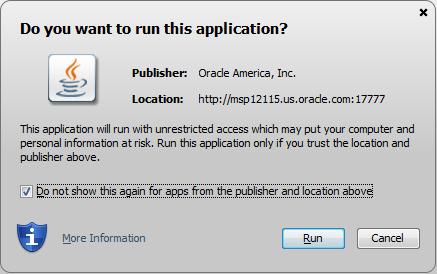
A security warning opens.
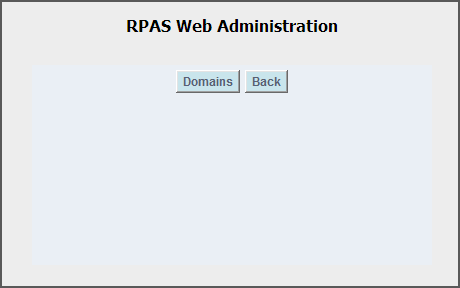
Click Run. To avoid seeing this message in the future, make sure Always trust content from this publisher option is selected. The RPAS Web Administration console opens.
Refer to the following topics to configure RPAS Web Launch or perform other administration activities.
The following sections provide instructions for these other Web Client Administration activities:
Adding, Modifying and Deleting Domain Configuration in an SSO Environment
Adding, Modifying and Deleting Domain Configuration in a Non-OSSO Environment
Perform the following procedure to add, modify, and delete domain configuration in an SSO environment:
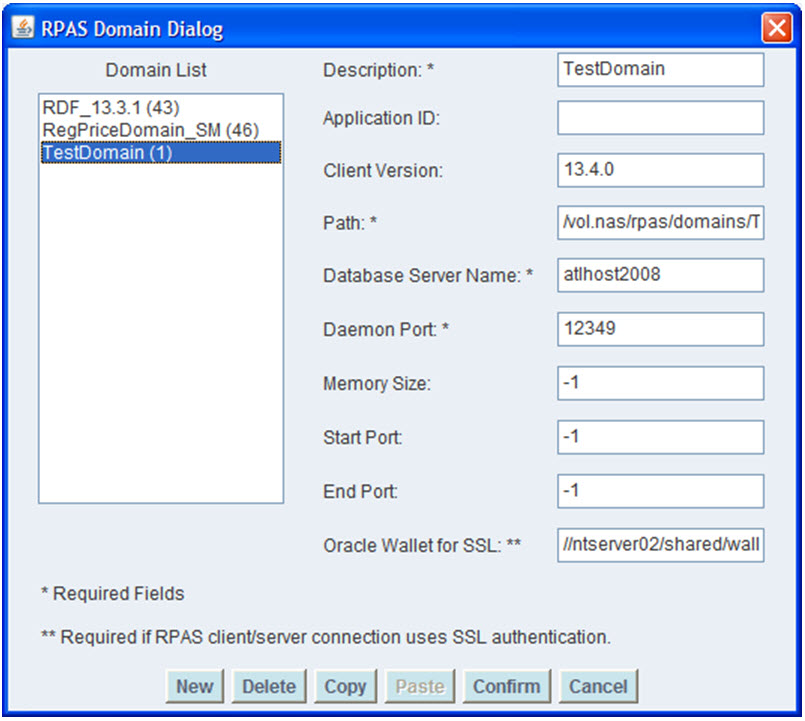
Click Domains in the RPAS Web Administration Console. The RPAS Domain Dialog window opens. Use this window to specify the location of RPAS domains. Each domain that can be accessed by a user must be specified with the dialog.
To add a new domain, click New, enter the following information, and click Confirm.
| Field Name | Value Description | Use |
|---|---|---|
| Description | This is displayed to users when they are selecting a domain to log in to. | Required. |
| Application ID | Used in domain filtering. | Can be any string without spaces. Leave blank if preferred. |
| Client Version | The version number of the RPAS Classic Client to launch. | It must match exactly the version number in the path of the client files on the Web server. Leave blank if multiple version support is not enabled. |
| Path | The full path to the directory containing the domain on the database server. | Required. |
| Database Server Name | The hostname of the database server containing the domain. | Required. |
| Daemon Port | The port number of the DomainDaemon process running on the database server. The port must be between 1025 and 65535 (inclusive). | Required. |
| Memory Size | Not currently used. | Leave blank. |
| Start Port | Start of the range of ports used by a client PC (Web launch architecture) to connect to the database server. | This value must be great than (>) 1025. If it not specified, the RPAS database server attempt to find a free port whenever a client connects. |
| End Port | End of the range of ports used by a client PC (Web launch architecture) to connect to the database server. | This value cannot be greater than 65535. |
| Oracle Wallet for SSL | The wallet location that passes to the Classic Client in order to support one-way SSL. | Required if the RPAS client/server connection uses SSL. |
To change an existing domain configuration, select the domain from the Domains List, modify the fields as necessary, and click Confirm. Select Cancel to discard any changes that have been made.
To remove a domain, select a domain from the Domains List and click Delete. The selected domain configuration is removed.
To copy all of the domain settings of a domain, perform the following:
Select the domain from the Domains List and click Copy.
Selecting another domain from the Domains List and click Paste. The domain is updated the domains settings you have copied.
Click Confirm to save the updated information.
In a non-OSSO environment, the administration tasks of maintaining the Domain data file are done manually by the administrator on the web server. The domain data file, domaidata.dat, can be located by the property dbPath in the property file (propfile) under the WEB-INF/config directory of the deployment.
The domaindata.dat file uses a Java property file format, that is with key=value format. If the key or value fields has any special characters (like #, !, =, and : ) in it, then these characters should be preceded with backslash to ensure that they are properly loaded. Spaces are not allowed at the end of each line.
The domain configuration key follows the format domain.{number_sequence}.{property_name}. The number sequence begins from 1. The number sequence can be discrete. But they should be unique for each domain configuration
Table 7-1 Domain Configuration Key Descriptions
| Field Name | Property Name in File | Value Description | Use |
|---|---|---|---|
|
Description |
.description |
This is displayed to users when they are selecting a domain to log in to. |
Required. |
|
Application ID |
.applicationID |
Used in domain filtering. |
Can be any string without spaces. Leave blank if preferred. |
|
Client Version |
.clientVersion |
The version number of the RPAS Classic Client to launch. |
It must match exactly the version number in the path of the client files on the Web server. Leave blank if multiple version support is not enabled. |
|
Path |
.path |
The full path to the directory containing the domain on the database server. |
Required. |
|
Database Server Name |
.dbServerName |
The hostname of the database server containing the domain. |
Required. |
|
Daemon Port |
.daemonPort |
The port number of the DomainDaemon process running on the database server. The port must be between 1025 and 65535 (inclusive). |
Required. |
|
Memory Size |
.dbMemSize |
Not currently used. |
Leave blank. |
|
Start Port |
.dbPortStart |
Start of the range of ports used by a client PC (Web launch architecture) or the Web server (Web tunneling architecture) to connect to the database server. |
This value must be great than (>) 1025. If it not specified, the RPAS database server attempt to find a free port whenever a client connects. |
|
End Port |
.dbPortEnd |
End of the range of ports used by a client PC (Web launch architecture) or the Web server (Web tunneling architecture) to connect to the database server. |
This value cannot be greater than 65535. |
|
Oracle Wallet for SSL |
.sslWalletLocation |
The wallet location that passes to the Classic Client in order to support one-way SSL. |
Required if the RPAS client/server connection uses SSL. |
|
id |
.id |
Should be same as the number_sequence value for the current domain configuration. |
Used for internal mapping. |
|
count |
.count |
Total domain configuration count |
Not used now. Used for backward compatibility |
The domain count entry in the domaindata.dat file is no longer used. However, this variable is allowed to be present in the domaindata.dat for backward compatibility.
This is a global variable, used for maintaining the total domain configuration count.
This follows the format domain.count.
Example 7-2 Sample domaindata.dat file
domain.1.sslWalletLocation=/path/to/wallets/clientdomain.1.path=/domain/path/in/serverdomain.1.daemonPort=12345domain.1.clientVersion=14.0.0domain.1.dbPortStart=-1domain.1.dbServerName=serverName or IPAddressdomain.1.id=1domain.1.dbMemSize=-1domain.1.dbPortEnd=-1domain.1.applicationID=domain.1.description=TestDomaindomain.count=10
Perform the following procedure the install the RPAS Classic Client and log in to a domain using RPAS Web Launch:
Start a Web browser and go to the following location/URL: http://[WEB_SERVER_ADDRESS]/[CONTEXT_NAME]/web
Example: http://rpasweb.oracle.com:13085/RPAS/web
This address is established during the initial installation and configuration. Administrators must provide this location/URL to end users. The [WEB_SERVER_ADDRESS] portion of the URL is the host address where the Java application service is running. This address may also include an alternate TCP/IP port number to communicate on (for instance, for port 8080, webss:8080). The login window opens.
|
Note: If using Windows 7, start the web browser in Run as administrator mode the first time you use RPAS Web Launch.This ensures that the browser has privileges to install the RPAS Classic Client. After the first time, run the web browser in regular mode for better security. |
Perform one of the following based on your environment:
If your environment is not using Oracle SSO, enter a user name and password, select a domain from the list, and then click Login.
If you are using SSO, enter your SSO credentials for authentication. A drop-down list appears, displaying a list of domains you can choose from. Select a domain. The RPAS Classic Client login page opens. Log in with your RPAS solution username and password.
|
Note: When using SSO, you can by-pass the login page by specifying the domain in the URL:http://[WEB_SERVER_ADDRESS]/[CONTEXT_NAME]/web?domain=[Desc].
The domain with a description field matching Desc will be launched automatically after the authentication. No spaces are allowed in the description field if this direct triggering mechanism feature is used. |
WhenLogin is selected, the DomainDaemon on the database server is contacted to verify that the specified user is allowed to access the selected domain. Ensure that the DomainDaemon process is running on the database server before clicking Login.
If access to the domain is allowed, a security dialog window may appear.
If the security window opens, click Run.
|
Note: Java Security Settings should be set to Medium instead of High. From the Windows Control Panel, click the Java icon to open the Java Control Panel. Select the Security tab and change the Security Level to Medium and then click OK. |
After you click Run in the security window, a check is made to see if the RPAS Classic Client application needs to be installed on the user's PC. The Web server administrator is able to define a common installation location of the RPAS Classic Client for all users' PCs.
This is accomplished by setting the appropriate value in the server-side clientPath.txt file (note the mixed-case filename) under the clientSourceDir/[VERSION] directory where the optional [VERSION] is the client version number if multiple versions are supported. The file clientPath.txt is an optional file which must reside under the same directory as buildNumber.txt does. RPAS Web installation files do not contain it. The administrator, or person responsible for installing RPAS Server components, must decide whether or not to define the installation location on user's PC by creating this file and specifying the full path of installation directory in the first line of the file. If launchPreinstalledOnly flag is set to true, the Web Launch applet will try to launch RPAS Classic Client from that location without downloading and installing the client. It will fail if the RPAS Classic Client has not been installed, and the applet will display an error message. If launchPreinstalledOnly flag is set to false and the user has not previously installed the RPAS Classic Client, or a newer version has become available on the server, the RPAS Classic Client will be downloaded and installed. If the launchPreinstalledOnly flag is set to false and the RPAS Classic Client path is not specified, the user is prompted for an installation location for the RPAS Classic Client. The RPAS Classic Client installation directory must have at least 50 MB storage space.
If necessary, select a directory that has at least 50 MB of free storage for installing RPAS Classic Client, and click OK. A status dialog box opens as files are copied from the server to the user's PC. After the files have been copied, a RPAS installation program runs, and the RPAS Classic Client starts. If everything is successful, the user sees a Login Successful message in the bottom left corner of the RPAS Classic Client window.
|
Note: If the RPAS Classic Client does not need to be installed on the user's PC after you click Login, the RPAS Classic Client immediately starts and connects the user to the selected domain. |
If a problem is encountered when using RPAS Web Launch, review any log files and record the output to determine the causes. Any support ticket submitted to Oracle must have the logging output attached. On the server side, the log files are specified by the property webLogFile. On the client side, logging output is written to Java Console which can be opened by right-clicking the Java icon in the Windows system tray and choosing Open Java Console.If the browser fails to launch the client without displaying an error message or behaves abnormally, we recommend that the user clear all browser cookies and try again.If an instance of RPAS Classic Client is already running when the Web Launch applet is trying to install RPAS Classic Client, the installation may fail. We recommend that the user stop all RPAS Classic Client processes and try again.
|
Note: You can turn on thedebug flag to obtain additional logging information by setting property debug to true in the property file propfile and restarting the web application. |
If you plan to implement RPAS Web Launch (including In-Context Launch) in conjunction with web-based applications, refer to either the Classic Client or Fusion Client version of the Oracle Retail Predictive Application Server Administration Guide for more information.