| Oracle® Retail Back Office User Guide Release 14.1 E54470-01 |
|


 Previous |
 Next |
Item Maintenance provides the functionality to maintain the store database of items and kits that are available in the store. A kit is a collection of items grouped under one price. You can search for and modify existing items or kits as well as add items or kits to the database. You can also add or modify the items included in a kit.
|
Note: If item information is being downloaded through the Data Import (DIMP) subsystem, any changes made through the Back Office Item tab may be overridden the next time item information is downloaded.If a retailer is integrated with a merchandising system application, it is assumed that the retailer is using the merchandising system application, and not the features of Back Office, to set up items. Oracle Retail does not support using Back Office to manage items when integrated with a merchandising system application. |
The following topics are discussed:
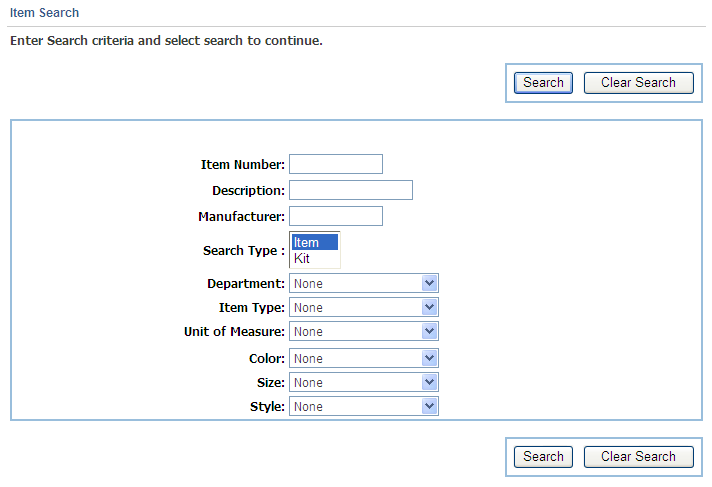
On the Item Search screen, you can search for items or kits and optionally select to add a new item or kit to the database if it is not found. To avoid duplication, a search must be made before you can add an item or kit to the database.
The Item Search fields are described in Table 2-1. The item number and item description fields are always available. The other search fields are only available when that search criteria has been enabled.
All or part of the item number, item description, or manufacturer can be entered. An asterisk can be used as a wildcard. The following formats are accepted. Item description is used for the examples:
If part of the description is entered, such as dishes, Back Office searches for item descriptions that have dishes in any part of the description. For example, dinner dishes, dishes for kids, and seasonal dishes to order would be matches.
If an asterisk is used as a suffix, such as dishes*, Back Office searches for item descriptions that start with dishes. For example, dishes for kids would be a match.
If an asterisk is used as a prefix, such as *dishes, Back Office searches for item descriptions that end with dishes. For example, dinner dishes would be a match.
The asterisk can also be placed anywhere in the description. For example, dinner dishes and dishes for kids would be matches for di*s.
To see all items, you enter just an asterisk.
To search for an item:
Click the Item tab. The Item Search screen is displayed.
Table 2-1 Item Search Fields
| Field | Description |
|---|---|
|
Item Number |
Unique identifying number or SKU number used to identify the item. All or part of the item number can be entered or an asterisk can be used as a wildcard as described above. |
|
Item Description |
Description of the item. All or part of the item description can be entered or an asterisk can be used as a wildcard as described above. |
|
Manufacturer |
Name of the manufacturer of the item. This field is only displayed if searching for an item by manufacturer is enabled. All or part of the manufacturer can be entered or an asterisk can be used as a wildcard as described above. |
|
Department |
Department where the item is defined. This field is only displayed if searching for an item by department is enabled. |
|
Item Type |
The type of item which may be stock item, service item, store coupon, or unknown. An example of a service item is delivery. This field is only displayed if searching for an item by item type is enabled. |
|
Unit of Measure |
How the item is measured, for example, pounds or liters. This field is only displayed if searching for an item by unit of measure is enabled. |
|
Style |
Style of the item, generally used for apparel. This field is only displayed if searching for an item by style is enabled. |
|
Color |
Color of the item, generally used for apparel. This field is only displayed if searching for an item by color is enabled. |
|
Size |
Size of the item, generally used for apparel. This field is only displayed if searching for an item by size is enabled. |
Enter an item number, description, or manufacturer.
Select the search type from the menu. To only search for items that match the criteria, select Item. To only search for kits, select Kit. To search for both items and kits, select both Item and Kit in the menu.
Select the remaining search criteria.
Click Search. Depending on the result, do one of the following:
If a matching item is not found, enter new criteria and retry the search.
If an item or kit number is not found, the Item Not Found screen is displayed. You can add the item or item or retry the search. To add the item or kit to the database, click Yes. To return to the search screen, click No.
If a matching item or kit is found, the Item Maintenance or Kit Maintenance screen is displayed. See "Managing Items" or "Managing Kits".
If multiple kits or items are found, a search results screen is displayed. See "Selecting an Item or Kit".
On the Search Results screen, you select an item or kit and view or modify details about it. You can also refine the search criteria and search again.
Table 2-2 describes the information on this screen.
Table 2-2 Search Results Columns
| Column | Description |
|---|---|
|
Item ID |
Unique identifying number or SKU number used to identify the item or kit. |
|
Point of Service ID |
Unique item or kit SKU number referenced by Oracle Retail Point-of-Service. |
|
Item Lists |
Item lists in which this item is included. An item list is a grouping of items for applying discounts and promotions. |
|
Description |
Description of the item or kit. |
|
Regular Price |
Regular or permanent price assigned to the item or kit. |
Click the item or kit number to view its details. See "Managing Items" or "Managing Kits".
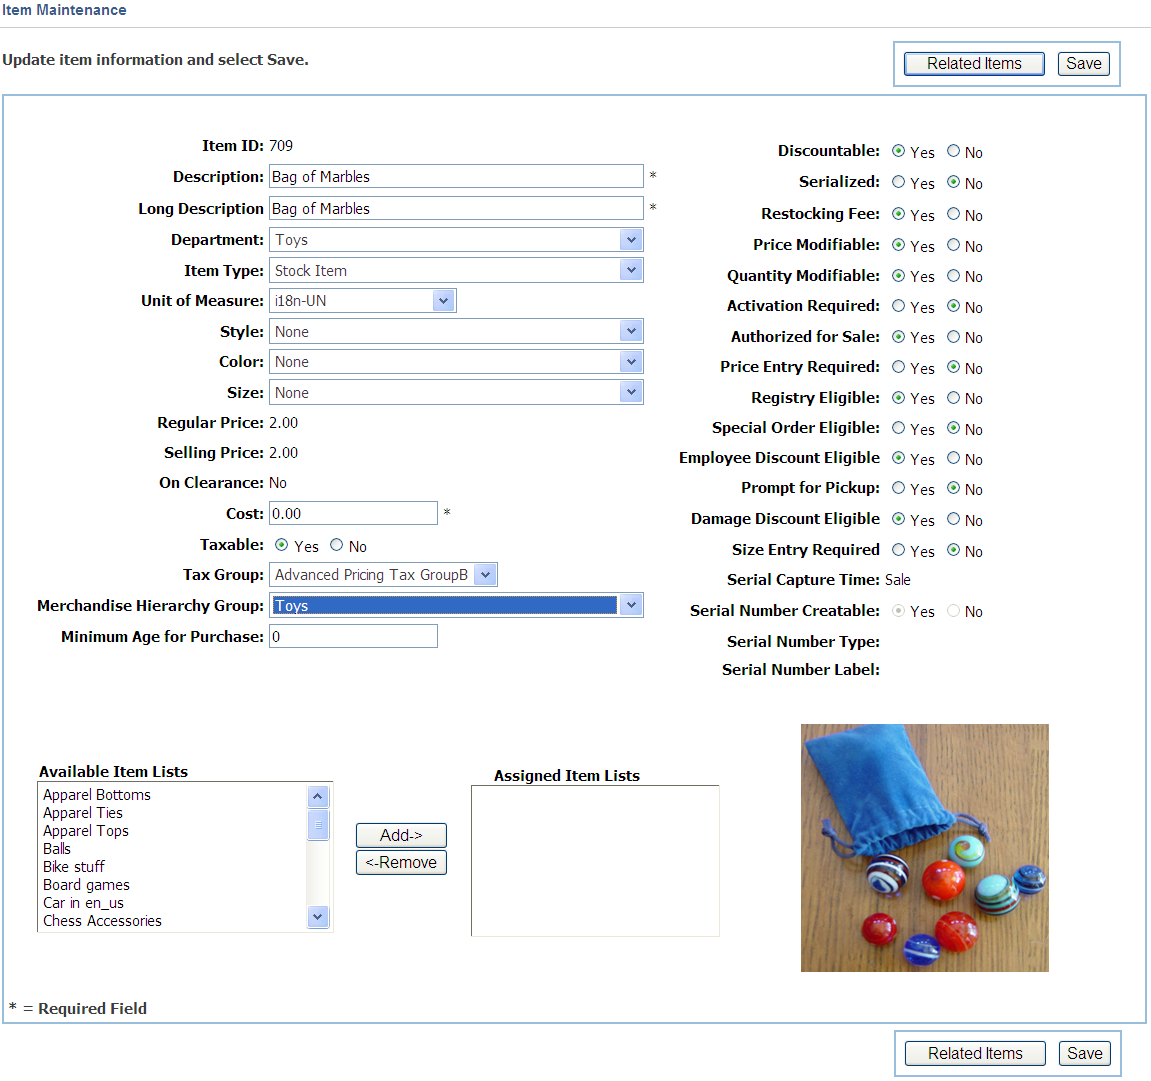
On the Item Maintenance screen, you can add a new item or modify an existing item.
|
Note: If you are not allowed to edit items, the Item Maintenance screen is displayed as read only. |
Table 2-3 describes the information on this screen.
Table 2-3 Item Maintenance Fields
| Input Field | Description |
|---|---|
|
Item Number |
SKU number assigned to the item. |
|
Description |
Short description of the item. |
|
Long Description |
Long description of the item. This description is displayed in Oracle Retail Point-of-Service. |
|
Department |
Department where the item is defined, generally used for reporting. |
|
Item Type |
The type of item which may be stock item, service item, store coupon, or unknown. An example of a service item is delivery. |
|
Unit of Measure |
How the item is measured, for example, pounds or liters. |
|
Style |
Style of the item, generally used for apparel. |
|
Color |
Color of the item, generally used for apparel. |
|
Size |
Size of the item, generally used for apparel. |
|
Regular Price |
Regular or permanent price of the item. |
|
Selling Price |
Price currently displayed in Oracle Retail Point-of-Service. When a new item is being created, this field is disabled. |
|
On Clearance |
If set to Yes, the item is being sold on clearance. The displayed selling price is the clearance price. |
|
Cost |
Cost of the item. Used for reporting. |
|
Taxable |
If the item is taxable, click Yes. If the item is not taxable, click No. |
|
Tax Group |
Group that determines how tax is calculated. |
|
Planogram ID |
Identifier of where the item is located in the store. |
|
Manufacturer |
Manufacture of the item. If search by manufacturer is enabled and the manufacturer information is available for the item, it is shown here. |
|
Merchandise Hierarchy Group |
Group in the merchandise hierarchy where the item is defined. This is used for reporting. |
|
Minimum Age for Purchase |
The minimum age required in order to purchase the item. |
|
Available Item Lists |
Item lists to which this item could be added. An item list is a grouping of items used for reporting and assignment of discount rules or items. |
|
Assigned Item Lists |
Item lists in which this item is included. |
|
Features |
Features that control how the item is used in Oracle Retail Point-of-Service. For a description of each feature, see Table 2-4. |
|
Serial Capture Time |
When the serial number is captured, which may be sale or store receiving. Note: This field can only be set using a merchandising application. It cannot be changed when either adding or editing item information. |
|
Serial Number Creatable |
If the serial number for the item can be created in Oracle Retail Point-of-Service, the field is set to Yes. If the serial number cannot be created, the field is set to No. Note: This field can only be set using a merchandising application. It cannot be changed when either adding or editing item information. |
|
Serial Number Type |
Type, such as, serial number, IMEI, or a value defined by the retailer. Note: This field can only be set using a merchandising application. It cannot be changed when either adding or editing item information. |
|
Serial Number Label |
Label displayed in Oracle Retail Point-of-Service, such as, Serial Number, IMEI, or a value defined by the retailer. Note: This field can only be set using a merchandising application. It cannot be changed when either adding or editing item information. |
|
Item Image |
The image is only displayed when an image for the item has been imported into Back Office using the Data Import (DIMP) Subsystem. For more information, see the Oracle Retail POS Suite/Merchandising Operations Management Implementation Guide. |
To modify or add an item:
Enter or update the item information.
Enter the item description and cost. Description, Long Description, and Cost are required fields and may not be left blank. When adding an item, Regular Price is also required.
Select options from the available menus.
Click Yes or No for each provided item feature. An administrator can customize these features. The available features are shown in Table 2-4.
Table 2-4 Item Maintenance Features
| Feature Name | Description |
|---|---|
|
Discountable |
When set to No, the markdown and discount buttons are not be available. |
|
Serialized |
When set to Yes, you are prompted to enter the serial number for the item. |
|
Restocking Fee |
When set to Yes, and the item is returned, a percentage of the item price is included as a fee. |
|
Price Modifiable |
When set to No, the Price Override button is not available. |
|
Quantity Modifiable |
When set to No, the Quantity button is not available. This is set to No on all gift cards. |
|
Activation Required |
When set to Yes, activation of the item, such as a gift card, is required. |
|
Authorized for Sale |
When set to No, the item is not allowed to be sold at Point-of-Service. |
|
Price Entry Required |
When set to Yes, you are prompted to enter a price for the item. |
|
Registry Eligible |
When set to No, the Item Registry button is not available. |
|
Special Order Eligible |
When set to No, the Order button is not available. |
|
Employee Discount Eligible |
When set to No, the item may not have an employee discount applied. |
|
Prompt for Pickup |
When set to Yes, the item is eligible for pick up. When the item is sold, the cashier is prompted to set up the item for pickup. |
|
Damage Discount Eligible |
When set to No, the item may not have a damage discount applied. |
|
Size Entry Required |
When set to Yes, you are prompted to enter a size for the item. |
Select one or more lists from the Available Item Lists menu.
To add the items to the Assigned Item Lists, click Add. To remove items from the Assigned Item Lists, click the list name, and click Remove.
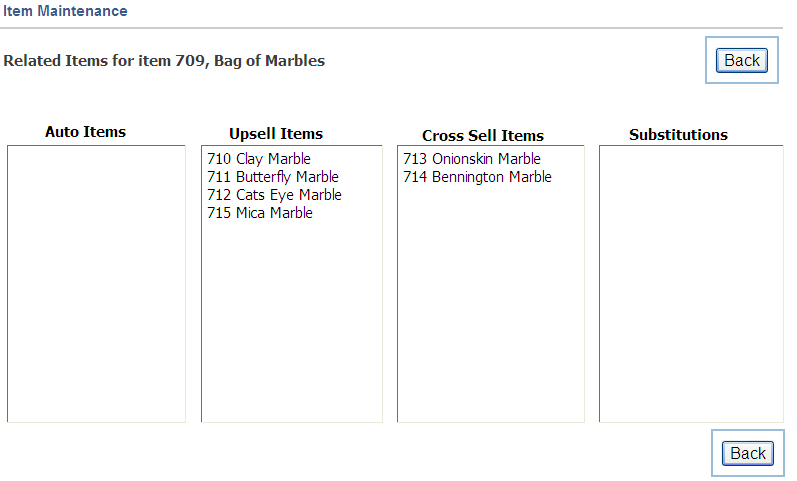
To display any related items, click Related Items. The screen is updated to display the related items.
The related items can be Cross Sell items, Upsell items, Automatic items, or Substitution items. To return to the Item Maintenance screen, click Back.
To save the updated information, click Save. The item information is saved and the Item Search screen is displayed. See "Searching for an Item or Kit".
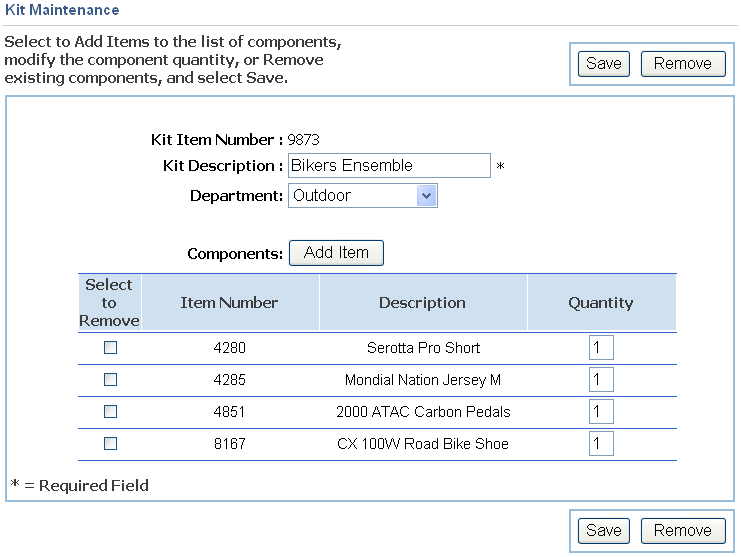
A kit is a set of items grouped under one promotional price. On the Kit Maintenance screen, you can modify existing kits or define a new kit.
|
Note: If you are not allowed to edit kits, the Kit Maintenance screen is displayed as read-only. |
Table 2-5 describes the information on this screen.
Table 2-5 Kit Maintenance Fields and Columns
| Data Field or Column | Description |
|---|---|
|
Kit Item Number |
SKU number assigned to the kit. |
|
Kit Description |
Description of the kit displayed in Oracle Retail Point-of-Service. |
|
Department |
Department where the kit is defined, generally used for reporting. |
|
Select to Remove |
A checked box means the item is selected to be removed from the kit. |
|
Item Number |
SKU number assigned to the item. |
|
Description |
Short description of the item. |
|
Quantity |
The number of this item that is included in the kit. |
To modify or add a kit:
Enter or modify kit information.
To set the kit description, enter a new description into the field.
To set the department, select a new department from the menu.
To set the quantity of items, delete the number in the Quantity box and enter a new number.
To remove an item, select the check box next to the item number, and click Remove.
To save the kit information, click Save. The Item Search screen is displayed.
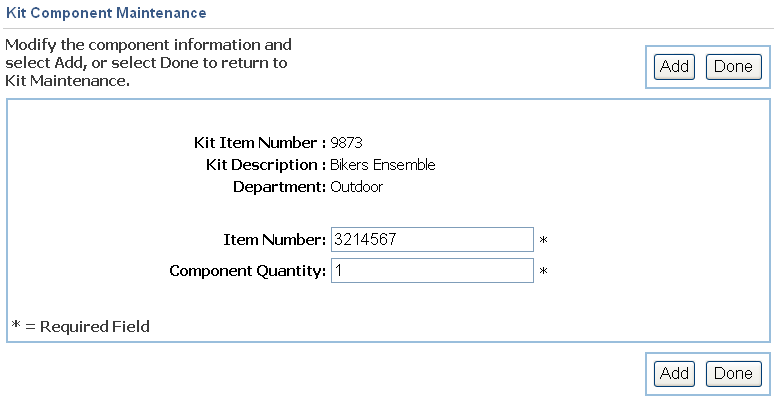
On the Kit Component Maintenance screen, you can add items to an existing or new kit. The items must exist before they can be added to a kit.
To add items to a kit:
Run a kit search using Steps 1-5 in "Searching for an Item or Kit". Choose to modify an existing kit or add a new kit to the database. The Kit Maintenance screen is displayed.
Click Add Item. The Kit Component Maintenance screen is displayed.
Enter the item number in the given field.
Enter the quantity in the component Quantity field.
To add the item, click Add. The Kit Maintenance screen is displayed. The new item appears at the bottom of the screen.