| Oracle® Retail Point-of-Service Installation Guide Release 14.1 E54459-01 |
|

 Previous |
 Next |
In addition to the GUI and text interfaces of the Point-of-Service installer, there is a silent mode that can be run. This mode is useful if you wish to run a new installation and use the settings you provided in a previous installation. It is also useful if you encounter errors during an installation and wish to continue after resolving them.
The installer runs in two distinct phases. The first phase involves gathering settings from the user. At the end of the first phase, a properties file named ant.install.properties is created with the settings that were provided and the cwallet.sso file is created. In the second phase, this properties file is used to provide your settings for the installation.
To skip the first phase and re-use the ant.install.properties and cwallet.sso files from a previous run, follow these instructions:
If the installer failed in its previous run, edit the ant.install.properties file and correct any invalid settings that may have caused the failure.
If the previous install was successful, copy the wallet file from the previous installation to the staging area:
For the silent install of the server, copy the cwallet.sso file from the
<POS_install_directory>\<server>\pos\bin directory to <INSTALL_DIR>.
For the silent install of a client, copy the cwallet.sso file from the
<POS_install_directory>\<client>\pos\bin directory to <INSTALL_DIR>.
For the silent install of the Mobile Point-of-Service server, the cwallet.sso file is found in the installation directory for the previous install. Copy the cwallet.sso file to <INSTALL_DIR> for this silent install.
If this is a client install and you are using a DigitalPersona fingerprint device, make sure the following properties in the ant.install.properties file are correct:
Microsoft POSReady:
## Properties from Page:fingerPrintDevice
input.client.device.dpfingerprint = true
## Properties from Page:DPEnvironmentClasspath
input.dpfingerprint.dpjavapos = C:\\DigitalPersona\\Bin\\JavaPOS\\dpjavapos.jar
input.dpfingerprint.jpos = C:\\DigitalPersona\\Bin\\JavaPOS\\jpos113.jar
input.dpfingerprint.dpotjni = C:\\DigitalPersona\\Bin\\Java\\dpuareu.jar
Novell SLEPOS:
## Properties from Page:fingerPrintDevice
input.client.device.dpfingerprint = true
## Properties from Page:DPEnvironmentClasspath
input.dpfingerprint.dpjavapos = //opt//DigitalPersona//Bin//JavaPOS//dpjavapos.jar
input.dpfingerprint.jpos = //opt//DigitalPersona//Bin//JavaPOS//jpos113.jar
input.dpfingerprint.dpotjni = //opt//DigitalPersona//Bin//Java//dpuareu.jar
Run the installer again with the silent argument:
Microsoft Windows:
install.cmd silent
Novell SLEPOS:
install.sh silent
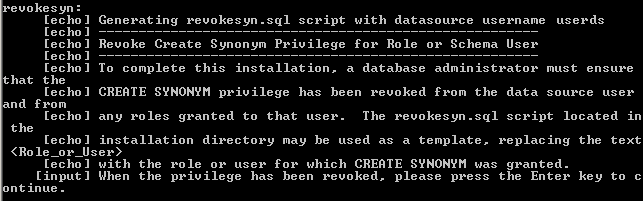
If this is a server install, after the installation is successfully completed, the CREATE SYNONYM privilege must be revoked. In the installer console window, it prompts for a database administrator to run the revokesyn SQL script to revoke the privilege. The script is found in the <INSTALL_DIR> directory.
For information on granting this privilege on Microsoft Windows, see "Create the Database Schema Owner and Data Source Users" in Chapter 3. For information on granting this privilege on Novell SLEPOS, see "Create the Database Schema Owner and Data Source Users" in Chapter 4.
If this is a client install and you are using a fingerprint device, verify the following:
The fingerprint device properties from Step 3 are correct in the following file:
<POS_install_directory>\<client>\pos\config\technician\PosDeviceTechnician.xml
The fingerprint device is enabled in the jpos.xml file.