| Oracle® WebCenter Framework Tutorial 10g (10.1.3.2.0) Part Number B31072-02 |
|
|
View PDF |
| Oracle® WebCenter Framework Tutorial 10g (10.1.3.2.0) Part Number B31072-02 |
|
|
View PDF |
In this lesson you will deploy your tutorial application to the WebCenter Preconfigured OC4J. Deploying an application involves packaging up all the required files in a standard J2EE format and directory structure—a WAR file or an EAR file.
All the packaging and deployment instructions for a WebCenter application are configured through a deployment profile. A deployment profile is a configuration file that names the pages, portlets, customizations, and metadata comprising the application, the type and name of the archive file to be created, dependency information, platform-specific instructions, and more.
There is a special deployment profile, specifically for WebCenter applications—the WebCenter Application Deployment Profile. This profile handles content that is unique to WebCenter applications such as portlets, content repository data controls, customizable component, and so on.
You can deploy WebCenter applications directly from Oracle JDeveloper to a standalone OC4J instance providing that the standalone OC4J and Oracle JDeveloper are on the same computer or have access to a common network drive. You'll learn more about single-step deployment in this lesson. You'll also learn how to manage WebCenter applications through the Application Server Control Console.
Before you deploy your WebCenter application:
Check that:
A connection exists between the WebCenter Preconfigured OC4J and Oracle JDeveloper.
The WebCenter Preconfigured OC4J is running.
For more detail, see Step 2: Setting Up Your Connection (Chapter 3).
Migrate the tutorial users/roles to the WebCenter Preconfigured OC4J—the deployment target. Run the JAZN Migration Tool in realm mode to merge the users and roles on the target OC4J:
Before running the JAZN Migration Tool, update your class path to contain references to: JDEVHOME\j2ee\home\jazn.jar and JDEVHOME\BC4J\lib\adfshare.jar
For example, enter the following in a command prompt: set CLASSPATH=JDEVHOME\j2ee\home\jazn.jar;JDEVHOME\BC4J\lib\adfshare.jar
Where JDEVHOME points to your JDeveloper installation, for example C:\myjdev.
Next, go to JDEVHOME, and open a command prompt.
Run the JAZN Migration Tool, as follows:
java oracle.security.jazn.tools.JAZNMigrationTool -sr jazn.com -dr jazn.com -st xml -dt xml -sf WEBCENTERSAMPLE\TutorialContent\system-jazn-data.xml -df JDEVHOME\jdev\extensions\oracle.adfp.seededoc4j.10.1.3.2.0\j2ee\home\config\system-jazn-data.xml -m realm
Where WEBCENTERSAMPLE points to where you installed the sample tutorial files, for example: C:, and JDEVHOME points to your JDeveloper installation, for example: C:\myjdev. See Figure 9-1.
Figure 9-1 Running the JAZN Migration Tool

The preconfigured OC4J's system-jazn-data.xml file will now contain the users and roles required by your application.
Let's deploy your application.
In this step you'll create a deployment profile for the tutorial application called MyTutorialApplication.deploy, and set some deployment options.
Right-click ViewController in the Applications Navigator, and select New.
Expand the General Category, and choose Deployment Profiles.
Select WebCenter Application WAR, and click OK.
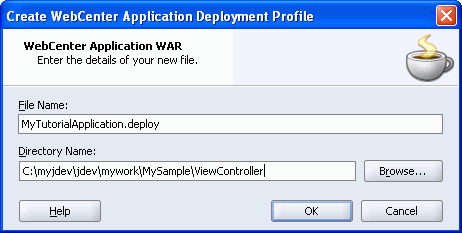
Enter a name for the deployment profile (Figure 9-2). For File Name, enter: MyTutorialApplication.
Figure 9-2 Create WebCenter Application Deployment Profile
Click OK.
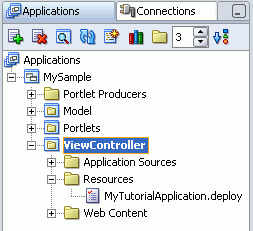
You should see the new deployment profile displayed under ViewController, Resources (Figure 9-3).
Figure 9-3 New Deployment Profile - MyTutorialApplication.deploy
To configure the deployment profile, right-click MyTutorialApplication.deploy in the Applications Navigator, and select Properties.
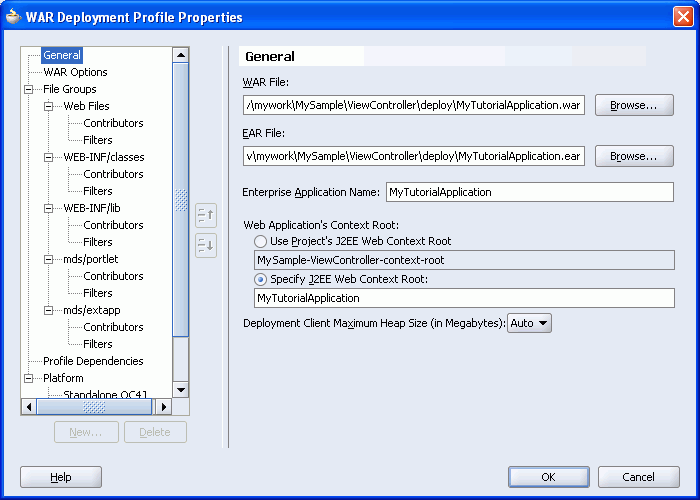
In the WAR Deployment Profile Properties window (Figure 9-4), enter a suitable context root for the application URL. Choose Specify J2EE Web Context Root, and enter: MyTutorialApplication
Figure 9-4 WAR Deployment Profile Properties
Select Platform from the list on the left, and then choose the connection named MyLocalOC4J from the Target Connection dropdown list (Figure 9-5).
You defined this connection earlier on, in Chapter 3, "Building and Testing Your First Portlet".
Figure 9-5 WAR Deployment Profile Properties - Target Connection

You don't need to set any more deployment options on this page. If your application required special libraries, you would select them here.
Click OK.
Click Save All in the JDeveloper tool bar.
During development, you can deploy WebCenter applications in a single step directly from JDeveloper to a standalone OC4J. You'll see how this works in the next step.
You can deploy your WebCenter applications in a production environment using Application Server Control Console. In the process, you package your WebCenter application in a generic EAR or WAR file. After that, you run the Predeployment tool against this file to remap the WebCenter application's external dependencies, for example, portlet producer end points and the MDS location. The Predeployment tool generates a targeted EAR file that is ready to deploy on the remote system. Additionally, some tasks related to security, content integration, and external applications may need to be performed as part of the deployment process.
For more information on WebCenter application deployment, see Oracle WebCenter Framework Developer's Guide.
In this step you'll use the connection details you defined earlier to deploy the tutorial application directly to your preconfigured OC4J. Let's do that now.
Right-click MyTutorialApplication.deploy, and choose Deploy to MyLocalOC4J.
A dialog asks you to define a suitable location for the MDS repository in your file system (Figure 9-6).
For MDS Path, enter: C:\TutorialContent\mds
You can choose a different location on your local file system if you wish. If the directory you specify does not exist, JDeveloper will create it for you.
Caution:
Do not create the MDS repository for your deployment inside the working directory for your application (in this caseJDEVHOME\jdev\mywork\MySample). Keeping separate MDS directories for development and deployment will not only avoid confusion but will prevent content in your application's source MDS repository from being overwritten.Click OK.
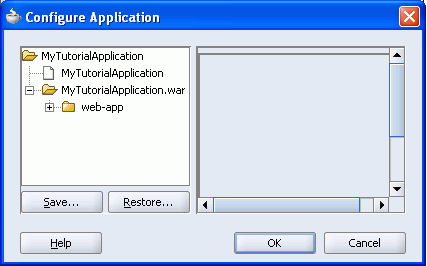
Wait for the Configure Application window to be displayed (Figure 9-7), and then click OK.
Figure 9-7 The Configure Application Window
WAR and EAR files are generated and deployed to the preconfigured OC4J. The EAR file contain a WAR file and a number of configuration (.xml) files. WAR files contain all the files and libraries used by the application.
At the end of deployment you should see -- Deployment finished -- in the Deployment-Log window. If you get this message you should be able to access the deployed application but you won't be able to log-in. You still need to migrate your application's security policy (stored in app-jazn-data.xml) to the preconfigured OC4J's system-jazn-data.xml file. Let's do that now.
In this step you'll use the JAZN Migration Tool to merge your application's security policy (stored in app-jazn-data.xml) into the preconfigured OC4J's system-jazn-data.xml file.
Note:
You'll find more about the JAZN Migration Tool in the Oracle WebCenter Framework Developer's GuideIn this tutorial, the location of these XML files are as follows:
Source app-jazn-data.xml JDEVHOME\jdev\extensions\oracle.adfp.seededoc4j.10.1.3.2.0\j2ee\home\applications\MyTutorialApplication\adf\META-INF\app-jazn-data.xml
Destination system-jazn-data.xml JDEVHOME\jdev\extensions\oracle.adfp.seededoc4j.10.1.3.2.0\j2ee\home\config\system-jazn-data.xml
Complete the following steps:
Before running the JAZN Migration Tool, update your class path to contain references to these .JAR files:
JDEVHOME\j2ee\home\jazn.jar
JDEVHOME\BC4J\lib\adfshare.jar
For example, enter the following in a command prompt: set CLASSPATH=JDEVHOME\j2ee\home\jazn.jar;JDEVHOME\BC4J\lib\adfshare.jar
Where JDEVHOME points to your JDeveloper installation, for example C:\myjdev.
Next, go to JDEVHOME, and open a command prompt.
Run the JAZN Migration Tool, as follows:
java oracle.security.jazn.tools.JAZNMigrationTool -sr jazn.com -dr jazn.com -st xml -dt xml -sf JDEVHOME\jdev\extensions\oracle.adfp.seededoc4j.10.1.3.2.0\j2ee\home\applications\MyTutorialApplication\adf\META-INF\app-jazn-data.xml -df JDEVHOME\jdev\extensions\oracle.adfp.seededoc4j.10.1.3.2.0\j2ee\home\config\system-jazn-data.xml -m policy
Where JDEVHOME points to your JDeveloper installation, for example C:\myjdev. For example, see Figure 9-8.
Figure 9-8 Running the JAZN Migration Tool

The preconfigured OC4J's system-jazn-data.xml file will now contain your application's security information. To make this information available, you'll need to restart the WebCenter preconfigured OC4J.
To restart the WebCenter preconfigured OC4J from JDeveloper:
Click the Stop WebCenter Preconfigured OC4J icon at the far right of the JDeveloper tool bar.
Click the Start WebCenter Preconfigured OC4J icon.
Wait for the message stating that the OC4J instance has initialized.
Now, let's try to display one of the pages of the deployed application.
Open a browser window and navigate to the tutorial's Welcome page. You'll need to enter a URL that uses the context root defined in the deployment profile (MyTutorialApplication), followed by /faces/, and the page name itself. The URL format you require is:
http://<host>:<port>/<context-root>/faces/<page-name>
For example:
http://localhost:6688/MyTutorialApplication/faces/Welcome.jspx
This tutorial assumes that localhost can be used in a URL to refer to the local computer on which your preconfigured OC4J installation resides. (If this is not the case, replace localhost with your computer's IP address.)
Log in as user Harvey, and enter the password welcome.
Click each page navigation button to check that your application works as expected.
Congratulations! You've just deployed your first WebCenter application.
Note:
The WebCenter Preconfigured OC4J is only suitable for test deployments such as this tutorial. Normally, you would not deploy WebCenter applications in the same OC4J instance that is used for the portlet producers. To find out how to deploy to an OC4J in Oracle Application Server or to a standalone OC4J instance, refer to the Oracle WebCenter Framework Developer's Guide.In this step you'll learn how to use the Oracle Enterprise Manager 10g Application Server Control Console to deploy, redeploy, and undeploy a WebCenter application. You'll also learn how to monitor portlet performance from the console.
To access Application Server Control Console for your preconfigured OC4J, navigate to the following URL:
http://<host>:<port>/em
For example: http://localhost:6688/em
This tutorial assumes that localhost can be used in a URL to refer to the local computer on which your preconfigured OC4J installation resides. (If this is not the case, replace localhost with your computer's IP address.)
For more information, select Help, WebCenter Preconfigured OC4J Readme from the main JDeveloper menu.
Log in as user oc4jadmin.
Enter the default password: welcome
The home page for your preconfigured OC4J is displayed.
Select the Applications tab, and then the name of your application. The application name is derived from the .EAR filename. In this tutorial the .EAR file was named after the deployment profile — MyTutorialApplication.
When you click MyTutorialApplication, you should see the application's home page, similar to that shown in Figure 9-9.
Figure 9-9 WebCenter Application Home Page in Enterprise Manager
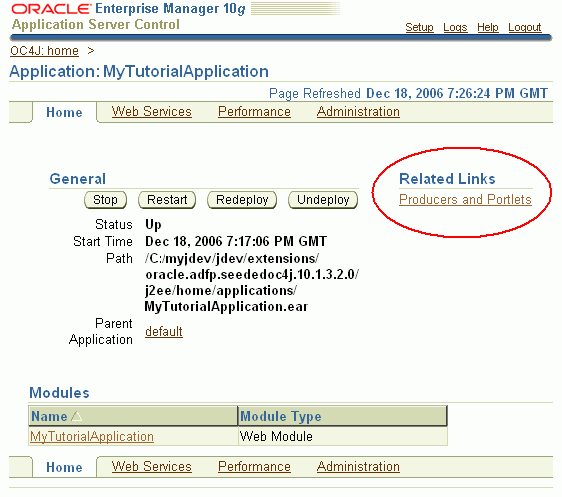
From here you can use the buttons to redeploy and undeploy the application. You can also stop and restart the application from here.
Under Related Links you should see a Producers and Portlets link. The information available from here is specific to WebCenter applications and it appears only when producer/portlet metrics are available. Statistics become available when a page containing portlets is accessed for the first time. If you did not display a page containing portlets during Step 4: Running Your Deployed Application, do so now (open MyPage or MyWeather), and then refresh the Application Server Control Console.
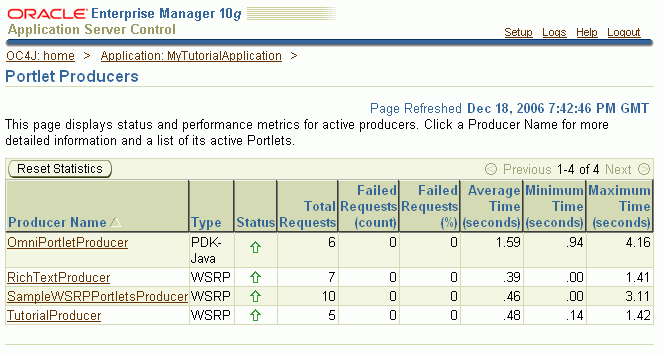
Click Producers and Portlets to browse the metrics available for your tutorial application.
You should see the Portlet Producers page (similar to that shown in Figure 9-10). From this page, you can monitor the status and performance of producers and portlets used by your WebCenter application.
Figure 9-10 Portlet Producers Screen in Enterprise Manager
To find out more about deploying, configuring, and monitoring WebCenter applications from the Application Server Control Console, refer to the Oracle WebCenter Framework Developer's Guide.
In this tutorial you built a simple, secure WebCenter application. You tested and deployed it, then used the Application Server Control Console to monitor its portlet producers.
Now you're more familiar with Oracle JDeveloper and Oracle WebCenter Framework functionality, you can start building your own application. For further assistance, refer to the Oracle WebCenter Framework Developer's Guide.