14 Working with the Documents Service
Oracle WebCenter enables you to integrate content by:
-
Using a Content Repository data control, which enables you to provide read-only access to a content repository, and maintain tight control over the way the content displays in your application.
-
Using the Documents service, which enables you to view and manage documents in your organization's content repositories.
This chapter describes how to work with the Documents service and task flows at runtime in WebCenter Spaces and any other custom WebCenter application. For more information about managing and including content in your WebCenter applications, see:
-
"Integrating Content" in Oracle Fusion Middleware Developer's Guide for Oracle WebCenter, which describes how to include content in a custom WebCenter application at design time using JCR data controls.
-
"Integrating the Documents Service" in Oracle Fusion Middleware Developer's Guide for Oracle WebCenter, which describes how to integrate the Documents service in a custom WebCenter application at design time, creating a user-friendly interface to manage documents at runtime.
-
"Managing Content Repositories" in Oracle Fusion Middleware Administrator's Guide for Oracle WebCenter to configure and manage content repositories used by WebCenter Spaces and any other custom WebCenter application.
This chapter provides detailed information about the Documents service and its task flows. It contains the following sections:
This chapter is intended for users who are interested in understanding and working with the Documents service in Oracle WebCenter applications to view, add, and manage files and configure file and folder properties. This includes WebCenter Spaces and custom WebCenter applications built with Oracle WebCenter Framework.
Your application administrator has the authority to expose or hide task flows from a particular service. This means that some of the tasks discussed in this chapter may not be available to you if the associated task flow is hidden.
14.1 What You Should Know About the Documents Service
The Documents service provides features for accessing, adding, and managing files and folders; configuring file and folder properties; and searching file and folder content in your organization's content repositories.
The Documents service allows your application to manage folders and documents from your company's content repositories in two ways:
-
Add any single folder or file in a content repository to a page (see Section 7.1.2, "Adding Document Library Content to a Page").
-
Add a Documents service task flow to a page (see Section 7.1.3, "Adding Task Flows to a Page").
The Documents service task flows are:
-
In the WebCenter Spaces application: Documents, Document List Viewer (which exposes content from All Documents, Personal Documents, and Group Space Documents), and Recent Documents.
-
In custom WebCenter applications: Documents, Document List Viewer (which exposes content from All Documents), and Recent Documents.
This section provides an overview of the Documents service task flows:
14.1.1 Adding Documents Service Task Flows at Design Time versus Runtime
In Oracle WebCenter Framework, the design-time environment discussed in Oracle Fusion Middleware Developer's Guide for Oracle WebCenter, developers use the WebCenter Services Catalog to include Documents service task flows when building a custom WebCenter application. In the Catalog, the Documents service task flows are listed as shown in Figure 14-1.
In a runtime environment (the WebCenter Spaces application and deployed custom WebCenter applications), users use the Oracle Composer Catalog to include Documents service task flows on a page. The Oracle Composer Catalog is the runtime rendering of the WebCenter Services Catalog. In the Oracle Composer Catalog, the Documents service task flows are listed as shown in Figure 14-2 (for WebCenter Spaces).
Figure 14-2 Oracle Composer Catalog: Documents Service Task Flows in the WebCenter Spaces Application (when editing a group space page)

The mapping of the Oracle Composer Catalog entries to the Documents service task flows is shown in Table 14-1:
Table 14-1 Oracle Composer Catalog Mapping to Documents Service Task Flows
| Oracle Composer Catalog | Documents Service Task Flow | Description |
|---|---|---|
|
Documents |
Documents task flow (equivalent to Document Library task flow in WebCenter Services Catalog in Oracle WebCenter Framework) |
Exposes all the folders and files available from the default content repository connection and default folder. Use to create, upload, and manage repository content; to manage file versions; and to check files out and in. See Section 14.1.2, "Understanding the Documents Task Flow." |
|
All Documents Group Space Documents (in WebCenter Spaces only) Personal Documents (in WebCenter Spaces only) |
Document List Viewer task flow |
Exposes a list of documents and optionally folders defined by the listing of a specific folder or the results of a document search. See Section 14.1.3, "Understanding the Document List Viewer Task Flow." |
|
Recent Documents |
Recent Documents task flow |
Exposes the files most recently modified in some way. See Section 14.1.4, "Understanding the Recent Documents Task Flow." |
14.1.2 Understanding the Documents Task Flow
The Documents task flow exposes all the folders and files available from the default content repository connection and default folder.
In WebCenter Spaces, the default folder is your personal folder if working with a page in your personal space, and the group space folder if working with a page in a group space. In custom WebCenter applications, the default folder is the root of the default content repository connection. You can also set the Connection Name and Start Folder Path properties to change the target folder (see Table 14-4).
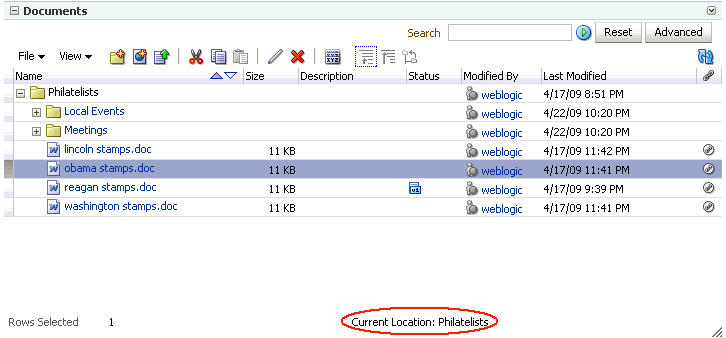
In the Documents task flow, the target folder is the current location, displayed in the status bar (in the lower right hand area) of the Documents task flow (Figure 14-3).
The current location is where any uploaded files, newly created HTML files, or pasted files and folders are placed. Selecting a single folder in the Documents task flow makes that folder the current location. In a Documents task flow that includes multiple folders, clicking a folder name to display the folder as the top-level folder in the task flow makes that folder the current location.
Adding the Documents task flow to a page (Figure 14-4) enables you to manage your documents, such as create, upload, and manage repository content; manage file versions; and check files out and in.
Figure 14-4 Documents Task Flow Displayed on a Page in a Group Space named Philatelists in WebCenter Spaces
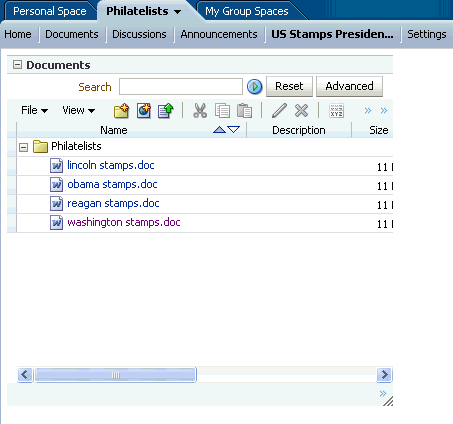
In the WebCenter Spaces application, your personal space and all group spaces have a Documents page, which is simply a page that is dedicated to the Documents task flow.
By default, a group space displays a tab for its Documents page. However, your personal space does not display the Documents page by default, so you have to display it yourself:
-
Click the Personal Space tab to display your personal space.
-
Click Page Actions, then select Manage Pages.
-
In the Manage Pages dialog box, in the row for the Documents page, click Show Page.
-
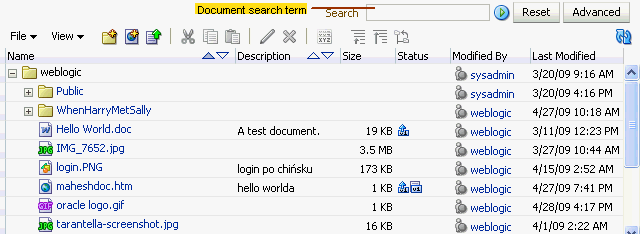
Click Close to display the Documents page for your personal space, listing all of the documents available to you (Figure 14-5).
Custom WebCenter applications get the same features as the Documents page in the WebCenter Spaces application by adding the Documents task flow to an application page. The only difference between the Documents task flow in the WebCenter Spaces application and a custom WebCenter application is the range of content that is displayed in a given task flow.
The Documents task flow provides features for supporting and maintaining your content. These include:
-
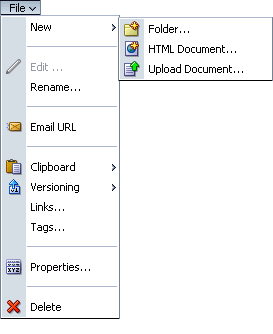
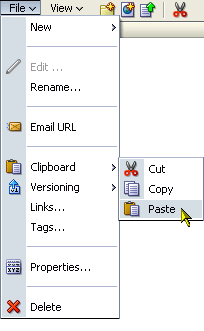
The File menu for convenient access to file and folder features (Figure 14-6).
-
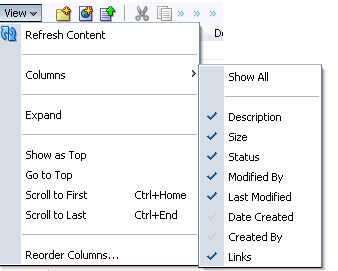
The View menu for setting your Documents display preferences (Figure 14-7).
-
An easy-access toolbar (Figure 14-8).
Use the Documents toolbar for quick access to frequently-used document functions, such as folder creation, file creation and upload, cutting, copying, editing, and deleting. Additionally, you can use icons on the toolbar to access file and folder properties and to adjust your view of repository content.
Note:
Actions available on the toolbar are also available on the menus; keep in mind that there is more than one way to accomplish your Documents tasks. -
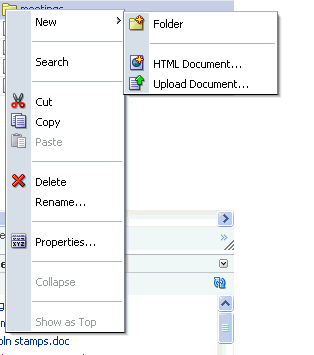
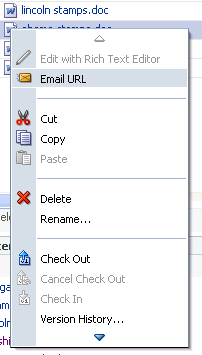
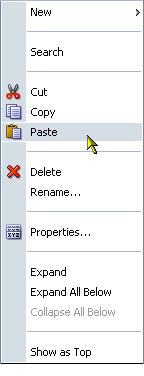
Context menus for convenient access to document functions. Right-click a folder or file icon to display the context menu (Figure 14-9 and Figure 14-10).
-
A dedicated file search.
The Documents service provides its own search tool, offering both basic and advanced searches. The document search feature stands apart from the Search service by searching only content provided through the Documents service. (For more information about the Search service, see Chapter 29, "Working with the Search Service.")
For more information, see Section 14.2.6, "Running Document Searches."
-
In-place creation and revision of HTML.
Launch the Rich Text Editor to create and edit HTML files, and save them directly to the content repository.
For more information, see Section 14.2.3.2, "Creating and Editing Rich Text Documents."
14.1.3 Understanding the Document List Viewer Task Flow
In both the WebCenter Spaces application and custom WebCenter applications, you can use the Document List Viewer task flow to add information from your organization's content repositories onto a page.
You can add a content repository's entire root folder or any number of subfolders onto a page. You can set the Connection Name and Start Folder Path properties to change the target location (see Table 14-4). Adding a folder or subfolder from the following selections in the Oracle Composer Catalog adds a Document List Viewer task flow listing the documents in that folder:
-
All Documents: A virtual node that includes the content of all connected content repositories. Adding a folder under this node to a page adds a Document List Viewer task flow listing the documents in that folder (Figure 14-11 and Figure 14-12).
-
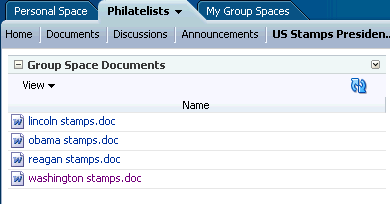
Group Space Documents or Personal Documents (WebCenter Spaces only): A direct shortcut to the folder under All Documents that contains documents associated with the current group space (Figure 14-13) or personal space. Group Space Documents is available for selection from the Oracle Composer Catalog only when you edit a page in a group space; Personal Space Documents is available only when you edit a page in your personal space. The contents of this folder are also reflected on the Documents page of the group space or personal space.
These entries in the Oracle Composer Catalog are both draggable and drillable. That is, you can drag them onto your page to create a Document List Viewer task flow of all of a space's folder content, or you can click the Open link to drill down into it, then drag a selected folder onto your page. Additionally, the Document List Viewer task flow can be configured to display or hide any subfolders.
Note:
You can also drill down to individual files to add to a page as links, images, or IFrames (depending on file type). Individual files on a page are not considered task flows. For more information, see Section 7.1.2, "Adding Document Library Content to a Page".When you add a Document List Viewer task flow to a page, the name of the folder that contains the displayed content appears above the viewing area. For example, in Figure 14-11, the name of the folder is Root Folder.
Figure 14-11 Document List Viewer Task Flow for All Documents for the Topmost Folder in the Content Repository in the WebCenter Spaces Application (Show Folders property set to true)
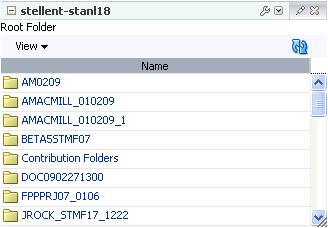
Figure 14-12 Document List Viewer Task Flow for All Documents for a Subfolder in the Content Repository in the WebCenter Spaces Application (Show Folders property set to true)
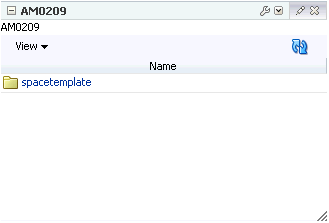
Figure 14-13 Document List Viewer Task Flow for Group Space Documents Displayed on a Group Space Page in the WebCenter Spaces Application
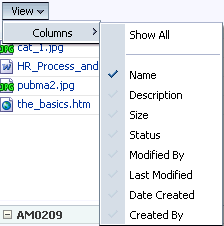
The Document List Viewer task flow includes a View menu, which you can use to personalize the display of the columns in the task flow (Figure 14-14).
For more information about working with the files and folders on a page, see Section 14.2, "Working with the Documents Service Task Flows."
14.1.4 Understanding the Recent Documents Task Flow
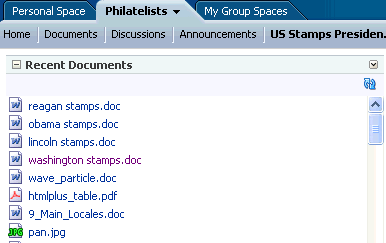
The Recent Documents task flow is a useful launching point into your most recently used documents. It exposes the files most recently modified in some way, such as recently uploaded, created, edited, copied, or moved (Figure 14-15).
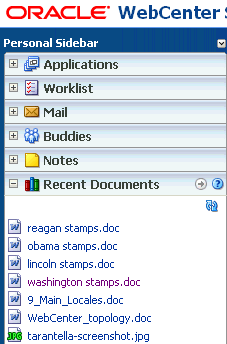
The Recent Documents task flow displays all files modified in the currently connected content repository. In WebCenter Spaces, the Recent Documents task flow appears in the WebCenter Spaces Sidebar by default (Figure 14-16), where you can click a file link in the list to open the file.
14.2 Working with the Documents Service Task Flows
As discussed above, the Documents service task flows provide convenient access to different groups of files in your organization's content repositories. Additionally, the Documents task flow provides a rich set of tools for adding, revising, versioning, and otherwise managing that content.
This section describes how to use those tools. It discusses document management features universally, as opposed to within the context of a particular task flow. All of the features discussed in this section are available through the Documents task flow (see Section 14.1.2, "Understanding the Documents Task Flow"). Each subsection includes information about which additional task flows provide access to the features described.
This section includes the following subsections:
14.2.1 Adding a Task Flow to a Page
For the steps to add a task flow, including any of the Documents service task flows, to a page, see Section 7.1.3, "Adding Task Flows to a Page".
14.2.2 Opening Files and Folders
You can open files using the method described in this section in all Documents service task flows. Opening folders is available to all Documents service task flows except the Recent Documents task flow, which does not display folders.
The Documents task flow is the only Documents service task flow that always displays folders. The Document List Viewer task flow may or may not display folders, depending on how it is configured.
Note:
For information about Documents service task flow configuration, see Section 14.4, "Setting Documents Service Task Flow Properties."Use the methods described in this section to open files and folders:
14.2.2.1 Opening Files
To open document files:
-
On a page, go to the Documents service task flow that lists the file you want to open, or go to the Documents page in a personal space or group space.
-
Click the file name.
The next thing that happens depends on the file type:
-
If the file can be opened in a browser, that is where it opens. This applies to HTML files, text files, and image files, such as
.gifand.jpgfiles. -
Other types of files, such as Microsoft Word files and zip files, invoke a download dialog box when you click them, which gives you the option of viewing the file in its native application, or saving the file to a local drive.
This is browser behavior, so the way you follow through depends on the browser you use and how that browser is configured.
For all file types, you can go right into a download operation by right-clicking directly on the document in the task flow. This opens your browser's context menu. From there, you can select the Save Link As menu option, or your browser's comparable menu option.
-
14.2.2.2 Opening Folders
You can open folders in two ways:
-
Expand the folder node by clicking the Expand icon (Figure 14-17) to view a hierarchical list of the folder's content.
-
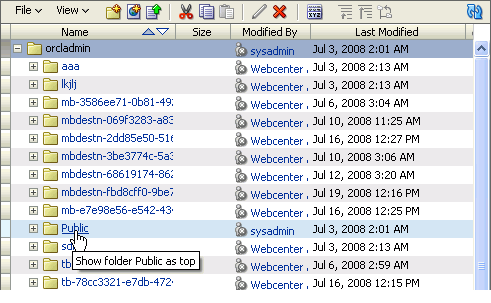
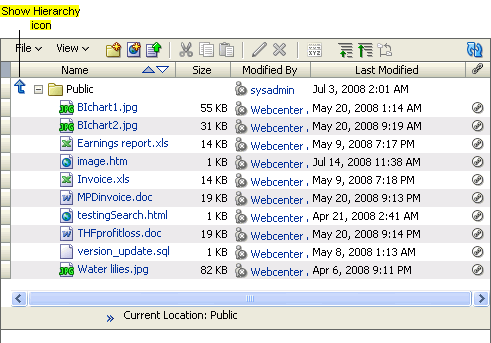
Click the folder name (Figure 14-18) to display the folder as the top-level folder in the task flow (Figure 14-19), which also makes the folder the current location (see Section 14.1.2, "Understanding the Documents Task Flow").
Click the Show Hierarchy icon to the left of the folder (Figure 14-19) to open a selection list of folders higher up the folder hierarchy.
Click a folder on the list to display your selection as the top-level folder. Clicking the first folder on the list (the root folder) returns you to the default folder display mode.
14.2.3 Adding Files
Add files to your WebCenter application to provide convenient access to them. Using Documents service features, you can add content by uploading it or by creating it on the spot, using the Rich Text Editor.
This section describes how to add files through the Documents task flow, which is the only Documents service task flow with file upload and file creation features:
14.2.3.1 Uploading Files
Use the Documents task flow's file upload feature to import content into a content repository. Upload files from any location that is accessible from your local file system. This includes remote systems to which your local system has access.
Note:
You can upload files if you have sufficient access privileges and the connection to your underlying content repository supports it.This section describes how to upload files to the content repository. It contains the following subsections:
14.2.3.1.1 Uploading a File Using the Toolbar
To upload a file from your file system using the toolbar:
-
Go to the Documents task flow on a page or go to the Documents page (in a personal space or group space) where you want to upload a file.
-
Select the row of the folder into which you want to upload the file. Note that to select a folder, you should click within the folder's row and not click the folder itself.
-
On the toolbar, click the Upload Document icon (Figure 14-20).
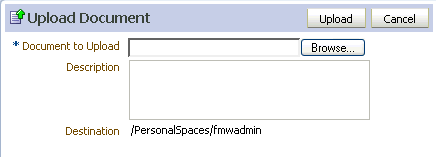
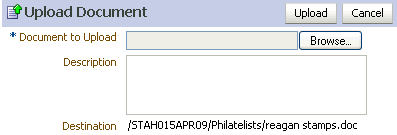
The Upload Document screen opens (Figure 14-21). All fields requiring a value are marked with an asterisk (*).
-
Click Browse next to the Document to Upload field, and then navigate to and select the file you want to upload.
-
Optionally, provide a description of the file in the Description field.
Note:
The Destination field, which appears below the Description field, shows the directory path to the folder where the uploaded document will be stored. -
Click Upload to complete the transaction.
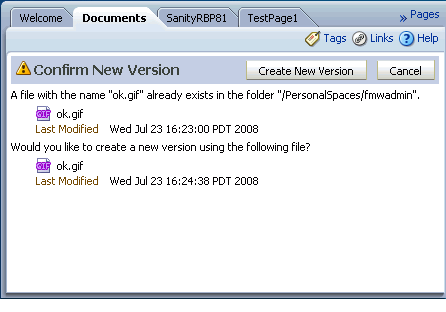
Where versioning is supported, a Confirm New Version screen opens when you upload a file with the same name as another file in the same folder (Figure 14-22).
You are given the option to save the new file as a new, current version or to cancel the file upload.
14.2.3.1.2 Uploading a File Using a Menu
The Documents task flow includes a File menu and context (right-click) menus for performing file and folder actions on the spot. Both the File menu and the folder context menu provide commands for uploading files. This section describes how to use them.
To upload files using the File menu or the folder context menu:
-
Go to the Documents task flow on a page or go to the Documents page (in a personal space or group space) where you want to upload a file.
-
Select the target folder where you want to upload a file.
-
From either the File menu or the folder context menu (right-click the folder), select New and then Upload Document.
The Upload Document screen opens (Figure 14-21). All fields requiring a value are marked with an asterisk (*).
-
Click Browse next to the Document to Upload field, and then navigate to and select the file you want to upload.
-
Optionally, provide a description of the file in the Description field.
Note:
The Destination field, which appears below the Description field, shows the directory path to the folder where the uploaded document will be stored. -
Click Upload to complete the transaction.
Where versioning is supported, a Confirm New Version screen opens when you upload a file with the same name as another file in the same folder (Figure 14-22).
You are given the option to save the new file as a new, current version or to cancel the file upload.
14.2.3.2 Creating and Editing Rich Text Documents
In addition to file upload, you can add content to a content repository through file creation. The Rich Text Editor is a fully-integrated HTML text editor, which you can use to create your own HTML documents and edit HTML documents contained in the content repository.
The Rich Text Editor provides basic styling features, such as selectors for font type, size, and color. It includes features for adding links, bulleted and numbered lists, and special text effects, such as subscript, superscript, strikethrough, and underline. It provides two modes—Rich Text Editing mode and Source Code mode. Use the Rich Text Editing mode to create and revise content in a WYSIWYG environment. Use the Source Code mode to enter your own HTML.
In the Documents service, the Rich Text Editor is available through the Documents task flow.
Note:
The Rich Text Editor ignores the following types of tags because they are irrelevant or redundant within the Rich Text Editor context:-
script tags
-
form elements, such as
input,select,textarea, andform -
frame/frameset -
document tags, such as
html,head,body,meta, andtitle -
unknown tags, for example,
<foo></foo>
This section describes how to create and edit files using the Rich Text Editor. It contains the following subsections:
14.2.3.2.1 Creating HTML Documents with the Rich Text Editor
To create HTML documents using the Rich Text Editor:
-
Go to the Documents task flow on a page or go to the Documents page (in a personal space or group space) where you want to create an HTML document.
-
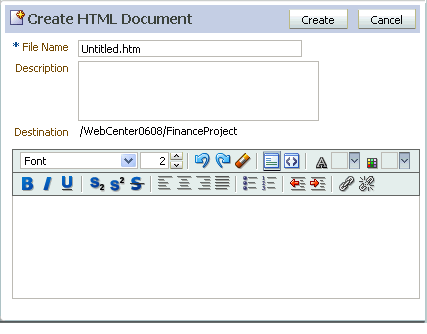
Click the create an HTML document icon (Figure 14-23).
The Rich Text Editor opens (Figure 14-24).
Fields that require a value are marked with an asterisk (*).
-
In the File Name field, enter a name for the file.
The editor appends the extension
.htm., unless.htmor.htmlis already specified. -
Optionally, enter a description of the file in the Description field.
Note:
The Destination field, which appears below the Description field, shows the directory path to the folder where the uploaded document will be stored. -
Using the editor, add text, formatting, styling, and links.
Table 14-2 lists and describes Rich Text Editor controls.
Table 14-2 Rich Text Editor Controls
Control Description 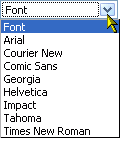
The Font drop-down menu. Select a font, and enter text; or highlight text, and select a font.

The Font Size selector. Select a size, and enter text; or highlight text, and select a size. Click the up arrow to increase font size. Click the down arrow to lower font size.

Ctrl-z
The Undo icon. Click the Undo icon to back out of the previous change. Change history is cleared when you click Create.

Ctrl-y
The Redo icon. Click the Redo icon to restore the previous change. Change history is cleared when you click Create.

The Clear Styling icon. Select text and click the Clear Styling icon to remove all styling, such as font types, font sizes, font weights, and font colors. Note that formats, such as bulleted and indented are not affected.

The Rich Text Editing Mode icon. Use this control to toggle the editor to Rich Text editing mode. In this mode, you can use the style controls at the top of the editor to design your HTML's look and feel.

The Source Code Editing Mode icon. Use this control to toggle the editor to the source code editing mode. In this mode, you can enter all of your own HTML manually. This includes entering source code for the insertion of images. Source code editing mode assumes you will enter all HTML code manually; therefore, most style controls at the top of the text box are not available in this mode.
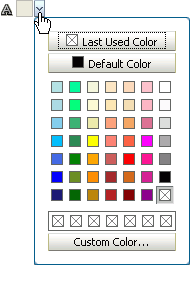
Foreground Color selector. Use the selector to apply color to text. Pick a color, and enter text; or highlight text, and select a color.
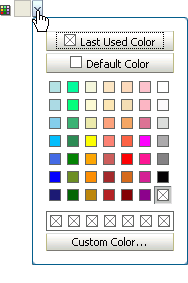
Background Color selector. Use the selector to highlight text. Select a color, and enter text; or select text and then a color to highlight.

The Bold icon. Highlight text, and click the Bold icon; or click the Bold icon, and enter text. Click the Bold icon again to exit Bold.

The Italic icon. Highlight text, and click the Italic icon; or click the Italic icon, and enter text. Click the Italic icon again to exit Italic.

The Underline icon. Highlight text, and click the Underline icon; or click the Underline icon, and enter text. Click the Underline icon again to exit Underline.

The Subscript icon. Highlight text, and click the Subscript icon to convert it to a subscript character (see icon's numeral
2for example); or click the Subscript icon, and enter text. Click the Subscript icon again to exit Subscript.
The Superscript icon. Highlight text, and click the Superscript icon to convert it to a superscript character (see icon's numeral
2for example); or click the Superscript icon, and enter text. Click the Superscript icon again to exit Superscript.
The Strikethrough icon. Highlight text, and click the Strikethrough icon to drawn a horizontal line through the middle of text, or click the Strikethrough icon and enter text. Click the Strikethrough icon again to exit Strikethrough.

The Justify Left icon. To align text left, highlight it and click the Left Justify Left icon. You can also click the icon and enter text.

The Justify Center icon. To center text, highlight it and click the Justify Center icon. You can also click the icon and enter text.

The Justify Right icon. To align text right, highlight it and click the Justify Right icon. You can also click the icon and enter text.

The Justify Full icon. To align text on both the right and left, highlight it and click the Justify Full icon. You can also click the icon and enter text.

The Bulleted List icon. To create a bulleted list, start a new line, click the Bulleted List icon, and enter text. You can also highlight lines of text and click the icon. Start a new line, and click the Bulleted List icon again to exit. Alternately, exit bullet mode by clicking Enter twice at the end of the last item.

The Numbered List icon. To create a numbered list, start a new line, click the Numbered List icon, and enter text. You can also highlight lines of text and click the icon. To exit bullet mode, start a new line and click the Numbered List icon again. Alternately, exit numbered mode by clicking Enter twice at the end of the last item.

The Outdent icon. To move a block of text left, select it and click the Outdent icon.

The Indent icon. To move a block of text right, select it and click the Indent icon.

The Link icon. Copy the target URL, and then click the Link icon and paste or enter a Web address in the resulting dialog box. Click OK in the dialog box to save the link.

The Remove Link icon. Highlight linked text and click the Remove Link icon to remove the link.
Ctrl-x
Use this key combination to delete highlighted selections. You can also use the keyboard Backspace and Delete buttons.
-
Click Create to save your changes and exit the editor.
14.2.3.2.2 Editing HTML Documents with the Rich Text Editor
You can use the Rich Text Editor to edit any HTML document that is available in a content repository. The editor is available to the files it was used to create as well as files created with other HTML authoring tools.
Note:
To use the Rich Text Editor to edit files created with other HTML authoring tools, the HTML files must be well formed (that is, have no unclosed tags) and contain no JavaScript.The editor recognizes the file extensions htm and html.
In the Documents service, the Rich Text Editor is available in the Documents task flow.
To edit an HTML document using the Rich Text Editor:
-
Go to the Documents task flow on a page or go to the Documents page (in a personal space or group space) that contains the HTML document you want to edit.
-
Check the HTML document out (see Section 14.2.4.5.1, "Checking a File Out"). The document must be checked out before it can be edited.
-
Select the HTML document by clicking in its row, and click the Edit with Rich Text Editor icon on the toolbar (Figure 14-25).
The file opens in the Rich Text Editor (Figure 14-24). The editor recognizes the file extensions
htmandhtml. -
Use the Rich Text Editor controls (see Table 14-2) to revise the document, or edit the document in Source Code mode to revise the HTML source.
-
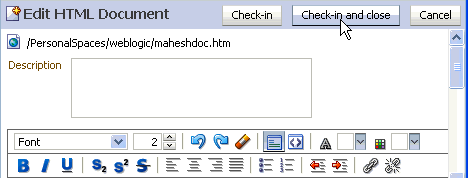
When you complete your revisions, click Check-in and close (Figure 14-26) to save your changes and exit the Rich Text Editor.
14.2.3.3 Copying and Pasting Files
The Documents service provides three options for copying and pasting files:
-
Toolbar options
-
Menu options
-
Drag-and-drop
-
Dragging and dropping files is equivalent to "move" or "cut/paste".
-
Dragging and dropping while pressing the Ctrl key is equivalent to "copy/paste".
-
This section describes how to accomplish file copying and pasting using menus and buttons. It contains the following subsections:
14.2.3.3.1 Copying and Pasting Files Using the Toolbar
To copy and paste one or multiple files using the toolbar:
-
Go to the Documents task flow on a page or go to the Documents page (in a personal space or group space) that contains the file(s) you want to copy.
-
Locate and select the file(s) you want to copy.
To select one file without opening it, click within the file row. To select multiple files, Ctrl-click the file rows.
-
On the toolbar, click the Copy icon (Figure 14-27).
-
Select the folder where you want to paste the copied file(s).
To select a folder, click in the folder's row. Clicking on the folder name produces a different result (see Section 14.2.2.2, "Opening Folders").
-
On the toolbar, click the Paste icon (Figure 14-27).
The copied file(s) are added to the selected folder.
14.2.3.3.2 Copying and Pasting Files Using a Menu
There are two menus to choose from when copying and pasting: the File menu and a context (right-click) menu.
To copy and paste files using the File menu or a file or folder context menu:
-
Go to the Documents task flow on a page or go to the Documents page (in a personal space or group space) that contains the file(s) you want to copy.
-
Locate and select the file(s) you want to copy.
To select one file without opening it, click in the file row. To select multiple files, Ctrl-click the file rows. Clicking on the file name opens the file (see Section 14.2.2.1, "Opening Files").
-
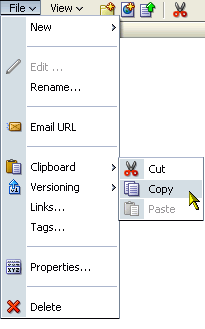
Open the File menu and select Clipboard and then Copy (Figure 14-28).
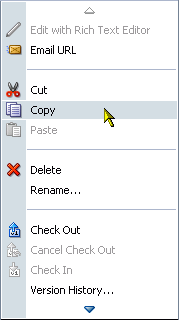
As an alternative, right-click a file icon or in a file row and select Copy (Figure 14-29).
-
Select the folder where you want to paste the copied file(s).
Select a folder by clicking its icon or in its row. Clicking a folder name provides a different result (see Section 14.2.2.2, "Opening Folders").
-
From the File menu, select Clipboard and then Paste (Figure 14-30).
As an alternative, right-click the target folder icon or in the target folder's row, and select Paste (Figure 14-31).
The copied file(s) are added to the selected folder.
14.2.4 Managing Files and Folders
The Documents service provides useful features for managing files and folders. These include tools for navigating the folder hierarchy, creating folders and subfolders; renaming, rearranging, and deleting files and folders; and checking files out and in.
This section discusses the Documents service file and folder management features. It contains the following subsections:
14.2.4.1 Navigating in the Documents Task Flow
The Documents task flow provides navigational features to assist you in accessing files and folders. For example, you can make a subfolder display as the top-level folder, and then easily navigate back up the folder hierarchy or instantly return to default view.
In the Documents service, only the Documents task flow makes use of folders by default. Other Documents service task flows can be configured to display folders along with files or to suppress the display of folders.
This section describes how to use the Documents task flow navigational features. It contains the following subsections:
14.2.4.1.1 Making a Subfolder the Top Folder
Using task flow navigation features, you can temporarily make a folder of interest the top folder in the folder hierarchy. This enables you to focus more easily on a folder of interest.
When you make a nondefault folder the top folder in the folder hierarchy, all folders that are not contained in the new top folder are hidden. Returning the task flow to its default view or navigating back up the folder hierarchy is easy (see Section 14.2.4.1.2, "Moving Up the Folder Hierarchy").
To make a folder display as the top folder:
-
On a page, go to the Documents task flow where you want to display a subfolder as the top-level folder.
-
Locate the folder you want to make the top folder, and click the folder's display name (Figure 14-32).
Figure 14-32 Meetings Folder Below Main Group Space Folder (WebCenter Spaces)
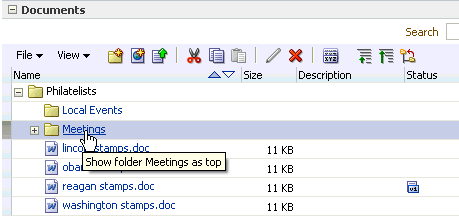
Description of "Figure 14-32 Meetings Folder Below Main Group Space Folder (WebCenter Spaces)"
The selected folder is listed as the top-level folder (Figure 14-33). All other folders outside the selected folder are no longer listed.
Figure 14-33 Meetings Folder Listed as Top Folder (WebCenter Spaces)
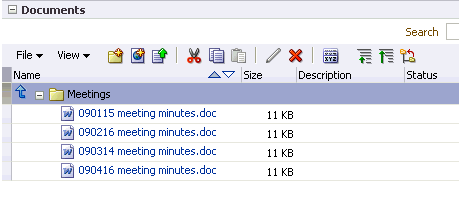
Description of "Figure 14-33 Meetings Folder Listed as Top Folder (WebCenter Spaces)"
14.2.4.1.2 Moving Up the Folder Hierarchy
When you have temporarily made a subfolder the top folder in the Documents task flow, and you want to move further up the folder hierarchy, or back to the default view, you have two options:
-
On the toolbar, click the Go Up icon (Figure 14-34).
The task flow view advances up one folder in the folder hierarchy. You can also click the Go to Top icon to advance to the topmost folder in the folder hierarchy.
-
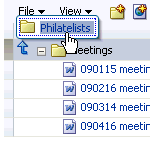
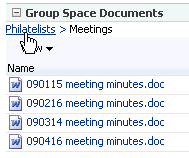
Click the arrow to the left of the current top folder, and select a folder on the list from the resulting pop-up (in Figure 14-35, Philatelists) to move up one folder.
The task flow view advances up one folder in the folder hierarchy.
14.2.4.2 Creating and Copying Folders
Folders provide a convenient way to organize the content exposed through the Documents service. Most Documents service task flows include the capability of displaying folders, but only the Documents task flow includes the capability of creating and copying them. This section describes how to create and copy folders in the Documents task flow. It contains the following subsections:
14.2.4.2.1 Creating Folders Using the Create a New Folder Icon
This section describes how to create a folder in the Documents task flow.
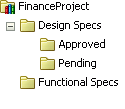
When you create a folder, it is always listed hierarchically below the folder that was selected when the new folder was created. For example, in Figure 14-36 the FinanceProject folder was selected when the Design Specs and Functional Specs folders were created. The Design Specs folder was selected when the Approved and Pending folders were created.
To create a folder using the Create a new folder icon:
-
Go to the Documents task flow on a page or go to the Documents page (in a personal space or group space) where you want to create a folder.
-
Select the folder under which to create the new folder, and click the Create a new folder icon (Figure 14-37) on the toolbar.
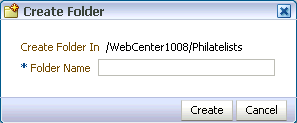
The Create Folder dialog box opens (Figure 14-38).
-
In the Folder Name field, enter a name for the folder; for example,
Design Specs. -
Click Create to create the folder and close the dialog box.
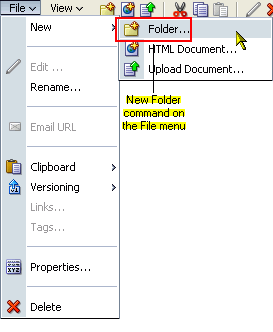
The File menu also provides an option for creating a new folder, as does the folder context (right-click) menu. Select New, then Folder (Figure 14-39).
14.2.4.2.2 Copying a Folder and Its Content
When you copy a folder that contains content, such as subfolders and files, the content is copied as well.
To copy a folder and its content:
-
Go to the Documents task flow on a page or go to the Documents page (in a personal space or group space) where you will copy a folder and its content.
-
Select the folder you want to copy, and click the Copy icon (Figure 14-40) on the toolbar.
-
Select a destination folder where you want to paste the copy, and then click the Paste icon (Figure 14-40) on the toolbar.
The copied folder and content display in the selected destination folder.
Note:
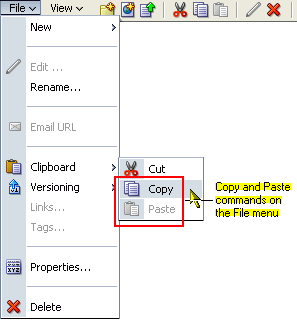
To rename the copy, see Section 14.2.4.3, "Renaming Files and Folders."Copy and Paste commands are also available on the task flow's File menu. Select Clipboard, then Copy and/or Paste (Figure 14-41).
Additionally, you can find the Copy and Paste commands on the folder context (right-click) menu.
14.2.4.3 Renaming Files and Folders
You can use menus and properties to rename files and folders. For example, on the File menu and on file and folder context (right-click) menus, you can select Rename. You can also rename a file through its properties.
This section describes how to rename files and folders using the Rename command on a context (right-click) menu and how to rename a file and revise its description through document properties. It contains the following subsections:
14.2.4.3.1 Renaming a File or Folder Through a Menu
To rename a file or folder using a context menu:
-
Go to the Documents task flow on a page or go to the Documents page (in a personal space or group space) that contains the file or folder you want to rename.
-
Right-click the file or folder icon or within the file or folder row, and select Rename.
-
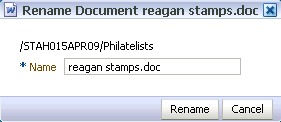
In the resulting dialog box (Figure 14-42), enter a new name in the Name field.
-
Click Rename button.
14.2.4.3.2 Renaming a File and Revising Its Description Through Properties
To rename a file or revise its description through its properties:
-
Go to the Documents task flow on a page or go to the Documents page (in a personal space or group space) where you want to rename a file or revise its description.
-
Select a file by clicking in its row.
-
On the toolbar, click the Properties icon (Figure 14-43).
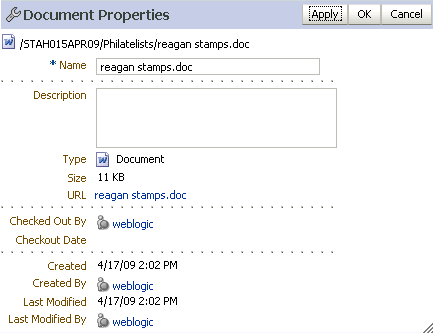
The Document Properties screen opens (Figure 14-44).
-
Revise the file name and description as desired, and click OK.
14.2.4.4 Moving Files and Folders
In the Documents task flow you can move files and folders into other folders by cutting-and-pasting as well as by dragging-and-dropping. You can use the Clipboard option on the File menu or the Cut and Paste options on the context (right-click) menus to cut and paste files and folders.
To move files and folders by dragging and dropping:
-
Go to the Documents task flow on a page or go to the Documents page (in a personal space or group space) where you want to move files or folders.
-
Click and hold the object you want to move.
-
Drag the object over the target folder (Figure 14-45).
-
Release the object onto the target folder.
14.2.4.5 Checking a File Out or In
When you want to retain exclusive use of a file—for example, when you're editing it—you can check the file out. File check-out is a useful way to prevent a file you are working on from being overwritten. Users can view the file, but they cannot upload a file of the same name into the same folder while the file is checked out.
When you're ready to release the file, you can either check it back in to the content repository or cancel file check-out. Checking a file back in involves uploading the revised file. Cancelling check-out removes the file's checked-out status without requiring a file upload.
File check-out and check-in are available for all files in the Documents task flow.
This section describes how to check a file out, cancel file check-out, and check a file in. It contains the following subsections:
14.2.4.5.1 Checking a File Out
To check a file out:
-
Go to the Documents task flow on a page or go to the Documents page (in a personal space or group space) where you want to check out a file.
-
Select the file you want to check out by clicking in its row.
-
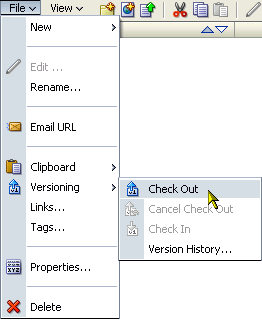
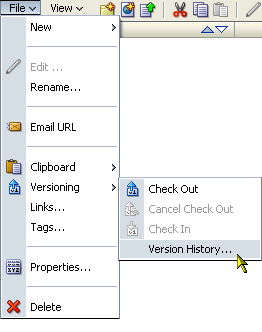
From the File menu, select Versioning and then Check Out (Figure 14-46).
In the Documents task flow, a Checked Out icon appears in the file's Status column. Roll your mouse pointer over the icon to see details about the user who has checked the file out (Figure 14-47).
Tip:
If the Checked Out icon does not display immediately, click the task flow's Refresh icon.
14.2.4.5.2 Canceling File Check-Out
There may be times when you want to cancel a file check-out without checking a new version of the file in.
To cancel file check-out:
-
Go to the Documents task flow on a page or go to the Documents page (in a personal space or group space) where you want to cancel a file check-out.
-
Select the checked-out file by clicking in its row.
-
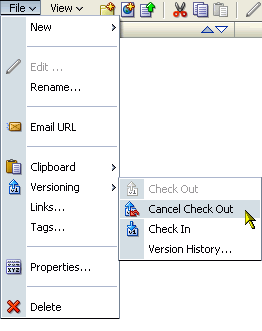
From the File menu, select Versioning and then Cancel Check Out (Figure 14-48).
The file is no longer checked out. The Checked Out icon no longer appears in the file's Status column in the Documents task flow.
14.2.4.5.3 Checking a File In
To check a file in:
-
Go to the Documents task flow on a page or go to the Documents page (in a personal space or group space) where you want to check a file in.
-
Select the checked-out file by clicking in its row.
-
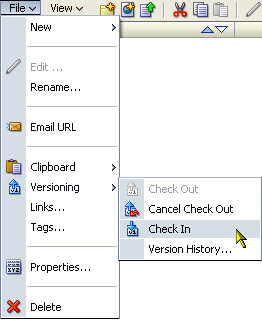
From the File menu, select Versioning and then Check In (Figure 14-49).
The Upload Document screen opens (Figure 14-50).
-
Click Browse, and navigate to the checked-out document.
Note:
The default maximum size for an uploaded file is 20 MB (to change this limit, see "Changing the Maximum File Upload Size" in Oracle Fusion Middleware Administrator's Guide for Oracle WebCenter). -
Optionally, enter a description in the Description field.
-
Click Upload.
The document is uploaded and checked in. The Checked Out icon no longer appears in the Status column.
14.2.4.6 Working with File Version Histories
Whenever you upload a file into a folder that already contains a file of the same name, you are given the option to either create a new version or cancel the upload altogether. (For more information about file upload, see Section 14.2.3.1, "Uploading Files".)
Whenever a file has multiple versions, it also has a version history. Version histories are available for viewing in the Documents task flow (Figure 14-52).
View a file's version history to track when a file was last revised, to determine which user revised it, and to delete a particular file version. This section contains the following subsections:
14.2.4.6.1 Viewing a File Version History
To view a file's version history:
-
Go to the Documents task flow on a page or go to the Documents page (in a personal space or group space) where you want to view a file's version history.
-
Select the file by clicking in its row.
-
From the File menu, select Versioning and then Version History (Figure 14-51).
The Version History screen opens (Figure 14-52).
To view a particular version, click its ID number in the Version ID column. Depending on both the file and browser type, the file opens on a new browser tab or you will be given the opportunity to download the file.
-
Click OK to exit the screen and return to the Documents task flow.
14.2.4.6.2 Deleting a File Version
When you view Version History, you can also select to delete one or more file versions.
To delete a file version:
-
Go to the Documents task flow on a page or go to the Documents page (in a personal space or group space) where you want to delete a file version.
-
Select the file by clicking in its row.
-
From the File menu, select Versioning and then Version History (Figure 14-51).
The Version History screen opens (Figure 14-52).
-
Select the version you want to delete by clicking in its row, and then click Delete (Figure 14-53).
-
Click OK to exit the screen and return to the Documents task flow.
14.2.4.7 Viewing File and Folder Properties
File and folder properties provide access to informational details about a selected file or folder. You can use file properties to rename a file, provide or revise a file description, or obtain a reusable link to the file. Additionally, both file and folder properties provide read-only information about location, type, and create and modification dates. File and folder properties also provide contact points to the users who created or last modified the file or folder.
To view file and folder properties:
-
Go to the Documents task flow on a page or go to the Documents page (in a personal space or group space) where you want to view file and folder properties.
-
Select the file or folder whose properties you want to view, and click the Properties icon on the toolbar (Figure 14-54).
The Document Properties (Figure 14-55) or Folder Properties screen opens:
-
Click OK to exit the Document Properties or Folder Properties screen and return to the Documents task flow.
14.2.4.8 Deleting Files and Folders
When you delete a folder, all the subfolders and files the folder contains are also deleted in the content repository. You can use both the toolbar and menu options in the Documents task flow to delete files and folders. This section describes how to delete files and folders using the Delete icon on the toolbar.
Note:
The root folder of the task flow cannot be deleted.To delete files and folders:
-
Go to the Documents task flow on a page or go to the Documents page (in a personal space or group space) where you want to delete files and folders.
-
Select the file or folder you want to delete by clicking its icon or in its row.
To make multiple selections, Ctrl-click each selection.
-
On the toolbar, click the Delete icon (Figure 14-56).
-
Click Delete in the confirmation dialog box.
Your selection is deleted.
The File menu and the file and folder context (right-click) menus also provide a Delete option.
14.2.5 Sharing Files and Folders
Making files and folders available to multiple users allows document sharing and collaboration. In the context of the WebCenter Spaces application, or custom WebCenter applications, this is easy to accomplish.
To share files and folders:
-
Add the file or folder to a page:
-
If the file or folder does not exist in the content repository, add a task flow containing a target parent folder to a page (see Section 7.1.3, "Adding Task Flows to a Page"), then upload the file or folder from its current location to the parent folder in the task flow (see Section 14.2.3, "Adding Files"). Once it is in the content repository, you can subsequently add the file or folder in its own task flow pane onto the page (see Section 7.1.2, "Adding Document Library Content to a Page").
-
If the file already exists in the content repository, simply add the file or folder to a shared page (see Section 7.1.2, "Adding Document Library Content to a Page"), or add a task flow containing the file or folder to a page (see Section 7.1.3, "Adding Task Flows to a Page").
-
-
Make the page containing the task flow available to other users (see Section 5.7, "Setting and Revoking Page Access Permissions").
-
Notify users with valid permissions that they can update the file by checking it out and in (see Section 14.2.4.5, "Checking a File Out or In").
14.2.6 Running Document Searches
In addition to WebCenter Search, which searches a particular space or across the entire application (see Chapter 29, "Working with the Search Service"), the Documents service provides its own search engine for file searches. A Documents search saves time and increases the relevancy of results by narrowing the scope of a search to files.
In the WebCenter Spaces application, the document search searches within a specific group or personal space's root folder. Within a custom WebCenter application, the document search searches through all files available to you.
The document search feature is exposed in the Documents task flow. It provides two levels of search: Basic and Advanced. This section contains the following subsections:
14.2.6.1 Running a Basic Document Search
Basic Search searches by full or partial names of files. For information about including file content in a search, see Section 14.2.6.2, "Running an Advanced Document Search."
To perform a basic document search:
-
Go to the Documents task flow on a page or go to the Documents page (in a personal space or group space) where you want to search for a particular file.
-
Enter a search term in the search field (Figure 14-57).
For example, enter a full or partial name of a file.
-
Click the Search icon.
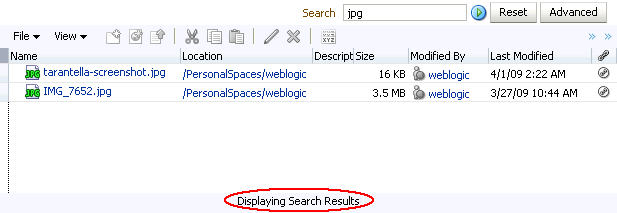
Results of matching file names display on the search results screen, with Displaying Search Results indicated at the bottom (Figure 14-58).
Look in the Location column to determine where a file or folder is located. Alternatively, click the file display name to open it from the search results screen.
-
Click Reset to clear the search field and return to the Documents task flow default display.
14.2.6.2 Running an Advanced Document Search
The Advanced search goes further than Basic search by including searches against file content, dates, and users. Additionally, you can narrow your search to a particular folder.
To perform an advanced document search:
-
Go to the Documents task flow on a page or go to the Documents page (in a personal space or group space) where you want to perform an advanced document search.
-
Click Advanced next to the Search field.
The Advanced Search screen opens (Figure 14-59).
Figure 14-59 Advanced Search Screen in Documents Task Flow

Description of "Figure 14-59 Advanced Search Screen in Documents Task Flow"
-
Enter search terms in one or more of the default fields:
-
File Name—Enter a full or partial file name.
-
Search Content For—Enter a term to search for in the content of any files in the Documents task flow.
-
A term is one or more words.
-
If multiple words are specified, separated by a character space, the words are implicitly "
AND'ed" together. That is, they must both appear in a given search result. -
Terms may also be "
OR'ed" with explicit use of theORkeyword. One or the other of the specified terms must appear in a given search result. -
ANDhas higher precedence thanOR. -
Special characters (such as a single quotation mark ('), a double quotation mark ("), or a hyphen (-) ) are not valid in a search term.
Table 14-3 shows examples of valid search syntax with Java Content Repositories (all supported content repositories are JCRs):
-
-
Look In—Click the Browse icon to open a list of content repository folders. Select one of these to narrow your search to the selected folder.
-
-
Optionally, select additional search criteria from the Add Fields drop-down list (Figure 14-60).
Add all or any of the following by selecting it from the list:
-
Dates—Adds search fields for Date Created and Date Last Modified. You can modify the dates search criteria by selecting a modifier from the Date Operators drop-down list (Figure 14-61).
Select to search for an exact date (is), a following date (is after), a preceding date (is before), or a date between two other dates (is between). When you select is between, an additional date field is provided for entering the second date (Figure 14-62).
Click the Select date icon to select a date in the correct format (
mm/dd/yyyy), for example6/18/2007, or enter a date manually. -
Users—Adds search fields for Created By (user who uploaded) and Last Modified By (Figure 14-63).
Enter a user name for the creator or modifier, or click the Browse icon to the right of each field, to select from a list of users or to search for a user name. Enter—minimally—two consecutive characters from the name of your search target (the search term do finds both condoleeza and doug). Click Search, and all names matching your search criteria appear in the results area.
Note:
In the WebCenter Spaces application, when you search documents in a group space, the user selection list and the user search find user names for current members of the group space.
To remove added fields, click the Remove icon.
-
-
Click Search to execute the advanced search.
Results display in the task flow content area. Click Reset to clear the search criteria and return the Documents task flow to its default view.
14.3 Personalizing and Customizing Documents Service Task Flows
The Documents service supports personalizations and customizations that enable you to control task flow content and display. This section contains the following subsections:
14.3.1 What You Should Know About Personalizing and Customizing
The main difference between personalizing and customizing Documents service task flows is the scope of people affected by such changes: personalization affects only your view of a task flow instance; customization affects all users' views.
Personalization is available to all Documents service task flows. Use personalizations to change your own view of the task flow. See Section 14.3.2, "Personalizing Documents Service Task Flows".
Customization is available to the Document List Viewer task flow, and affects the display of files and folders in all users' views. See Section 14.3.3, "Customizing the Documents Service Task Flows".
14.3.2 Personalizing Documents Service Task Flows
You can personalize your own view of Documents service task flows by hiding or showing columns and by rearranging the list of documents according to the sort order of a particular column.
This section describes how to personalize a Documents service task flow. It contains the following subsections:
14.3.2.1 Hiding and Showing Columns in Documents Service Task Flows
You can hide and show one or more informational columns in Documents service task flows that provide a View menu (Documents task flow and Document List Viewer task flow). This is useful for simplifying or expanding the details that are displayed with files and folders.
To hide or show informational columns in your unique view of a task flow:
-
Go to the Documents task flow on a page or go to the Documents page (in a personal space or group space) that you want to personalize.
-
Open the View menu, and click Columns (Figure 14-64).
-
Select or clear individual columns to show or hide them, or select Show All to display all available columns.
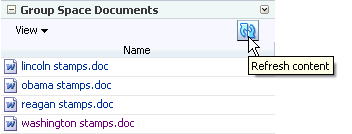
If changes do not display immediately, click the task flow's Refresh content icon (Figure 14-65).
14.3.2.2 Reordering Columns in Documents Service Task Flows
You can reorder the informational columns in any Documents service task flow that provides a View menu (Documents task flow and Document List Viewer task flow). This is useful for prioritizing the details that are displayed with files and folders, depending on the information in which you are most interested.
To reorder the informational columns in your unique view of a task flow:
-
Go to the Documents task flow on a page or go to the Documents page (in a personal space or group space) that you want to personalize.
-
Open the View menu, and click Reorder Columns.
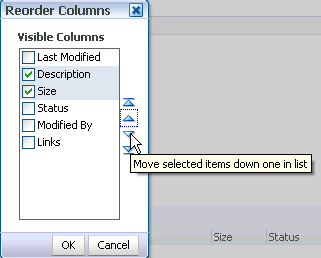
The Reorder Columns dialog box opens (Figure 14-66).
-
Select or clear one or more columns, then click the reorder icons to rearrange the order of the columns in the Documents service task flow.
14.3.2.3 Sorting Files and Folders in Documents Service Task Flows
You can sort columns in the Documents task flow and Document List Viewer task flow. Sorting enables you to quickly rearrange the order of the content in a Documents service task flow. Each task flow column provides a one-click sorting feature that you can use to instantly rearrange all task flow content according to the ascending (1, 2, 3, A, B, C) or descending (C, B, A, 3, 2, 1) order of a particular column.
To sort files and folders in your unique view of a task flow:
-
Go to the Documents task flow on a page or go to the Documents page (in a personal space or group space) that you want to sort.
-
Move your cursor over the header of the column you want to use to sort files and folders.
-
Click the Sort Ascending icon to sort the column in ascending order (1, 2, 3, A, B, C, or smallest to largest), or click the Sort Descending icon to sort the column in descending order (C, B, A, 3, 2, 1, or largest to smallest) (Figure 14-67).
Figure 14-67 Sort Ascending and Sort Descending Icons
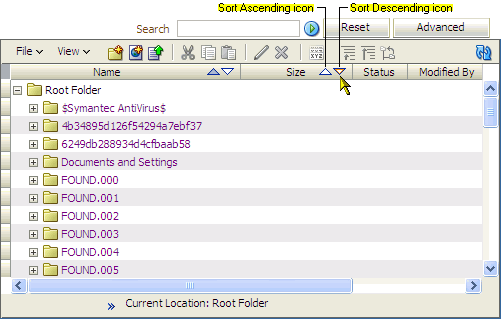
Description of "Figure 14-67 Sort Ascending and Sort Descending Icons"
The sorting icons display by default on the Name column. For other columns, the icons display when you hover your mouse pointer over the column name.
14.3.3 Customizing the Documents Service Task Flows
Customizing Documents service task flows affects all users. With sufficient privileges, you can use task flow properties to display or hide any subfolders in the selected folder, to change the target location, or add filtering criteria. Refer to Section 14.4, "Setting Documents Service Task Flow Properties" for information about setting properties to customize Documents service task flows for all users.
Additionally, you can customize the display of files and folders in the Document List Viewer task flow for all users by the results of an advanced document search, or specify the initial folder content to display when a user accesses the task flow.
To customize the display of files and folders in all users' views:
-
Go to the Document List Viewer task flow on a page or go to the Documents page (in a personal space or group space) that you want to customize.
-
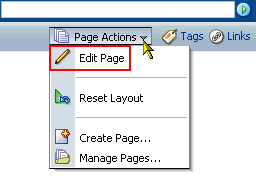
From the Page Actions menu, select Edit Page to open Oracle Composer (Figure 14-68).
Note:
If the Edit Page command is not available on the Page Actions menu or the Page Actions menu does not display, it is likely that you do not currently have sufficient page access. Contact your application administrator for a higher level of access.For information about Oracle Composer, see Section 4.3, "Introducing Oracle Composer."
-
Provided the task flow supports it, customization is available through the Edit icon in the task flow header when the task flow's host page is opened in Oracle Composer. Click the Edit icon in the task flow header (Figure 14-69).
The task flow's customization settings display (Figure 14-70).
-
Select a customization method:
-
Results of a Document Search. Enter an advanced document search, and click Save. For more information, see Section 14.2.6.2, "Running an Advanced Document Search."
In Oracle Composer, click Save and then Close to return to page view mode and view the results in the task flow.
-
Content from a Selected Folder (folders are displayed in the task flow pane only when the task flow is configured to display folders; that is, its
showFoldersproperty is set totrue). Click the Browse icon, navigate to and select the folder with the content you want to initially display in the task flow, then click Save.In Oracle Composer, click Save and then Close to return to page view mode and view the content of the selected folder in the task flow.
Click the breadcrumb links to navigate up the folder hierarchy to the root folder (Figure 14-71).
-
14.4 Setting Documents Service Task Flow Properties
Documents service task flows have associated properties, which users with sufficient privileges can access and modify. The task flow properties can specify whether to display or hide any subfolders in the selected folder, change the target location, or add filtering criteria. Changes to property values affect the appearance and behavior of the task flow instance for all users.
To access Documents service task flow properties, open Oracle Composer (select Page Actions, then Edit Page), then click the Edit icon for the task flow you want to configure (Figure 14-72).
The Component Properties dialog box for the task flow opens (Figure 14-73).
Figure 14-73 Components Properties Dialog Box for Document List Viewer Task Flow for Personal Documents
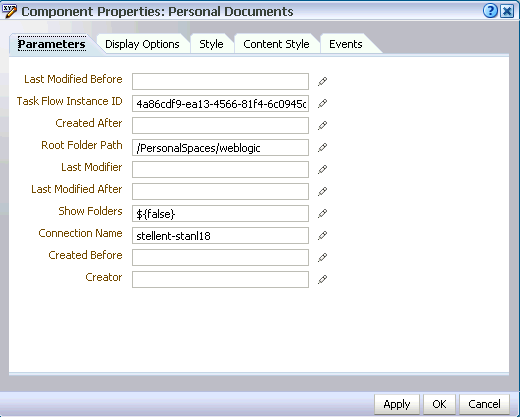
The Component Properties dialog box consists of five tabs to set Documents service task flow properties:
-
Setting Documents Task Flow Properties on the Parameters Tab
-
Setting Documents Task Flow Properties on the Display Options Tab
-
Setting Documents Task Flow Properties on the Style and Content Style Tabs
14.4.1 Setting Documents Task Flow Properties on the Parameters Tab
The Parameters tab displays properties that specify the source and range of displayed files and folders and the display order of listed files. Enter or select property values, or to use a dynamic computation for your property value, click the Edit icon next to a property field to open an Expression Language (EL) editor to select a preformatted EL expression or to enter any value or construct your own EL expression. For more information, see Section 7.4.5, "Using Expression Language (EL) Expressions with Component Properties".
In the context of Documents service task flows, these properties control default behavior of task flow content and facilitate the wiring of a task flow to page parameters and page definition variables. Knowledgeable users can enter different value types to create dynamic relationships between task flows on a page and between a task flow and the page itself. For more information, see Chapter 8, "Wiring Pages, Task Flows, Portlets, and UI Components"
Table 14-4 lists and describes the properties included on the Parameters tab for the Documents service task flows and indicates which task flows use a particular property. The associated parameter names are shown in parentheses for each property.
Table 14-4 Properties of Documents Service Task Flows: Parameters Tab
| Property(associated parameter) | Available To Task Flows... | Description |
|---|---|---|
|
( |
|
The name of the content repository connection. If no value is entered, the default connection specified by the administrator is used. For information about configuring content repository connections, see "Registering Content Repositories" in Oracle Fusion Middleware Administrator's Guide for Oracle WebCenter. When you want to change the |
|
( |
|
Limit the display of task flow content to files and folders created after a specified date and time. If no value is entered, then no "after" filtering using the creation date is applied. The value requires the following format: yyyy-mm-ddThh:mm:ss.sssTZD For example: 2009-04-17T18:24:36.000+01:00 This property is available for contextual wiring. For more information, see Chapter 8, "Wiring Pages, Task Flows, Portlets, and UI Components". |
|
( |
|
Limit the display of task flow content to files and folders created before a specified date and time. If no value is supplied, then no "before" filtering using the creation date is applied. The value requires the following format: yyyy-mm-ddThh:mm:ss.sssTZD For example: 2009-04-17T18:24:36.000+01:00 This property is available for contextual wiring. For more information, see Chapter 8, "Wiring Pages, Task Flows, Portlets, and UI Components". |
|
( |
|
Limit the display of task flow content to files and folders created by a particular user. Enter the user name as specified by the user's login credentials (for example, This property is available for contextual wiring. For more information, see Chapter 8, "Wiring Pages, Task Flows, Portlets, and UI Components". |
|
( |
|
Limit the display of task flow content to files and folders last modified after a specified date and time. The value requires the following format: yyyy-mm-ddThh:mm:ss.sssTZD For example: 2009-04-17T18:24:36.000+01.00 For the Recent Documents task flow: if no value is entered, then files and folders modified in the last three months are shown. This property is available for contextual wiring. For more information, see Chapter 8, "Wiring Pages, Task Flows, Portlets, and UI Components". |
|
( |
|
Limit the display of task flow content to files and folders modified before the specified date and time. The value requires the following format: yyyy-mm-ddThh:mm:ss.sssTZD For example: 2009-04-17T18:24:36.000+01:00 This property is available for contextual wiring. For more information, see Chapter 8, "Wiring Pages, Task Flows, Portlets, and UI Components". |
|
( |
|
Limit the display of task flow content to files and folders last modified by a particular user. Enter the user name as specified by the user's login credentials (for example, This property is available for contextual wiring. For more information, see Chapter 8, "Wiring Pages, Task Flows, Portlets, and UI Components". |
|
( |
|
Limit the number of files displayed to the specified maximum. If no value is entered, then all matching files are shown. |
|
( |
|
The default display order of files in the task flow:
|
|
The name of the folder to use as the root folder in the current task flow instance. This property is a content-scoping parameter that assists with determining the source and range of content to display in the task flow instance. There is no need to set this value for task flows that display the content of the current space's default root folder. But it is useful, for example, when you want the start folder to be other than a group space's default root folder and when you want to display content from another group space. For example
|
|
|
( |
|
Specifies whether to display folders along with files, which are displayed by default.
|
|
( |
|
The name of the folder to use as the root folder in the current task flow instance. This property is a content-scoping parameter that assists with determining the source and range of content to display in the task flow instance. To obtain a folder path, go to the Documents task flow, right-click the folder icon of the folder you want to use as the start folder, and select Properties. The full path is the first piece of information at the top of Folder Properties. |
|
( |
|
The unique identifier of the selected task flow instance. The purpose of this automatically assigned identifier is to assist with maintaining the association of this task flow instance with its customization and personalization settings. Do not edit this value. |
14.4.2 Setting Documents Task Flow Properties on the Display Options Tab
The Display Options tab displays properties that control the selections offered on the task flow chrome, and the display elements that surround task flow content. Enter or select property values, or to use a dynamic computation for your property value, click the Edit icon next to a property field to open an Expression Language (EL) editor to select a preformatted EL expression or to enter any value or construct your own EL expression. For more information, see Section 7.4.5, "Using Expression Language (EL) Expressions with Component Properties".
Table 14-5 lists and describes the properties included on the Display Options tab, which are available to all Documents service task flows (Documents, Document List Viewer, and Recent Documents).
Table 14-5 Properties of Documents Service Task Flows: Display Options Tab
| Properties | Description |
|---|---|
|
See Table 7-1. |
|
|
See Table 7-1. |
|
|
See Table 7-1. |
|
|
See Table 7-1. |
|
|
ALT text, which appears when users roll their mouse pointers over the task flow. |
|
|
See Table 7-1. |
|
|
See Table 7-1. |
|
|
See Table 7-1. |
|
|
See Table 7-1. |
|
|
See Table 7-1. |
|
|
See Table 7-1. |
14.4.3 Setting Documents Task Flow Properties on the Style and Content Style Tabs
The Style and Content Style tabs display properties that define the appearance of component instance content. These settings override style information defined for the parent components of the selected component instance. Parent components can include a component that wraps the component instance, the page that contains the component instance, or the entire application.
For more information about each property, see Section 7.4.6, "Working with Style and Content Style Properties".
14.4.4 Setting Documents Task Flow Properties on the Events Tab
The Events tab provides a means of wiring a contextual event to an Event Handler to enable a specified action when the event is triggered. For example, a button click is an event, and the result that flows from that event is described by the Event Handler. Resulting actions can include a partial page refresh, value passing from a provider component to a consumer component, additional navigation, and the like. The association of events with a particular component is determined by the developers who created the component. Experienced users can create connections between components and between components and pages using Events and Event Handlers.
For more information, see Section 7.4.7, "Working with Component Contextual Events".

