|
|
Visitor Tools allow individual portal users to customize the makeup and appearance of their portal desktop to create a more personalized portal experience. This chapter explains how to enable Visitor Tools.
This chapter includes these topics:
When enabled, Visitor Tools add features to portal desktops that allow portal visitors to modify the content and appearance of their desktops, books, and pages.
Changes made by a user through Visitor Tools are saved in the database and persist each time the user logs in to the portal. Visitor Tools provide a small subset of features that are available in the Portal Administration Console, such as changing the portal look & feel, adding and removing portlets, books, and pages, and others features.
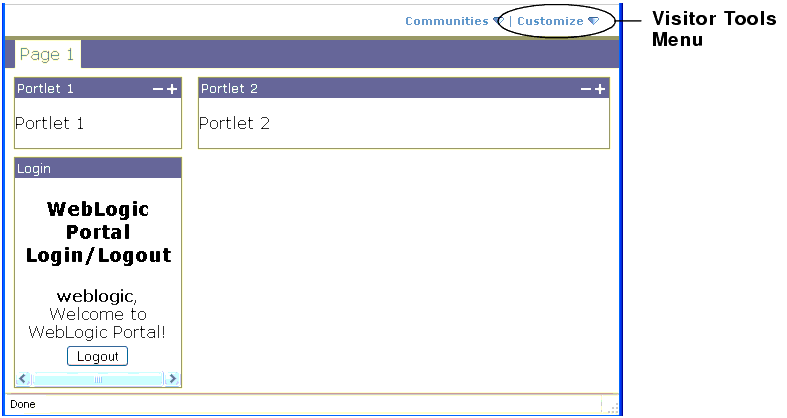
Visitor Tools provide a Customize menu that portal visitors can use to access the customize their portal desktop.
Enabling Visitor Tools is a two-step process. First, you need to verify in Workshop for WebLogic that the proper facet is installed in the portal web project that contains the portal you wish to enable. Second, you need to create a properly configured desktop in the WebLogic Portal Administration Console based on the enabled .portal file.
This section includes these topics:
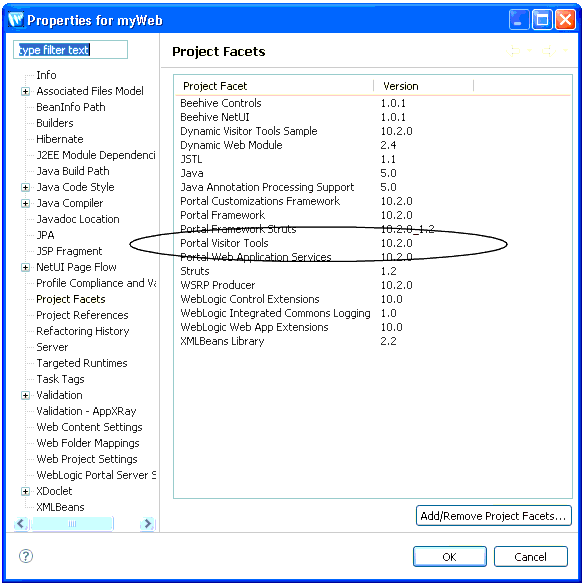
The deployed portal web project that contains the portal you wish to enable for Visitor Tools must include the Portal Visitor Tools facet. Although this facet is installed by default, this section explains how to verify that the facet is installed and how to add it if necessary.
To do this, right-click the portal web project, and select Properties. The Properties dialog appears (see Figure 8-1).
If the facet is not in the list, add it by following the instructions in Adding Facets to an Existing Project.
To take advantage of Visitor Tools, you must create a streaming portal desktop. This means that you must use the WebLogic Portal Administration Console to create a desktop and explicitly enable Visitor Tools for that desktop. For more information about streaming portals, refer to File-Based Portals and Streaming Portals.
| Note: | To use Visitor Tools, the portal desktop must be created from a template .portal file in a Portal Web Project that includes the Portal Visitor Tools facet. See Verifying the Portal Visitor Tools Facet. |
| Note: | Visitor Tools do not appear on a user’s desktop unless the user is authenticated; therefore, to use Visitor Tools, a portal must include some form of user authentication (for example, a login portlet). For more information about authentication, see the Security Guide. |
This section explains how to configure a streaming portal desktop that includes Visitor Tools. After the desktop is configured, users of the desktop can view and interact with the Visitor Tools.
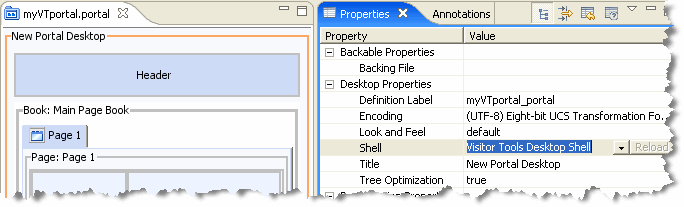
.portal file created previously as the basis for the new desktop, and select Visitor Tools Desktop Shell as the Default Shell for the desktop. | Tip: | For detailed instructions on creating a desktop, refer to Creating a Desktop. |
To confirm that visitor tools are enabled:
| Tip: | The GroupSpace Guide explains the Visitor Tools features from an end user’s perspective; if you want to create a customized user guide for your portal visitors, you can consider using that content as a starting point. |


|