|
|
The Dynamic Visitor Tools (DVT) sample application uses and demonstrates certain WLP and external client-side development technologies. The primary purpose of the DVT sample application is to highlight the possibilities of client-side portal development.
| Note: | The DVT Sample is not supported for a production environment. The DVT sample is intended to illustrate how the WLP client-side development technologies such as the REST and Disc APIs and the external Dojo toolkit, can be used to enhance a portal’s interactivity. |
This chapter includes these topics:
The Dynamic Visitor Tools (DVT) sample application demonstrates highly interactive tools for customizing the appearance, behavior, and content of WebLogic Portal applications. These sample tools use WLP features such as the Disc APIs and the REST API to enhance the user’s experience through highly interactive user interfaces, in-place editing of certain text elements, such as titles, and faster browser refresh times. See the Client-Side Developer’s Guide for detailed information on Disc and REST.
To experience the DVT, you can:
| Note: | As stated previously, the DVT sample application is only provided for demonstration purposes. The DVT sample is not intended to be used in a production environment. |
Before you can use any WLP sample application, the Portal Examples feature must be installed. This feature adds the available WLP sample applications and the sample domain to your installation. Portal Examples are not installed by default.
Install the Portal Examples using the Oracle WebLogic Portal Installer. You can install the examples into a new installation or into an existing installation by following these steps:
WebLogic Portal provides a DVT sample application that is pre-configured and ready to run. The DVT sample application lets you experience the DVT without having to use the development or administration tools. This section explains how to start the DVT sample application.
| Note: | The Dynamic Visitor Tools (DVT) feature is a sample WLP application that uses certain WLP and external client-side development technologies. The DVT Sample is not supported for a production environment. |
To run the pre-configured DVT sample application on a Windows system:
This section explains how to enable the DVT for any portal desktop. This section includes these basic steps:
| Tip: | You can also use a cheat sheet in Workshop for WebLogic to guide you through this procedure. To open the cheat sheet, select Help > Cheat Sheets > Oracle WebLogic Portal > Create a Dynamic Visitor Tools Enabled Desktop. |
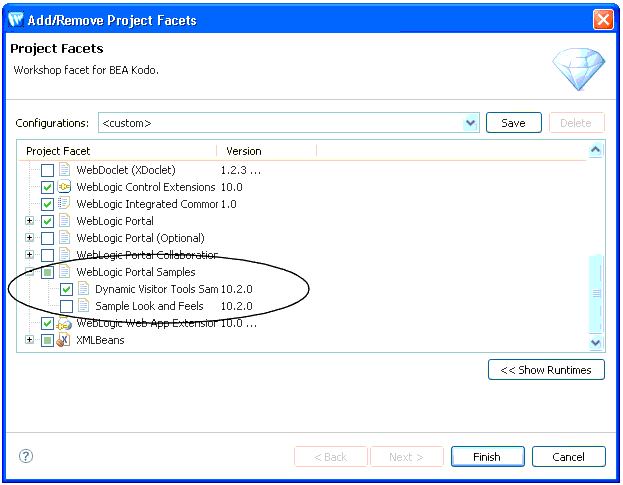
You must add Dynamic Visitor Tools Sample facet to the web project that you wish to enable for DVT.
| Note: | You must install the Portal Examples before you perform these steps. See Installing the Portal Examples. |
For more information on adding facets, see “Adding Facets to an Existing Project” in the Portal Developer’s Guide.
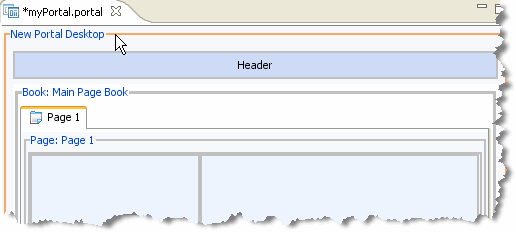
To configure a DVT-enabled portal in Workshop for WebLogic:
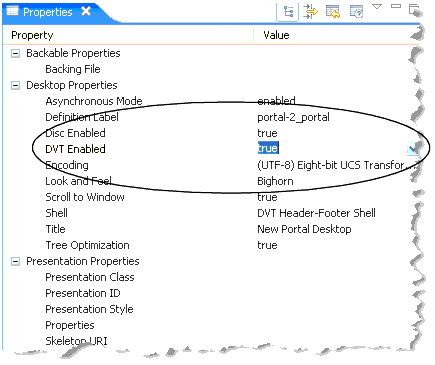
.portal file) in the Portal editor. DVT Enabled to true. Note that the Disc Enabled field is automatically set to true after this selection. This flag enables the dynamic features supported by the WLP framework.
Shell to DVT Header-Footer Shell. This setting enables the DVT sample for a portal.
| Note: | Login UI is provided automatically when you enable DVT. Authentication is required for users to see and use the DVT. |
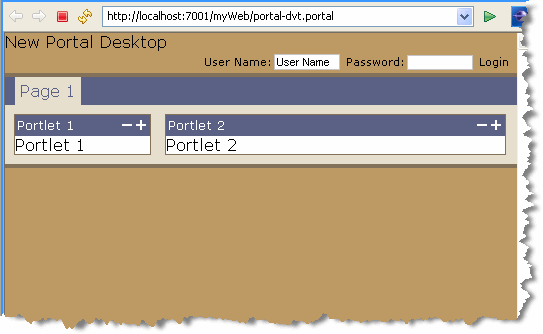
After you have created a .portal file with Dynamic Visitor Tools enabled you need to use the Portal Administration Console to create a streaming desktop using the .portal file as a template and perform some additional configuration. You can then open the desktop and test the Dynamic Visitor Tools. (For information on streaming desktops, see the WebLogic Portal Development Guide.)
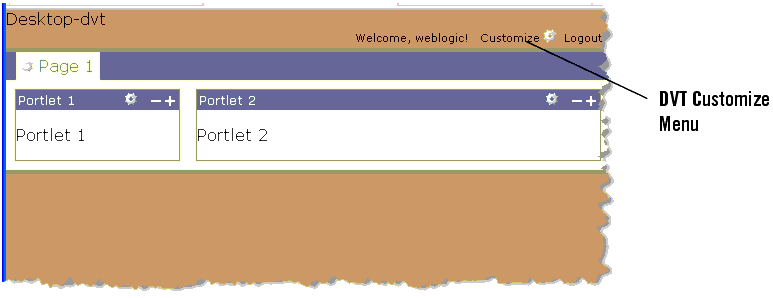
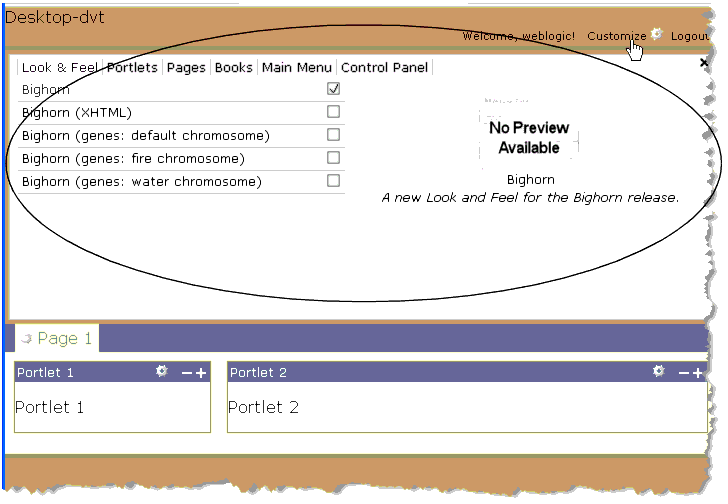
.portal file you enabled for DVT in Workshop for WebLogic, as explained in Configuring Dynamic Visitor Tools in Workshop for WebLogic. The DVT customization dialog provides the following features, by default.
| Tip: | These features are a subset of features that are available to administrators using the Administration Console; however, when a user modifies a desktop using the DVT, those specific changes are saved and persist for that user only. |
| Note: | Neither the DVT sample nor developer additions are supported. |
You can modify the DVT JavaScript source files to customize the DVT sample if you wish. The source files are stored in a J2EE Shared Library. You can view the contents of this library in the Merged Projects view of Workshop for WebLogic. The DVT source is in the samples/dvt folder under the portal web application. To edit a file, you must first extract it from the shared library. In the Merged Projects view, click on any file in italics that you wish to modify. Right-click and select Copy to Project. This action creates a copy of the file in your web project, and this copy overrides the default version in the library module.
| Note: | This section describes a basic scenario where you edit a configuration file and redeploy an EAR. For information on more advanced redeployment options, see the WebLogic Server document Deploying Applications and Modules with weblogic.deployer. |
If you deploy a portal web application that includes the DVT sample application to a domain that lies outside of Workshop for WebLogic, you need to edit the domain’s config.xml file manually as explained in this section.
For example, suppose you use Workshop for WebLogic to create an EAR file and add to the EAR a portal web application with the DVT sample facet included. If you then export the EAR file from Workshop for WebLogic and deploy the EAR to a new portal domain, you will receive deployment errors. The application will not deploy unless you do the following:
DOMAIN_HOME/config/config.xml file. <WLPORTAL_HOME>. <library>
<name>wlp-sample-lookandfeel-web-lib#10.3.0@10.3.0</name>
<target>AdminServer</target>
<module-type>war</module-type>
<source-path>
WLPORTAL_HOME\samples\lib\j2ee-modules\wlp-sample-lookandfeel-web-lib.war
</source-path>
<security-dd-model>DDOnly</security-dd-model>
</library>
<library>
<name>wlp-sample-dvt-web-lib#10.3.0@10.3.0</name>
<target>AdminServer</target>
<module-type>war</module-type>
<source-path>
WLPORTAL_HOME\samples\lib\j2ee-modules\wlp-sample-dvt-web-lib.war
</source-path>
<security-dd-model>DDOnly</security-dd-model>
</library>


|