Flat files, such as spreadsheets, offer a highly adaptable means of storing and manipulating data, especially data that needs to be quickly changed. Flat files are simply treated as another data source that ALDSP can use to generate metadata and create a data service.
Objectives
After completing this lesson, you will be able to:
Create a data service that can access data stored in a flat file.
Associate the flat file data service with a logical data service.
Overview
Flat files, such as spreadsheets, often support a text format called CSV or Comma Separated Values. Such file formats typically have a .csv extension.
34.1 Importing Flat File Metadata
The flat file must be in a ALDSP project, before a data service can be generated. As part of the import process, you must provide a schema name, a file name, or both.
Objectives
In this exercise, you will:
Create a data service that queries data stored in a flat file. The flat file contains customer valuation data received from an internal department that deals with customer scoring and valuation models. The file contains the following fields:
Customer_id
Valuation_date
Valuation_score
Instructions
Right-click the DataServices folder and import the FlatFiles folder, which is located in <beahome>\weblogic81\samples\LiquidData\EvalGuide.
Import source metadata by completing the following steps:
Right-click the FlatFiles folder and select Import Source Metadata.
Select Delimited Data from the Data Source Type drop-down list, then click Next.
Ignore the Schema field.
Click Browse, next to the Delimited Source field.
Select Valuation.csv and click Select.
Confirm that the Has Header checkbox is enabled.
By selecting this option, you specify that the header data, which is usually located in the first row of the spreadsheet, will not be treated as data within the generated data service.
Confirm that the Delimited radio button is enabled. By enabling this option, you specify that the data is separated by a specific character, rather than a fixed width such as 10 spaces.
Confirm that a comma (,) is in the Delimiter field. If data is delimited, then you must specify what character is used to delimit the data. Although the default is a comma, any ASCII character is supported.
Click Next. The Summary dialog box opens.
Click Finish. A new data service called Valuation.ds is created in the DataServices\FlatFiles.
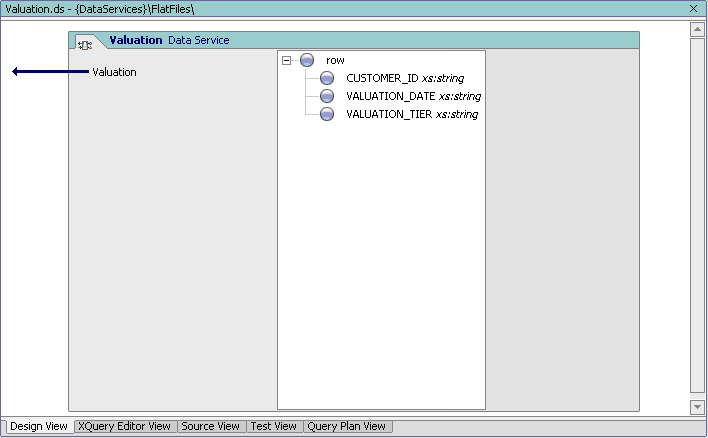
Open the Valuation.ds file in Design View.
Open Valuation.ds in Design View and confirm that there is a Valuation function. This function will retrieve all data from the flat file.
Figure 34-1 Design View of the Data Service Based on a Flat File
34.2 Testing Your Flat File Data Service
After creating the data service, you need to confirm that the service is able to return data, based on the associated delimited source file.
Objectives
In this exercise, you will:
Build the DataService project.
Execute the Valuation function.
Instructions
Right-click the DataServices folder.
Choose Build DataServices.
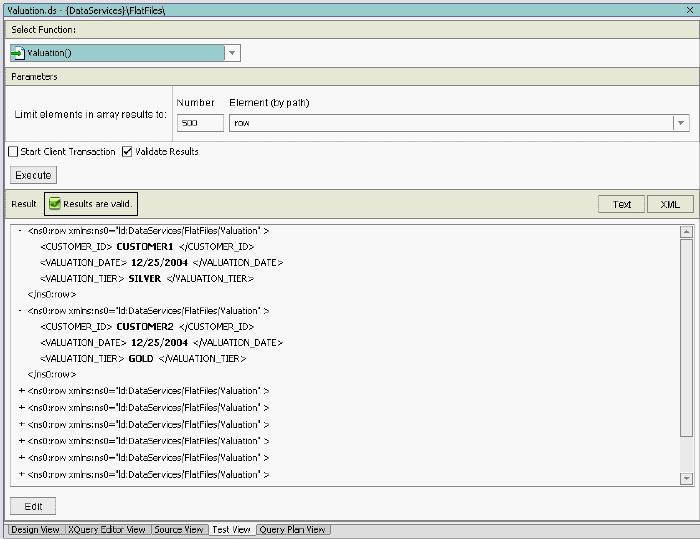
Open Valuation.ds in Test View.
Test the data service by completing the following steps:
Select Valuation() from the Function drop-down list.
Click Execute.
Confirm that you can retrieve data, as displayed in Figure 34-2. Notice that the return element is introspected. That is based on the header information in the Valuation.csv file.
Figure 34-2 Test Results—Flat File Data Service
34.3 Integrating Flat File Valuation with a Logical Data Service
At this point, you are able to pull data from the flat file. However, integrating the flat file data service into a logical data service lets you retrieve multiple sources of information.
Objectives
In this exercise, you will:
Modify a function to retrieve data from a flat file physical data service.
View the results in both XQuery Editor View and Source View.
Instructions
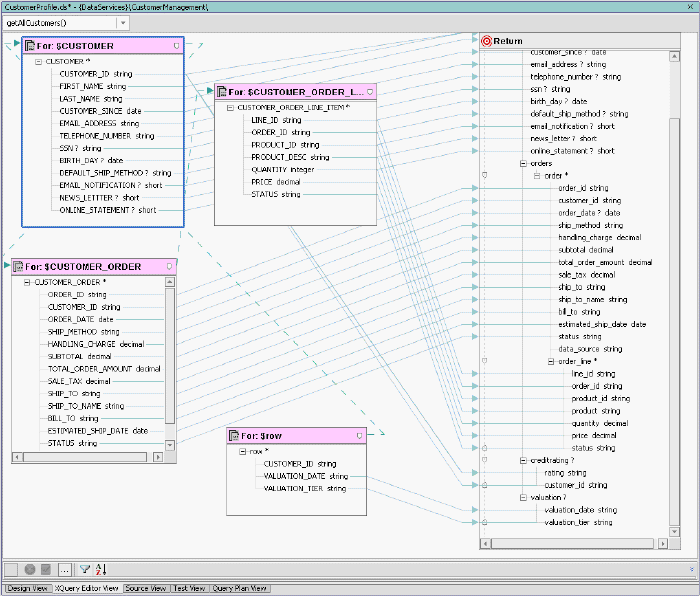
Open CustomerProfile.ds under DataServices/CustomerManagement/CustomerProfile in XQuery Editor View.
Select getAllCustomers() from the Function drop-down list.
In the Data Services Palette, expand the FlatFiles and Valuation.ds folders.
Drag and drop Valuation() into XQuery Editor View.
Create a simple mapping by dragging and dropping the VALUATION_DATE and VALUATION_TIER elements (valuation node) onto the corresponding elements in the Return type.
Create a join. Drag and drop the CUSTOMER_ID element (Customer node) onto the corresponding element in the Valuation node. The final layout should be similar to that shown in Figure 34-3:
Figure 34-3 XQuery Editor View of Flat File Data Service Integrated with Logical Data Service
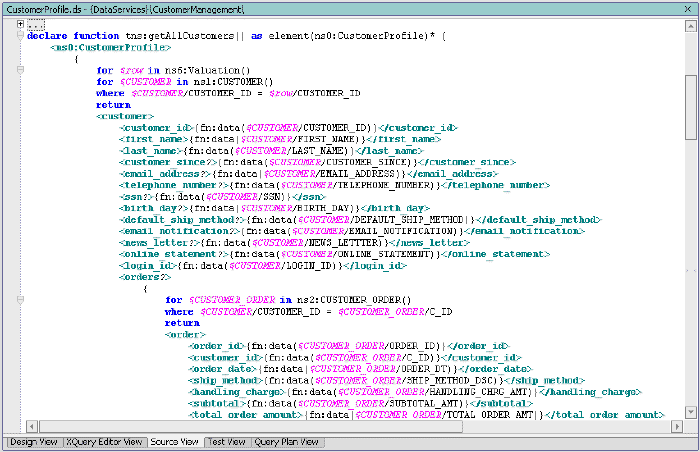
Open CustomerProfile.ds in Source View and confirm that the following mapping have been created:
Figure 34-4 Source View of Flat File Data Service Integrated with Logical Data Service
34.4 Testing an Integrated Flat File Data Service
Testing the function lets you confirm that the data is correctly retrieved.
Objectives
In this exercise, you will:
Test the getAllCustomers function.
View the results.
Instructions
Open CustomerProfile.ds in Test View.
Select getAllCustomers() from the Function drop-down list.
Click Execute.
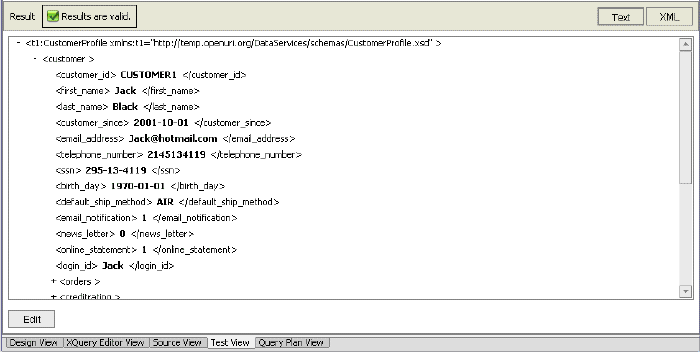
Confirm that you can retrieve valuation information.
Figure 34-5 Test View of Integrated Flat File Data Service
(Optional) Use the getCustomerProfile function, enter CUSTOMER3 in the Parameter field, and click Execute.
Note:
Ensure that the user has access to run the getCustomerProfile function by checking the security settings in the ALDSP Console.
Lesson Summary
In this lesson, you learned how to:
Import a CSV file containing valuation information.
Create a flat file physical data service.
Integrate the flat file physical data service with a logical data service.