|
|
The following sections describe how to install BEA SALT using graphical user interface (GUI) mode installation on both Windows and UNIX systems:
GUI- mode installation is a graphics-based method for executing the BEA SALT installation program. It can run on both Windows and UNIX systems.
To run GUI-mode installation, the computer console on which you are installing the software must support a Java-based GUI. All Windows system consoles support Java-based GUIs, but not all UNIX system consoles do.
| Note: | To install BEA SALT on a non-graphical UNIX system console, see BEA SALT Console-Mode Installation. |
Perform the following steps to install the BEA SALT software on Windows or on UNIX in graphics mode:
 Run. The Run dialog appears.
salt20_tux91_32_win2k3_x86.exe$ su -
Password:
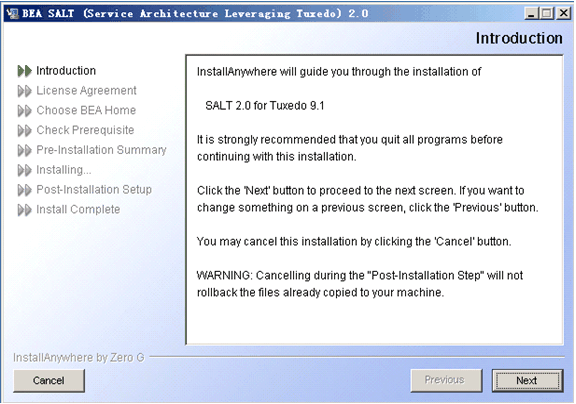
/tmp > sh salt20_tux91_32_hpux_1123_pa.binThe Introduction screen (see Figure 2-1) appears.
You can select from the following options:
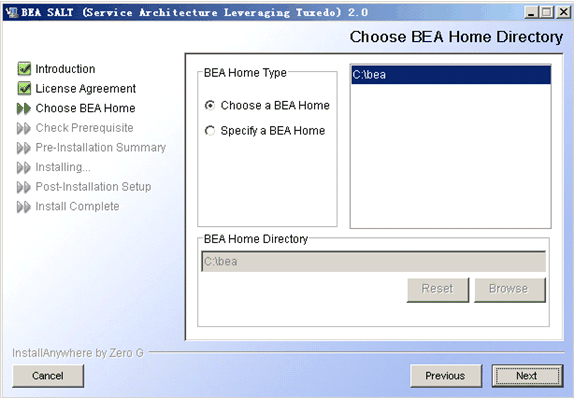
Click the Choose a BEA Home option button if you already have one or more BEA Home directories on your system. Select a BEA Home directory from the list displayed to the right of the option buttons.
All valid BEA Home directories are displayed in this list. Valid BEA Home directories are directories where BEA products have been installed using the standard installation program.
Click the Specify a BEA Home button to select an existing directory.
Click Next to accept this BEA Home Directory and Tuxedo sub-directory as the location to install BEA SALT and proceed with the installation.
Click Previous to go back and select/specify another BEA Home Directory.
Click Cancel to terminate the installation process.
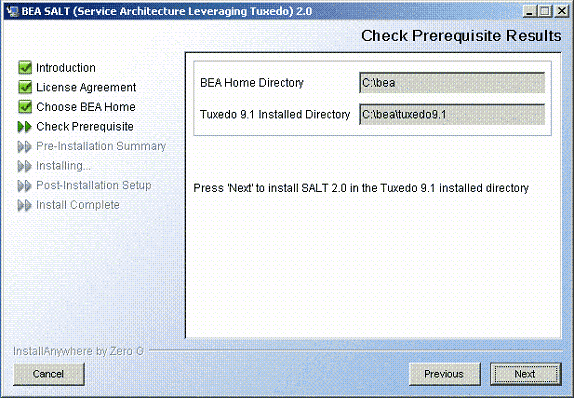
| Note: | BEA SALT installation will report an error and will not proceed in the event of the following: |
registry.xml not found in the given BEA Home Directoryregistry.xml.You can select from the following options:
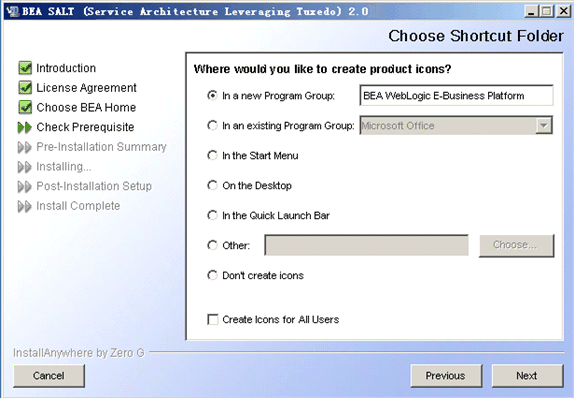
If you select an existing Program Group, use the drop down to select the Program Group where you want to install the shortcut icons.
If you select Other, you should click Choose to browse to another location where you want to install the shortcut icons
| Note: | If “In a new Program Group”, “In the Start Menu”, or “On the Desktop” buttons are selected, the “Create Icons for All Users” check box becomes active. |
| Note: | If the box is checked, shortcut icons are created for all users who log on to the computer. If the box is not checked, shortcut icons are created for the current logged-on user only. |
Click Next to accept the selected option as the location to install BEA SALT shortcuts and proceed with the installation. Click Cancel to terminate the installation process.
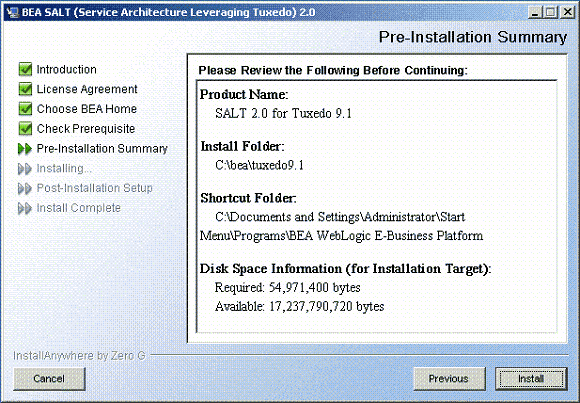
Review the summary information and click Install if the information is correct.
Click Previous to go back and modify any input that you want to change.
Click Cancel to terminate the installation process. This is the last chance you have to cancel your installation without copying any files on your target machine.


|