Installation Guide
|
|
|
Get Adobe Reader |
Installing BEA Tuxedo Mainframe Adapter for TCP Gateway
The installation procedure for BEA Tuxedo Mainframe Adapter for TCP Gateway is slightly different for each platform on which the product can be installed. Follow the directions for the appropriate platform. The following information assists you in successfully installing this product:
- Preparing to Install
- Installing TMA TCP Gateway
- Installing on UNIX Platforms in Console Mode
- Installing on Windows or UNIX Platforms in Graphics Mode
- Uninstalling Tuxedo Mainframe Adapter for TCP Gateway
- Distribution Libraries and Executables
Note: To upgrade from previous releases of eLink for Mainframe TCP, refer to BEA Tuxedo Mainframe Adapter for TCP Release Notes.
Preparing to Install
The TMA TCP Gateway product runs on UNIX-based and Windows 2000 platforms. Complete the following tasks prior to installing the TMA TCP Gateway software:
- Review the platform support and software requirements sections of the BEA Tuxedo Mainframe Adapter for TCP Release Notes and make sure that the computer upon which you are installing satisfies the listed requirements.
- Install and verify the operation of one of the following:
- Verify the installation of one of the following:
- Java Software Development Kit (JDK), Standard Edition, v 1.3.0
- Java Runtime Environment (JRE), International Version, v 1.3.0
A JDK is required by the InstallAnywhere installation product to install Tuxedo Mainframe Adapter for TCP. A JDK is installed with Tuxedo 8.1. Verify that the system PATH environment variable is set to the correct version of the JDK. If the JDK version displayed is lower than the required version, you will need to configure your
PATHenvironment variable to use the required JDK that is installed with Tuxedo 8.1.- Install and verify the TCP/IP stack software
Installing TMA TCP Gateway
The TMA TCP Gateway product runs on Unix-based platforms and Windows 2000. Refer to the appropriate platform sections for installation instructions.
Installing on UNIX Platforms in Console Mode
Perform the following steps to install the Tuxedo Mainframe Adapter for TCP Gateway software in console mode on a certified UNIX platform:
- Mount the CD-ROM. Mount commands vary depending on your system configuration. Refer to your System Administrator for the specific command for your system. Use a command similar to the following command to mount the CD-ROM on any UNIX system, except HP-UX.
If you are installing on an HP-UX system, use a command similar to the following command:
# mount -r -F cdfs -o cdcase /dev/cdrom/c1b0t010 /mnt- Execute the installation program in character-based mode by selecting the appropriate file for your platform from the listed files. For example, for the AIX platform, select:
- The installation program runs and prompts you for responses (see Listing 1-1 for an example).
$ su -
Password:
# ls -l /dev/cdrom
total 0
brw-rw-rw- 1 root sys 22, 0 July 1 10:55 c1b0t010
# mount -r -F cdfs /dev/cdrom/c1b0t0l0 /mnt
# cd /mnt
# ls
tmatcp81_Aix.bin
tmatcp81_Win.exe
tmatcp81_Hp.bin
tmatcp81_Sol8.bin
# sh tmatcp81_Aix.bin -i console
Listing 1-1 UNIX Console Mode Installation Example
Preparing to install...
Preparing CONSOLE Mode Installation...

================================================================
BEA Tuxedo Mainframe Adapter TCP 8.1(created with InstallAnywhere by Zero G)
----------------------------------------------------------------


================================================================
Introduction
------------

This installer will guide you through the installation of 'Tuxedo Mainframe Adapter for TCP'. On each step, answer the questions provided.  Type "quit" at any time to exit the installer.

PRESS <ENTER> TO CONTINUE: <ENTER>

================================================================

License Agreement

-----------------

Please read before installing:

BEA Tuxedo Mainframe Adapter for TCP 8.1 Software License

The Tuxedo Mainframe Adapter for TCP 8.1 Software and accompanying documentation (respectively "Software" and "Documentation")...
                              .
                              .
                              .
BEA reserves all rights not expressly granted to you.

General Terms

Term. This License will become effective on the date you acquire the Software and will remain in force until terminated. You may terminate this License at any time by destroying the Documentation and Software together with all copies and adaptations. This License shall also automatically terminate if you breach any of the terms or conditions. You agree to destroy the original and all copies of the Software and Documentation, or to return them to BEA upon termination of this License.

Governing Law. Except as otherwise restricted by law, this License shall be

PRESS <ENTER> TO CONTINUE: <ENTER>

governed by, and interpreted in accordance with, the laws of the State of California of the United States of America, without regard...
                              .
                              .
                              .
Severability. If any provision in this License is invalid or unenforceable,

PRESS <ENTER> TO CONTINUE: <ENTER>
that provision shall be construed, limited, modified or, if necessary, severed, to the extent necessary, to eliminate its invalidity or unenforceability, and the other provisions of this License shall remain unaffected.
...
                              .
                              .
                              .
BEA is a registered trademark of BEA Systems, Inc.
BEA Tuxedo is a registered trademark of BEA Systems, Inc. in the US and other countries
Copyright 2003, BEA Systems, Inc. All Rights Reserved.


DO YOU AGREE WITH THE TERMS OF THE LICENSE? (Y/N): Y


================================================================
Choose BEA Home Directory
-------------------------


    1- Create a New BEA Home

    2- Use Existing BEA Home

Enter a number:     1

Specify a new BEA Home: /usr/bea


=================================================================

Installing...

-------------

 [===============|===============|===============|==============]

 [--------------|---------------|---------------|---------------]

=================================================================...
                              .
                              .
                              .

=================================================================
License Selection Option
------------------------
1- Copy License File Now
2- Copy License File Later
Enter a number: 1
Specify a Path to your License File:

...
                              .
                              .
                              .

Install Complete

----------------

Congratulations. 'Tuxedo Mainframe Adapter for TCP' has been successfully installed to:

   /usr/bea/tuxedo8.1

PRESS <ENTER> TO EXIT THE INSTALLER: <ENTER>
Installing on Windows or UNIX Platforms in Graphics Mode
Perform the following steps to install the Tuxedo Mainframe Adapter for TCP Gateway software on a Windows platform or on a UNIX platform in Graphics Mode:
-
When installing on a Windows platform, Install Anywhere should start automatically when you load the CD. Proceed to Step 3.
The following files should be located in root:
tmatcp81_Aix.bintmatcp81_Hp.bintmatcp81_Win.exetmatcp81_Sol8.bin- Install Anywhere runs and the Introduction screen (Figure 1-1) is displayed.
- Mount the CD-ROM. Mount commands vary depending on your system configuration. Refer to your System Administrator for the specific command for your system. Use a command similar to the following command to mount the CD-ROM on any UNIX system, except HP-UX.
If you are installing on an HP-UX system, use a command similar to the following command:
> mount -r -F cdfs -o cdcase /dev/cdrom/c1b0t010 /mntThe following files should be located in root:
tmatcp81_Aix.bintmatcp81_Hp.bintmatcp81_Win.exetmatcp81_Sol8.binThe Introduction screen (see Figure 1-1) is displayed.
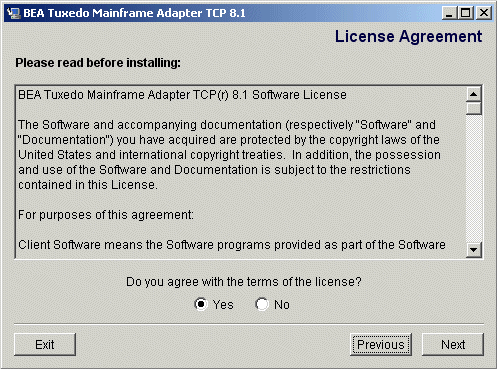
- Click Next to continue with the installation. The License Agreement screen is displayed (Figure 1-2).
- Click the Yes option button to accept the license agreement; then click Next to proceed with the installation. The Choose Install Set screen is displayed. This screen appears in Windows installations only.
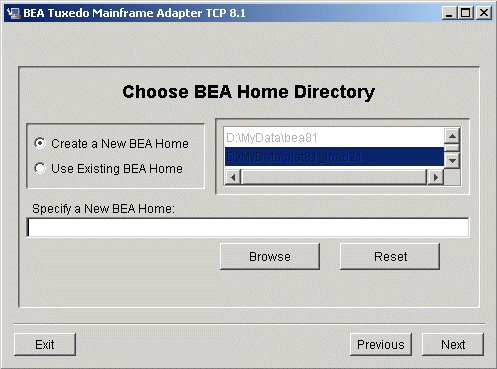
- Click Next to proceed with the installation. The Choose BEA Home Directory screen is displayed (see Figure 1-3).
- Create or select a BEA Home directory (the default for Windows is
c:\bea; the default for UNIX is$HOME/bea). The BEA Home directory is the root directory in which you install all BEA products. - Accept the default location for your BEA Home directory or click Browse to specify a different location. If you accept the default location, it will be your BEA Home directory and your Tuxedo Mainframe Adapter for TCP Gateway software will install in the corresponding Tuxedo directory. If you do not want to install Tuxedo Mainframe Adapter for TCP Gateway in this default location, you will have the opportunity, in Step 7, to choose another directory in which to install the software.
If you already have one or more BEA Home directories on your system, you can use one of those directories as follows:
- If the installation program encounters a previous version of Tuxedo Mainframe Adapter for TCP in the selected BEA Home directory, the Previous Installation Found message box displays (Figure 1-4).
- Click Continue to install over the previous version.
- Click Cancel to return to the Choose BEA Home Directory Screen and select another directory.
- Click Exit to exit the installation program.
- If you do not have a successful installation of Tuxedo 8.1 in the BEA Home directory, the Tuxedo 8.1 Not Installed message box displays (Figure 1-5).
- Click Exit to exit the installation program.
- Click Previous to return to the Choose BEA Home Directory Screen and select another directory.
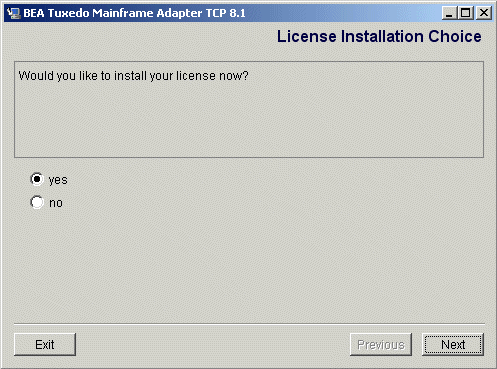
- If the installation process continues, the License Installation Choice screen displays. To install the license now, select yes. To install the license later, select no.
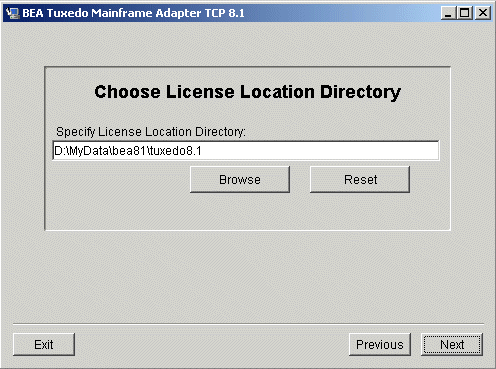
- If you select yes, the Choose License Location Directory screen will display. Type in the directory where the license is located or click on Browse to select a directory. Click Next to complete the installation process.
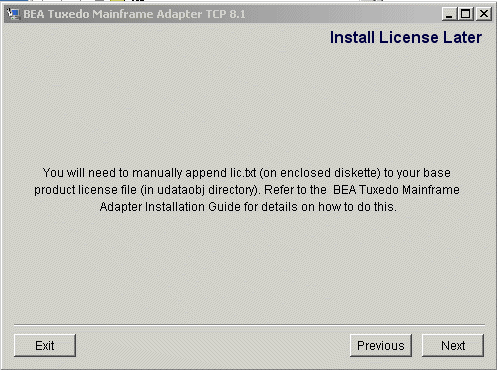
- If you click No, the Install License Later screen will display. Click Next to complete the Installation process.
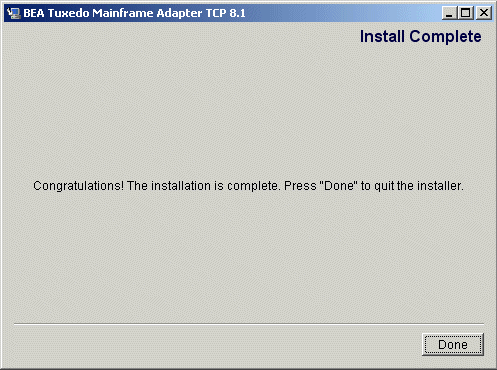
- Upon installation completion, the Install Complete screen is displayed (Figure 1-9). Click Done to exit the installation program.
$ su -
Password:
> ls -l /dev/cdrom
total 0
brw-rw-rw- 1 root sys 22, 0 July 1 10:55 c1b0t010
> mount -r -F cdfs /dev/cdrom/c1b0t0l0 /mnt
> cd /mnt/
/mnt> sh tmatcp81_<platform>.bin
Figure 1-1 Introduction Screen
Figure 1-2 License Agreement Screen
Note: If you click the No option button, you will not be able to continue with the installation. You must either exit the installation or go back to the Introduction screen.
Figure 1-3 Choose BEA Home Directory Screen
Figure 1-4 Previous Installation Found Message Box
Figure 1-5 Tuxedo 8.1 Not Installed Message Box
Figure 1-6 License Installation Choice Screen
Figure 1-7 Choose License Location Directory Screen
Figure 1-9 Install Complete Screen
Uninstalling Tuxedo Mainframe Adapter for TCP Gateway
This section provides instructions for uninstalling the Tuxedo Mainframe Adapter for TCP Gateway component. The following topics are discussed:
Uninstalling on UNIX Platforms in Console Mode
To uninstall Tuxedo Mainframe Adapter for TCP Gateway on a UNIX platform:
Listing 1-2 displays a Tuxedo Mainframe Adapter for TCP Gateway component uninstallation.
Note: The single-dash bar just beneath the double-dash bar in Listing 1-2 is a progress indicator. When the single-dash bar becomes the same length as the double-dash bar, uninstallation is complete.
> cd <bea/home>/tuxedo8.1/uninstaller_TMATCP
<bea/home> sh UninstallTMATCP -i console
Listing 1-2 UNIX Uninstallation Example
Preparing CONSOLE Uninstall...
=================================================================
BEA Tuxedo Mainframe Adapter TCP (InstallAnywhere Uninstaller by Zero G)
-----------------------------------------------------------------
About to uninstall...
BEA Tuxedo Mainframe Adapter TCP
This will completely remove all components installed by InstallAnywhere. It will not remove files and folders created after the installation.
PRESS <ENTER> TO BEGIN THE UNINSTALL, OR 'QUIT' TO EXIT THE UNINSTALLER: <ENTER>
=================================================================
Uninstall...
------------
[==================|==================|==================|======]
[------------------|------------------|------------------|------]
================================================================
Uninstall Complete
------------------
All items were successfully uninstalled.
PRESS <ENTER> TO EXIT THE UNINSTALLER: <ENTER>
Uninstalling on Windows Platforms
Perform the following steps to uninstall the Tuxedo Mainframe Adapter for TCP Gateway software on a Windows platform:
- Choose Start
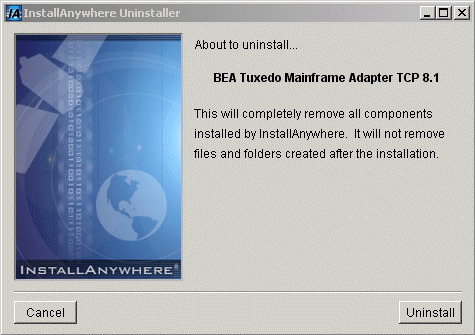
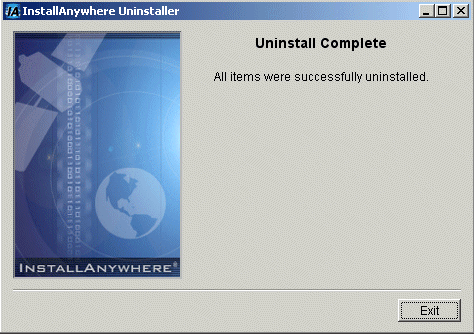
—> Programs—> BEA WebLogic E-Business Platform—> Tuxedo Mainframe Adapter for TCP 8.1—> Uninstall BEA Tuxedo Mainframe Adapter for TCP from the Start menu. The Tuxedo Mainframe Adapter for TCP Uninstaller screen is displayed (Figure 1-10). - Click Uninstall to start uninstalling TMA TCP. When the process is complete, the screen shown in Figure 1-11 is displayed.
Figure 1-10 Tuxedo Mainframe Adapter for TCP Uninstaller Screen
Figure 1-11 Tuxedo Mainframe Adapter for TCP Uninstallation Complete Screen
Distribution Libraries and Executables
The Tuxedo Mainframe Adapter for TCP CD-ROM contains the following libraries and executable programs. After installing the TMA TCP software, verify that these libraries and programs are installed on your system.
HP-UX 11.00
Verify that the following files are installed by TMA TCP Gateway.
|
|
Solaris 8
Verify that the following files are installed by TMA TCP Gateway.
|
|
|
|
|
AIX
Verify that the following files are installed by TMA TCP Gateway.
|
|
|
|
|
Windows 2000
Verify that the following files are installed by TMA TCP Gateway.

