

|

|
|
|
|
Setting Up Your Environment
Before you can build your BEA Tuxedo ATMI application in an IDE, you must set the following fundamental parameters in your environment:
To provide this information, access the BuildTuxedo project_name dialog box in the msdev GUI.
Specifying the Build Type, Header File, and Filename
To specify the build type, header file, and filename:
Build Page

Note: Windows 98 users can select only Workstation Client type.
The Initialization and Cleanup options allow you to override the default init/exit functions by specifying valid function names. The Entry Point option allows you to specify the name of the function generated by BuildTuxedo. After specifying its name, you can call the function from anywhere in the application.
How BuildTuxedo Uses the Header File
In the header file, BuildTuxedo adds the necessary pragma statements to build the current BEA Tuxedo ATMI project correctly. BuildTuxedo opens the file specified in the Header File field of the Build page, if the file is present; otherwise, it creates a new one. A section starting with:
//Begin Tuxedo Section*****DO NOT EDIT*****
and ending with:
//End Tuxedo Section
designates the area in the header file in which pragma statements are written. This area is maintained by BuildTuxedo. If BuildTuxedo does not locate this section in the file, it appends it to the end of the header file. Because all other text within the file remains unchanged, you can specify stdafx.h as the header file.
Note: If your project is new, and you select OK or Apply, you must select Files into Project from the MSDEV Insert menu. You then add the file generated by BuildTuxedo to the current project. You need to do this only for a new project or when you change the name of the C/C++ output file.
Specifying Function and Service Names
Select the Services tab to specify function and service names. The following figure shows the Services page.
Services Page
Two lists are used to maintain the service dispatch table:
Note: To scroll up and down either list, use the arrow keys.
Generally, the service and the function that performs the service are represented by the same name. For example, function x performs service x. In some cases, the function may have a different name from the service it performs. For example, in one case, function abc performs services x, y, and z. In another case, the service name may not be known until run time.
You must specify any function associated with a service when you build the server. For any function associated with a service, you must specify the service, the appropriate prototype, a C linkage, a void return, and a single TPSVCINFO pointer parameter. To specify a function to which a service name can be mapped, you must add the function to the Function Name list. This information is required for the service dispatch table.
Note: If you are using the buildserver(1) command, you can provide this information with the -s option. For more information about the -s option, see Programming BEA Tuxedo ATMI Applications Using C or Programming BEA Tuxedo ATMI Applications Using COBOL.
To add or edit names on the Function Names list:
|
To |
Action |
|---|---|
|
Add an item |
|
|
Modify an existing name |
Highlight the name, and type over it. |
|
Delete a name |
Highlight the name on the list and click the X icon or click Delete. |
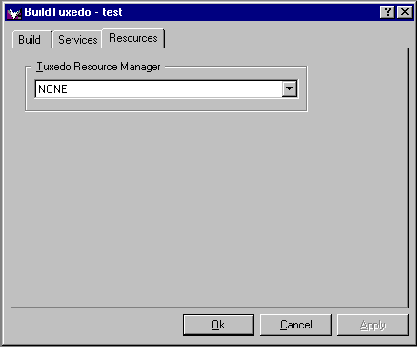
Specifying a Resource Manager
To specify a resource manager:
Resources Page
 \
\
Note: The Tuxedo Resource Manager field contains a list of BEA Tuxedo resource managers available on the system, as defined in the %TUXDIR%\udataobj\RM file. If the file is not present, a default (NONE) is displayed.

|

|

|
|
|
|
Copyright © 2001 BEA Systems, Inc. All rights reserved.
|