


|

|
|
|
|
WebLogic Collaborate Enabler for RosettaNet Installation on UNIX Systems
The following sections describe BEA WebLogic Collaborate Enabler for RosettaNet installation procedures for a UNIX system:
Installing the Prerequisites
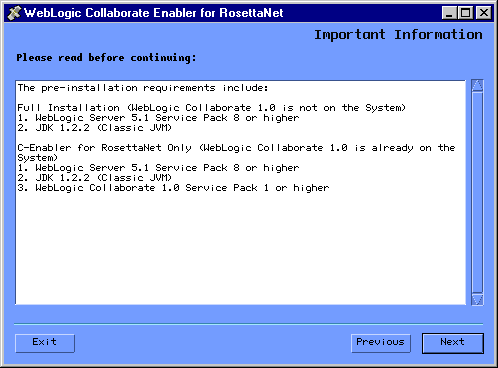
You can install WebLogic Collaborate Enabler for RosettaNet as either a Full Installation (if you do not have WebLogic Collaborate 1.0 installed on your system), or a C-Enabler for RosettaNet Only Installation (if you already have WebLogic Collaborate 1.0 installed on your system).
Before you install the WebLogic Collaborate Enabler for RosettaNet software, make sure you have the software and hardware prerequisites for your installation as described in the following sections:
C-Enabler for RosettaNet Only Installation
Installation prerequisites include:
Note: If you installed WebLogic Collaborate 1.0 with WebLogic Server 5.1 Service Pack 7, you must upgrade to WebLogic Server 5.1 Service Pack 8 (or higher). You must edit the setenv.cmd (or setenv.sh) file in the WebLogic Collaborate product directory to change occurrences of weblogic510sp7boot.jar and weblogic510sp7.jar to weblogic510sp8boot.jar and weblogic510sp8.jar, respectively.
Full Installation
Installation prerequisites include:
Note: See the Download area on the http://www.bea.com Web site for Service Packs.
Table 3-1 WebLogic Collaborate 1.0 Hardware and Software Requirements
Notes: 1. To avoid Java errors, modify PATH so that $JAVA_HOME/bin is first in your PATH:
2. Additional installation prerequisites include access to a CD reader (if you are installing WebLogic Collaborate Enabler for RosettaNet from the CD ROM distribution), a network connection, and a Web browser (Netscape Navigator 4.7 or above).
Table 3-2 Database Support
Note: To use an Oracle database, the following variables should be defined in the user you create for WebLogic Collaborate Enabler for RosettaNet. Contact your Oracle Database Administrator for more information.
ORACLE_HOME=directory_where_Oracle_is_installed
PATH=$PATH:$ORACLE_HOME/bin
LD_LIBRARY_PATH=$LD_LIBRARY_PATH:$ORACLE_HOME/lib
For more details about using the JDBC specification for database access, see http://www.weblogic.com/docs51/classdocs/jdbcdrivers.html.
Installing the WebLogic Collaborate Enabler for RosettaNet Software
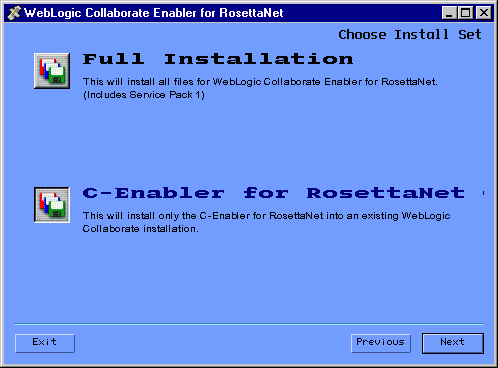
During the installation procedure you are prompted to choose the install set, that is, either the Full installation or the C-Enabler for RosettaNet Only installation. The WebLogic Collaborate Enabler for RosettaNet installation procedure installs the components as described in Table 3-3.
Table 3-3 The WebLogic Collaborate Enabler for RosettaNet Installation Package
The following sections describe how you can install the WebLogic Collaborate Enabler for RosettaNet software on UNIX systems:
Using the BEA Installation Program on Solaris Systems
You can install WebLogic Collaborate Enabler for RosettaNet on Solaris systems using either a graphical installation program or a text-based installation program. To use the text-based installation program, refer to Using the Console-Mode Installation on UNIX Systems.
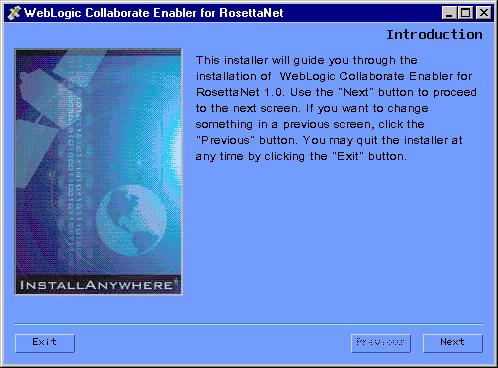
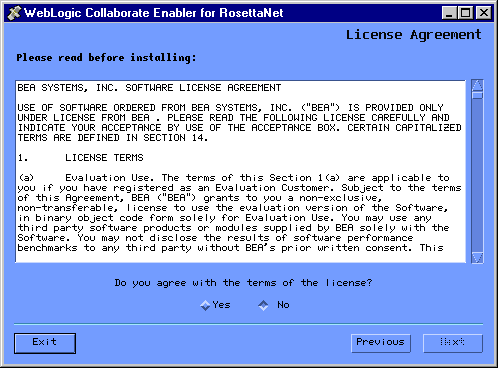
To install WebLogic Collaborate Enabler for RosettaNet on a Solaris system using the graphical installation program, complete the following procedure:
Consult your UNIX documentation for information about mounting and unmounting CDs.
Note: The Solaris Volume Management software automatically mounts CDs on /cdrom/cdrom0/. It is not necessary to unmount CDs on Solaris systems. However, to open the CD reader, you need to issue an eject command from the root directory.
Warning: The installation fails if $JAVA_HOME/bin is not in your PATH. If necessary, update your PATH as follows:
prompt> PATH=$JAVA_HOME/bin:$PATH
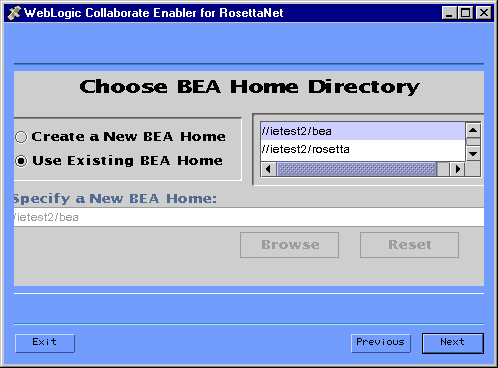
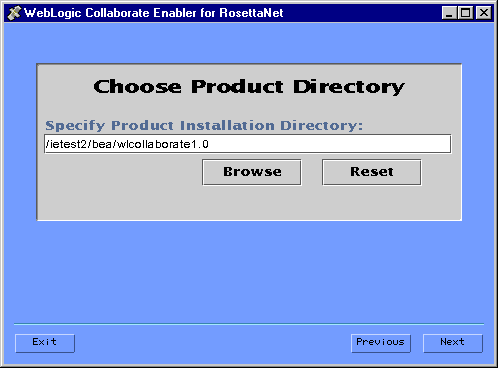
Note: When the product is installed, the bea home directory is created under $HOME. A beahomelist file which contains a list of known BEA home directories for the current user is created in the bea directory.
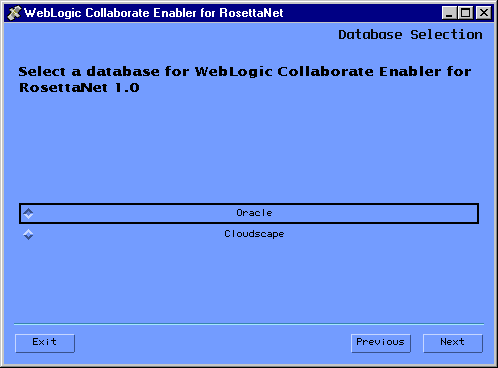
The next screen displayed in the installation process depends on the database you selected.
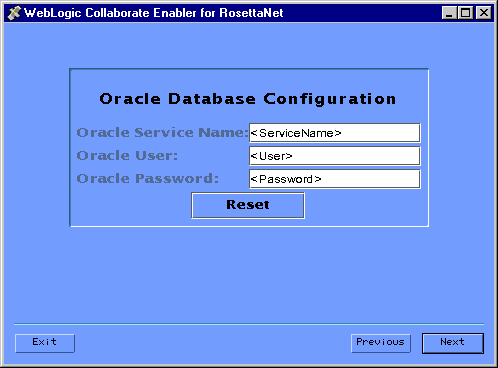
To configure the Oracle database, enter the Oracle Service name, user, and password in the appropriate fields and click Install.
When the installation begins, a screen showing the status of the installation process is displayed.
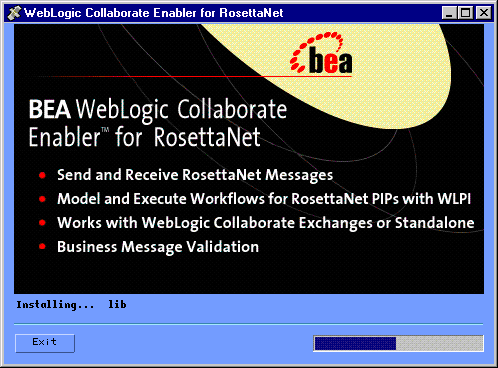
After you install all the WebLogic Collaborate Enabler for RosettaNet components, the Install Complete screen is displayed, indicating that the installation procedure is finished.
Using the Console-Mode Installation on UNIX Systems
Console-mode installation provides a method to install WebLogic Collaborate Enabler for RosettaNet using a text-based installation program that offers the same capabilities as the graphics-based installation program. You can install WebLogic Collaborate Enabler for RosettaNet on Solaris, HP-UX, and AIX operating systems using the console mode.
Consult your AIX, HP-UX, or Solaris documentation for information on mounting and unmounting CDs.
Note: The Solaris Volume Management software automatically mounts CDs on /cdrom/cdrom0/. It is not necessary to unmount CDs on Solaris systems. However, to open the CD reader, you need to issue an eject command from the root directory.
prompt> sh install.bin -i console
A series of prompts is displayed.
Warning: The installation fails if $JAVA_HOME/bin is not in your PATH. If necessary, update your PATH as follows:
prompt> PATH=$JAVA_HOME/bin:$PATH
Installing the Software License
If you download WebLogic Collaborate Enabler for RosettaNet from the BEA Web site, an evaluation license is included with the distribution.
If you purchase WebLogic Collaborate Enabler for RosettaNet on a CD, you will receive a license by email from BEA.
How you install the license file depends on which installation set you chose:
Full Installation
Copy the rosettanet_license.bea file into the <WLC_HOME>/license directory, and name the file license.bea
where
C-Enabler for RosettaNet Only Installation
The following procedure assumes that you have a license.bea file in your existing <WLC_HOME>/license directory (where <WLC_HOME> is the product directory where WebLogic Collaborate is installed on your system).
prompt> . ./setenv.sh
Note: You must run the setenv.sh script in a Bourne or Korn shell. If you use a csh, change to the Korn shell by typing ksh at your UNIX prompt.
prompt> cd license
prompt> . UpdateLicense.sh rosettanet_license.bea
where rosettanet_license.bea is the license you received for the WebLogic Collaborate Enabler for RosettaNet software.
Customizing the Run-Time Environment
The installation procedure configures some of your WebLogic Collaborate Enabler for RosettaNet system. Before you proceed to use the software, confirm the environment variables in the setenv.sh script as follows:
This environment variable should be set to the location of the Java 2 SDK 1.2.2 software on your machine, for example:
set JAVA_HOME=/usr/local/jdk1.2.2
This environment variable should be set to the location of the WebLogic Server 5.1 software on your machine, for example:
set WL_HOME=/usr/local/weblogic51
This environment variable should be set to the location of the WebLogic Collaborate Enabler for RosettaNet software on your machine, for example:
set WLC_HOME=/usr/local/bea/wlcollaborate1.0
Uninstalling the WebLogic Collaborate Enabler for RosettaNet Software
Your WebLogic Collaborate Enabler for RosettaNet product directory structure is dependent on how you installed the software, that is whether you chose the Full Installation (you did not have WebLogic Collaborate 1.0 installed on your system) or the C-Enabler for RosettaNet Only installation option (you already had WebLogic Collaborate 1.0 installed on your system). You can uninstall the product as follows:
Alternatively, you can invoke an uninstall script by opening a command window and executing the following command:
prompt> $WLC_HOME/UninstallerDataRosettaNet/uninstallrosettanet
The entire WebLogic Collaborate product directory and all its components are uninstalled from your system.
Alternatively, you can invoke an uninstall script by opening a command window and executing the following command:
prompt> $WLC_HOME/UninstallerDataRosettaNet/uninstallrosettanet
The rosettanet directory and all the WebLogic Collaborate Enabler for RosettaNet components are uninstalled from your system.

|

|
|
|
|
Copyright © 2001 BEA Systems, Inc. All rights reserved.
|