


|

|
|
|
|
WebLogic Collaborate Installation on UNIX Systems
The following sections describe WebLogic Collaborate installation procedures for a UNIX system:
Installation Prerequisites
Before you install the WebLogic Collaborate software, you must have the following software and hardware configuration for your machine:
Note: The Java 2 SDK software must be installed to run the WebLogic Collaborate sample applications, including the installation verification example. To avoid Java errors, modify PATH so that $JAVA_HOME/bin is first in your PATH:
prompt> PATH=$JAVA_HOME/bin:$PATH
Note: The 256 MB RAM recommendation is for one instance of WebLogic Server, where the c-hub and c-enabler are colocated. You may need more memory if you run two instances of WebLogic Server.
WebLogic Collaborate is supported on platforms that are certified and approved for WebLogic Server 5.1. For details about WebLogic Server 5.1 platforms, refer to http://www.weblogic.com/platforms/index.html.
BEA ships the Cloudscape software—a pure-Java relational database management system (RDBMS)—with WebLogic Server. If you installed WebLogic Server before October 1 2000, you should update your Cloudscape database with the 3.5.0 version. You can download Cloudscape 3.5.0 from the WebLogic Server 5.1.0 Service Packs section at the following URL:
http://commerce.bea.com/downloads/weblogic_server.jsp#wlssp.
The Oracle 8.1.5 client libraries must be installed on the machine running WebLogic Server 5.1. You must also have access to an Oracle 8.1.5 or 8.1.6 server. WebLogic Collaborate uses the WebLogic jDriver for Oracle, which is included with your WebLogic Server software.
For more information about configuring Oracle with WebLogic Server, see http://www.weblogic.com/docs51/install/install_jdbc.html.
Note: The following variables should be defined in the user you create for WebLogic Collaborate, to use an Oracle Database. Contact your Oracle Database Administrator for more information.
ORACLE_HOME=directory_where_Oracle_is_installed
PATH=$PATH:$ORACLE_HOME/bin
LD_LIBRARY_PATH=$LD_LIBRARY_PATH:$ORACLE_HOME/lib
For more details about using the JDBC specification for database access, see http://www.weblogic.com/docs51/classdocs/jdbcdrivers.html.
Installing the BEA WebLogic Collaborate Software Package
The WebLogic Collaborate installation procedure installs the following components:
The following sections describe how you can install the WebLogic Collaborate software on UNIX systems.
On Solaris:
On all UNIX platforms:
Using the BEA Installation Program on Solaris Systems
You can install WebLogic Collaborate on Solaris systems using either a graphical installation program or a text-based installation program. To install WebLogic Collaborate using a text-based installation program, refer to Using the Console-Mode Installation on UNIX Systems.
To install WebLogic Collaborate on a Solaris system using the graphical installation program, complete the following procedure:
Consult your UNIX documentation for information about mounting and unmounting CDs.
Note: The Solaris Volume Management software automatically mounts CDs on /cdrom/cdrom0/. It is not necessary to unmount CDs on Solaris systems. However, to open the CD reader, you need to issue an eject command from the root directory.
Warning: The installation fails if $JAVA_HOME/bin is not in your PATH. If necessary, update your PATH as follows:
prompt> PATH=$JAVA_HOME/bin:$PATH
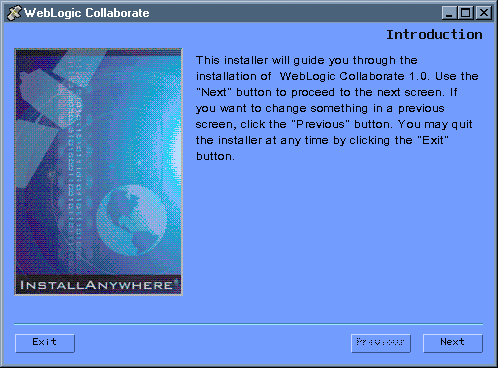
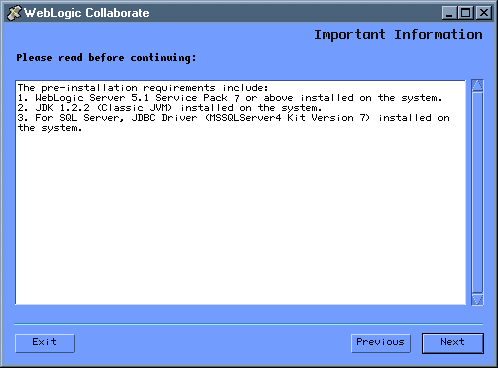
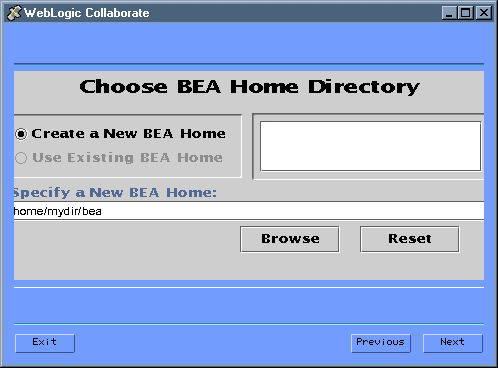
Note: When the product is installed, the bea home directory is created under $HOME. A beahomelist file which contains a list of known BEA home directories for the current user is created in the bea directory. 
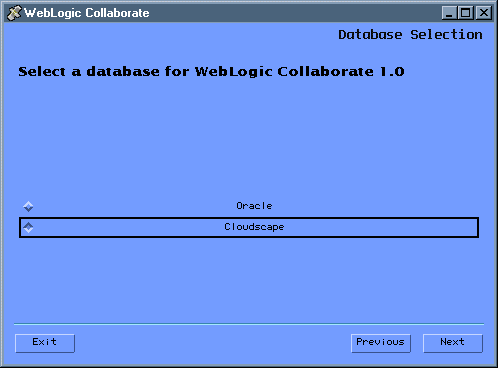
The next screen displayed in the installation process depends on the database you selected.
Cloudscape is the default database. It is a pure-Java relational database management system that BEA ships with WebLogic Server and requires no database configuration to use.
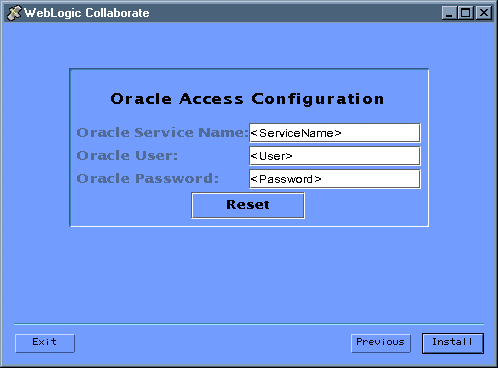
To configure the Oracle database, enter the Oracle Service name, user, and password in the appropriate fields and click Install. When the installation begins, a screen showing the status of the installation process is displayed. 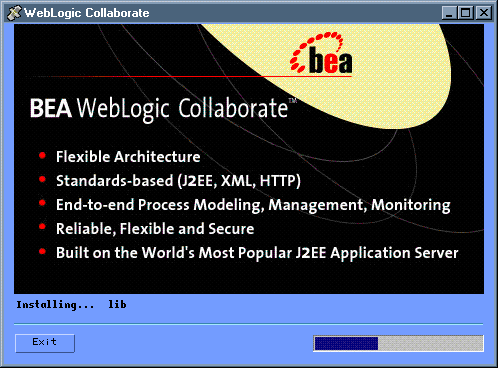
After you install all the WebLogic Collaborate components, the Install Complete screen is displayed, indicating that the installation procedure is finished. 
Copy the license file into the following directory:
$WLC_HOME/license
Your license file is in the downloaded distribution if you downloaded the product from the BEA Web site, or is sent to you by email if you purchased the software on a CD.
Using the Console-Mode Installation on UNIX Systems
Console-mode installation provides a method to install WebLogic Collaborate using a text-based installation program that offers the same capabilities as the graphics-based installation program. You can install WebLogic Collaborate on Solaris, HP-UX, and AIX operating systems using the console mode.
Consult your AIX, HP-UX, or Solaris documentation for information on mounting and unmounting CDs.
Note: The Solaris Volume Management software automatically mounts CDs on /cdrom/cdrom0/. It is not necessary to unmount CDs on Solaris systems. However, to open the CD reader, you need to issue an eject command from the root directory.
prompt> sh install.bin -i console
A series of prompts is displayed.
Warning: The installation fails if $JAVA_HOME/bin is not in your PATH. If necessary, update your PATH as follows:
prompt> PATH=$JAVA_HOME/bin:$PATH
$WLC_HOME/license
Your license file is in the downloaded distribution if you downloaded the product from the BEA Web site, or is sent to you by email if you purchased the software on a CD.
Customizing the Run-Time Environment
The installation procedure configures some of your WebLogic Collaborate system. You should confirm the system configuration before you run the Installation Verifier example (see Verifying the Software Installation). The following sections describe the system configurations you should set or confirm:
Environment Variables
You must set the environment variables in the setenv.sh and createDB.sh files by completing the following procedure:
This environment variable should be set to the location of the Java 2 SDK 1.2.2 software on your machine, for example:
set JAVA_HOME=/usr/local/jdk1.2.2
This environment variable should be set to the location of the WebLogic Server 5.1 software on your machine, for example:
set WL_HOME=/usr/local/weblogic51
This environment variable should be set to the location of the WebLogic Collaborate software on your machine, for example:
set WLC_HOME=/usr/local/bea/wlcollaborate1.0
If necessary, substitute the environment variables at the beginning of the file (<ORACLE_USER>, <ORACLE_PASSWORD>, and <ORACLE_SERVICENAME>) with the user ID, password, and ORACLE_SERVICENAME values for your system. ORACLE_SERVICENAME is defined in the Oracle client tnsnames.ora file and is usually the Oracle system ID.
Repository Data Files
XML files are used to configure the repository and load it with the data for the example verifier application. If you are using an Oracle database, confirm that the BulkloadOracleConfig.xml file is configured as follows:
WebLogic Properties File Settings
Confirm that the weblogic.properties file in the $WLC_HOME/hub directory matches your environment, as described in this section.
The following is an example extract from the file showing the weblogic.jdbc.connectionPool.wlcPool property settings for the supported databases. This example shows that the file is configured for the Cloudscape database (that is, the Oracle property is commented and the equivalent Cloudscape property is uncommented).
##Oracle##weblogic.jdbc.connectionPool.wlcPool=\
##Oracle##	url=jdbc:weblogic:oracle,\
##Oracle##	driver=weblogic.jdbc.oci.Driver,\
##Oracle##	loginDelaySecs=1,\
##Oracle##	initialCapacity=1,\
##Oracle##	maxCapacity=5,\
##Oracle##	capacityIncrement=1,\
##Oracle##	allowShrinking=true,\
##Oracle##	shrinkPeriodMins=15,\
##Oracle##	refreshTestMinutes=10,\
##Oracle##props=user=<ORACLE_USER>; \
##Oracle##password=<ORACLE_PASSWORD>; \
##Oracle##server=<ORACLE_SERVICENAME>
#
# Cloudscape
#
weblogic.jdbc.connectionPool.wlcPool=\
	url=jdbc:cloudscape:wlcdb,\
	driver=COM.cloudscape.core.JDBCDriver,\
	loginDelaySecs=1,\
	initialCapacity=1,\
	maxCapacity=10,\
	capacityIncrement=1,\
	allowShrinking=true,\
	shrinkPeriodMins=15,\
	refreshTestMinutes=10
Verifying the Software Installation
An installation verification example is provided to ensure that the installation of WebLogic Collaborate is successful. This section explains what the installation verification example does and how you run it.
How the Installation Verification Example Works
Run this example immediately after the installation procedure to verify that WebLogic Collaborate was installed successfully on your system. The verification example does the following:
Running the Installation Verification Example
After you complete the installation, as described in Installing the BEA WebLogic Collaborate Software Package, and customize your environment, as described in Customizing the Run-Time Environment, verify that the installation is successful as follows:
prompt> cd $WLC_HOME
prompt> . ./setenv.sh
Note: You must run the setenv.sh script in a Bourne or Korn shell. If you use a csh, change to the Korn shell by typing ksh at your UNIX prompt.
prompt> createDB.sh [oracle|cloudscape]
where the database name you use corresponds to your database.
prompt> cd examples/verifier
prompt> bulkloader.sh \
../[BulkloadOracleConfig.xml|BulkloadCloudscapeConfig.xml]
where the XML filename you use corresponds to your database.
prompt> build.sh
prompt> cd $WLC_HOME/hub
prompt> ./startweblogic.sh
http://localhost:7001/Verifier.html
where localhost represents the name of the machine where you are running WebLogic Server.
The verification example starts. During verification, the Partner1 c-enabler sends a message to the Partner2 c-enabler. The message sent by Partner1 is the string ABCDEFGHI, and the message returned by Partner2 is abcdefghi.
If the verification sample executes successfully, a report containing a "verification SUCCESS" message is displayed in the browser. The report identifies the process flow and the status of the verifier application.
The following is an extract from a typical report:
WLC Verifier
Partner 2 enabler started
Waiting for request...
Partner 1 process flow.
Starting enabler... done.
Creating conversation... done.
Sending message: conversation id=verifierConv ...
string=ABCDEFGHI
Status=success
Waiting for response... done.
Processing reply:
Received string=abcdefghi
Verification SUCCESS
Termination conversation:verifierConversation:1.0requ...
success
Troubleshooting Your Installation
The following information can help you to troubleshoot the WebLogic Collaborate software installation.
Starting the Installer
If the graphical installer fails to start, it might be because the necessary operating system patches for the JDK are not installed. In particular, you must install the Solaris OpenWindows Motif patches. Refer to the BEA WebLogic Collaborate Release Notes for a list of OS patches required for this release of WebLogic Collaborate. Refer to the following URL for more details about Solaris patches for the JDK:
http://www.java.sun.com/products/jdk/1.2/install-solaris-patches.html
Starting the C-Hub
If the c-hub fails to start, the license may not be installed. Check for error messages in the window in which WebLogic Server was started.
Running the Verification Example
If you have problems running the installation verification example:
Accessing Verifier.html
If your Web browser is unable to connect to the URL, it could indicate that your browser is using a proxy server and is preventing you from connecting to your local WebLogic server.
To bypass the proxy server, change your browser's proxy settings so the browser does not use the proxy server to access the servlet. For example, in Netscape:
localhost:listening_port
In the preceding syntax, listening_port is the listening port number specified in the weblogic.properties file. The default listening port number is 7001.
Also check for error messages in the terminal window in which WebLogic Server was started.
Uninstalling the BEA WebLogic Collaborate Software Package
You can remove the WebLogic Collaborate software from your system by deleting the directory where you installed it.
Alternatively, you can invoke the Uninstall script as follows:
prompt> $WLC_HOME/UninstallerData/uninstall
A screen prompting you to confirm the removal of the software is displayed. Click Uninstall to continue and WebLogic Collaborate is uninstalled from your system.

|

|
|
|
|
Copyright © 2000 BEA Systems, Inc. All rights reserved.
|