| Download Docs | Site Map | Glossary | |
|
|
|||
| bea.com | products | dev2dev | support | askBEA |
|
|
|
||||||||
| e-docs > WebLogic Platform > WebLogic Integration > AI Topics > Using Application Integration > Defining an Application View |
|
Using Application Integration
|
Defining an Application View
This section presents the following topics:
Before You Begin
When you define an Application View, you are creating an XML-based interface between WebLogic Server and a particular EIS application within your enterprise. Once you create the Application View, a business analyst can use it to create business processes that use the application. For any adapter, you can create any number of Application Views, each of which may contain any number of services and events.
Before you attempt to define an Application View, make sure the following prerequisites are satisfied:
High-Level Procedure for Defining an Application View
Figure 2-1 summarizes the procedure for defining and configuring an Application View.
Figure 2-1 Procedure for Defining and Configuring an Application View

Sample Detailed Procedure for Defining an Application View
This section explains how to define and maintain Application Views using an EIS adapter for a hypothetical database EIS called simply DBMS. The steps in the procedure presented here correspond to the steps shown in Figure 2-1.
When you create Application Views for your enterprise, they may look different from those shown in this document. Such differences are to be expected, because the Application View's adapter determines the information required for each Application View page, and each enterprise has its own specialized adapters. For details about an adapter used in your enterprise, consult the relevant technical analyst or EIS specialist.
Note: Before performing the following steps, ensure that WebLogic Server is running on your system.
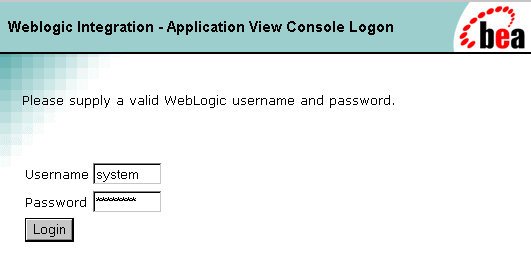
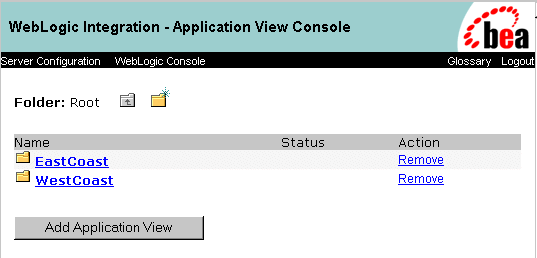
Step 1: Log On to the Application View Console
The Application View Console displays all the Application Views in your WebLogic Integration environment, organized in folders.
To log on to the Application View Console:
http://host:port/wlai

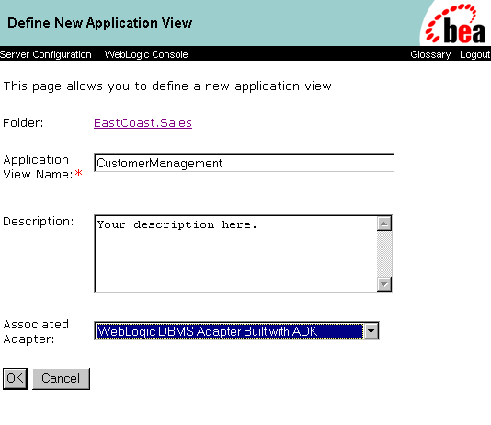
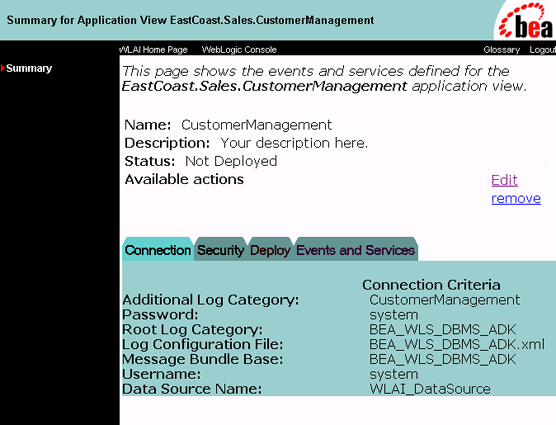
Steps 2 and 3: Define an Application View and Configure Connection Parameters
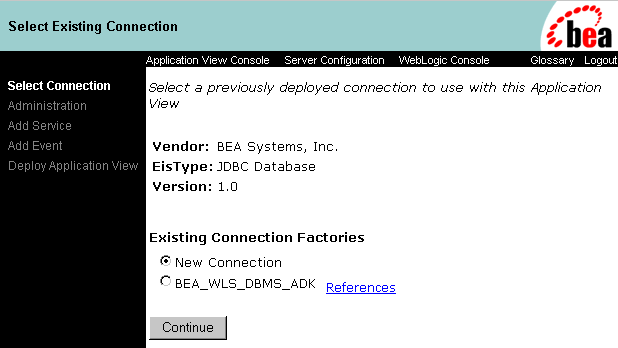
From the Connection Factory selection page, you can display the Select Connection or Connection Configuration pages at any time. You can switch between a new connection factory and an existing one at any time before the Application View is deployed.
Using an existing connection factory can simplify server administration, especially in cases where multiple adapters interact with a single EIS. Also, using a shared connection factory allows an administrator to set the connection factory configuration parameters and direct users to select an existing connection. In this case, the users do not have to know how to configure connection parameters.
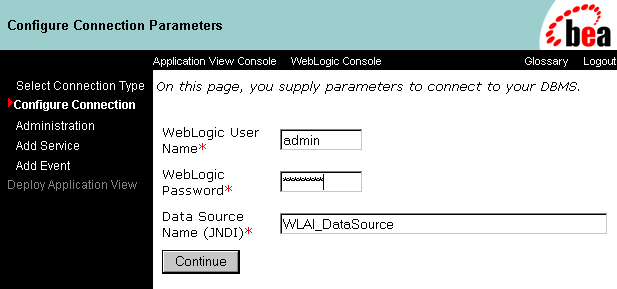
If you choose to use an existing connection factory, the Application View Administration page is displayed. (For information about the Application View Administration page, see step 9.) On the Configure Connection Parameters page, define the network-related information necessary to enable the Application View to interact with the target EIS. You need to enter this information only once per Application View.
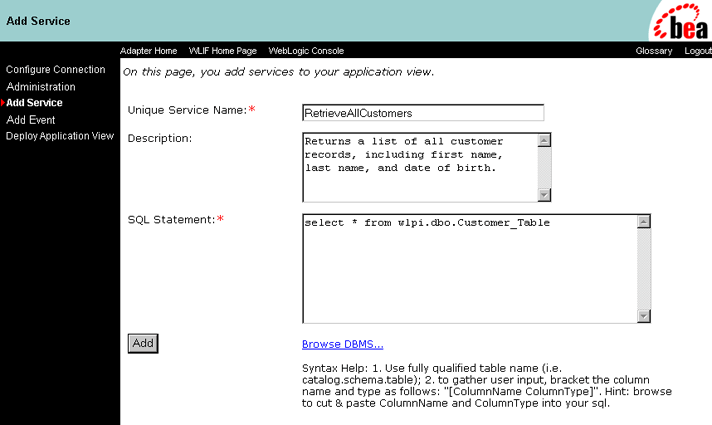
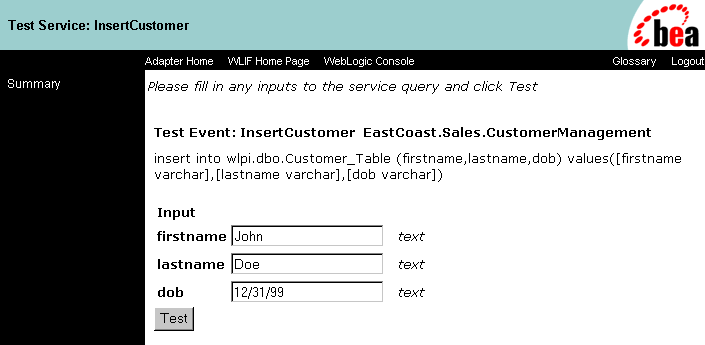
Step 4A: Add a Service to an Application View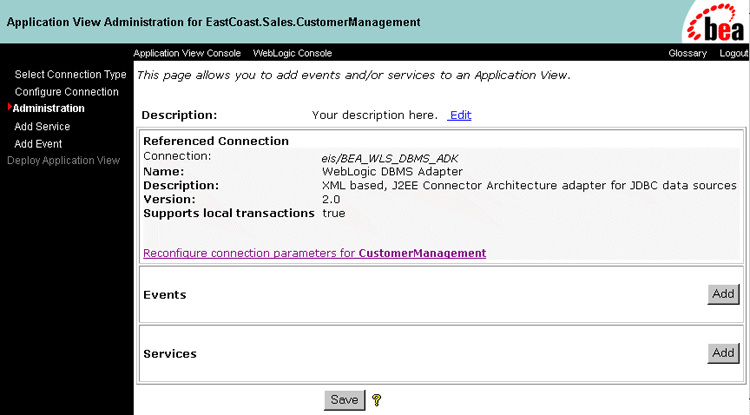
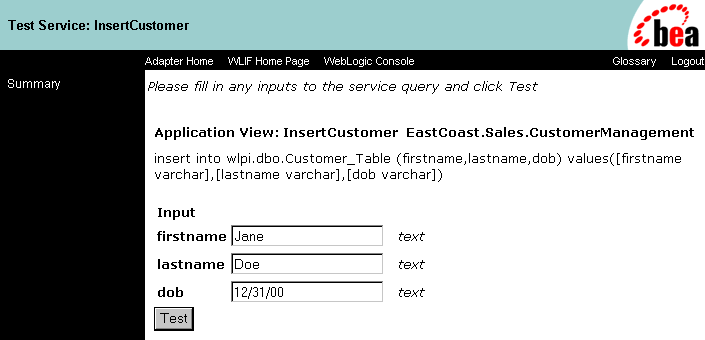
In many cases, this required information consists of an SQL statement for retrieving information from or updating information in a database. The following sample SQL statement retrieves customer information from a customer table based on a user-specified country value:
select * from PBPUBLIC.CUSTOMER_TABLE
where COUNTRY=[country varchar]
The sample Application Views provided with WebLogic Integration include services which use SQL statements. Display the Application View Administration page and click the View Summary link for a service. The Summary page includes an SQL statement.
Step 4B: Add an Event to an Application View
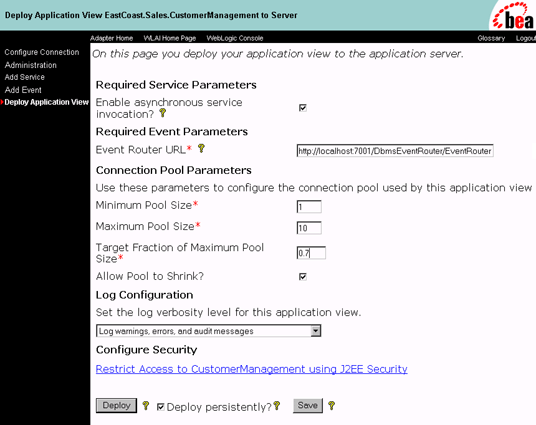
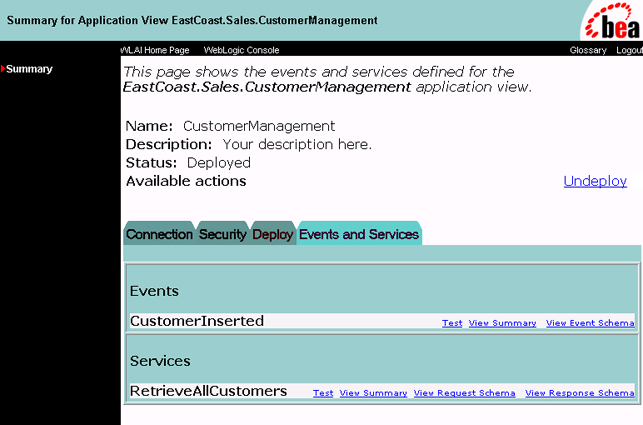
Step 5: Deploy an Application View
You may deploy an Application View when you have added at least one event or service to it. You must deploy an Application View before you can test its services and events or use the Application View in the WebLogic Server environment. By deploying an Application View, you place relevant metadata about its services and events into a run-time metadata repository. Deployment also makes the Application View available to other WebLogic Server clients. As a result, business processes can interact with the Application View, and you can test the Application View's services and events.
To deploy an Application View:

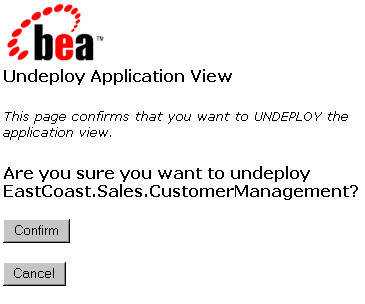
Optional Step: Undeploy an Application View
You must undeploy an Application View whenever you want to edit its connection parameters, add services and events to it, or disable clients from using it. For information about editing connection parameters, see Steps 2 and 3: Define an Application View and Configure Connection Parameters. When an Application View is undeployed, no other WebLogic Server clients can interact with it, and you cannot test its services or events.
To undeploy an Application View:
Step 6A: Test an Application View's Services
The purpose of testing an Application View service is to evaluate whether or not that service interacts properly with the target EIS. You can test an Application View only if it is deployed and it contains at least one event or service. To test an Application View service:

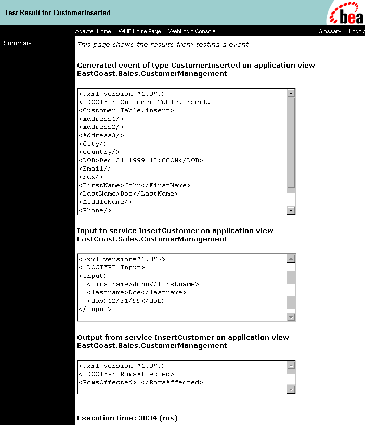
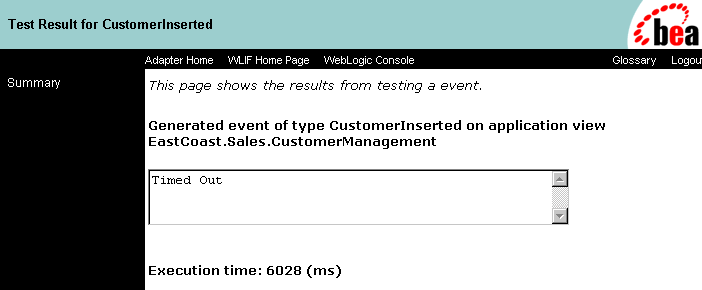
Step 6B: Test an Application View's Events
The purpose of testing your Application View events is to evaluate whether or not the Application View responds correctly to the EIS application. You can test an Application View only if it is deployed and it contains at least one event or service. To test an Application View event:

If You Select Service
If You Select Manual
Editing an Application View
When you define an Application View, you must configure its connection parameters. After you add and test services and events, you may want to reconfigure the connection parameters or remove services and events.
To edit an existing Application View:


|

|

|