
| Download Docs | Site Map | Glossary | |
|
|
|||
| bea.com | products | dev2dev | support | askBEA |
 |
 |
|
|||||||
| e-docs > WebLogic Platform > WebLogic Integration > Starting, Stopping, and Customizing > WebLogic Integration Administration and Design Tools |
|
Starting, Stopping, and Customizing
|
WebLogic Integration Administration and Design Tools
This section provides the information you need to get started with the WebLogic Integration design and administration tools. It includes the following topics:
Web Browser Configuration Requirements
To use WebLogic Integration you must also use Netscape Navigator 4.7 (or above) or Microsoft Internet Explorer 5.x (or above). In addition you must configure your browser to accept cookies and to bypass the proxy server.
Note: On UNIX systems, you must include the browser executable netscape in your PATH variable.
Accepting Cookies
Configure your browser to accept cookies by completing the steps for the appropriate browser:
The Preferences dialog box is displayed.
The Internet Options dialog box is displayed.
Bypassing the Proxy Server
If your Web browser is configured to use a proxy server to access the Internet, you must bypass the proxy when you access any of the following:
Bypassing the Proxy Server in Netscape
To bypass the proxy server in Netscape:
Bypassing the Proxy Server in Microsoft Internet Explorer
To bypass the proxy server in Microsoft Internet Explorer:
Starting the Samples Launcher
The samples launcher page is your gateway to an exploration of the sample applications provided with WebLogic Integration. As described in Configuring and Starting the Samples Domain, to start WebLogic Integration in the samples domain for the first time, you must execute the RunSamples command. This command configures the samples domain, starts the server, and starts the samples launcher.
Once you have configured your samples domain, you can access the samples launcher at any time. If the server is running, you can open the samples page in your browser or use the shortcuts described in the following procedure.
To start the samples launcher:
http://host:7001/index.html
In this URL, host is the computer name or IP address of the system that is running the server for the samples domain, and 7001 is the listen port configured for the server. The server may be running on any system. If it is running on the local computer, specify localhost or 127.0.0.1.
Learning to Use the Samples
The following table lists documents in which you can find information about the sample applications.
Starting the WebLogic Server Administration Console
The WebLogic Server Administration Console allows you to view or modify the configuration of the WebLogic Integration resources deployed on WebLogic Server.
To start the WebLogic Server Administration Console:
http://host:port/console
In this URL, host is the computer name or IP address of the system that is running the administration server for the domain, and port is the listen port configured for the server. The server may be running on any system. If it is running on the local computer, specify localhost or 127.0.0.1.
For example, if the administration server is running on the local computer, and it is configured to listen on 7001, enter the following:
http://localhost:7001/console
Note: Bookmark the WebLogic Server Administration Console for quick access.
Learning to Use the WebLogic Server Administration Console
For detailed information about WebLogic Server administration, see the WebLogic Server 7.0 documentation at the following URL:
http://download.oracle.com/docs/cd/E13222_01/wls/docs70/index.html
Information about using the WebLogic Server Administration Console is also provided through online help. For help at any time, click the question mark in the upper right-hand corner of the page.
Starting the Application View Console
The Application View Console allows you to define application views for adapters you develop using the WebLogic Integration Adapter Development Kit (ADK). You can define application views only for adapters that are deployed in the active domain. When you define an application view, you are creating an XML-based interface to an enterprise application. In conjunction with the application integration plug-in, this view can then be used to include operations that use the application in the workflows you model in the Studio.
To start the Application View Console:
http://host:port/wlai
In this URL, host is the computer name or IP address of the system that is running WebLogic Integration, and port is the listen port configured for the server. WebLogic Integration may be running on any machine. If it is running on the local computer, specify localhost or 127.0.0.1.
For example, if the administration server is running on the local computer, and it is configured to listen on 7001, enter the following:
http://localhost:7001/wlai
Figure 2-3 Application View Logon
From this page, you can navigate to an existing view or define a new view for a deployed adapter.
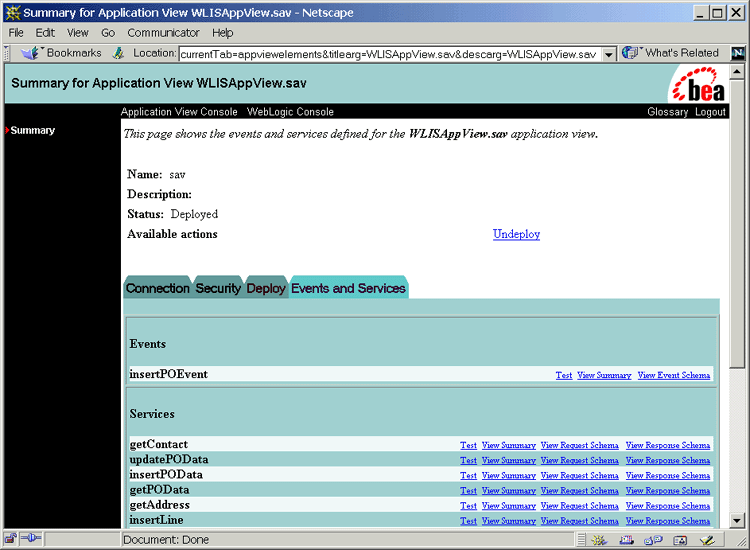
Select the name of an Application View to access a page on which a summary of the specified view is displayed. For example, the summary page for the WLISAppView application view, which is used in the WebLogic Integration sample, is shown in the following figure.
Figure 2-5 Summary Page for the WLISAppView Application View
Learning to Use Application Views For information about using adapters built with the BEA WebLogic Integration ADK, see Using Application Integration. This document explains how to define and use application view services and events.
Starting the Studio
The WebLogic Integration Studio is the process-modeling client application that allows you to create and monitor workflows. When you execute the studio.cmd (Windows) or studio (UNIX) command, you are prompted to log in to the process engine running on a local or remote instance of WebLogic Integration.
The following sections provide the information you need to start the Studio:
Start Procedure for the Studio
To start the Studio:
t3://host:port
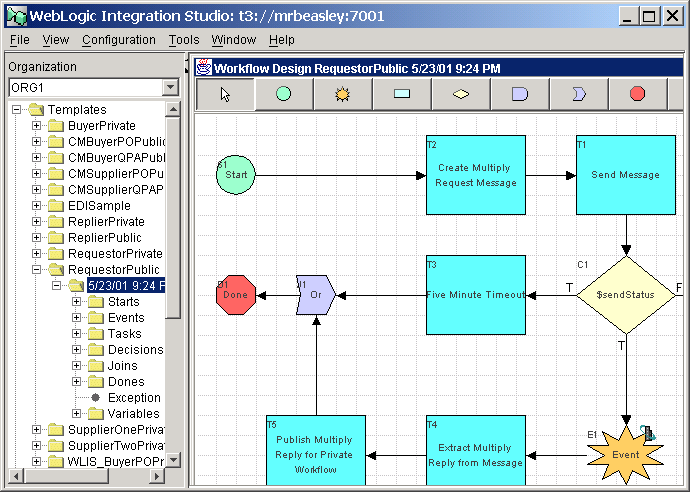
Once you are connected, the Studio application window is displayed. The following figure shows the Studio application window as it appears when connected to the process engine in the samples domain. In this case, the requestor partner public workflow for the Hello Partner sample is selected.
Figure 2-7 Sample Workflow Displayed in the Studio
Note About BPM Plug-Ins The functionality of the WebLogic Integration process engine and the Studio client application can be extended by built-in or customer-developed BPM plug-ins. Which plug-ins are deployed depends on the configuration of the active domain. The following table summarizes the deployment of plug-ins in a WebLogic Integration domain.
To view a list of the plug-ins currently deployed, choose Configuration For information about developing custom plug-ins, see Programming BPM Plug-Ins for WebLogic Integration. Learning to Use the Studio Information about using the Studio is provided in the following documents.
Information about using the Studio is also provided in the online help.
Note: Online help is not available for the B2B integration plug-in. For information on using the B2B integration plug-in, see Creating Workflows for B2B Integration.
Starting the Worklist
The Worklist can be used to manage notifications from the system and responses from the user regarding workflow tasks that require human intervention. The following procedure describes how to start the Worklist.
Note: The Worklist client application is deprecated as of this release of WebLogic Integration. For information about the features that are replacing the Worklist, see the BEA WebLogic Integration Release Notes.
To start the Worklist:
t3://host:port
Here host is the computer name or IP address of the system, and port is the listen port configured. If WebLogic Integration is running on the local computer, specify localhost or 127.0.0.1.
For example, if the server is running on the local computer, and it is configured to listen on 7001, enter the following:
t3://localhost:7001
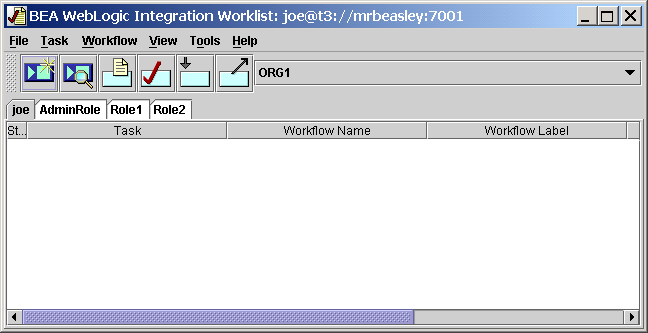
Once you are connected, the Worklist application window is displayed, as shown in the following figure.
Figure 2-9 Worklist Application Window
Learning to Use the Worklist To learn how to use the Worklist, see Using the WebLogic Integration Worklist.
Starting the Format Builder
The Format Builder allows you to create Message Format Language (MFL) files—also known as message formats—that describe the content and structure of the binary data used by other systems in your organization. In conjunction with the data integration plug-in, these message formats are used by the process engine to translate binary data to XML, and vice versa. This translation capability simplifies the task of incorporating, into your workflows, actions that send or receive data from these systems.
To start the Format Builder:
t3://host:port
Here host is the computer name or IP address of the system and port is the listen port configured for the server. If WebLogic Integration is running on the local computer, specify localhost or 127.0.0.1.
For example, if the server is running on the local computer, and it is configured to listen on 7001, enter the following:
t3://localhost:7001
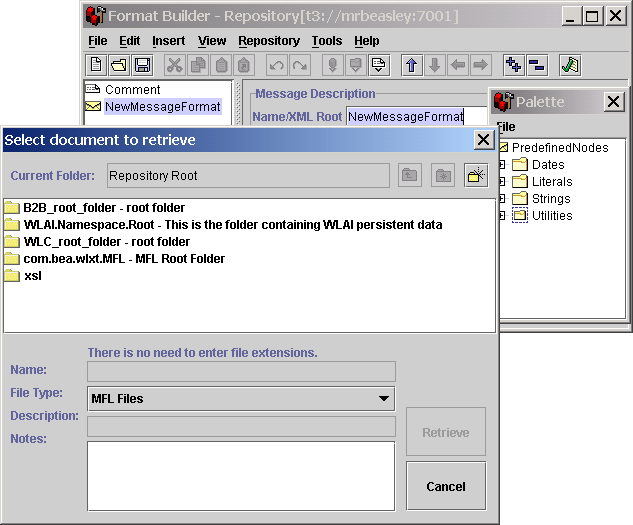
Once you are connected, the application window is displayed. You can create new message formats, or retrieve and modify existing formats. For example, to retrieve items from the XML repository, Choose Repository
Figure 2-11 Retrieve Dialog Box in the Format Builder
Learning to Use the Format Builder To learn how to use the Format Builder, see Translating Data with WebLogic Integration
Information about using the Format Builder is also provided in the online help provided with the Format Builder. To view the help, choose Help
Starting the B2B Console
The WebLogic Integration B2B Console allows you to:
To start the WebLogic Integration B2B Console:
http://host:port/b2bconsole
In this URL, host is the computer name or IP address of the system that is running WebLogic Integration and port is the listen port configured for the server. WebLogic Integration may be running on any system. If it is running on the local computer, specify localhost or 127.0.0.1.
For example, if the administration server is running on the local computer, and it is configured to listen on 7001, enter the following:
http://localhost:7001/b2bconsole
Notes: Bookmark the B2B Console for quick access.
Which items are displayed in the navigation tree (in the left pane) is determined by the B2B preference settings. For example, if the Display advanced configuration controls option is disabled, the Logic Plug-Ins are not displayed. For information about the B2B preferences, see "Setting Preferences" in Configuring B2B Integration in Online Help for the WebLogic Integration B2B Console.
Learning to Use the B2B Console
For an overview of the configuration requirements for the B2B integration functionality provided by WebLogic Integration, a tour of the B2B console, and information about the B2B repository, see Administering B2B Integration.
Information about using the B2B Console, including descriptions of the fields and options on each page, is provided in the online help. For help at any time, click the question mark in the upper right-hand corner of any page displayed by the B2B Console.
Note: The information in the online help is also available as a document entitled Online Help for the WebLogic Integration B2B Console.
Starting and Stopping the B2B Engine from the B2B Console
This section provides instructions for shutting down and restarting the B2B engine from the B2B Console.
When you use the B2B Console to shut down or restart the B2B engine, only the B2B engine is affected; all other WebLogic Integration applications, including the web server that contains the B2B Console web application itself, continue to run.
Stopping the B2B Engine from the B2B Console
To shut down the B2B engine, while keeping other WebLogic Integration applications and services running:
Figure 2-13 General Tab for B2B Monitoring
Restarting the B2B Engine from the B2B Console
To restart the B2B engine after shutting it down from the B2B Console:
Figure 2-15 General Tab for B2B Monitoring
The restart process may take a couple of minutes. You are returned to the Monitoring/General tab when the process is complete.

|

|

|