
| Download Docs | Site Map | Glossary | |
|
|
|||
| bea.com | products | dev2dev | support | askBEA |
|
|
|
||||||||
| e-docs > WebLogic Platform > WebLogic Integration > BPM Topics > Using the Worklist > Customizing the Worklist |
|
Using the Worklist
|
Customizing the Worklist
Note: The Worklist client is deprecated as of this release of WebLogic Integration. For information about the features that are replacing it, see the BEA WebLogic Integration Release Notes.
The following sections explain how to customize the display and behavior of the Worklist:
Working with Task Status
You can update task status and select task status categories to display on the User ID and Role tabs.
Updating Task Status
Select View
Selecting Task Status Categories to Display
To select task status categories to display on the User ID and Role tabs:
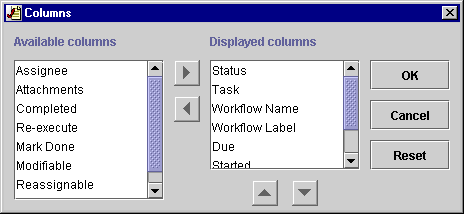
Selecting Column Headings to Displays
To select column headings to display on the User ID and Role tabs:
Figure 4-1 Columns Dialog Box
Selecting Task Sort Order
To select task sort order on the User ID and Role tabs:
Note: Select the Ascending checkbox to sort tasks in ascending order by the selected column heading. Otherwise, the tasks on the User ID and Role tabs are sorted in descending order.
Selecting a Display Option
To select a display option for the Worklist console:

|

|

|


