Managing WebLogic Integration Solutions
|
|
Business Calendar Configuration
This section provides the information you need to use the Business Calendar Configuration module of the WebLogic Integration Administration Console to:
Note: You must be logged in as a member of the Administrators, IntegrationAdministrators, or IntegrationOperators group to map, import, or otherwise modify a business calendar. See Default Groups, Roles, and Security Policies.
The following topics are provided:
- About Business Calendars and Business Time Calculations
- Overview of the Business Calendar Configuration Module
- Adding a Business Calendar
- Listing and Locating Business Calendars
- Viewing and Changing Business Calendars
- Defining a Time Period Rule
- Exporting and Importing Business Calendars
- Assigning Business Calendars to Users and Groups
- Deleting Business Calendars
About Business Calendars and Business Time Calculations
Business calendars represent the operating hours of a business. A business calendar specifies a time zone and a set of time period rules. The time period rules determine the days, dates, and hours that are free (available for business activities) and busy (unavailable for business activities). Time period rules are evaluated in sequence as follows:
- Rules that appear later in the list supersede rules that appear earlier in the list.
- Intervals for which there are no rules are busy intervals.
The following examples illustrate how to a business calendar is constructed.
Example 1
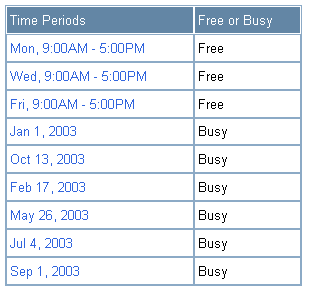
The following is an example of a business calendar for the year 2003:
In the above, the first three rules define Mondays, Wednesdays, and Fridays from 9 to 5 as free. By default, all other time is busy. The remaining rules designate the American business holidays that fall on Mondays, Wednesdays, or Fridays as busy, selectively overriding the regular free intervals.
Example 2
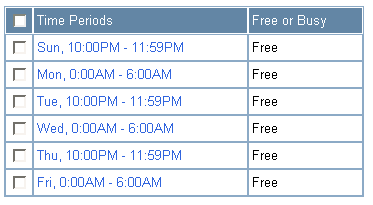
The following is an example of a business calendar for a night-shift worker whose regular hours are from 10 PM to 6 AM three nights a week.
Of the calendars defined within WebLogic Integration, one must be designated the system calendar. Initially, the system calendar is a default calendar named System Calendar, but you can switch the system calendar designation to a custom calendar at any time.
When allocating worklist tasks to users, the business calendar assigned to a user can be referenced to determine whether or not the user is available. Each user is associated with one of the following:
- A named calendar
In this case, the specified calendar is used to determine busy and free time. - No calendar
In this case, the calendar currently designated as the system calendar is used to determine busy or free time.
Calendars can also be assigned to groups, but a group calendar is not "inherited" by users in the group, but rather can be used to determine busy or free time for the group. To learn more about how calendars can be used in determining task dates, see the Introduction in Using the Worklist.
In addition to being mapped to users or groups in order to determine user availability, business calendars are used in the calculation of business time. When specifying the times that business events are to take place (such as a message being sent or a particular task instance becoming overdue), you may wish to express time intervals in business time by associating the interval with a business calendar. For example, suppose the following:
- A Timer event generator is configured to send a message every 24 hours from January 1 to January 31, 2003.
- The business calendar shown in Example 1 is associated with the 24 hour interval. Therefore, the 24 hour interval represents business time calculated against the calendar.
When calculating business time, free time periods are counted to determine when a business time interval has elapsed. Based on the business calendar shown at the beginning of this section, the free days in January fall on the following dates: 3, 6, 8, 10, 13, 15, 17, 22, 24, 27, 29, 31. Since each free day has 8 free hours, a Timer event generator configured to send a message every 24 business hours would send messages at 5 PM on the 8th, 15th, 24th, and 31st.
To learn more about configuring Timer event generators, see Defining Channel Rules for a Timer Event Generator.
When calculating business time against a business calendar, if the interval is specified by a mixture of days, hours, and minutes (for example, 3 days, 4 hours, and 5 minutes), the days are accounted for first, then the hours, and finally the minutes. The passage of a day in a business calendar is the passage of any day or date that has any free time defined for it.
If the calculation lands on a time that is busy, the calendar is rolled in the direction of the operation in one minute intervals until the next free time is reached. For example, if the calculation adds time (addBusinessTime method) and the addition lands on a busy time, the result rolls forward in one minute intervals until next available free minute. Alternately, if the calculation subtracts time (subtractBusinessTime method) and the subtraction lands on a busy time, the result rolls backward in one minute intervals until next available free minute. For instance, if the free time is 9:00 AM. to 5:00 PM, the subtraction rolls back to 4:59 PM.
For additional information about the methods available for business calendar operations (for example, determining whether or not a user is free or determining a due date based on the passage of a business time interval), see the com.bea.wli.calendar.api Javadoc.
Overview of the Business Calendar Configuration Module
The following table lists the pages you can access from the Business Calendar Configuration module. The tasks and topics associated with each are provided.
Adding a Business Calendar
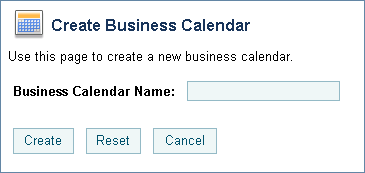
The Create Business Calendar page allows you to add a new calendar.
To add a business calendar:
- Update the time period rules as required. See Viewing and Changing Business Calendars.
Listing and Locating Business Calendars
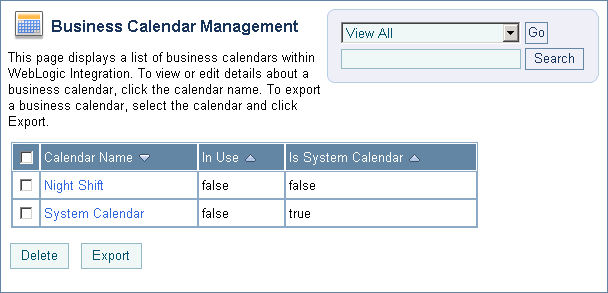
The Business Calendar Management page lists the defined business calendars. For each business calendar, the In Use and Is System Calendar status (true or false) are also displayed.
To list and locate roles:
- Filter by business calendar name. Enter the search target, then click Search. The business calendars matching the search criteria are displayed.
- Resort the list. Ascending
 and descending
  arrow buttons indicate sortable columns. Click the button to change the sort order.
 - Scroll through the pages. Use the controls in the lower left corner. Go to a page by selecting the page number or by using the arrow buttons to go to the next
 , previous
  , first
  , or last
  page.
page.
Viewing and Changing Business Calendars
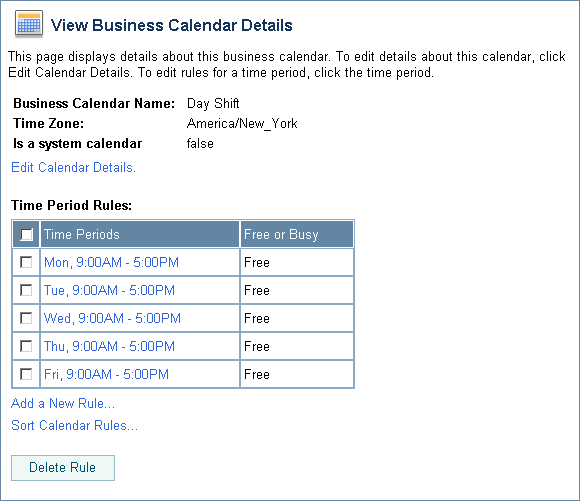
The View Business Calendar Details page allows you to view the business calendar properties.
If you are logged in with sufficient privileges, you can:
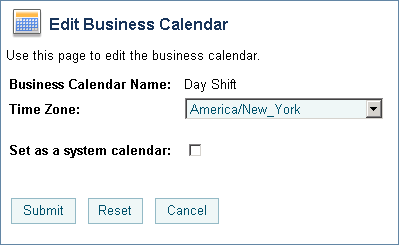
- Update the time zone or designate a calendar as the system calendar.
- Add a time period rule.
- Change a time period rule.
- Delete one or more time period rules.
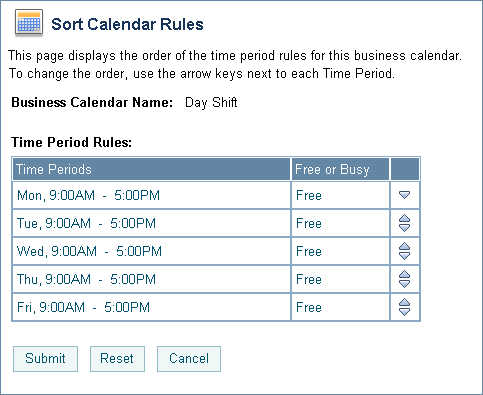
- Sort the time period rules.
To view business calendar properties:
- Locate the business calendar. See Listing and Locating Business Calendars.
To update the time zone or designate a calendar as the system calendar:
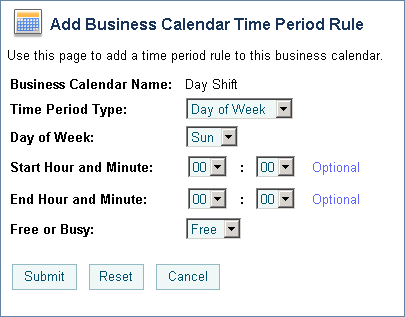
To add a time period rule:
- Define the time period as required. See Defining a Time Period Rule.
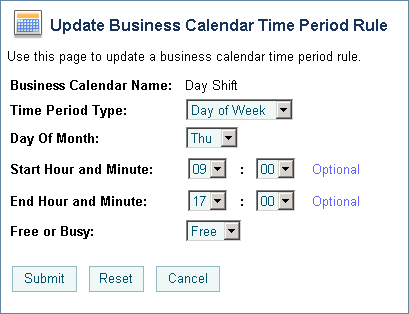
To change a time period rule:
- Define the time period as required. See Defining a Time Period Rule.
To sort the time period rules:
To delete a time period rule:
Defining a Time Period Rule
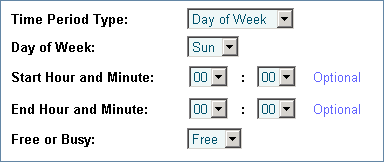
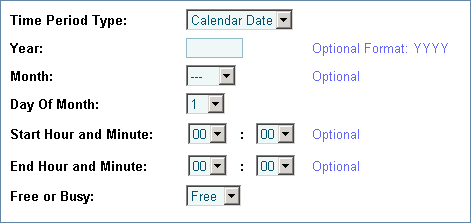
The Add Business Calendar Time Period Rule and Update Business Calendar Time Period Rule pages allow you to define the properties of a time period rule. There are three types of rules:
To define a Day of the Week rule:
- From the Start hour and minute drop-down lists, select the time period start hour and minute.
- From the End hour and minute drop-down lists, select the time period end hour and minute.
Note: If you do not specify start and end times (that is, if 00:00 is specified for both) the Free or Busy status specified in the following step applies to the entire day.
To define a Calendar Date rule:
- From the Start hour and minute drop-down lists, select the time period start hour and minute.
- From the End hour and minute drop-down lists, select the time period end hour and minute.
Note: If you do not specify start and end times (that is, if 00:00 is specified for both) the Free or Busy status specified in the following step applies to the entire day.
To define a Date Range rule:
Exporting and Importing Business Calendars
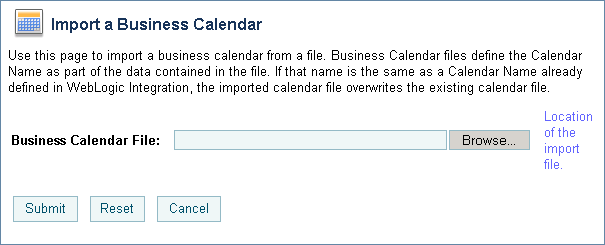
You can export and import business calendars. When you export a business calendar, the calendar name, time zone, and business rules are exported in XML format. When you import a calendar, if the name specified by the <sch:name> element in the in the XML file matches an existing calendar, the rules and time zone defined in the existing calendar are overwritten by the rules defined in the XML file. If the name specified by the <sch:name> element does not match any existing calendar, a new calendar is created.
If the calendar you are importing has the same name as the calendar currently designated as the system calendar, the system flag element <sch:systemFlag> must be set to Y in the XML file. If you are importing a new calendar, or updating a calendar that is not currently designated as the system calendar, the system flag is reset to F on import, regardless of the setting in the XML file.
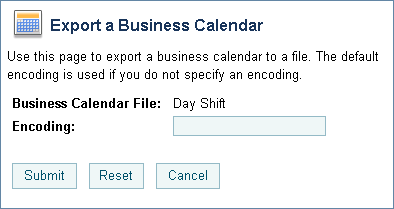
To export a business calendar:
- Locate the calendar to be exported. See Listing and Locating Business Calendars.
- To specify a character set other than the default, enter it in the Encoding field. See http://www.iana.org/assignments/character-sets for values. If a preferred MIME name is indicated for the character set, specify that name.
Note: If the Encoding field is empty, the default character set is used.
To import a business calendar:
Assigning Business Calendars to Users and Groups
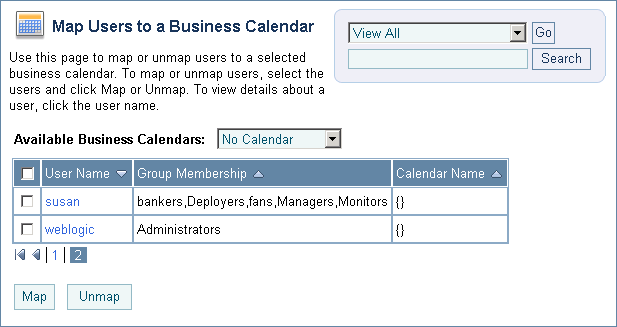
The Map Users to a Business Calendar page allows you to:
- Assign a business calendar to one or more users.
- Remove the business calendar assignment from one or more users.
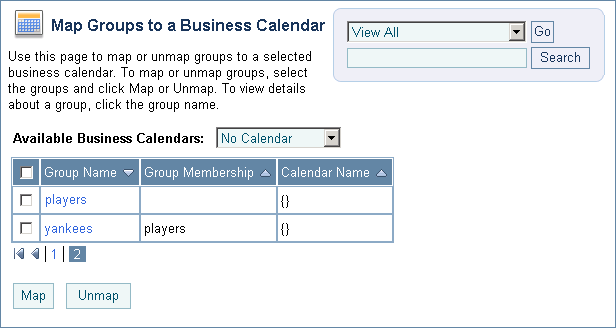
The Map Groups to a Business Calendar page allows you to:
- Assign a business calendar to one or more groups.
- Remove the business calendar assignment from one or more groups.
Note: If a user is not mapped to a calendar, the system calendar is used. A calendar mapped to a group is not "inherited" by users in the group. To learn how a calendar mapped to a user or group can be used in determining worklist task dates, see "Task Due Dates" in Creating and Managing Worklist Tasks in Using the Worklist.
Note: If an authenticator that implements the required MBeans is not configured, the calendar mapping options are disabled. To learn more about the authenticator requirements, see Security Provider Requirements for User Management.
To assign a business calendar to one or more users:
- From the left panel, select Business Calendar Mapping to display the Map Users to a Business Calendar page.
To remove the business calendar assignment from one or more users:
To assign a business calendar to one or more groups:
To remove the business calendar assignment from one or more users:
Deleting Business Calendars
The Map Users to a Business Calendar page allows you to delete selected calendars.
Note: You cannot delete a calendar if it is in use (mapped to a user) or is designated as the system calendar. See Assigning Business Calendars to Users and Groups to update the In Use status.
To delete calendars:
- Locate the calendars to be deleted. See Listing and Locating Business Calendars.
Note: If any of the selected calendars are currently being referenced by a Timer event generator, a warning is displayed. Click Cancel to cancel the delete operation, or OK to delete the selected calendars anyway.
