Tutorial: Building a Worklist Application
|
|
Step 3. Design How to Start the Business Process
In this step, you begin the design of the Resolution Approval business process. Specifically, you design how the business process is started at run time.
To start this step, you design the Start node in your business process to receive a Bug Resolution message from a client—the receipt of this message is the trigger that starts the business process.You then create a variable to hold the incoming message.
In Design View, interactions between a business process and a client application are represented by Client Request and Client Response nodes. In this tutorial, you add a Client Request node to your business process and subsequently create the code on this node to handle the receipt of a message from a client.
Complete the following tasks to design the Client Request node that starts your business process:
- Create a Start Node in Your Business Process
- Design the Communication Between a Client and the Business Process
Create a Start Node in Your Business Process
In Step 2. Create Your Application, you created a business process in the Worklist Tutorial application. This step begins the design of that business process with the bug tracking business logic.
- With the
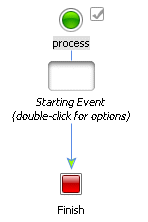
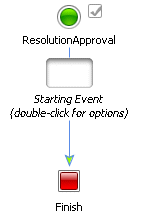
Worklist_Tutorialopen in WebLogic Workshop, double-click ResolutionApproval.jpd on the Application panel. The business process is displayed in the Design View.
Design the Communication Between a Client and the Business Process
In this step, you set up the communication between a client and the business process. To do so, complete the steps in the following sections:
To Design Your Client Request Node
Designing your Client Request node includes creating a method and parameters that your client uses to trigger the start of your business process, plus designing the logic for handling the receipt of a request from a client.
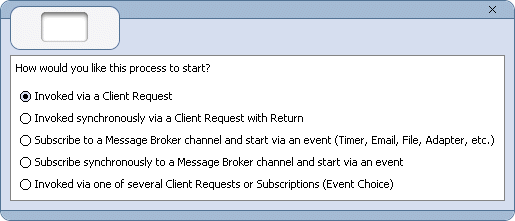
- In Design View, double-click the empty Starting Event target to display the Start node builder. The node builder shows the following:
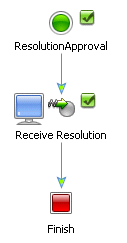
- To close the node builder, click X in the top right-hand corner. The empty node that was associated with the Start node is now populated with a Client Request node.
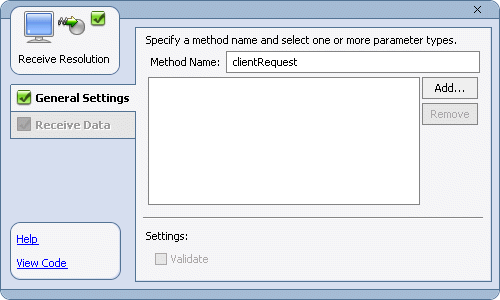
- Double-click the Receive Resolution node to invoke the node builder, as shown in the following figure:
Note: Node builders provide a task-driven user interface that helps you design your the communication between a business process and its clients and other resources.
To Specify General Settings
The following steps describe how to specify the method exposed by your business process to clients—clients invoke this method to start and make requests on your business process.
- In the Method Name field on the General Settings tab, change the default method name from
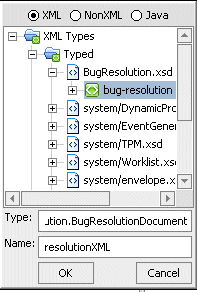
clientRequesttoreceiveResolution. - On the General Settings tab, click Add. A panel, which shows the data types you can use is displayed:
The Bug Resolution message from clients is an XML message. Therefore, we are concerned with XML Types at this node.
- If necessary, select XML. The panel is populated with a list of XML Schema files (Typed XML) and a list of Untyped XML objects available in your project.
A graphical representation of the XML Schema defined by
BugResolution.xsdis displayed in the data types panel.- Click the bug-resolution node. (It represents the parent element in your XML document.) The Type field is populated with the XML type:
com.bea.wliWorklistTutorial.bugResolution.BugResolutionDocument.
Note: When you make your business process available as a service, the name you assign to a method on a Client Request node is the name of the method that is exposed via the Web Services Description Language (WSDL). In general, we recommend that you define a name that is representative of the service offered by your business process.
Note: Remember that you added the required XML Schemas as you built the Receive Resolution Business process in Create the Tutorial Schemas.
In this step, you will use the BugResolution.xsd to specify the structure of documents that clients can send to start your business process.
To Specify Receive Data
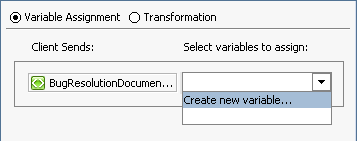
- Click the Receive Data tab. This tab allows you to specify a variable to which a Bug Resolution message received from a client is assigned at run time. By default, the Receive Data tab opens on the Variable Assignment panel.
- Variable Assignment—Use this mode when you want to assign the data received from the client to a variable of the same data type.
- Transformation—Use this mode when you want to create a transformation between the data assigned to a variable and that expected by the method parameter.
In this tutorial, we use the Variable Assignment mode because we want to assign the XML message received from the client directly to a variable of the same data type. Specifically, you create a variable of typed XML (
BugResolutionDocument) to which your business process assigns the incoming Bug Resolution from clients.- Under Select variables to assign, click the arrow in the drop-down list and select Create new variable...
You have now completed the design of how the business process is started at run time. To begin integrating your business process with a user using a Worklist control, proceed to Step 4. Create Task and Assign to User.
