Tutorial: Building a Worklist Application
|
|
Step 1. Set Up Your Environment
In this step, you set up the actors in the tutorial, that is, the users and groups required to complete the tasks you design in the tutorial business process. Specifically, if you have not already done so, you create an integration domain for your worklist application. Next, you use the WebLogic Integration Administration Console to configure users and groups. Lastly, you create a business calendar for your SoftCo enterprise.
Complete the following tasks in Step 1:
- Before You Begin
- Create a New WebLogic Integration Domain
- Configure the Users and Groups
- Create a Business Calendar
Before You Begin
Before you begin the Worklist tutorial you must have WebLogic Platform 8.1 installed on your system. For more information, see Installing WebLogic Platform.
Create a New WebLogic Integration Domain
The Worklist tutorial requires a WebLogic Integration domain. If you have not already created a WebLogic Integration domain, use the WebLogic Platform Configuration Wizard to create one. If you have already created an integration domain and you want to use it for the tutorial application, you can skip the procedure to create a new domain and instead start WebLogic Server in the existing domain.
Note: The domain name used in this tutorial is worktutorial, but you can use any valid domain name.
To Create a New WebLogic Integration Domain
- Windows: From the Start menu, choose Programs
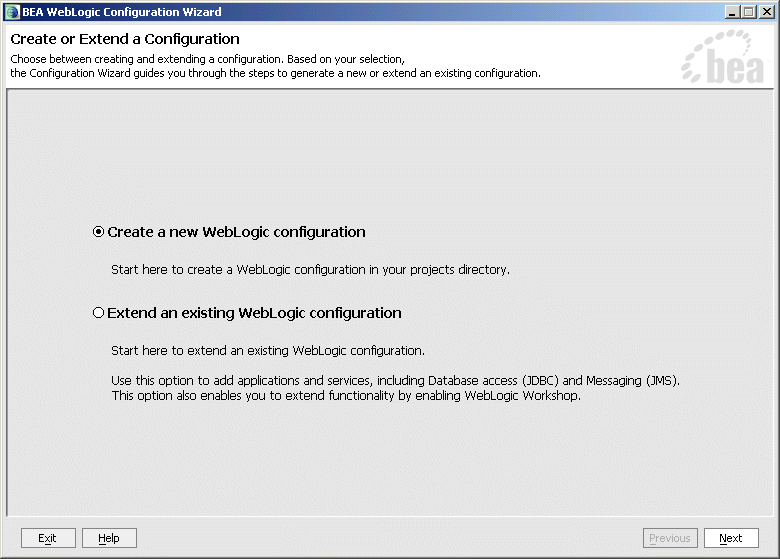
—> BEA WebLogic Platform 8.1—> Configuration Wizard. - UNIX: Open a command shell, change to the
/common/binsubdirectory of the product installation directory (such as/bea/weblogic81/common/bin), and enter the following command:sh config.sh. - In the Configuration Wizard, make the following selections in each screen. After each selection, click Next to continue.
Configure the Users and Groups
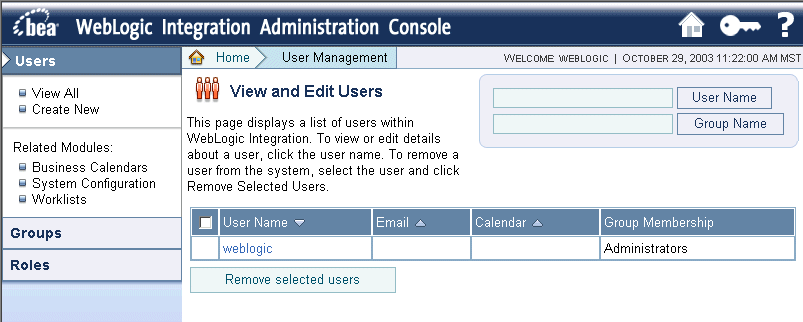
You use the WebLogic Integration Administration Console to configure the following groups in your SoftCo enterprise: Quality Engineers, Release Managers, Development Engineers.
- After the WebLogic Server is running, start the WebLogic Integration Administration Console by doing either of the following:
- From the Start menu, choose Programs
—> BEA WebLogic Platform 8.1—> Examples—> WebLogic Integration—> Integration Admin Console. - In a Web browser, enter the following URL:
http://localhost:7001/wliconsole. - In the left panel, click Groups. The View and Edit Groups screen is displayed, which allows you to create new groups.
- (Optional) In the Description field, enter a description for the group, such as
Softco QA Engineers. - Repeat Step 5 two more times to create two more groups—name the groups ReleaseManagers, and DevelopmentEngineers.
|
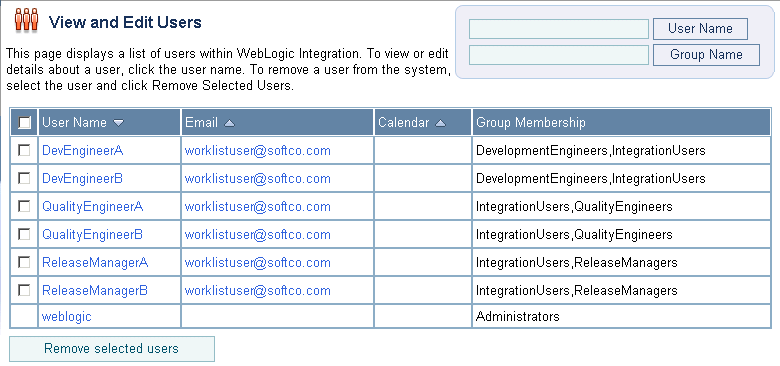
For simplicity, specify the same email address for each user, one that will work for your testing purposes. |
|||
Create a Business Calendar
You must create a Business Calendar for use by the SoftCo enterprise during the tutorial scenario. A Business Calendar specifies the dates and times that an enterprise is open for business.
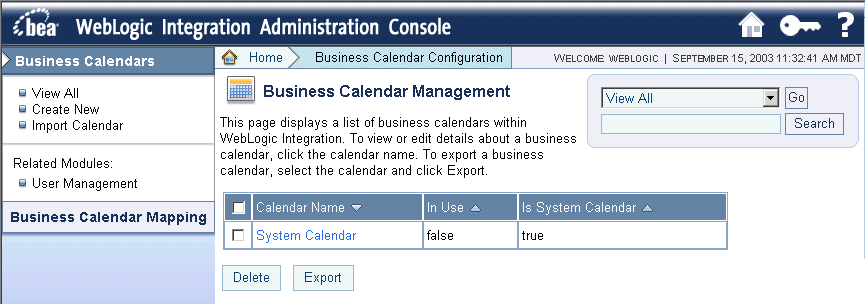
- Navigate to the Business Calendar Configuration module in the WebLogic Integration Administration Console.
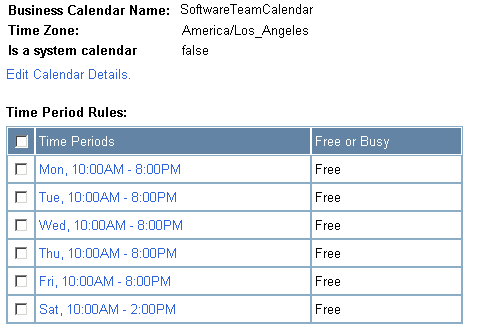
- In the calendar list, click SoftwareTeamCalendar. The View Business Calendar Details screen is displayed, which allows you to specify the time period rules.
The default rules in the business calendar specify that business hours for employees at SoftCo include Monday to Friday, 9AM to 5PM. You must change the default rules to create the appropriate calendar for the SoftCo enterprise. You can change the business rules for the calendar by editing the Time Period Rules table. To do so:
This completes creating the Business Calendar for the tutorial. To begin creating a WebLogic Workshop application that orchestrates the resolution of a bug in the SoftCo bug tracking system, proceed to Step 2. Create Your Application.
Note: To learn more about Business Calendars and defining the time-period rules, see Business Calendar Configuration in Managing WebLogic Integration Solutions.
