Tutorial: Building a Worklist Application
|
|
Step 5. Receive Resolution Approval From the Task Owner
In the preceding step, you designed the logic in the business process that assigns the task of approving the resolution of a bug to the user who created the bug. The design only allowed that the task owner could approve the resolution of the bug in two days. This step describes how you design your business process to handle other possible events.
The business logic in the tutorial scenario dictates that the business process handle the receipt of one of multiple possible events from the Task control. When you design business processes in WebLogic Workshop, you can use an Event Choice group to create logic that causes the process to wait to receive one of a number of events. In this step, you learn how to design an Event Choice group for this scenario.
It includes the following tasks:
- Create an Event Choice Group to Handle the Resolution Approval Events
- Specify the Events That the Business Process Can Receive From the Task Control
Create an Event Choice Group to Handle the Resolution Approval Events
When you design business processes in WebLogic Workshop, you can use an Event Choice group to create logic that causes the process to wait to receive one of a number of events. After it receives one of the possible events, the flow of the business process continues. You design additional nodes within an Event Choice group to handle the incoming events. The flow of execution proceeds along one branch in an Event Choice node; the branch containing the event that happens first.
To Create an Event Choice Group
- Click
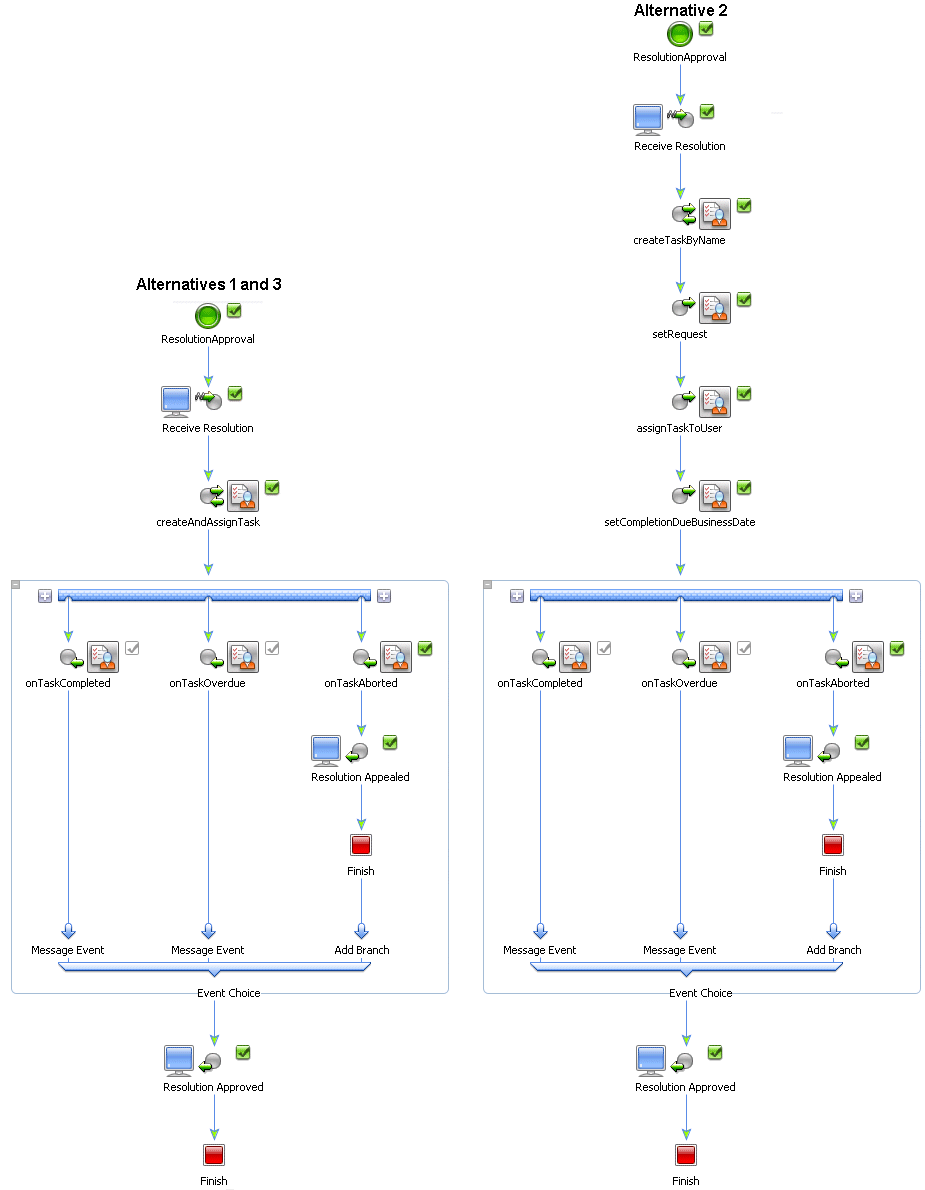
 Event Choice in the Palette, then drag and drop it onto the Resolution Approval business process, placing it immediately after the createAndAssignTask (Alternatives 1, 3) or setCompletionDueBusinessDate (Alternative 2) node.
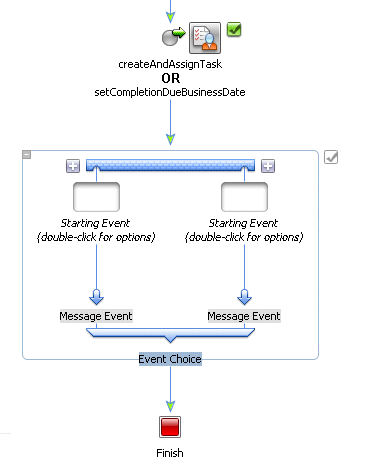
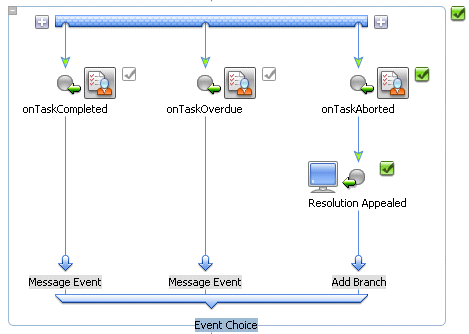
 The business process is updated (in Design View) to contain a representation of the Event Choice group as shown in the following figure:
Note that by default, Event Choice nodes are created with two branches. In this step, you design the Resolution Approval business process to handle a business scenario in which the task control returns one of three events. Therefore, you must expand the default Event Choice group to include a third Message Event branch, as described in the next step.
- Click one of the
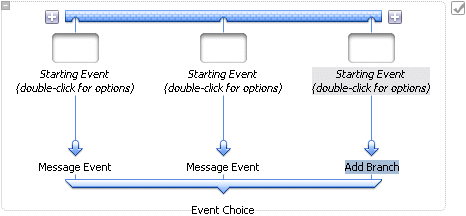
 on the Event Choice group. An additional Message Event branch is created. The Event Choice group should resemble the following:
Note: To add logic to the business processes that you design in WebLogic Workshop, you drag the process node that represents that logic from the Palette onto the process in the Design View.
If the Palette is not visible in WebLogic Workshop, choose View
Specify the Events That the Business Process Can Receive From the Task Control
The first node on each branch of an Event Choice group handles the receipt of one event. At run time, the flow of execution proceeds along one branch in an Event Choice group, specifically, the branch containing the event that happens first.
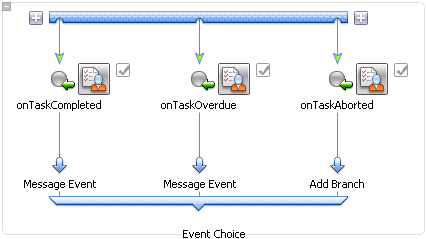
In the tutorial, you design the Message Event branches to handle the following events:
- The task is completed by the task owner; the task owner approves the resolution of the bug.
- The resolution of the bug is appealed by the task owner. Appeals must be accompanied by a document that describes the reason for the appeal.
- The task is not addressed by the task owner in the specified two day time period. In other words, the completion of the task is overdue. In this scenario, bugs that are not appealed or approved in two days are assumed approved.
To design the Message Event branches, you specify a callback method on the Task control (taskCtrl) to create and bind to a Control Receive node at the beginning of each branch in the Event Choice group, as described in the following steps:
- If necessary, expand the list of methods available in the Controls tab of the Data Palette by clicking the + beside the taskCtrl control.
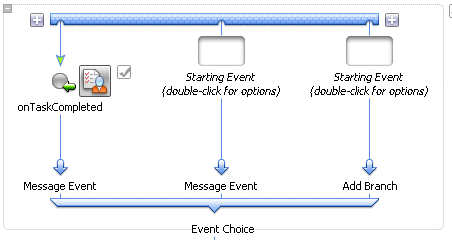
Then drag and drop it onto the Event Choice group, placing it on the left-most Message Event branch. By doing so, you specify a Control Receive as the Starting Event on the branch and bind the onTaskCompleted callback method to that Control Receive node. The Event Choice node is updated in the Design View to reflect the changes you made:
void onTaskCompleted(XmlObject response)
Design How the Callback Events are Handled by the Resolution Approval Process
At run time, the Resolution Approval business process blocks waiting for an event from the Task control before it proceeds. The flow of execution proceeds along one branch of the Event Choice group—the branch started by the event that happens first.
To Design For the Scenario in Which the Bug Resolution is Approved
No further design is required for the onTaskCompleted or onTaskOverdue nodes. At run time, whenever either of these message events is received, the business process exits the Event Choice group and proceeds to the next node in the process. The next node, which you will design in this step, is a Client Response node, which sends an approval message to the client. This node is followed by the Finish node, which marks the end of the business process.
To create the Client Response node, complete the following steps:
To Design For the Scenario in Which the Bug Resolution is Appealed
However, because the SoftCo business scenario dictates that appeals must be accompanied by a document that describes the reason for the appeal, we want to design additional logic in the process for the case in which an onTaskAborted message event is received. This section describes how to design the onTaskAborted branch of the Event Choice group, which defines the flow of execution when the Task owner appeals the resolution of the bug. This section contains the following steps:
- To Design the onTaskAborted Message Event Branch
- To Design the Client Response in the Case of an onTaskAborted Message
To Design the onTaskAborted Message Event Branch
- Alternatives 1, 2—TaskCtrl and void onTaskAborted(XmlObjectResponse)
- Alternative 3—customTaskCtrl and void onTaskAborted(XmlObject response)
- Create a variable to which the document returned by the Task control, containing the reason for the appeal, is assigned at run time:
At run time, the document returned by the task owner that describes the reasons for appealing the resolution of the bug is assigned to the appealXML variable.
The last step in designing the logic for the SoftCo business scenario is to define a node in the business process that returns the document containing the reasons for the appeal to the client. Note that the client is the same resource that starts the Resolution Approval business process.
To Design the Client Response in the Case of an onTaskAborted Message
- Click
 Client Response in the Palette, then drag and drop it onto the Request Approval business process, placing it on the process immediately after the onTaskAborted node in the Event Choice group.
 - Click the Send Data tab. The Send Data tab opens and displays the Variable Assignment pane by default.
This completes the design of the Event Choice group, and the Resolution Approval business process. To run and test the functionality of the business process you created using WebLogic Workshop's browser-based interface, proceed to Step 6. Run the Resolution Approval Business Process.
