|
|
You can create a group from one or more nodes or other groups. You can simplify the display of your business process in the Design view, by collapsing a group of nodes into a single node. A group can provide an extra level of exception handling logic—exception handlers that you specify for a group catch exceptions that are not handled by exception handlers defined for nodes inside the group.
You can specify groups of nodes in a business process. Also, some business process nodes are implicit groups—Client Request with Return, Decision, For Each, Do While, While Do, Parallel, Switch and Event Choice. Groups that represent these nodes and groups defined by you have the same characteristics.
This section describes how to work with groups in your business processes. It includes the following topics:
The specified nodes are grouped inside a collapsible box in the Design view.
You can name the group by double-clicking the default name (Group) and entering the name you want to assign.
| Note: | If you select a set of nodes and right-click to display the drop-down menu, the Group Select command is unavailable if the grouping of these nodes would create an invalid business process. For example if you drag a Client Response node to a Group node throws an assertion error. |
 Group from the Node Palette onto the business process, placing it on the business process at the point at which you want to create a group.
 An empty Group is created in the business process.
| Note: | You must first expand a collapsed group to ungroup it. |
Collapsing simplifies the view of your business process in the Design view.
You can also toggle between collapsed and expanded groups by clicking  or
or  in the upper left-hand corner of the group.
| WARNING: | When you delete a group, you delete all the contents of that group. |
Activate an exception, a message, or a timeout path for a group of nodes in the following way:
For more information about exception paths and how to configure them, see Handling Exceptions. To learn about the settings in the Properties pane, see Creating Exception Handler Paths.
For information about how to configure your message path, see Adding Message Paths.
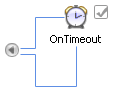
For information about how to configure your timeout path, see Adding Timeout Paths.
You can add business process nodes to the paths shown in the preceding figure, as required to define the exception handling logic.
Each of the nodes described in the following topics is implicitly a group of nodes:
Defining Conditions For Branching (Decision nodes)
Creating Case Statements (Switch nodes)
Receiving Multiple Events (Event Choice nodes)
Creating Looping Logic (While Do and Do While nodes)
Looping Through Items in a List (For Each nodes)


|