In this step, you start the WebLogic IDE and create a new Worklist project. Here, you create the Loan Request task type and define its properties, steps, actions, and constructors.
In this section you create a new project.. A project is in essence a container of files and directories relating to a single unit of work. In the case of this tutorial, your project will contain all of your Loan Request task type files and directories.
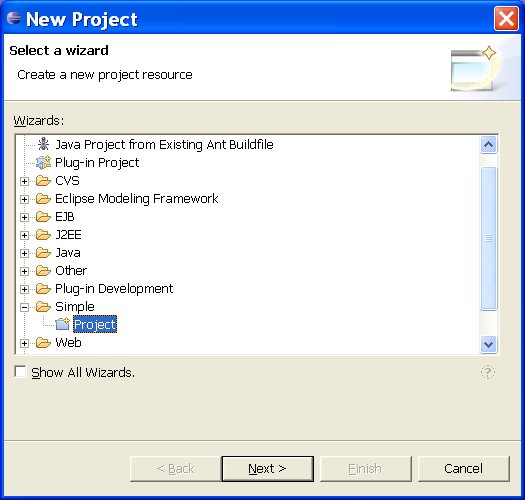
Select File New Projectfrom the WebLogic IDE menu. The New Project dialog box is displayed.
Figure 3-1 New Project Dialog Box
Expand the Simple folder.
Select Project.
Click Next.
Figure 3-2 New Task Project Dialog Box
Enter the project name Tutorial_Loan_Request.
Keep the default settings.
Click Finish.
The Tutorial_Loan_Request project is created and is displayed in the Navigator pane.
Create the Loan Request Task Type
In this section, you create and manage the Loan Request task type to be used throughout this tutorial.
Main Steps to Create Loan Request Task Type
The main steps involved in creating the Loan Request task type include:
Create the Loan Request task type and its properties. A task type contains a description of the steps, properties, task assignment rules, and so on that are common to a class of tasks for a given purpose. See Step 1: Create and Define the Task Type.
Create steps for the Loan Request task type. A step is a phase in the overall completion of a task. Task assignment can occur at any step in a task. See Step 2: Create the Steps.
Create actions for the Loan Request task type. An action is a discrete operation that can alter the properties of a task and causes a transition to another step defined for the task. See Step 3: Create the Actions.
In this step, you create and define the Loan Request Task Type file: loan-request.task.
In the Navigatorpane, right-click the Tutorial_Loan_Request project.
From the pop-up menu, select New Other WebLogic Integration Task Type.
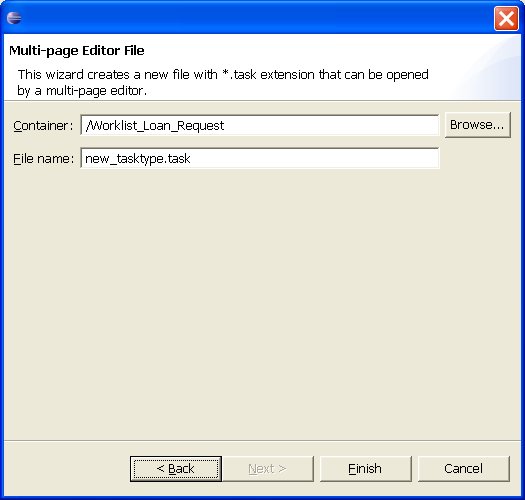
The Multi-page Editor File dialog box appears:
Figure 3-3 Multi-page Editor File
In the File Name field, change the name of the file to loan_request.task.
Click Finish.
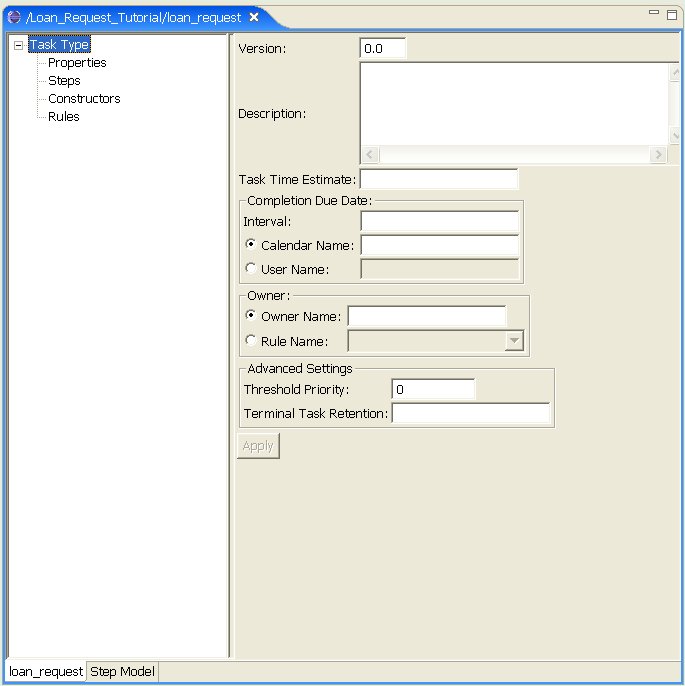
A new Task Type pane is added to your workspace:
Figure 3-4 Task Type Pane
NEED TO EXPLAIN THESE FIELDS - BUT THEY WILL PROBABLY CHANGE WITH MITCH'S NEXT CHECK IN
Step 2: Create the Steps
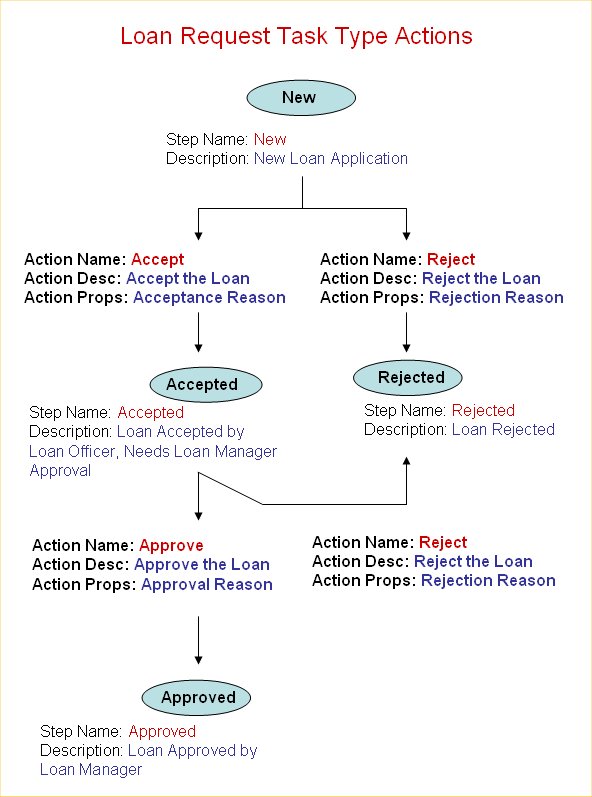
Next you will create steps for the Loan Request task type. Each step in essence represents a different state in which the Loan Request task type resides.
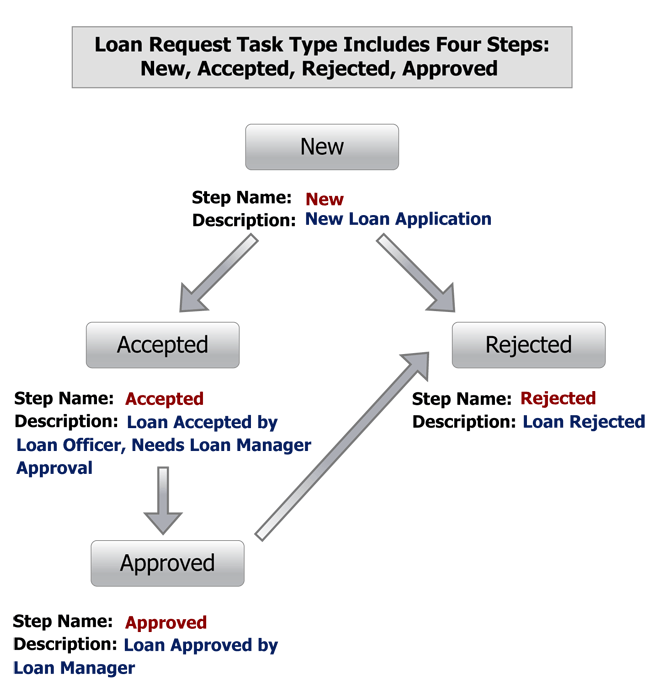
The following flow illustrates the relationship between the four steps you will create:
New—A new loan request is submitted by a customer.
Accepted—The loan request is accepted by a loan officer but still needs loan manager approval.
Rejected—Either the loan officer or the loan manager rejects the loan request.
Approved—The loan request is approved by the loan manager.
Instructions for Creating Steps
To create a step, you use the Task Type Editor as follows:
Right click on the Loan Request task type.
From the drop-down menu, select New Step. A new step appears under the Loan Request task type. By default it is named Step 1.
Change the name of the step by right clicking on the step, selecting Rename, and entering the new name in the provided field.
Add a description for the step in the provided field
DOCUMENT INSTRUCTIONS BASED ON NEW UI.
Step 3: Create the Actions
Next you will create actions for the Loan Request task type. Actions are taken by appropriate actors (loan officer or loan manager) at respective steps. When an action is taken, it often causes the task type to transition from one step to another.
The Loan Request task type can be accepted or rejected by the Loan Officer, moving it from a state of New to a state of Accepted or Rejected.
If the Loan Officer accepts the Loan Request task type, it can be approved or rejected by the Loan Manager. This moves it from the state of Accepted to a state of Approved or Rejected.
The following figure illustrates the actions you create and how they relate to the steps you created in Step 2: Create the Steps.
Instructions for Creating Actions
To create an action, you use the Task Type Editor as follows:
Right click on the step for which you will create actions.
From the drop-down menu, select New Action. A new action appears under the step. By default it is named Action 1.
Change the name of the step by right clicking on Action 1, selecting Rename, and entering the new name in the provided field.
Add a description for the action in the provided field
DOCUMENT HOW THIS IS DONE - NEW UI
Step 4: Create the Constructors
Next you create the constructors for the loan request task type.
For the purposes of this tutorial, we will set a constructor that defines a simple loan request task type. It will require the following information:
First Name of Loan Requester
Last Name of Loan Requester
Amount of Requested Loan
Step 5: Create the Rules
Next you create rules for the loan request task type. For the purposes of this tutorial, you will define a rule that will determine which Loan Officer group the loan request task type will be assigned to. This will depend on the state in which the customer applying for the loan lives. You will define three loan officer groups:
Western—this group handles loan requests coming in from the western United States
Central—this group handles loan requests coming in from the central United States
Eastern—this group handles loan requests coming in from the eastern United States
For the purposes of our tutorial, the customer who has submitted the loan request is from California. Therefore, according to the rules you define in this section, the loan request will be routed to the Western loan officer group for processing.


 New
New