


|

|
|
|
|
Using Application Views in WebLogic Process Integrator
This section contains information on the following subjects:
Before You Begin
The following prerequisites must have been met before you can invoke an application view service or receive an application view event in WebLogic Process Integrator:
Introduction to Using Application Views
in WebLogic Process Integrator
After you create all the required application view services and events for your enterprise, use the application views to execute your business processes. The simplest way to do this is by using WebLogic Process Integrator to design workflows that use the application view services and events.
WebLogic Process Integrator provides a GUI-based environment for designing business process workflows. These workflows can include application view services and events defined using Application Integration. For complete information on Process Integrator, see "BEA WebLogic Process Integrator."
Using Application Views in WebLogic Process Integrator
There are four ways to use application view services and events in WebLogic Process Integrator:
Use these scenarios in combination with each other to create your own workflows. This document does not fully explain how to use WebLogic Process Integrator. For complete information on WebLogic Process Integrator, see the WebLogic Process Integrator User Guide or see http://www.oracle.com/technology/documentation/index.html.
Scenario 1: Setting Up a Task Node to Call
an Application View Service
In your organization, there may be situations in which you want to call an application view service from within a workflow. To do this, add a task node to the workflow, then add an appropriate Application View Service action to the task node. When the workflow is saved and activated, the application view service will be called whenever the task node executes.
Steps for Setting up a Task Node to Call
an Application View Service
Follow these steps to create a task node that calls an application view service:

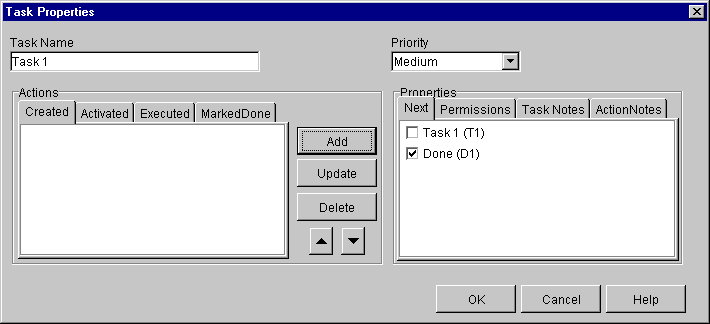
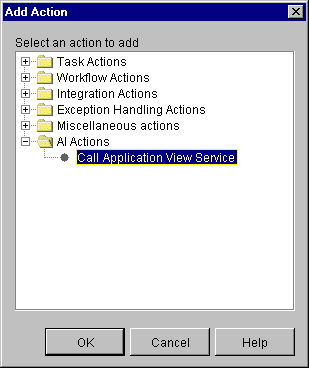
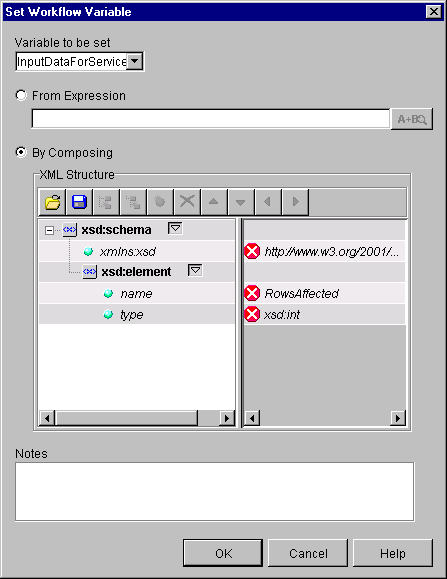

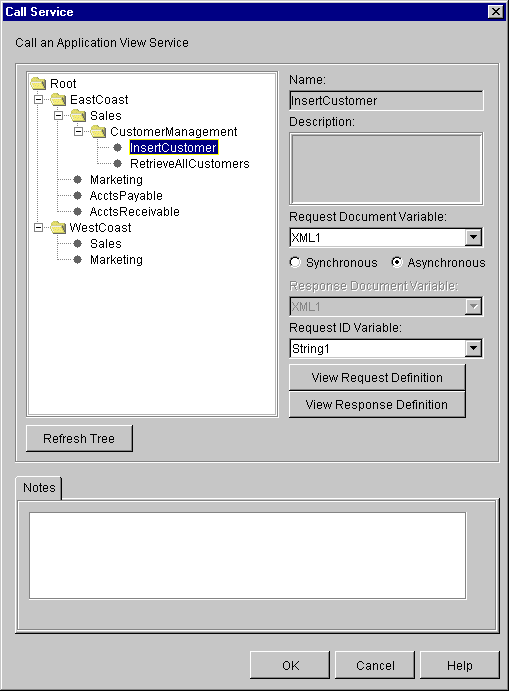
The application view tree organizes application view services by folder (example: EastCoast.Sales) and application view (example: CustomerManagement). All application view services are at the lowest level of the hierarchy.
Note: To check for newly saved application views and events at any time, click Refresh Tree.
Because this XML variable serves as the input document of the application view service, make sure the variable is properly set before the service is called.
Note: If you need to examine the XML schema of the input document, click View Request Definition. The View Definition dialog box displays. Click Close when finished.
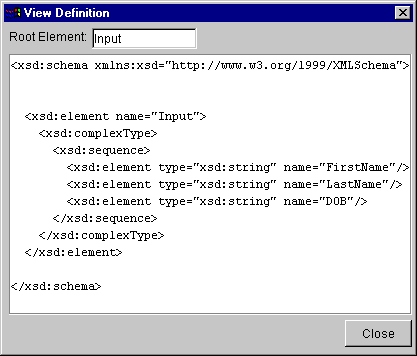
Note: A node that synchronously calls a service will wait for the service to return a response document before the workflow can continue. If the node asynchronously calls a service, the workflow will continue.
Note: If you need to examine the XML schema of the response document, click View Response Definition. The View Definition dialog box displays. Click Close when finished.
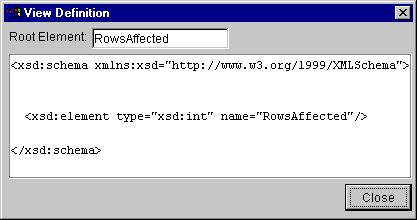
When the node calls the application view service, the node does not wait for a response and allows the workflow to continue processing. The workflow uses the Request ID Variable to allow asynchronous event nodes to receive the service response. If you do not care about the asynchronous service response, skip this step.
Note: When you set up a task node to call an asynchronous application view service, the result will be returned to WebLogic Process Integrator. The workflow identifies this response using the Request ID Variable you selected. In a typical workflow, you will want to set up a corresponding event node that waits for this response. For more information on creating such an event node, see Scenario 2: Setting Up an Event Node to Wait for a Response from an Asynchronous Application View Service.
Scenario 2: Setting Up an Event Node to Wait for
a Response from an Asynchronous
Application View Service
This section explains how to receive an asynchronous application view service response and handle any errors it may contain.
Receiving an Asynchronous Application View
Service Response
In a workflow, whenever an action calls an application view service asynchronously (see Scenario 1: Setting Up a Task Node to Call an Application View Service), the application view service will return a response. Normally, if you care about the response, you will want to set up a corresponding asynchronous event node to wait for the response. This section explains a highly simplified scenario in which an event node receives an application view service response without checking for errors.
Handling Errors in an Asynchronous Application View
Service Response
Although this scenario does not handle errors returned in the application view service response, you will normally want to handle errors in your own workflows. To handle asynchronous service response errors in your workflows, use the new features included in the AI Plug-in.
The AI Plug-in includes a new variable type, AsyncServiceResponse, and three new functions:
For complete documentation of these functions, see Explanation of Functions Provided by the AI Plug-in.
Steps for Setting Up an Event Node to Wait for a Response
from an Asynchronous Application View Service
To set up an asynchronous event node to wait for a response from an asynchronous application view service, create an event node, then set up the event node to wait for an event of type "AI AsyncResponse." When you set up an event node to wait for an asynchronous response from an application view service, the event node uses a designated Request ID Variable to receive the response. As long as the service-calling task node and the response-receiving event node use the same Request ID Variable, the asynchronous event node will correctly receive the service response.
Follow these steps to set up an event node to wait for a response from an asynchronous application view service:

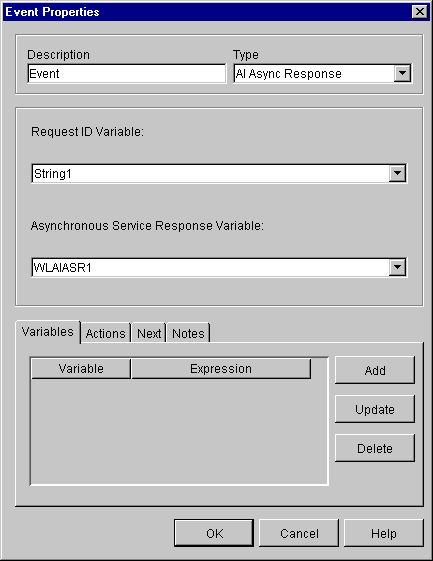
Note: The purpose of this event node is to wait for a response to a Call Application View Service action that was called asynchronously earlier in the workflow. The Call Application View Service action sets the Request ID Variable. To make the action and this event node work together, they must both use the same Request ID Variable. For more information on setting up the Call Application View Service action, see Scenario 1: Setting Up a Task Node to Call an Application View Service.
Explanation of Functions Provided by the AI Plug-in
When using the Application Integration Plug-in, use the new functions AIHasError(), AIGetErrorMsg(), and AIGetResponseDocument() to interrogate AI Asynch Response. If the Application Integration Plug-in is installed in WebLogic Process Integrator, then you have access to these new functions. Using these functions, you can set up decision nodes to handle success and failure conditions.
AIHasError()
Use AIHasError() to determine the status of an asynchronous service response.
Operands:
AsyncServiceResponse variable
Preconditions:
You have created a variable of type AsyncServiceResponse. You have called an asynchronous application view service. The application view service has returned a response, which is stored in your AsyncServiceResponse variable.
Returns:
Boolean
Output explanation:
False: The asynchronous application view service call was successful.
True: The asynchronous application view service call failed.
AIGetErrorMsg()
Use AIGetErrorMsg() to retrieve the error message string returned by an asynchronous application view service.
Operands:
AsyncServiceResponse variable
Preconditions:
You have created a variable of type AsyncServiceResponse. You have called an asynchronous application view service. The application view service has returned a response, which is stored by your AsyncServiceResponse variable.
Returns:
String
Output explanation:
Error string: Returns an error string explaining why the asynchronous application view response failed.
Empty string: There was no error.
AIGetResponseDocument()
Use AIGetResponseDocument() to retrieve the actual XML response document returned by an asynchronous application view service.
Operands:
AsyncServiceResponse variable
Preconditions:
You have created a variable of type AsyncServiceResponse. You have called an asynchronous application view service. The application view service has returned a response, which is stored by your AsyncServiceResponse variable.
Returns:
XML
Output explanation:
XML document: Returns an XML document representing the asynchronous service response.
Null: No response document was returned, because an error ocurred.
Scenario 3: Creating a Workflow that is Started
by an Application View Event
You may want to create a workflow that starts whenever a designated application view event occurs. To set up a workflow to be started by an application view event, edit the workflow's start node so it responds to an event of type AI Start, then select the appropriate application view event. If necessary, you can set up conditions on which to filter the event. After you save and activate the workflow, the start node will execute each time the application view event occurs.
Steps for Creating a Workflow that is Started
by an Application View Event
Follow these steps to set up a workflow with a start node that is triggered by an application view event.

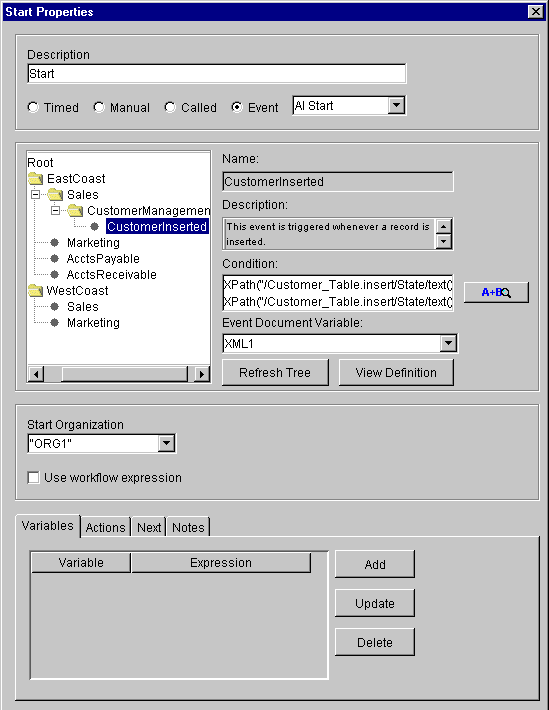
The application view tree organizes application view events by folder (example: EastCoast.Sales) and application view (example: CustomerManagement). All application view events are at the lowest level of the hierarchy.
For information on setting up conditions and XPath expressions, see the WebLogic Process Integrator User Guide.
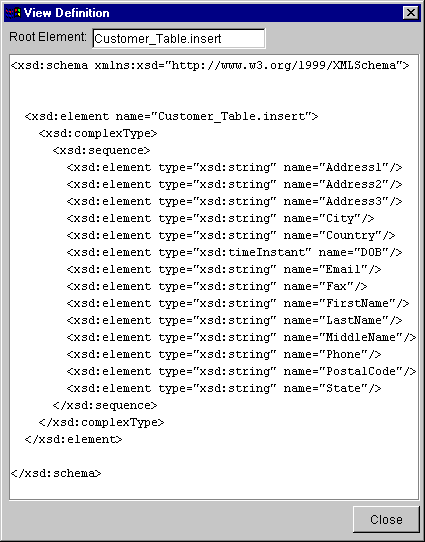
Note: If you need to examine the XML schema of the event document, click View Definition. The View Definition dialog box displays. Click Close when finished.
Scenario 4: Setting Up an Event Node to Wait for
an Application View Event
In a workflow, you may want to create an event node that is triggered by an application view event. To set up an event node to respond to an application view event, edit the event node so it responds to an event of type AI Event, then select the appropriate application view event. If necessary, you can set up conditions on which to filter the application view event. After you save and activate the workflow, the workflow will progress to this event node, wait for a specified application view event, and continue processing.
Steps for Setting Up a Node to Wait for
an Application View Event
Follow these steps to set up an event node to be triggered by an application view event.

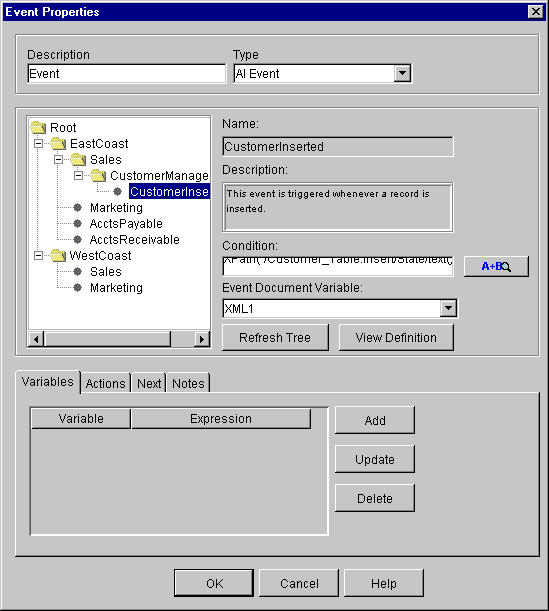
The application view tree organizes application view events by folder (example: EastCoast.Sales) and application view (example: CustomerManagement). All application view events are at the lowest level of the hierarchy.
Note: To check for newly saved application views and events at any time, click Refresh Tree.
For information on setting up conditions and XPath expressions, see the WebLogic Process Integrator User Guide.
Note: If you need to examine the XML schema of the event document, click View Definition. The View Definition dialog box displays. Click Close when finished.


|

|

|
|
|
|
Copyright © 2001 BEA Systems, Inc. All rights reserved.
|