WebLogic Portlets for Siebel Installation Guide
|
|
|
WebLogic Portlets for Siebel Installation Guide
This document explains how to install the BEA WebLogic Portlets for Siebel application.
The BEA WebLogic Portlets for Siebel application integrates BEA WebLogic Portal with the Siebel 7.0.4 system.
This guide contains the following sections:
- Installation Prerequisites for BEA WebLogic Portlets for Siebel
- Installing BEA WebLogic Portlets for Siebel
- Configuring the BEA WebLogic Portal
- Downloading the Third Party Software
- Configuration and Settings for Siebel (on Unix)
- Configuration and Settings for BEA WebLogic Portlets
- Activating the License for BEA WebLogic Portlets
- Uninstalling BEA WebLogic Portlets for Siebel
- Troubleshooting
- Installation Verification Tests for BEA WebLogic Portlets for Siebel
Installation Prerequisites for BEA WebLogic Portlets for Siebel
Hardware Requirements
The server should have the following configuration:
Software Requirements
The following software must be installed on the server:
- BEA WebLogic Platform 8.1 SP2 or SP3
- Siebel 7.0.4
- One of the following databases should be available:
- One of the following web browsers should be available:
- Java 2 SDK
Administrator Privileges
You must have BEA WebLogic Platform administrator privileges in order to install and configure the BEA WebLogic Portlets for Siebel application.
Licensing and Encryption
The WebLogic Platform software cannot be used without a valid license. You can purchase licenses for the entire WebLogic Platform product or for individual components. For information about the licenses available for WebLogic Platform, contact your sales representative or visit the BEA corporate Web site at http://www.bea.com.
About 128-Bit Encryption
Secure sockets layer (SSL) encryption software is available with two levels of encryption: 56-bit and 128-bit. Licenses for the 128-bit client version of SSL are available in the United States and Canada. With proper authorization, customers outside the United States and Canada may also acquire licenses with 128-bit encryption enabled.
A WebLogic Platform license comes with 56-bit encryption enabled by default. Enabling 128-bit encryption for SSL requires that a 128-bit encryption license be present in the license.bea file of the target BEA Home directory before you install the WebLogic Platform software.
Installing BEA WebLogic Portlets for Siebel
Before you start the BEA WebLogic Portlets for Siebel installation ensure that you are installing BEA WebLogic Portlets for Siebel on a supported platform. See Installation Prerequisites for BEA WebLogic Portlets for Siebel on page 2.
Installing BEA WebLogic Portlets for Siebel
BEA WebLogic Portlets for Siebel can be installed on both Unix and Windows operating systems using graphical-mode installation.
Graphical-Mode Installation on a Windows System
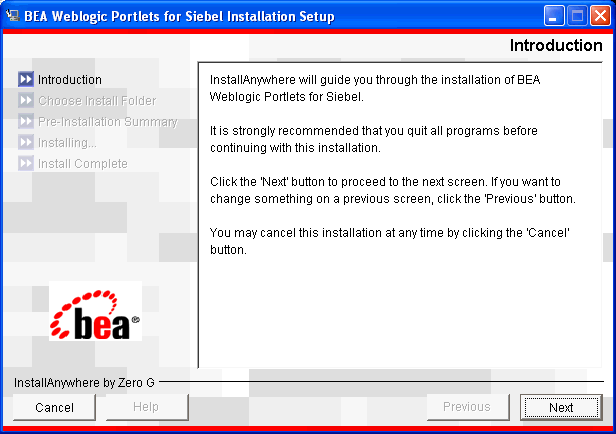
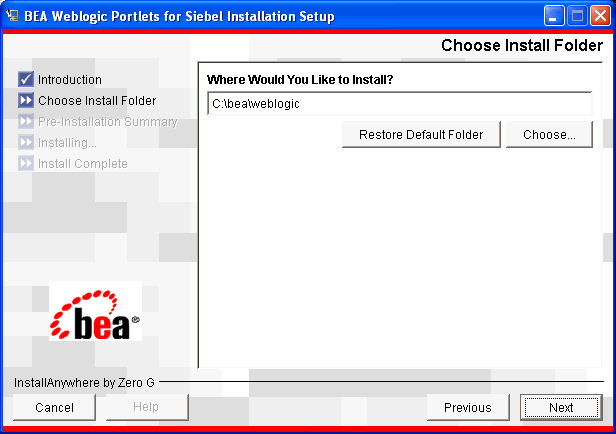
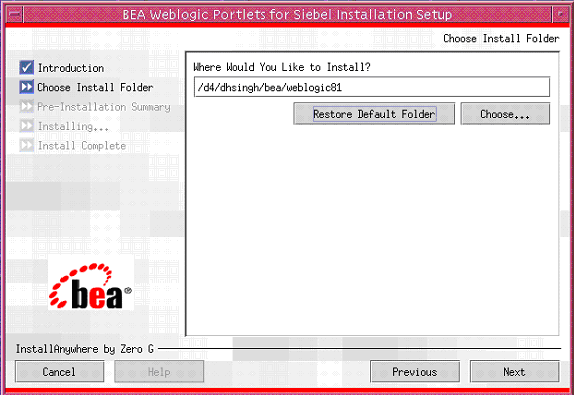
- In the Choose Installation Folder screen, specify the path of the installation directory or click Choose to select the
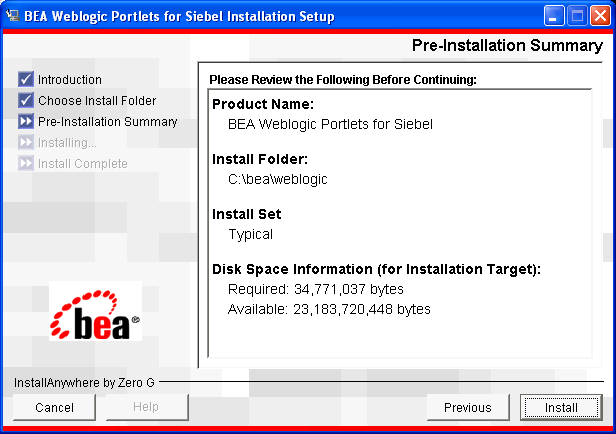
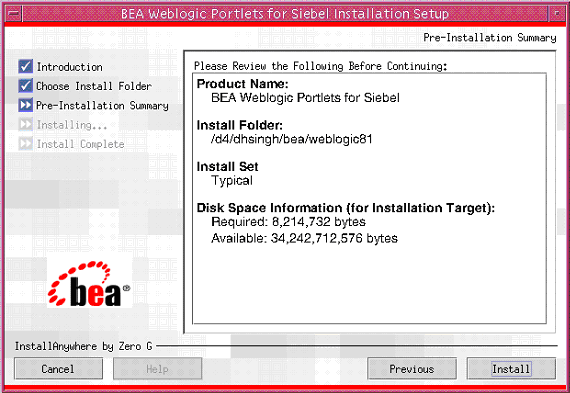
\bea\weblogic<version>directory. This is the path where BEA WebLogic Portlets for Siebel will be installed. - The Pre-Installation Summary screen displays your installation preferences. Click Install to continue.
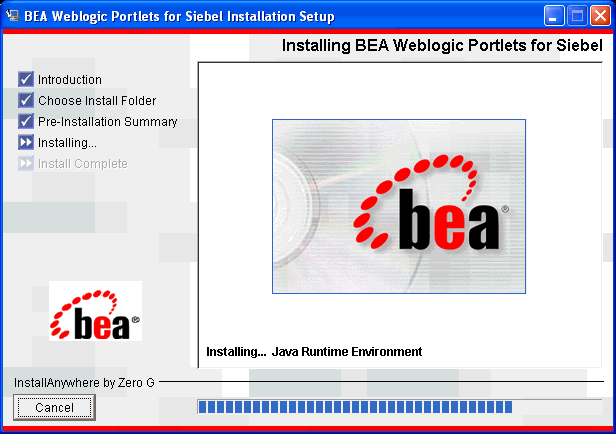
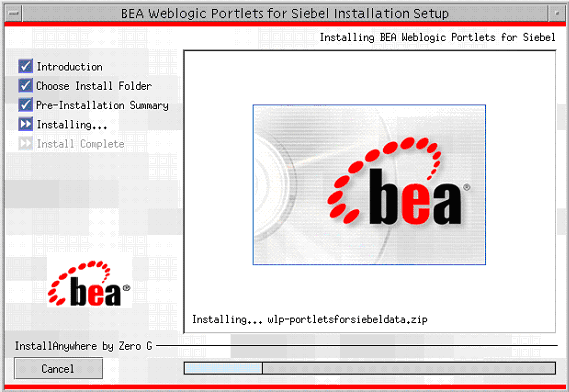
- The Installing BEA WebLogic Portlets Installation Setup screen displays the progress of the installation.
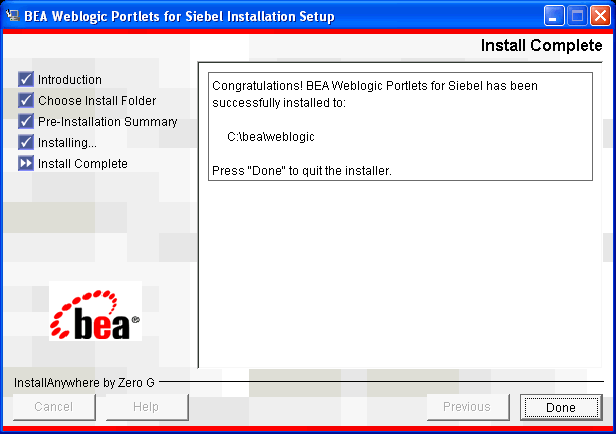
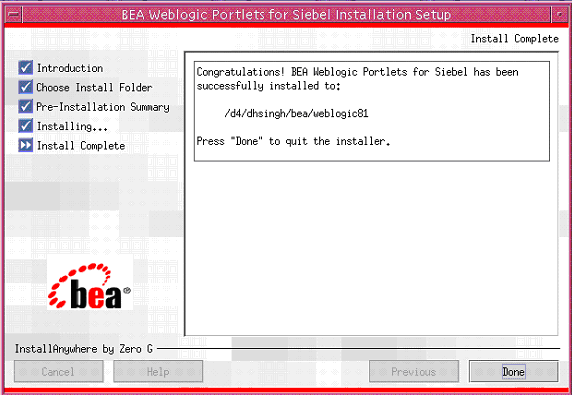
- The Install Complete screen confirms that BEA WebLogic Portlets for Siebel was installed successfully. Click Done to complete the installation.
Figure 1 Installation Initialization Screen
Figure 3 Choose Installation Folder Screen
Note: If a folder other than \bea\weblogic<version> is selected then you need to manually copy the templates files from <selected folder>\workshop\templates to \bea\weblogic<version>\workshop\templates.
Figure 4 Pre-installation Summary Screen
Figure 6 Install Complete Screen
Graphical-Mode Installation on a Unix System
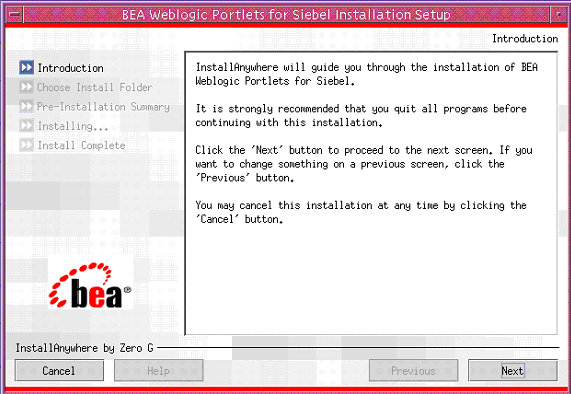
To start the installation on Unix system:
- In the Choose Installation Folder screen, specify the path of the installation directory or click Choose to select the
\bea\weblogic<version>directory. This is the path where BEA WebLogic Portlets for Siebel will be installed. - The Install Complete screen confirms that BEA WebLogic Portlets for Siebel was installed successfully. Click Done to complete the installation.
./install.bin
Figure 7 Installation Initialization Screen
Note: If a folder other than \bea\weblogic<version> is selected then you need to manually copy the templates files from <selected folder>\workshop\templates to \bea\weblogic<version>\workshop\templates.
Figure 9 Choose Installation Folder Screen
Figure 10 Pre-Installation Summary Screen
Figure 12 Install Complete Screen
Reviewing the Installation
The installer will install files in the following directories:
- Product Documentation will be copied into a directory at
<%BEA_HOME%>\weblogic<version>\portal\thirdparty\siebelportlets\docs - Workshop Application Template will be copied into
<%BEA_HOME%>\weblogic<version>\workshop\templates - DDL and DML scripts will be copied into a subdirectory of
<%BEA_HOME%>\weblogic<version>\portal\thirdparty\siebelportlets\scripts
Note: Depending on the type of installation the product documentation might be shipped separately.
Configuring the BEA WebLogic Portal
After the installation is completed, perform the following tasks using the BEA WebLogic Workshop.
Downloading the Third Party Software
|
Download from http://xml.apache.org/dist/xerces-j/old_xerces2/ |
|
||
|
Download the appropriate driver from http://otn.oracle.com/software/index.html |
|||
|
|
|||
Downloading Oracle JDBC Drivers
To download Oracle JDBC drivers, you can either:
- Go to the URL http://otn.oracle.com/software/index.html and look for the appropriate driver.
Or, if you already have Oracle installed:
Configuration and Settings for Siebel (on Unix)
Make the following changes on the Unix system:
-
"${JAVA_HOME}/bin/java" ${JAVA_VM} ${MEM_ARGS} ${JAVA_OPTIONS} -Dfile.encoding="ISO8859_1" -classpath
"${JAVA_HOME}/bin/java" ${JAVA_VM} ${MEM_ARGS} ${JAVA_OPTIONS} -classpath
-Dfile.encoding="ISO8859_1"
${JAVA_HOME}/bin/java ${JAVA_VM} ${MEM_ARGS} ${JAVA_OPTIONS} -Dweblogic.Name=${SERVER_NAME}
-Dfile.encoding="ISO8859_1"
Configuration and Settings for BEA WebLogic Portlets
Setting Up Siebel Portlets Repository
Creating Schema and Importing Metadata in MS SQL Server
To create schema and import metadata for WebLogic Portlets for Siebel in MS SQL Server run the following scripts in MS SQL Server's Query Analyzer in the order given below.
- If WebLogic Portlets for Siebel has not been installed on your machine, then run the following scripts.
The scripts for creating schema are located at the following path:
<%BEA_HOME%>\weblogic<version>\portal\thirdparty\siebelportlets\scripts\schema\mssql
Creating Schema and Importing Metadata in Oracle
To create schema and import metadata for BEA WebLogic Portlets in Oracle database run the following scripts in Oracle's SQL Plus in the order given below:
- If WebLogic Portlets for SAP has not been installed on your machine, then run the following scripts:
The scripts for creating schema are located at the following path:
<%BEA_HOME%>\weblogic<version>\portal\thirdparty\siebelportlets\scripts\schema\oracle
Configuring the SiebelPortalNet.properties File
To configure the properties file:
Registering Java Data Source
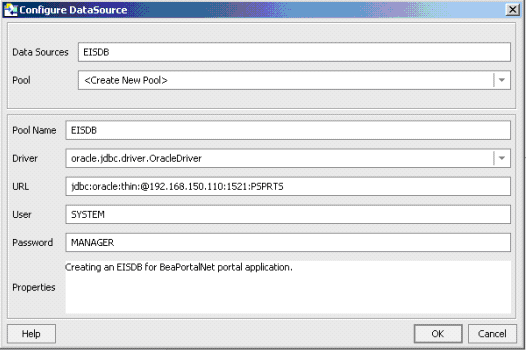
Figure 13 Configuring DataSource (for Oracle) Screen
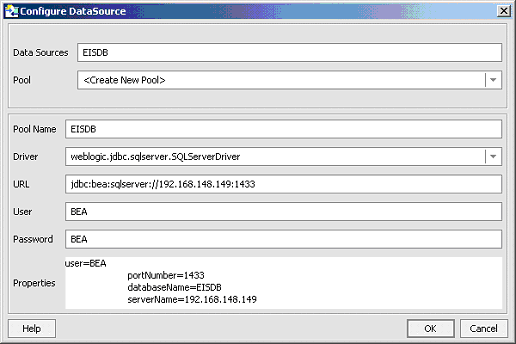
Figure 14 Configuring Data Source (for MS SQL Server) Screen
Activating the License for BEA WebLogic Portlets
To activate the license for BEA WebLogic Portlets:
Uninstalling BEA WebLogic Portlets for Siebel
To uninstall BEA WebLogic Portlets for Siebel:
Troubleshooting
Installation Verification Tests for BEA WebLogic Portlets for Siebel
Instructions
This section provides instructions on running the installation verification test.
- This Installation Verification Test is designed to confirm that BEA WebLogic Portlets for Siebel has been installed properly. The Installation Verification Test is not designed to serve as a comprehensive test of BEA WebLogic Portlets for Siebel functionality.
- BEA specialists performing this test should provide one copy of this test to the customer installation contact by attaching it to a copy of the Post Installation Checklist.
- Unless otherwise indicated, each section covers functionality for all platforms that BEA WebLogic Portlets for Siebel currently supports. Please note that not all products are available on all platforms.
- The BEA WebLogic Platform Installation Verification Test should be completed prior to starting this test.
- BEA WebLogic Portlets for Siebel must have been installed as per the Installation Guide for BEA WebLogic Portlets for Siebel.
Installation Verification
Verify Project Templates
Project related templates would be copied into a directory at <%BEA_HOME%>\weblogic81\workshop\templates.
Verify that the following files are present in the folder:
Verify Sample View Templates
Sample view templates (for .jsp and .jpf files) will be copied into a directory at <%BEA_HOME%>\weblogic81\portal\thirdparty\siebelportlets\newportlets.
Verify that the following files are present in the folder:
Verify Product Documentation
Third party product documentation, if provided, will be copied into a directory at <%BEA_HOME%>\weblogic81\portal\thirdparty\siebelportlets\docs.
Verify that the following files are present in the folder:
- BEA WebLogic Portlets Administration Guide.doc
- BEA WebLogic Portlets Installation Guide.doc
- Development Guide for BEA WebLogic Portlets.doc
- User Guide for BEA WebLogic Portlets.doc
Verify SQL Scripts
SQL scripts for MS SQL Server will be copied into a subdirectory of <%BEA_HOME%>\weblogic81\portal\thirdparty\siebelportlets\scripts\schema\mssql.
Verify that the following script files are copied into the folder:
- MSSQL_PNET_DROP_TABLE.SQL
- MSSQL_PNET_ CREATE_TABLES.SQL
- MSSQL_PNET_DROP_FKEYS.SQL
- MSSQL_PNET_CREATE_FKEYS.SQL
Also verify that the insertion script file MSSQL_PNET_INSERT_SCRIPTS.SQL is copied into the following folder:
<%BEA_HOME%>\weblogic81\portal\thirdparty\siebelportlets\scripts\data
SQL scripts for Oracle will be copied into a subdirectory of <%BEA_HOME%>\weblogic81\portal\thirdparty\siebelportlets\scripts\schema\oracle.
Verify that the following files are present in the folder:
- ORACLE_PNET_DROP_TABLE.SQL
- ORACLE_PNET_CREATE_TABLES.SQL
- ORACLE_PNET_DROP_SEQUENCE.SQL
- ORACLE_PNET_CREATE_ SEQUENCE.SQL
- ORACLE_PNET_DROP_FKEYS.SQL
- ORACLE_PNET_CREATE_FKEYS.SQL
Also verify that the insertion script file ORCLE_PNET_INSERT_SCRIPTS.SQL is copied into the following folder:
<%BEA_HOME%>\weblogic81\portal\thirdparty\siebelportlets\scripts\data.
Database Verification
Verify Database
Prerequisite: DataSource Creation has been done either using the BEA WebLogic Workshop / WebLogic console.
Assumption: DataSource/Connection pool has been created using either BEA WebLogic Workshop/WebLogic console as specified in the Installation document.
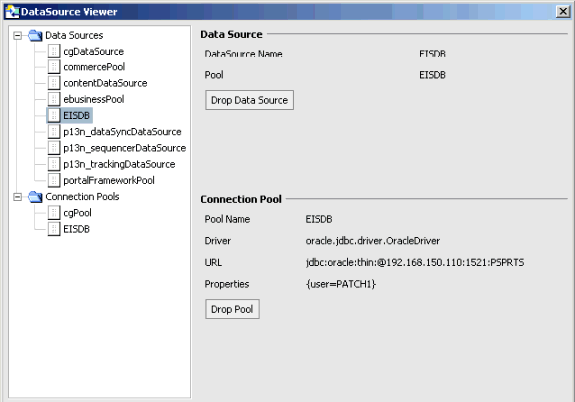
Note: The DataSource Name field should display as above, but the remaining fields may contain different information depending on your specific installation.
EIS Administration Verification
Verify EIS Administration Portlet Initialization and Authentication
To verify administration authentication:
Verify EIS Instance Creation
Verify EIS Credential Mapping
To create an EIS credential mapping:
- The list of Portal Users matching the search criteria is populated in the Portal User Id drop down box. Select the Portal User Id.
- Select the Allow Drilldown To EIS option to give Native drill down to view the information in the Portlet though ITS (Internet Transaction Service) by the portal user as required.
- Select the Allow Detailed Information option to give Target drilldown to view the Siebel window information in the Portlet by the portal user as required.
Portlets Verification
Verify Authentication
- Sales Order
- Shipping Status
- Service Request
- Service Request Activity
- My Accounts
- My Team Accounts
- Agreements By Expiry Date
- All Assets By Account
- Contacts By Account
- Customer List With Address Info
- Repair Status
- RMA Order Status
Note: The visibility of the portlets will vary depending on the permission set by the administrator to the users for the above listed portlets.
Verify the Sales Order Portlet
Prerequisite: The user has successfully logged into the Portal.
To view an existing sales order:
Verify the Shipping Status Portlet
Prerequisite: The user has successfully logged into the Portal.
To edit / update a sales order shipping status:
- The Sales Order Shipping Status portlet shows the shipping status information pertaining to the selected sales order.
Verify the My Accounts Portlet
Prerequisite: The administrator has given permission, for this portlet, to the portal user, who can be either an employee or an administrator or both.
