Establishing Interportlet Communications
|
|
Setting Up the Examples
This manual contains two exercises that will step you through the procedures for establishing interportlet communications. One example uses a portal event handler (A Simple Example of Establishing IPC), while the other employs both a custom event handler and a page flow event handler (Establishing IPC by Using Custom and Page Flow Events). These examples will familiarize you with the workings of the Event Handler tool in the context of some common uses of that tool.
These examples are specific to interportlet communications within a single portal web application. They do not apply to federated portal applications. For information on establishing IPC with federated portals (such as WSRP), please refer to Establishing Interportlet Communications with Remote Portlets
This section includes information on the following topics:
- Parts of a Portal Application
- Step 1: Create the Domain
- Step 2: Create the Enterprise Application
- Step 3: Create the Portal Web Application (Project)
- Summary
- Next Steps
Parts of a Portal Application
A portal application is part of hierarchy of the components described in this section.
- Portal Domain: The portal domain is a logically related group of WebLogic Server resources that contain the application server, including the administration server and managed servers, used by the portal, represented by a
config.xml file. - Portal Application: This component, also called the "enterprise" application, consists of one or more portal web application (or "project") modules, EJB modules, and resource adapters. It might also include a client application. An enterprise application is defined by an
application.xmlfile, which is the standard J2EE deployment descriptor for enterprise applications. You can have more that one portal application per domain. - Portal Web Application: Alternately referred to as the "portal project," this component is the specific portal. It contains the elements of the portal framework necessary to build and render the portal, such as the WebLogic Portal JSP tags, APIs and the default framework files. The
In this section, you will create the domain and enterprise application that you will use in the exercises included in A Simple Example of Establishing IPC and Establishing IPC by Using Custom and Page Flow Events. In this exercise, the root directory for your domain should be BEA_HOME\user_projects\domains; for the applications and all of their components, it's BEA_HOME\user_projects\applications (where BEA_HOME is the directory where you installed BEA WebLogic Platform). These are default directories that BEA WebLogic Platform creates upon installation.
Step 1: Create the Domain
To create a domain, do the following:
- Follow the prompts using the value specified in Table 2-1. Click Next when you are finished with each dialog box.
Step 2: Create the Enterprise Application
To create a portal application, do the following:
- In Name, enter ipcTest.
- In Server, click Browse to display the Select WebLogic Server config.xml File dialog box. Navigate to the ipcDomain directory and select
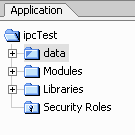
config.xml. When the application is successfully created, it will appear in the application panel, as shown in Figure 2-1.
Figure 2-1 . Portal Application Created
Step 3: Create the Portal Web Application (Project)
The portal web application, or portal project, will contain the framework components required to build and render the portal. To create the portal web application, use the following procedure:
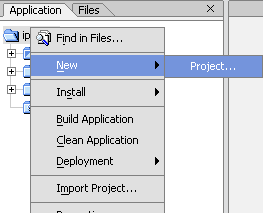
- In the file tree, right-click the application name (ipcTest) and select New>Project, as shown in Figure 2-2.
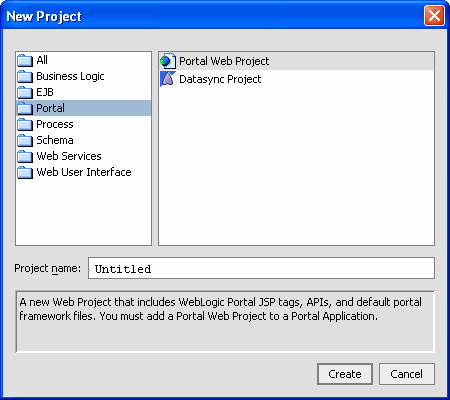
The New Project dialog box appears (Figure 2-3):
Figure 2-3 New Project Dialog Box
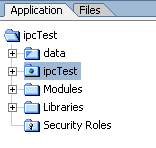
The project is updated (you will see a progress meter). Once the update is complete, the project appears as a directory in the file tree (Figure ).
Figure 2-4 Project Added to File Tree
Figure 2-2 Creating a New Project
Summary
Upon completion of the preceding procedures, you will have created a domain, an enterprise application, and a portal web application. The file tree in the left-hand pane of WebLogic Workshop should look like the example in Figure 2-1. These will be the domain and enterprise application you will use for the exercises in this document.
Next Steps
With a development environment completed, you next will complete the exercises described in their respective chapters:
In these exercises, you will create individual page flows, portlets, JSPs, and backing files to establish interportlet communications within the portal project. You will then add these portlets to a portal and test the application to ensure IPC has been achieved.


