Using WSRP with WebLogic Portal
|
|
Implementing Custom Data Transfer
Custom data transfer allows portlet developers to exchange arbitrary data between Producers and Consumers; for example,
- You are a portal developer building a portal with a set of location-sensitive portlets deployed on one/more producers. You would like to supply a zip code to each of these portlets at request time so that each portlet can use this zip code to generate location-aware markup.
- You want to send arbitrary data such as theme or style information or user profile data to portlets.
Custom data transfer allows you to easily resolve these situations and many others like them. Both Simple Producers and Complex Producers can take advantage of this feature.
This section describes how to implement custom data transfer. It includes information on these subjects:
Custom Data Transfer Interfaces
Custom data transfer introduces the following "marker" interfaces:
Allows the Consumer to send some arbitrary data to the Producer when an interaction (such as a form submission) is taking place.
Implementing the Interfaces
The following example illustrates custom data transfer using com.bea.wsrp.ext.holders.SimpleStateHolder. This class provides a default implementation of the above interfaces. You can use this class to exchange simple name-value pairs of data.
Implementing Interfaces in a Complex Producer: Example
To send data, you need to create an instance of this instance and place it in the request as a request attribute. The Producer/Consumer then transmits that object across the wire and make it available as a request attribute on the other end.
In the following example, we are sending a zip code to a remote portlet.
Step 1: Set Up the Environment
Set up your environment by doing the following:
Note: For instructions on how to create the components required by the following steps, Step 1: Set Up Your Environment in chapter "Establishing Interportlet Communications with Remote Portlets".
Step 2: Create the Producer JSP and Portlet
With the environment in place, you will next create a JSP file on the Producer and a portlet to surface that file. This JSP file will get the state from the request. To do so, do the following:
Note: The following procedure assumes that WebLogic Workshop is running. If it isn't, launch it now.
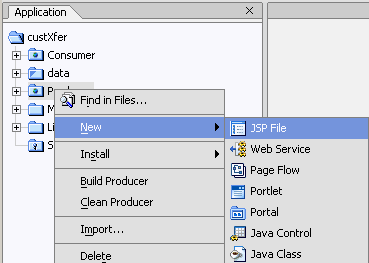
- Right-click Producer in the application tree to open the context menu and select New>JSP File (Figure 6-1).
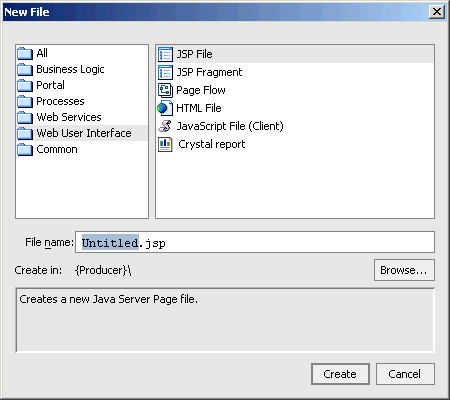
The New File dialog box appears (Figure 6-2).
Figure 6-2 New File Dialog Box for New JSP
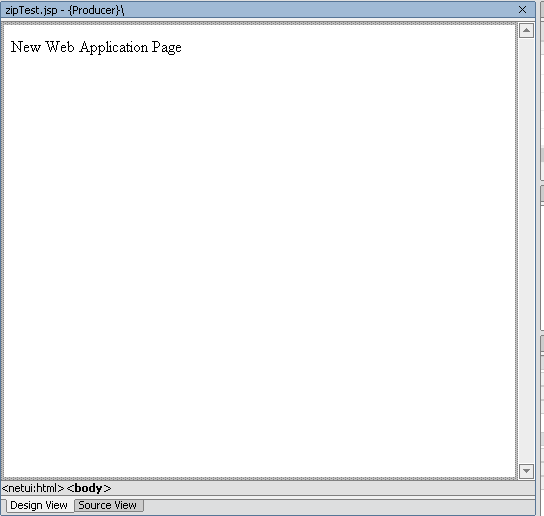
The default JSP file appears, in Design View, in the middle pane of WebLogic Workshop (Figure 6-3)
Figure 6-3 Default JSP in Design View
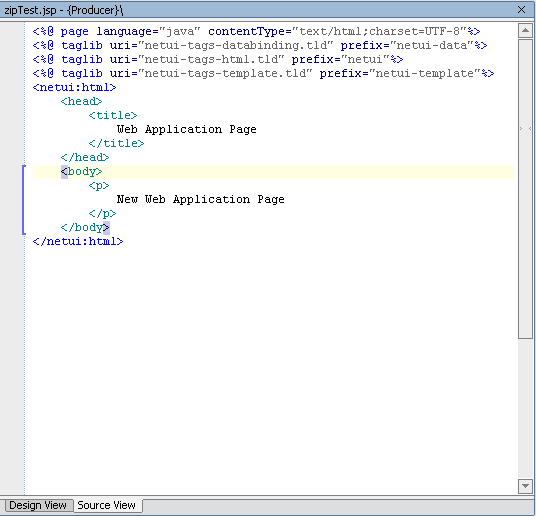
- Click Source View to display the JSP source (Figure 6-4).
- Copy the code in Table 6-1 and replace the contents of the JSP source with it.
Figure 6-1 Creating a New JSP File
Figure 6-4 Default JSP in Source View
Listing 6-1 Code to Get State from the Request
<%@ page import ="com.bea.wsrp.ext.holders.SimpleStateHolder,
          com.bea.wsrp.ext.holders.MarkupRequestState"%>
<%
    SimpleStateHolder state = (SimpleStateHolder)
    request.getAttribute(MarkupRequestState.KEY);
    String zip = (String) state.getParameter("zipCode");
%>
<%=zip%>
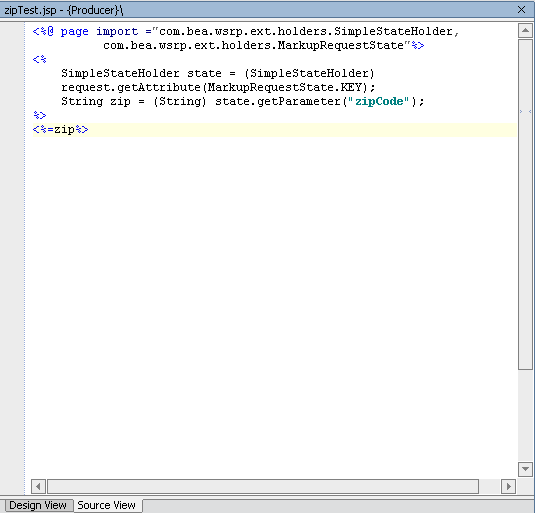
When complete, the Source View should look like that shown in Figure 6-5.
Figure 6-5 New JSP Source for zipTest.jsp
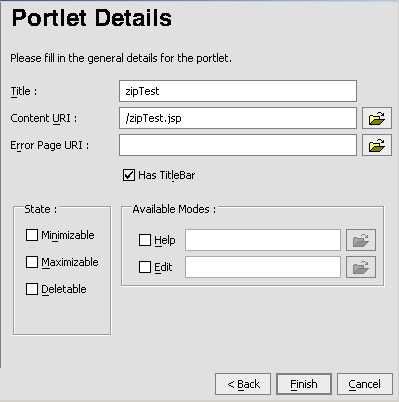
The Portlet Details dialog box appears. Note that
zipTest.jspalready appears in the Content URI field (Figure 6-6).Figure 6-6 Portlet Details with zipTest.jsp Included
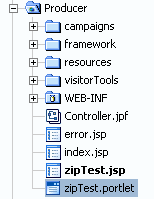
The portlet
zipTest.portletwill be created and appear in the application tree (Figure 6-7).Figure 6-7 New JSP Portlet, zipTest.portlet, Added
Step 3: Federate zipTest.portlet to the Consumer
Next, you need to set up a remote portlet on the Consumer to surface in zipTest.portlet from the Producer. Use the following steps.
Note: Before you begin, start WebLogic Server by opening the tools file and selecting WebLogic Server>Start WebLogic Server.
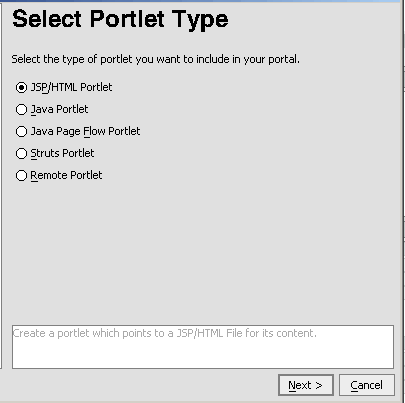
The Select Portlet Type dialog box appears (Figure 6-8).
Figure 6-8 Select Portlet Type Dialog Box
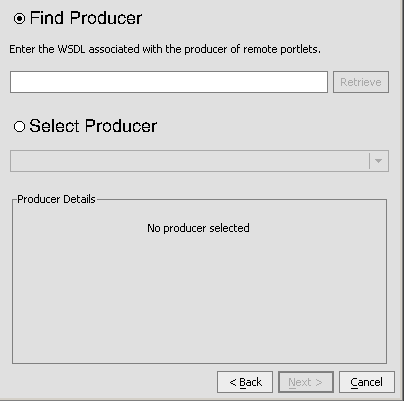
The Find/Select Producer dialog box appears (Figure 6-9).
Figure 6-9 Find/Select Producer Dialog Box
-
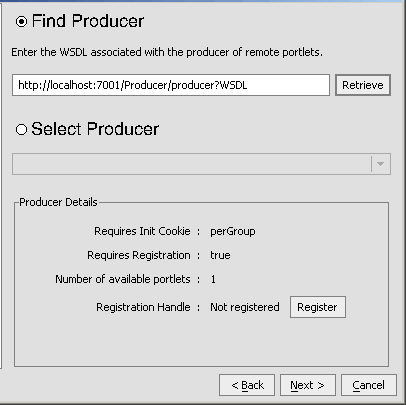
After a few moments, the Find/Select Producer dialog box refreshes, displaying the Producer details, as shown in
Figure 6-10 Producer Retrieved
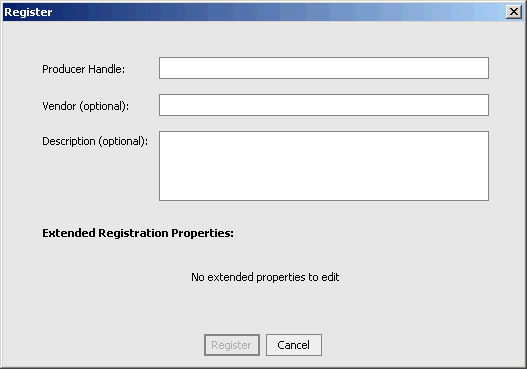
The Register dialog box appears (Figure 6-11).
Figure 6-11 Register Dialog Box
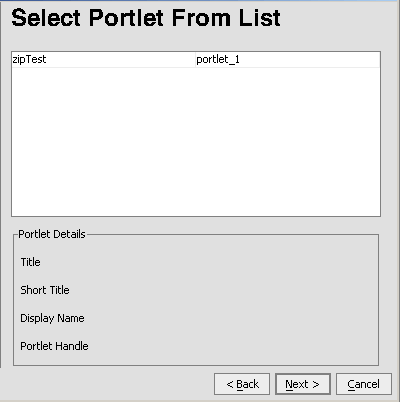
The Select Portlet from List dialog box appears (Figure 6-12).
Figure 6-12 Select Portlet from List Dialog Box
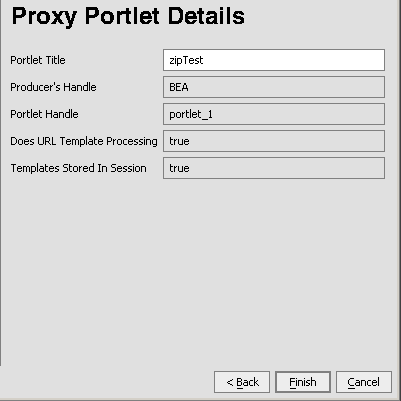
The Proxy Portlet Details dialog box appears (Figure 6-13).
Figure 6-13 Proxy Portlet Details Dialog Box
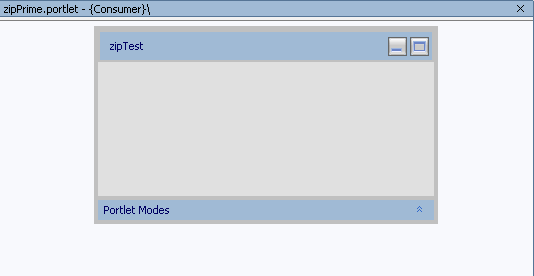
The Proxy Portlet Details dialog box closes and WebLogic Workshop reappears, showing the design view of the new portlet (Figure 6-14).
Figure 6-14 New Remote Portlet zipPrime.portlet in Design View
http://localhost:7001/Producer/producer?WSDL
Step 4: Create and Attach a Backing File to the Consumer
In this step, you will create a backing file called CustomDataBacking.java on the Consumer side and attach that backing file you created in Step 3: Federate zipTest.portlet to the Consumer. Use the following procedure:
- Expand the Consumer node to show
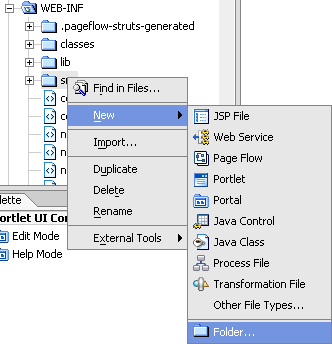
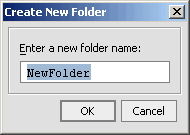
WEB-INF/srcand right-click it to open the context menu, and select New>Folder, as shown in Figure 6-15. The Create New Folder dialog box appears (Figure 6-16).
Figure 6-16 Create New Folder Dialog Box
The
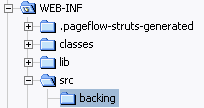
backingfolder will appear in the application tree underWEB-INF/src, as shown in Figure 6-17.Figure 6-17 backing Folder Under WEB-INF/src
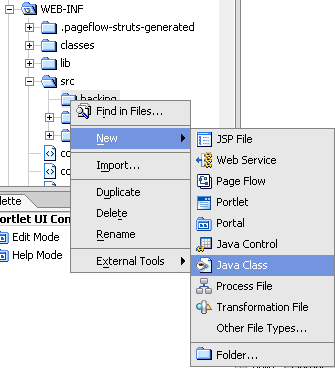
- Right-click backing to open the context menu and select New>Java Class (Figure 6-18).
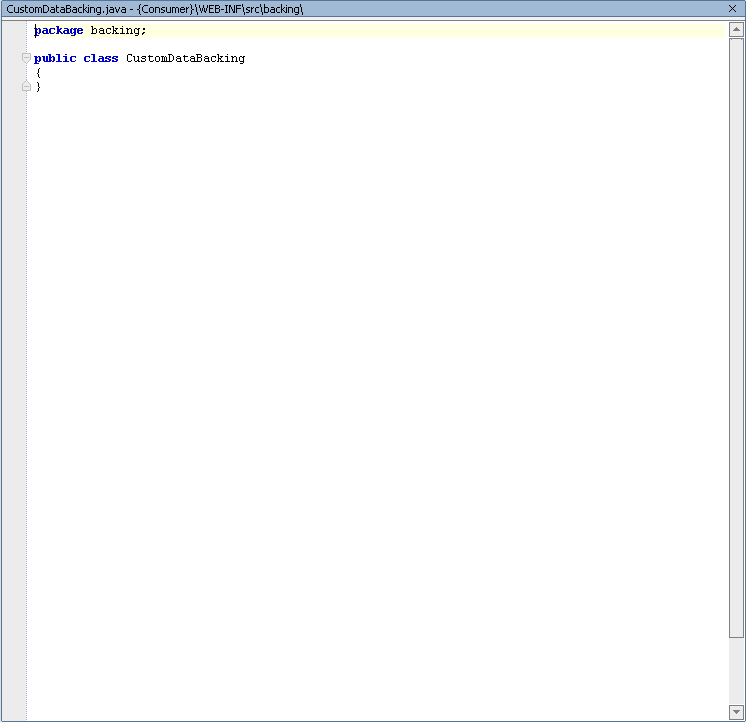
A backing file template opens in WebLogic Workshop (Figure 6-19).
Figure 6-19 Backing File Template
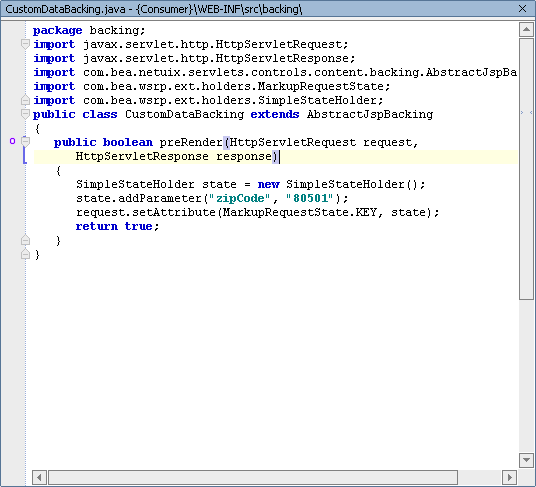
- Copy the code in Table 6-2 into the template and save the file.
Figure 6-15 Creating a New Folder in WEB-INF/src
Figure 6-18 Creating a New Java Class
Listing 6-2 Adding an Instance of SimpleStateHolder
package backing;
import javax.servlet.http.HttpServletRequest;
import javax.servlet.http.HttpServletResponse;
import com.bea.netuix.servlets.controls.content.backing.AbstractJspBacking;
import com.bea.wsrp.ext.holders.MarkupRequestState;
import com.bea.wsrp.ext.holders.SimpleStateHolder;
public class CustomDataBacking extends AbstractJspBacking
{
   public boolean preRender(HttpServletRequest request,
      HttpServletResponse response)
   {
      SimpleStateHolder state = new SimpleStateHolder();
      state.addParameter("zipCode", "80501");
      request.setAttribute(MarkupRequestState.KEY, state);
      return true;
   }
}
The template should now look like the example in Figure 6-20.
Figure 6-20 CustomDataBacking.java in WebLogic Workshop
- Add the backing file to
zipPrime.portletby typingbacking.CustomDataBackingin the Backing File field in the Property Editor, as illustrated in Figure 6-21 and press Tab.
Figure 6-21 Adding a Backing File
Step 5: Test the Application
With the application components in place, you can now test the application. If the test is successful, the zip code 80501, provided by the backing file created on the Consumer, will appear in the portlet when it is rendered.
To test the application, do the following:
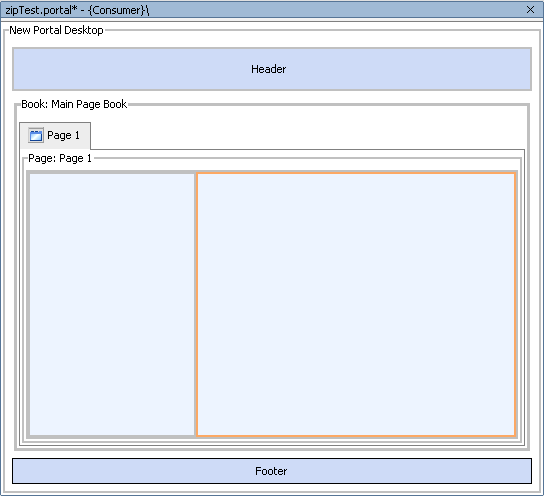
The portal is created and appears in the WebLogic Workshop design view (Figure 6-22).
Figure 6-22 zipTest.portal in WebLogic Workshop Design View
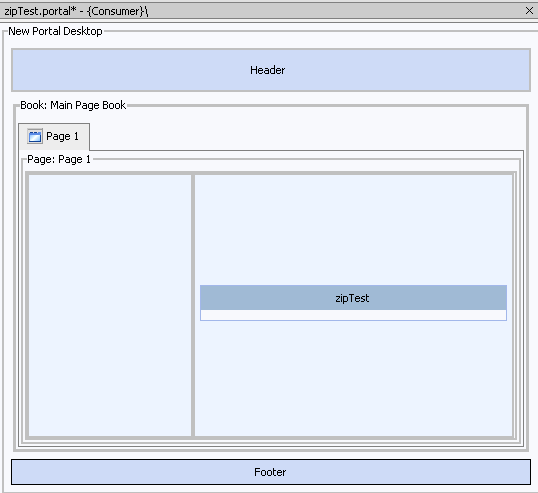
- Drag zipTest from the data palette into the portal (you can place it in either placeholder; in Figure 6-23, it is in the right-hand placeholder).
A browser opens, displaying the portal (this might take a few moments). Note the zip code 80501 appearing in the portlet (Figure 6-24).
Figure 6-24 zipTest.portal Successfully Rendered
Figure 6-23 zipTest.portlet Added to zipTest.portal
Using this Example in a Simple Producer
The procedure described in Implementing Interfaces in a Complex Producer: Example applies only to complex producers. If you want to use the preceding example in a simple producer, you must make a few modifications. To implement the interfaces in a simple Producer, use this procedure:
- In the application custXfer, create a new project; however, instead of a Portal Web Project, make this project a simple Web Project and call it simpleProducer. See Step 1: Set Up the Environment for instructions.
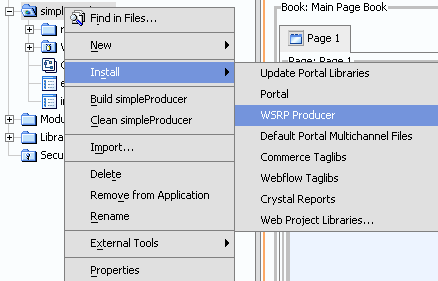
- Right-click simpleProducer in the application tree to open the context menu and select Install>WSRP Producer (Figure 6-25.
The application tree will update and show
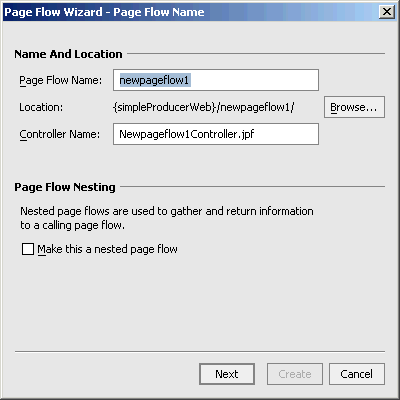
wsrp-producer-config.xmlunder thesimpleProducer/WEB-INFdirectory.The Page Flow Wizard - Page Flow Name dialog box appears (Figure 6-26).
Figure 6-26 Page Flow Wizard - Page Flow Name Dialog Box
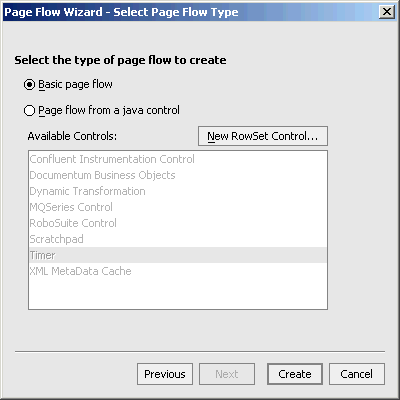
The Page Flow Wizard - Select Page Flow Type dialog box appears (Figure 6-27).
Figure 6-27 Page Flow Wizard - Select Page Flow Type Dialog Box
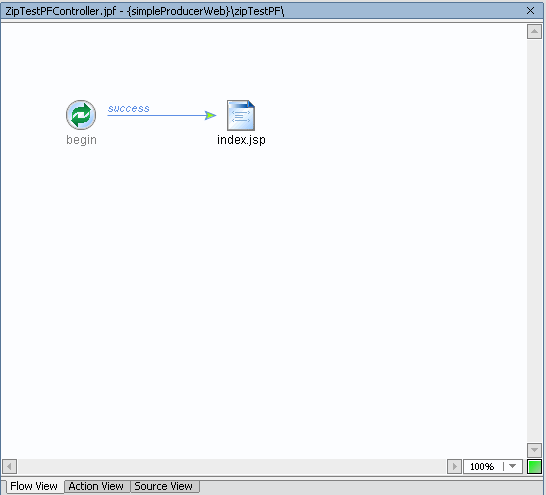
WebLogic Workshop reappears, showing the basic page flow in the Flow View (Figure 6-28).
Figure 6-28 Basic Page Flow in Flow View
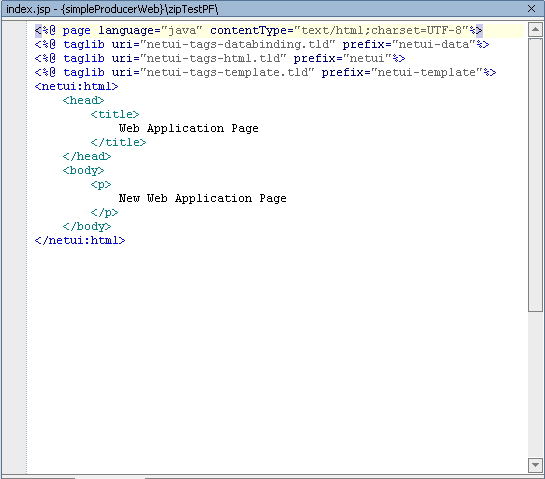
- Click Source View to display the
index.jspsource (Figure 6-29). - Copy the code in Listing 6-3 into
index.jsp, overwriting its entire default content.
Figure 6-25 Installing a WSRP Producer
Figure 6-29 index.jsp Source View
Listing 6-3 Using a Page Flow Portlet for a Simple Producer
<%@ page import="com.bea.wlw.netui.pageflow.scoping.ScopedRequest"%>
<%@ page import ="com.bea.wsrp.ext.holders.SimpleStateHolder,
                  com.bea.wsrp.ext.holders.MarkupRequestState"%>
<%
    SimpleStateHolder state = (SimpleStateHolder)
    ((ScopedRequest) request).getOuterRequest().
    getAttribute(MarkupRequestState.KEY);
    String zip = (String) state.getParameter("zipCode");
%>
<%=zip%>
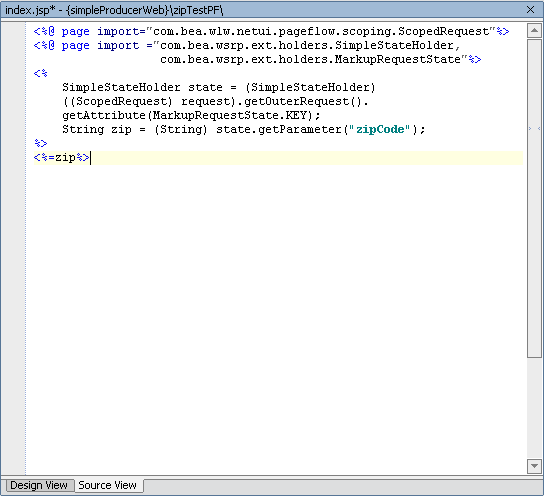
The Source View for
index.jspshould now look like Figure 6-30.Figure 6-30 Updated index.jsp in WebLogic Workshop
- Right-click
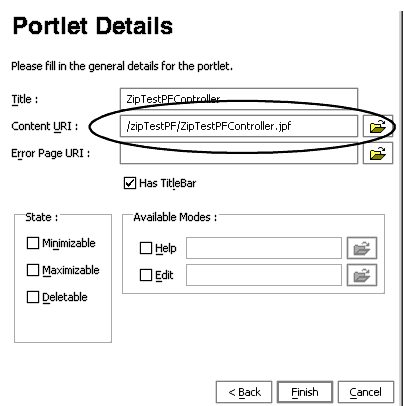
ZipTestPFController.jpfin the application tree to open the context menu and select Generate Portlet... The Portlet Details dialog box appears (Figure 6-31).
Figure 6-31 Portlet Details for a JPF Portlet
Note that
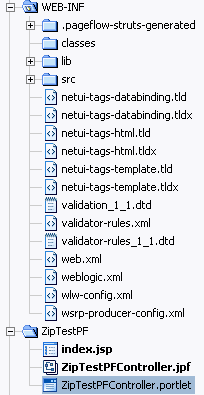
/zipTestPF/ZipTestPFController.jpfhas already been entered in the Content URI field.The portlet is created; note that
ZipTestPFController.portletnow appears undersimpleProducerWeb/WEB-INF(Figure 6-32).Figure 6-32 ZipTestPFController Added to Application Tree
- Federate Z
ipTestPFController.portletto the Consumer portal web application following the steps specified above in Step 3: Federate zipTest.portlet to the Consumer. Make the following changes within the procedure: - File name: simpleProducer
- Find Producer:
http://localhost:7001/simpleProducer/producer?WSDL Note: Registration is not required (Requires Registration=false) since you are federating a portlet from a simple producer; therefore, you don't need to open the Registration dialog box as you would for a complex producer.
- Select Portlet from List: ZipTestPFController
- Producer Handle: USPS
- Attach the backing file
CustomDataBacking.javaby typingbacking.CustomDataBackingin the Backing File field in the Property Editor. Press Tab. A browser will open and, after a few moments, the portal will appear, showing the zip code 80501, as shown in (Figure 6-33).
Figure 6-33 zipTest.portal in a Browser
Note: Ensure that WebLogic Server is running.
Deploying Your Own Interface Implementations
If you want to deploy your own implementations of these interfaces, consider the following practices:
- The implementation must be serializable.
- The same class version of the implementation must be deployed on both the Producer and Consumer. If the versions are different, the implementations must make sure to have the same
serialVersionUIDfor all versions. - Sending large amounts of data may have performance implications.
Implementation Rules
Whether a Consumer or Producer can send custom data depends on the type of request. These rules apply:
- Consumers can always send
InteractionRequestState. There are no exceptions. - Producers can always return
InteractionResponseState. There are no exceptions. - Consumers can send
MarkupRequestStateonly when there is a need to refresh the portlet. For example, if caching is enabled on the remote portlet, Consumer may not always send a request to the Producer to generate markup. - Consumers cannot return
MarkupResponseStateif any the following options are enabled:
