| Download Docs | Site Map | Glossary | |
|
|
|||
| bea.com | products | dev2dev | support | askBEA |
|
|
|
||||||||
| e-docs > WebLogic Server > JRockit for Windows and Linux User Guide > Using the JRockit Management Console |
|
JRockit for Windows and Linux User Guide
|
Using the JRockit Management Console
The JRockit Management Console can be used to supervise and monitor running instances of JRockit. It provides real-time information about the running application's characteristics, which can be used both during development—for example, to find where in an application's life cycle it consumes more memory—and in a deployed environment—for example, to monitor the system health of a running application server.
This section includes information on the following subjects:
The extra cost of running the JRockit Management Console against a running JRockit is very small and can almost be disregarded. This provides for a very low cost monitoring and profiling of your application.
Starting the JRockit Management Console is a two-step process:
Additionally, you might want to also complete these tasks as part of the start-up process:
Before the Management Console can connect to JRockit, the management server in the virtual machine needs to be started. The server is disabled by default. To enable the management server, start JRockit set the -Xmanagement option:
-Xmanagement
Start the JRockit Management Console
Start the JRockit Management Console from the command prompt by typing:
java -jar ManagementConsole.jar
Note: Before starting the Management Console, you must specify the JRE and the path to the .jar file.
When JRockit is started with the -Xmanagement option set—and provided JRockit is not running in "quiet" mode—it should print out a short message following the command line indicating that the management server is running and which port it is using. You can optionally choose which port to use by setting the port in the port property:
-Djrockit.managementserver.port=<portnumber>
The default port the management server uses to connect is 7090. It is strongly recommended that you block this port in your firewall, otherwise unauthorized users might access the management server.
Change the Number of Connections
You can change the number of connections allowed to the server by setting the maxconnect property:
-Djrockit.managementserver.maxconnect=<maximum number of connections>
The default limit is four concurrent connections. While this should be enough for most users, you can change it, if necessary. The connection limit protects against Denial of Service (DoS) attacks by intruders.
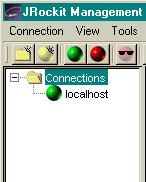
When the JRockit Management Console window appears, the console has started, as shown in Figure 8-1:
Figure 8-1 JRockit Management Console
The JRockit Management Console window is divided into two panes: a connection browser tree in the left pane (Figure 8-2) and a tabbed interface in the right pane (Figure 8-3).
Figure 8-3 Information Tabs (Administrator Mode)
The first tab shows an Overview of information for the selected JRockit connection(s) (as highlighted in the connection browser pane). The other tabs contain detailed information about different areas of JRockit, as will be described in Information Tabs" on page 8-16.
Figure 8-3 shows the information tabs available in the console's Administrator operation mode. When the console is in the Developer mode, additional tabs appear, as shown in Figure 8-4. These two operation modes are described in Setting the Operation Mode" on page 8-10.
Figure 8-4 Information Tabs (Developer Mode)
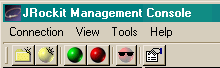
The console includes a toolbar that contains command buttons for some of the menu options (Figure 8-5). To toggle the Toolbar on or off, on the View menu select Tool Bar.
Figure 8-5 Management Console Toolbar
The status bar (Figure 8-6) at the bottom of the window displays information messages and tool tips when you hover over a toolbar button or select something in a menu. It also indicates whether the JRockit Management Console is connected to one or several JRockit implementations or not. To toggle the Status Bar on or off, on the View menu, select Status Bar.
Once the console is running, you will need to configure it to suit your needs. Configuring—or "setting up"—the console includes these tasks:
The connection browser displays a collection of saved connections to JRockit organized in folders. If necessary, you can add your own folders and connection nodes to the tree structure. Active connections currently connected to a running JRockit are indicated by a green icon; those disconnected are indicated by a red icon.
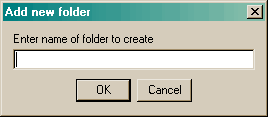
To create your own folder in the connection browser, do the following:
The Add new folder dialog box (Figure 8-7) appears:
Figure 8-7 Add New Folder Dialog Box
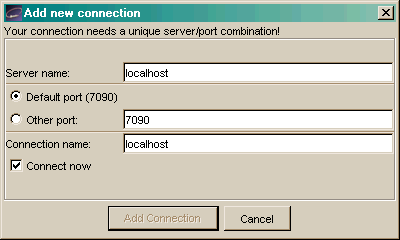
To create a new connection to JRockit in the connection browser, do the following:
The Add new connection dialog box (Figure 8-8) appears:
Figure 8-8 Add New Connection Dialog Box
Connecting a Connection to JRockit
To connect to JRockit, do the following:
Disconnecting a Connection from JRockit
To disconnect a connection from JRockit, do the following:
Renaming a Connection or Folder
To rename a connection or a folder of connection, do the following:
The Folder properties dialog box (Figure 8-9) appears:
Figure 8-9 Folder Properties Dialog Box
Note: If you select the last option (click the item label), the Folder properties dialog box will not appear. Instead, the label itself will be enabled for direct editing. Simply type the new name over the old and click away from the label.
Removing a Connection or Folder
To remove a connection or folder, do the following:
Hiding Disconnected Connections
Sometimes you might want to show just information about active JRockit connections. To hide information about disconnected connections, do one of the following:
To show the information about disconnected connections again, simply deselect Hide Disconnected in same way that you made the selection.
This section describes how to enable various JRockit Management Console settings.
The Management Console can be run in two different operating modes:
To set the operation mode, do the following:
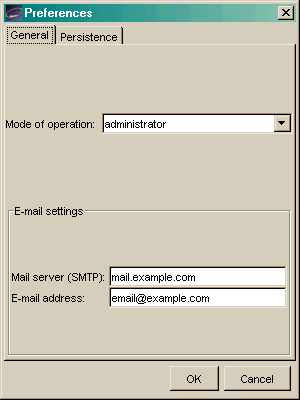
The Preferences dialog box (Figure 8-10) appears:
Figure 8-10 Preferences Menu (General Tab)
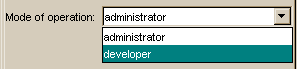
Figure 8-11 List of Operation Modes
Depending upon the mode to which you are toggling, the tabs on the console will change. See Figure 8-3 and Figure 8-4 for examples.
In addition to setting the operation mode, you can use the Preferences dialog box to change these settings:
To change either of these values, open the Preferences dialog box from the Tools menu and proceed are described in the following sections:
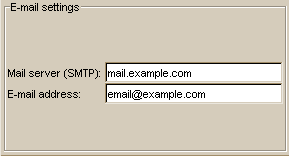
To change e-mail preferences, do the following:
Figure 8-12 E-mail Preferences Panel
Enabling the persistence means that aspect values are saved to a file and can be reviewed in charts by opening the View menu and selecting View Historical Data (View Historical Data" on page 8-29).
Selecting Aspects to Persist To set persistence preferences, do the following:
Note: If you have not disconnected the connections and attempt to use this dialog box, you will be prompted to disconnect.
The checkboxes in the Aspects to persist panel become enabled (Figure 8-13):
Figure 8-13 Aspects to Persist Panel
The selected aspect values are saved to a file that you can review in charts as described in View Historical Data" on page 8-29.
Specifying the Persistence Directory In addition to setting preferences for the aspects to persist, you can also specify where to save the file that contains the aspect value (the "Persistence directory"). To do so:
Erasing Persistence Value Logs Finally, you can erase all persistence value logs by clicking Clear all aspect logs. You will see a confirmation message to which you should respond Yes.
You can customize the console and change the way some of the monitoring data is displayed, as described in this section.
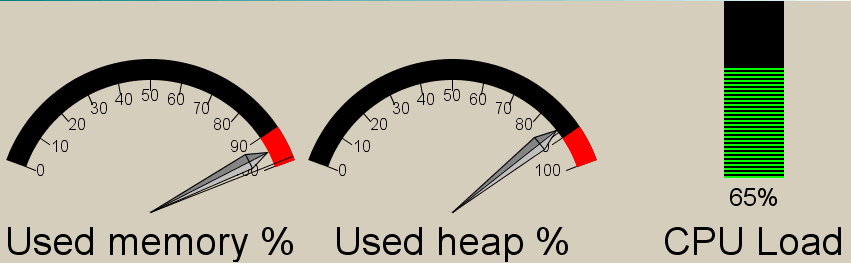
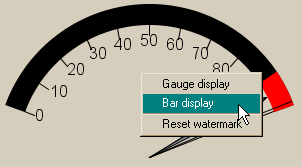
The gauges and bars are graphical devices showing memory and processor usage (Figure 8-14).
Figure 8-15 Gauge Context Menu (Bar Display Selected)
The selected gauge will appear as a bar (Figure 8-16).
Figure 8-16 Gauges and Bars with Gauge Converted to a Bar Display
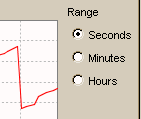
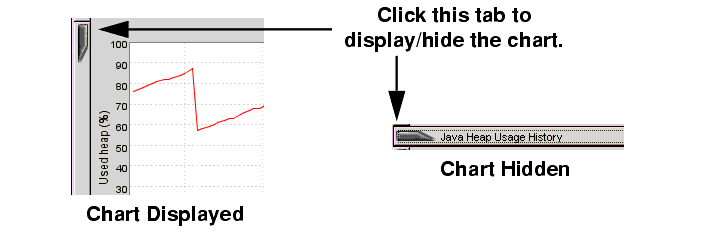
Charts appear on the JRockit Management Console to show specified information about JRockit.
Figure 8-17 Range Selection Radio Buttons
When you exit the JRockit Management Console, your settings are automatically saved in a file called consolesettings.xml. This file is located in the folder:
<user home directory>\ManagementConsole
The exact path to the user home directory will vary on different platforms. On Windows it is usually something like \Documents and Settings\<username>; for example:
C:\Documents and Settings\jsmith\ManagementConsole
If no settings file exists in this directory it will be automatically created the next time the Management Console is closed.
Warning: Do not edit this file by hand! Doing so can make it unusable and may cause the Management Console to crash on startup.
If you are experiencing problems with the settings file, you can always delete it and let the Management Console create a new one for you.
The JRockit Management Console monitors different "aspects" of JRockit. An aspect is data that can be measured; for example, used heap size or JRockit uptime.
Information tabs are pages containing details about different areas of the monitored JRockit. You can change tab by clicking on it or by accessing the View menu. This section describes the tabs available on the JRockit Management Console.
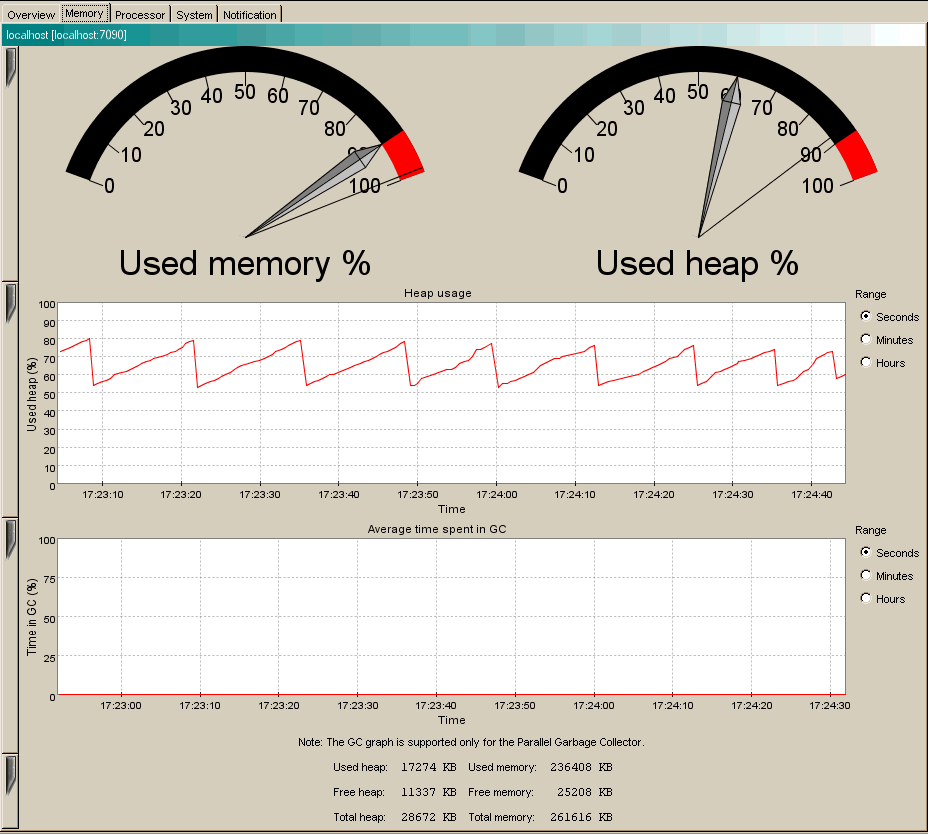
The Overview tab (Figure 8-19) shows an overview of selected connections. To select more than one connection, select the folder containing the connections you want to view. They will appear simultaneously. The page is divided into a "dash board" with gauges in the upper part and charts in the lower part.
The Memory tab (Figure 8-20) shows information about the memory status of the system, as shown.
At the bottom of the page the following text information is displayed (in kilobytes):
The Processor tab (Figure 8-21) shows information about the processor status of the system.
At the bottom of the page the following text information is displayed:
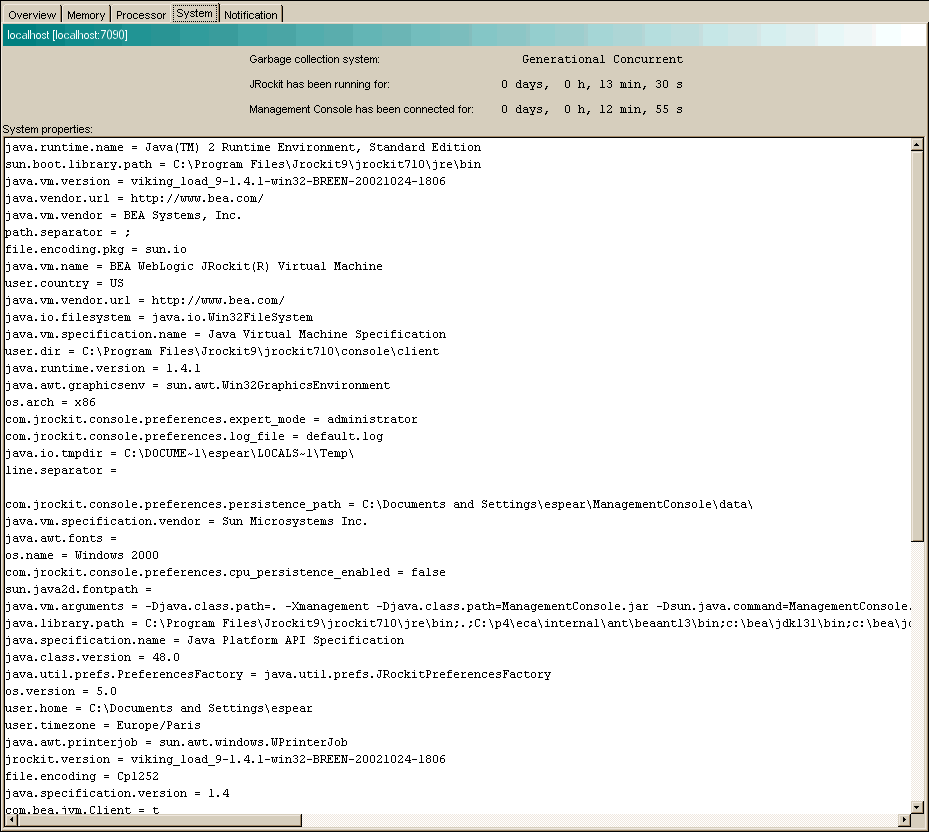
The System tab (Figure 8-22) shows various information about the system status.
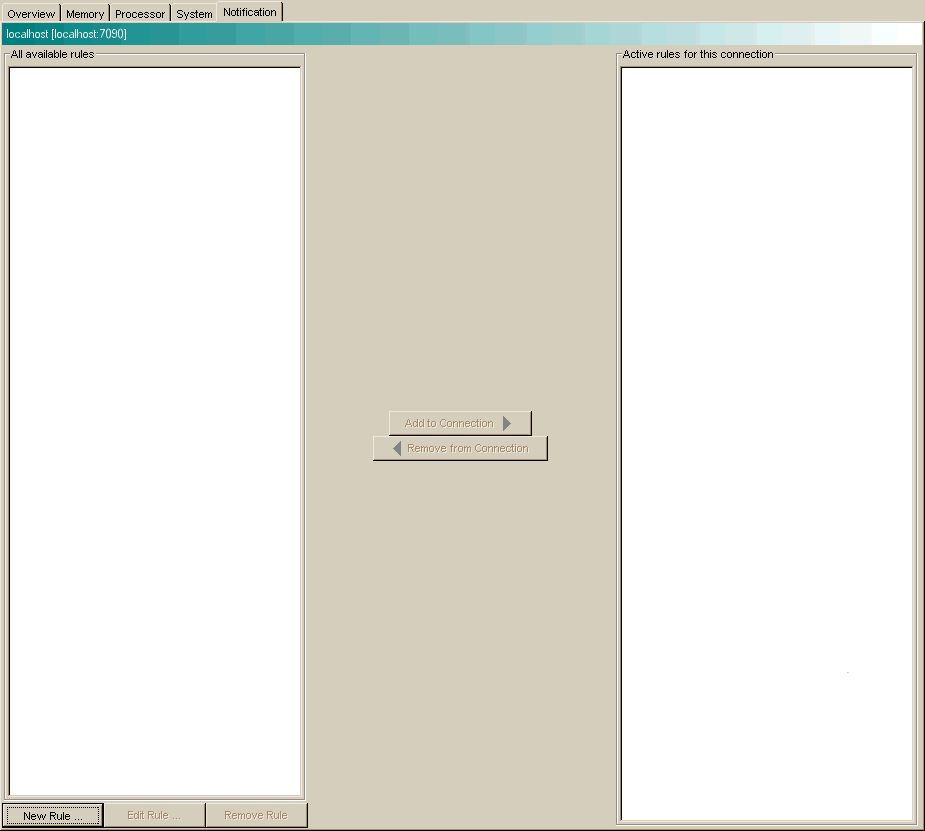
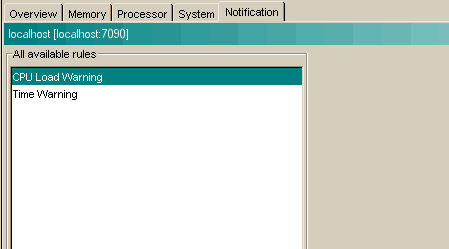
Use the Notification tab (Figure 8-23) to define alerts that notify users when certain events occur. You can create your own notification rules based on different triggers, with optional constraints, that alert you with a prescribed notification.
Figure 8-23 Notification Tab (No Rules Defined)
A notification trigger can be a certain event, for example, that the connection to JRockit was lost, or that an aspect reaches a certain value, for example, the used memory reaches 95%. A notification constraint can limit when a rule is triggered for example by not sending alerts at night or on certain dates.
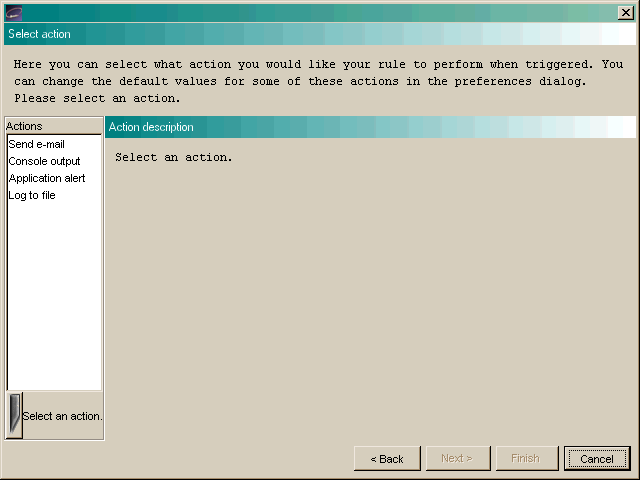
The notification action is how the alert is communicated to the user. It can be one of the following:
Rules determine when and how to issue a notification. To create a new rule, do the following:
The Name rule dialog box appears (Figure 8-24):
Figure 8-24 Name Rule Dialog Box
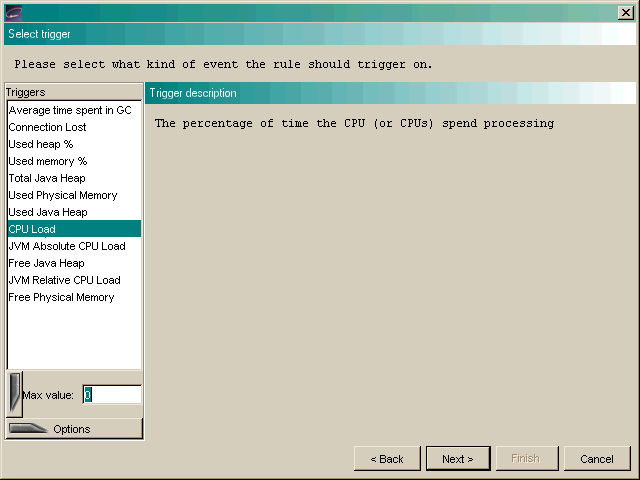
The Select trigger dialog box appears (Figure 8-25):
Figure 8-25 Select Trigger Dialog Box
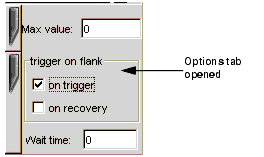
Figure 8-26 Trigger Threshold and Options Text Boxes
The Select Action dialog box appears (Figure 8-27):
Figure 8-27 Select Action Dialog Box
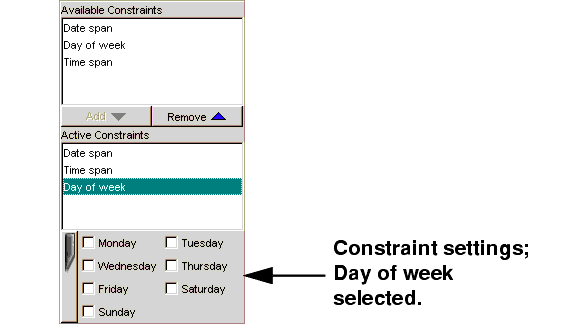
The Add Constraint dialog box appears (Figure 8-28):
Figure 8-28 Add Constraint Dialog Box
The constraint name will appear in the add list, as shown in Figure 8-29.
The new rule appears in the All available rules list on the Notification tab, as shown in Figure 8-30.
To edit a rule, do the following:
To add a rule to JRockit, do the following:
The rule appears in the Active rules for this connection list, as shown in Figure 8-31.
Figure 8-31 Rule Added to Active rules for This Connection List
To remove a rule from JRockit, do the following:
To remove a rule from the Available rules list, do the following:
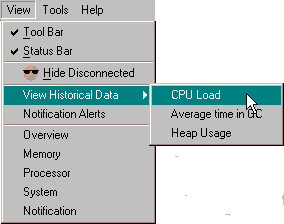
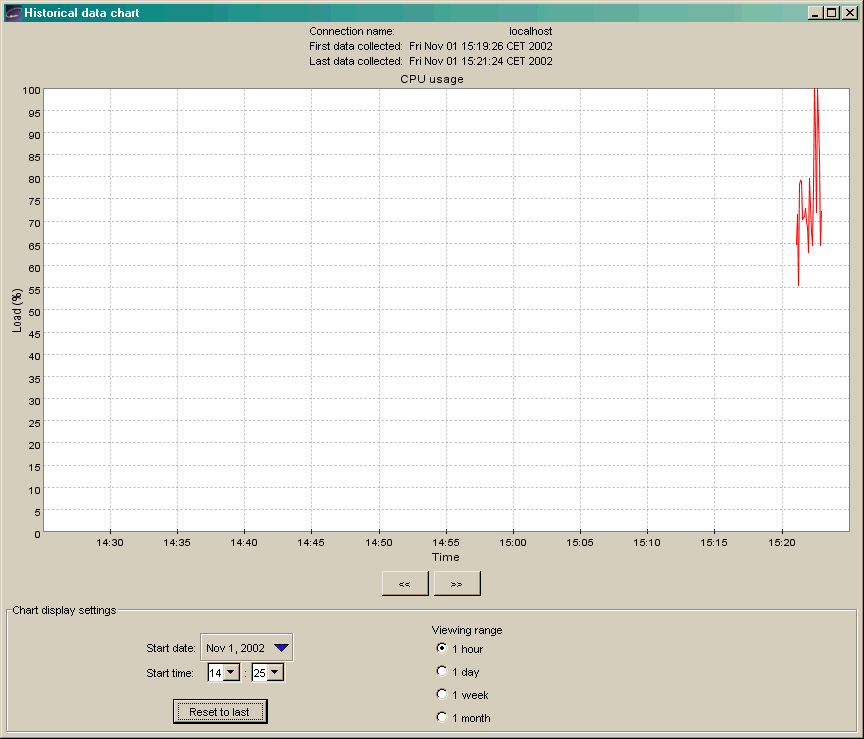
The historical data window displays a chart where historical data for an aspect can be viewed. This is useful for observing trends over time and, for example, finding when a server running with JRockit has its peak loads.
To open this window, do the following:
Figure 8-32 View Menu with Historical Data Submenu Open
Historical data for the selected aspect appears (Figure 8-33).
Figure 8-33 Historical Data (CPU Load Selected)
To be able to observe historical data, aspect data from JRockit must first have been persisted, that is, written to file. See Setting Other Preferences" on page 8-11 to enable or disable persistence. The following aspects are possible to persist, and thus display, historical data for:
As soon as data has been created by a connected connection, it is available for historical observation.
Using Advanced Features of the Console
This section describes the more advanced features of the Management Console. Some of these are only available when running in the Developer mode, described in Setting the Operation Mode" on page 8-10.
The stack dump contains a list of all running threads in JRockit with a method call stack trace for each thread.
To view the thread stack dump, open the Tool menu and select View Thread Stack Dump. A dialog box containing the stack dump appears (Figure 8-34).
Note: You must be in the developer operation mode before you can perform the tasks described in this section. For more information on entering the developer operation mode, see Setting the Operation Mode" on page 8-10
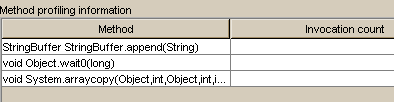
The Method Profiler tab allows the developer to monitor method execution in a non-intrusive way. The Method Profiler can provide information about the average time spent in selected methods and the number of times methods are invoked.
Method Templates are collections of methods that can be re-used on different connections. There is a Default template, but the user may also create new templates.
To add a method to a template, do the following:
The Enter class name dialog box appears (Figure 8-35).
Figure 8-35 Enter Class Name Dialog Box
The Select method dialog box appears (Figure 8-36):
Figure 8-36 Select Method Dialog Box
The method name will appear on the Method profiling information list, as shown in Figure 8-37.
Figure 8-37 Method Profiling Information List with Method Added
Removing a Method from a Template
To remove a method from a template, do the following:
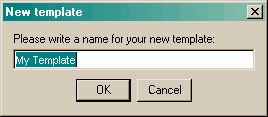
To create a new template, do the following:
The New template dialog box appears (Figure 8-38).
Figure 8-38 New Template Dialog Box
To remove a template, do the following:
Starting and Stopping Method Profiling
To start the method profiling, do the following:
You can switch between using qualified method names or short names in the method profiling table.
The Exception Count Tab (Figure 8-39) shows exceptions thrown in JRockit. It counts the number of exceptions of a certain type thrown.
Figure 8-39 Exception Counting Tab
To add an exception to observe, do the following:
The exception should now be displayed in the table.
Starting, Stopping, and Removing an Exception Count
To start the exception count, click Start. The results should now appear next to the name of the exception being counted. Similarly, to stop the exception count, click Stop.
To remove an exception from the count, select the exception to be removed and click Remove.
To close the JRockit Management Console and disconnect all connections, open the Connection menu and select Exit. Clicking X in the top right corner of the window will also close the JRockit Management Console.

|

|

|