Object-Relational Mappings: Annotating Java Classes
This document describes the following:
1. Annotating Existing Java Classes
Using OEPE, you can annotate existing Java classes (POJOs) with JPA annotations based on a database schema. When you do, Eclipse will add JPA annotations to the appropriate accessors.Note that prior to annotating classes, you should set up and configure the database connection, as well as add JPA support to your Eclipse project.
To annotate an existing Java class, follow this procedure:
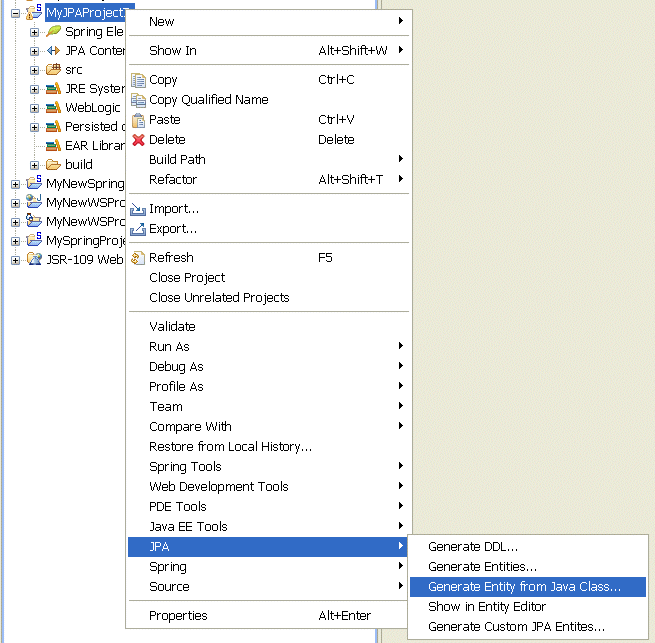
Figure 1. Generate Entity from Java Class
Alternatively, you can open the Generate JPA Mapping wizard by right-clicking your project in the Project Explorer and selecting New > Other > JPA > Generate Entity from Java Class.
Note that if you select property from the Entity Access combo box, the JPA annotations will be added to the class' getter methods. If you select field, the annotations will be added to the Java fields.

Figure 2. Selecting Java Class to Annotate
As the example in Figure 4 demonstrates, the
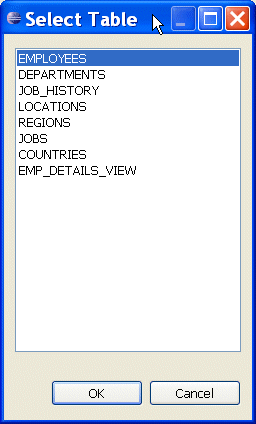
Figure 3. Select Table Dialog
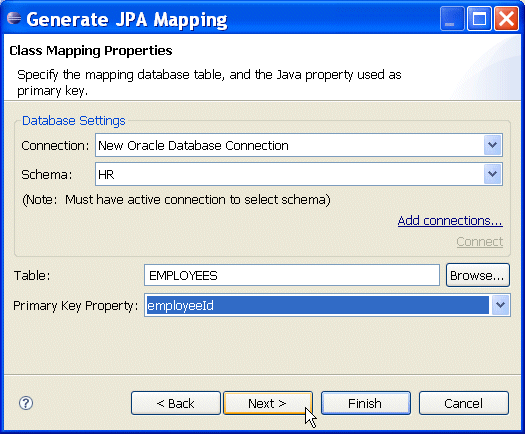
Figure 4. Generate JPA Mapping - Class Mapping Properties Dialog
EMPLOYEE table from the HR schema will be mapped to the Employee class. The class's employeeId field will be mapped to the table's primary key.
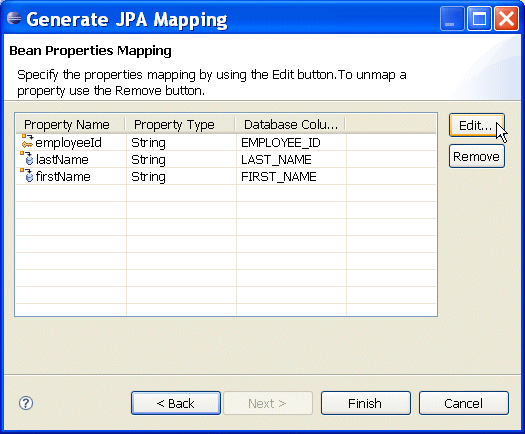
Figure 5. Generate JPA Mapping - Bean Properties Mapping Dialog
Note that you can click Edit to display a dialog appropriate for a specific annotation. Use this dialog to edit a selected property mapping.
An example illustration represented by Figure 6 shows the Basic Annotation dialog.
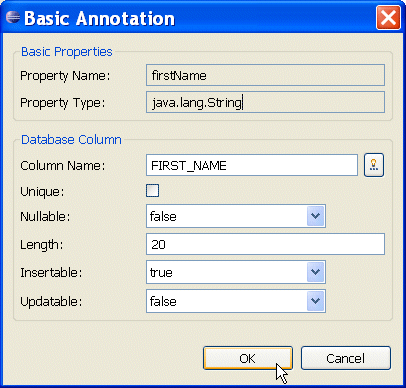
Figure 6. Basic Annotation Dialog
For information on how to annotate more complex types, see Annotating Complex Types.
Eclipse will add JPA annotations to the source code of your Java class. These annotations will map the class and its properties or fields to the selected table and columns. Note that if the class has already been annotated, Eclipse will remove the existing JPA annotations and generate new annotations based on the mapping properties.
The following example shows the annotated Employee class.
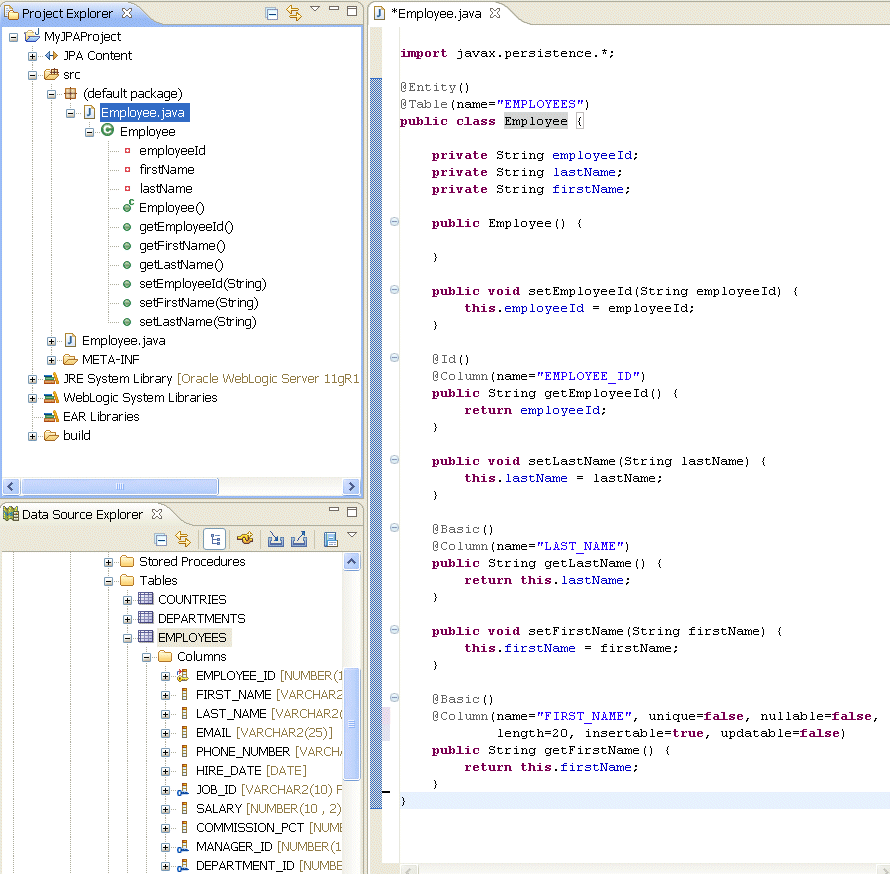
Figure 7. Annotated Class Example
Getting Started With the Oracle Database Plugin for Eclipse
Configuring a Persistence Provider for JPA Projects
Introduction to EclipseLink JPA
If you are annotating more complex types, such as a Collection or another class, which would result in the creation of one-to-one, one-to-many, many-to-one, or many-to-many mappings, a dialog similar to the one shown in Figure 8 will appear.
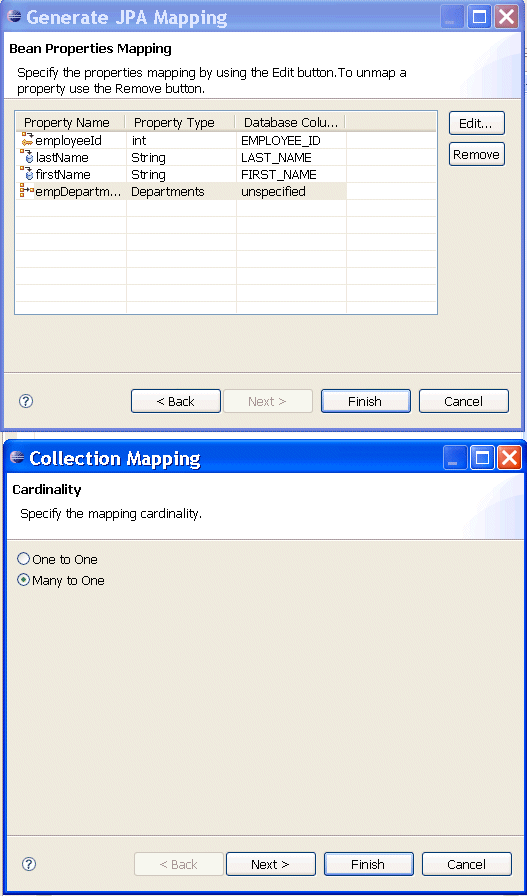
Figure 8. Collection Mapping Dialog
Upon selecting the mapping type and clicking Next, you can specify the mapping properties on the subsequent screen, as Figure 9 shows. For information on default and valid values for each field, see @ManyToOne.
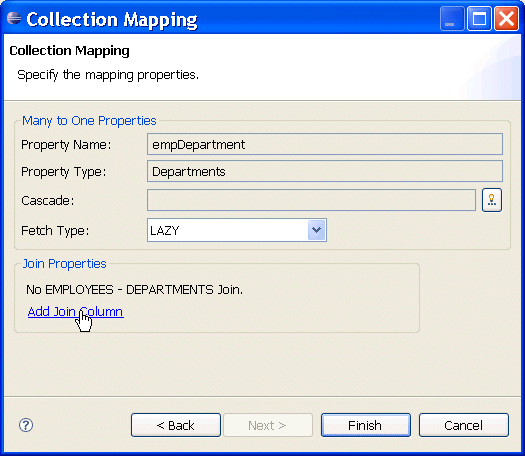
Figure 9. Collection Mapping Dialog - Specifying Mapping Properties
Note that you might find the Join Properties part of this dialog displayed on a separate wizard page, accessible by clicking Next.
By clicking Add Join Column you can specify the join column's name and properties, as Figure 10 shows. For more information, see Section 9.1.6 "JoinColumn Annotation" of the JPA Specification.

Figure 10. Annotate Join Column Dialog
After clicking OK on the Add Join Column dialog, and then Finish on the Collection Mapping dialog, shown in Figure 11, Eclipse will generate the mapping and annotate your class.
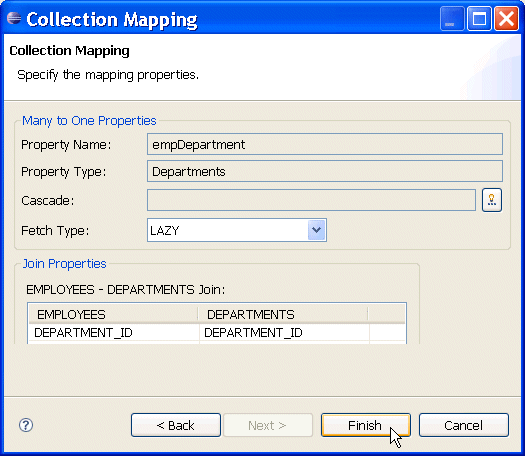
Figure 11. Collection Mapping Dialog
The following code example demonstrates the annotated Employee class with its entity access level set to field, and a defined many-to-one relationship to the Departments object.
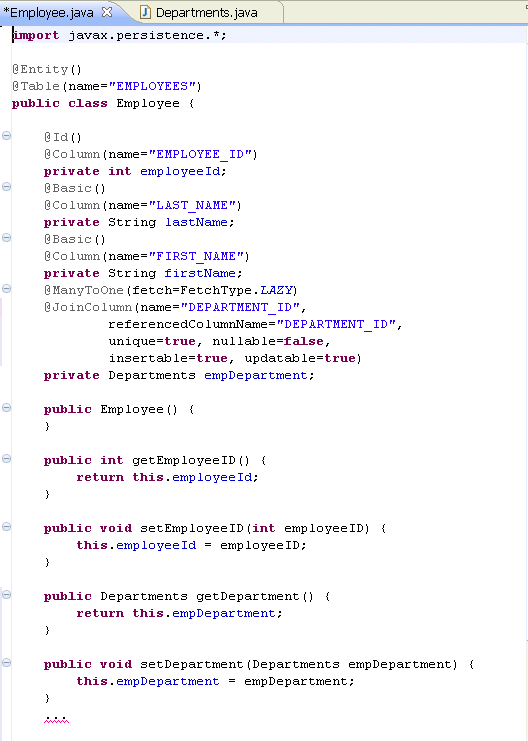
Figure 12. Annotated Class Example - Complex Types