Web Application Development: Using the Web Page Editor Palette
This document describes the following:
- Displaying the Palette in External View
- Editing Tag Library Entries in the Palette
- Using the Data Palette
- Customizing the Palette
- Related Information
You use the Web Page Editor Palette to edit and create a variety of tags, such as HTML, JSP, JSF, and so on.
In addition to standard HTML and JSP tags, the Palette displays an item for each tag in the JSP tag libraries that are on the application's classpath. You drag and drop tags on to the Design or Source view to design Web pages. You can pin the Palette to be open, or set to automatically expand when the cursor is placed over it while it is in its collapsed state.
To access the Palette, from your Web project open in the Project Explorer, right-click a page on which you are planning to drop or edit tags, and then select Open With > Web Page Editor from the drop-down menu, as Figure 1 shows.
1. Displaying the Palette in External View
2. Editing Tag Library Entries in the Palette
The Data Palette allows you to do the following:
You can also modify the Palette settings by right-clicking a specific tag library node and selecting Options > Settings to open the Palette Settings dialog that Figure 17 shows.
4.1 Docking and Undocking the Palette
4.2 Modifying the Display of the Palette
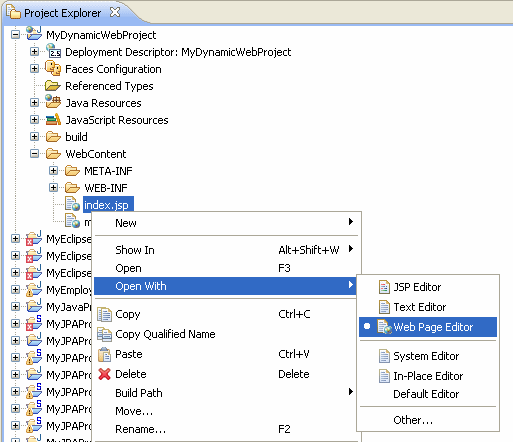
Figure 1. Opening JSP Page in Web Page Editor
With the page open in the editor view, click Show Palette (a gray triangular button located at the top right corner of the editor) to display the Palette, as Figure 2 shows.
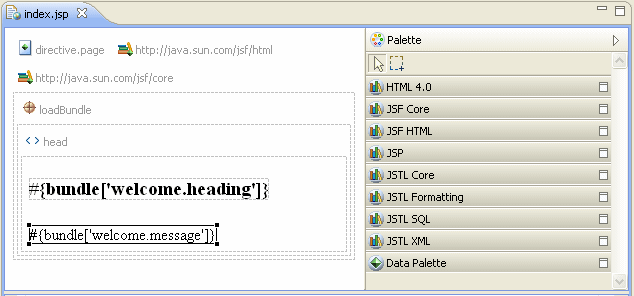
Figure 2. Palette
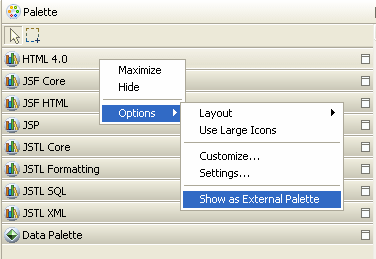
Figure 3. Displaying External Palette
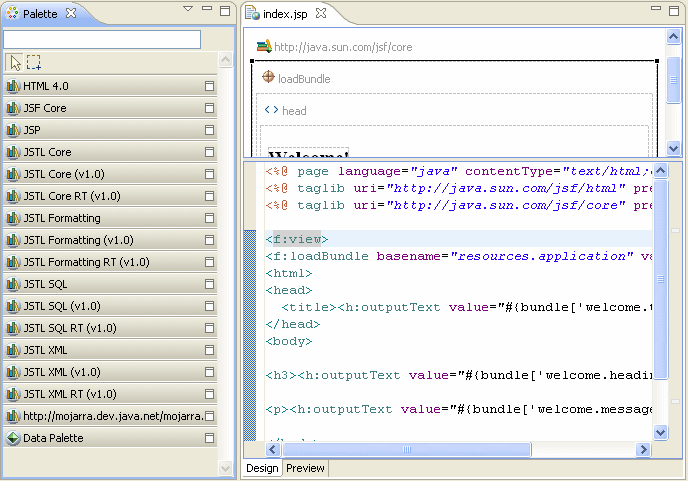
Figure 4. External Palette
To reverse the external view display and have the Palette displayed as a part of the Web Page Editor, click the Close button.
Notice that the external view allows you to filter the tag library nodes to define which ones the Palette should display. To do so, enter the filter text in the filter field.
Alternatively, you can use a property sheet to add and edit tags.
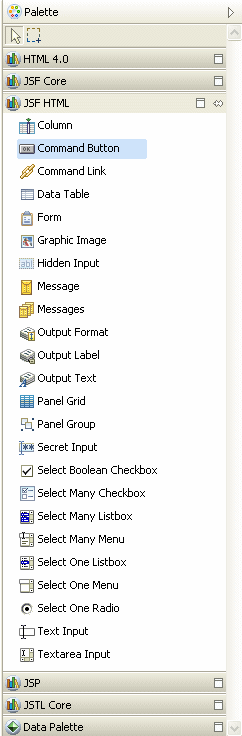
Figure 5. Selecting a Tag Library Entry
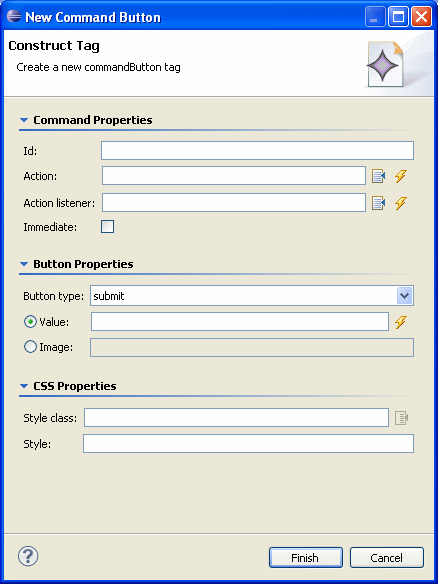
Figure 6. Construct Tag Dialog
The Data Palette that Figure 7 shows is a part of the Web Page Editor Palette and is always the last list item in the tag library list.
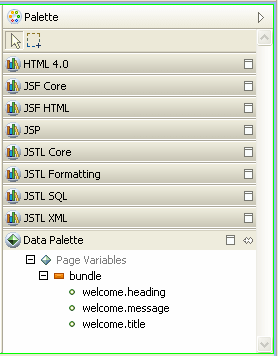
Figure 7. Data Palette
The Data Palette displays variables in scope for the page, as follows:
Note that the Data Palette automatically refreshes itself when variables are discovered. Also note that when the Palette is displayed as an external view and you have the ability to use filters, you can filter by "used variable only".

Figure 8. Inserting Variable in the Page
This opens the Insert Fields dialog that lets you select a generator for content creation (see Figure 9), choose fields that you would like to generate (see Figure 10) and define the order in which they should appear (see Figure 11).
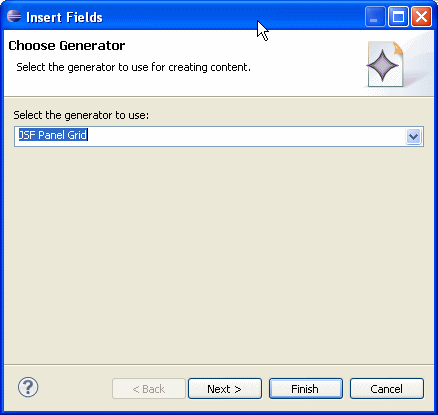
Figure 9. Choosing a Generator
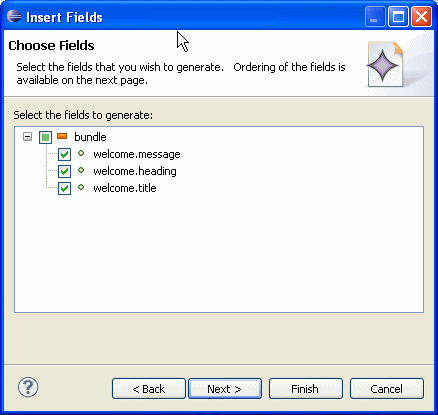
Figure 10. Choosing Fields
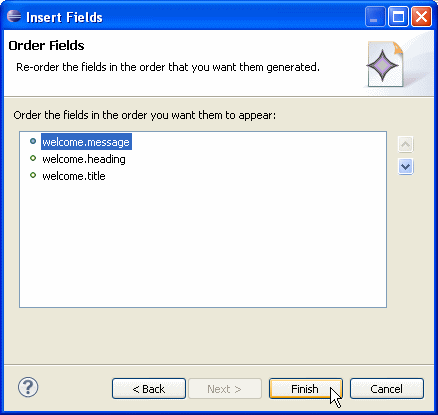
Figure 11. Ordering Fields
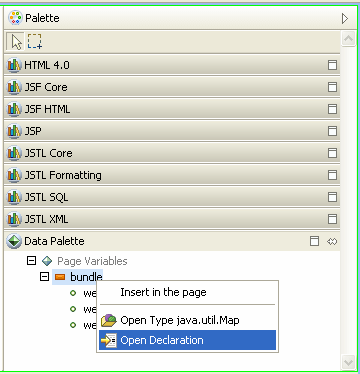
Figure 12. Opening Variable Declaration
This opens the editor with the position of the variable declaration highlighted.
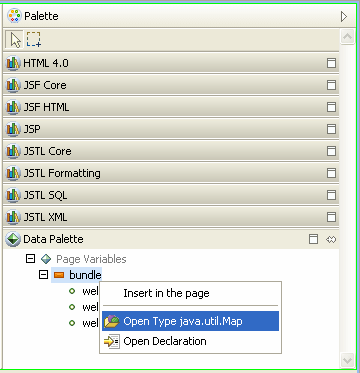
Figure 13. Opening Variable Type
This opens the appropriate Java class in the source editor or, if the source is not available, in the read-only Class File Editor.
Note the following:
java.lang.String[], you would navigate to java.lang.String.

Figure 14. Creating a New Artifical Variable
To customize the way the Palette displays tags, right-click a specific tag library node and select Options > Customize, as Figure 15 shows.
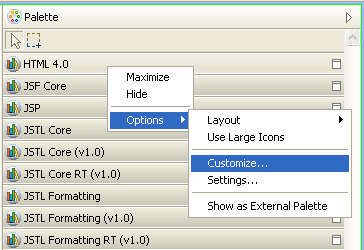
Figure 15. Customizing the Palette
This opens the Customize Palette dialog, as Figure 16 shows.
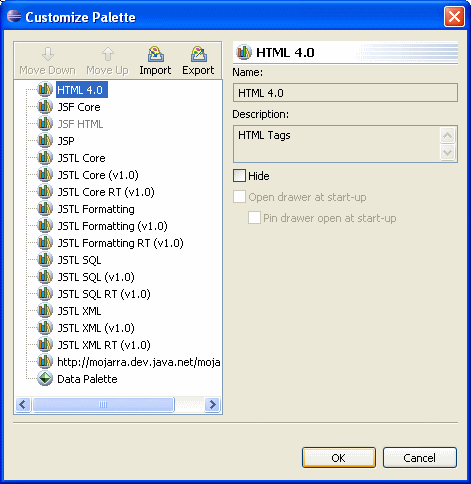
Figure 16. Customize Palette Dialog
Using this dialog, you can modify names and descriptions of tag library nodes, specify whether or not a particular node should be displayed, as well as import or export tag libraries.
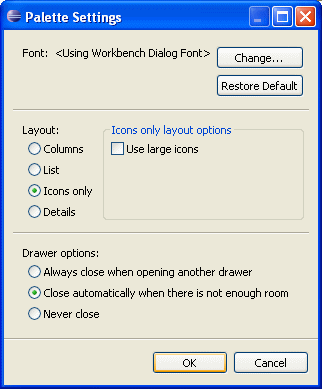
Figure 17. Changing the Palette Settings
Using this dialog, you can specify the font, layout, and icon size for a tag library node, as well as define drawer options.
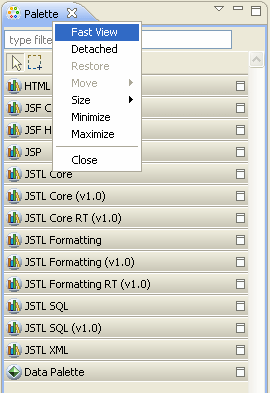
Figure 18. Displaying External Palette
Notice the Palette icon at the bottom left corner of the main IDE window that Figure 19 shows. You undock the Palette by clicking this icon.

Figure 19. Docked Palette

Figure 20. Preparing to Move the Palette

Figure 21. Moving the Palette
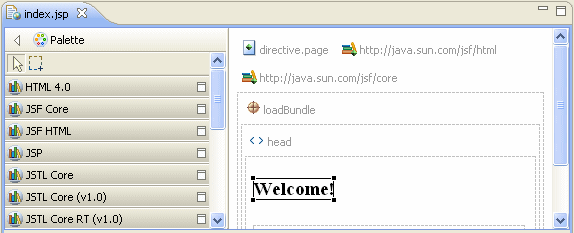
Figure 22. Repositioned Palette
Alternatively, you can move the Palette by right-clicking the top area and selecting Dock On > Left or Dock On > Right from the drop-down menu, as Figure 23 shows.
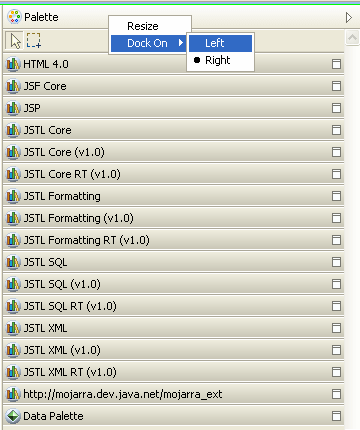
Figure 23. Docking the Palette
Figure 24 shows the repositioned Palette.
Figure 24. Repositioned Palette
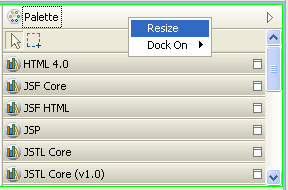
Figure 25. Resizing the Palette
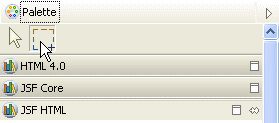
Figure 26. Using the Marquee Tool
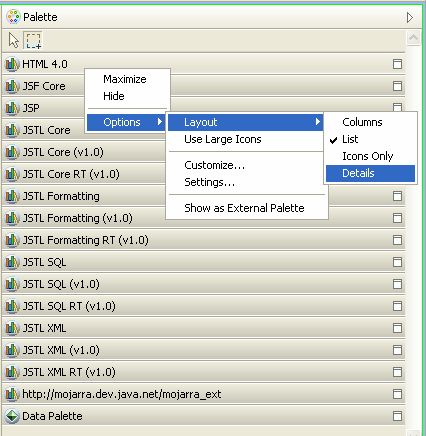
Figure 27. Changing the Palette Layout and Icon Size
