Web Application Development: Editing Tags with Property Sheets
This document describes the following:
You use property sheets to quickly edit the most common attributes of various tags with assistance of choice dialogs. Property sheets offer collapsible sections and provide buttons that enable choice of values and binding to dynamic values.
The Property sheet (view) displays attributes and their values for a tag selected in the Design or Source page. The Property view consists of two tabs:
You open a Property sheet (see Figure 1) by selecting Window > Show View > Properties from the top-level menu. By selecting a tag in the Source or Design view and then clicking on buttons located to the right of attribute edit fields on the Property sheet displays editor dialogs.
1.3 Selecting a Navigation Case
1.7 Choosing a Resource Bundle
Also note that if the
The General tab also provides hyperlink on select attributes that help you navigate to the target resource.
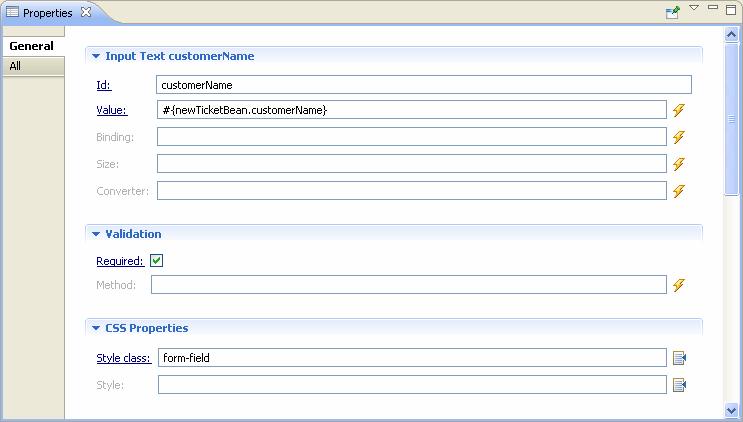
Figure 1. Property Sheet
You use the Choose Binding dialog to create bindings to dynamic values. Figure 2 and Figure 3 show the Variables and Resources tabs of this dialog.

Figure 2. Choose Binding Dialog - Variables
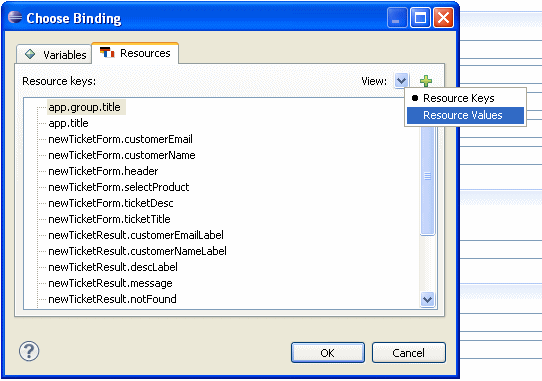
Figure 3. Choose Binding Dialog - Resources
The Resources tab allows you to do the following:
You use the Choose Method dialog that Figure 4 shows to select an existing or create a new method in the selected managed bean.
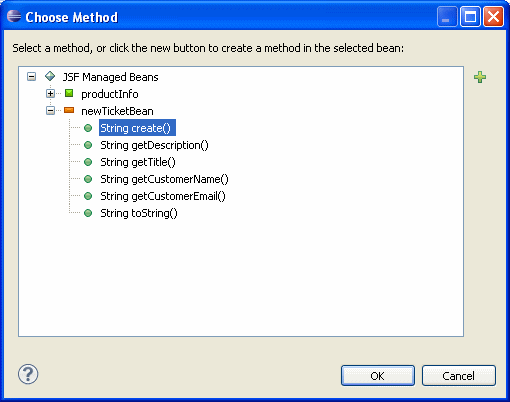
Figure 4. Choose Method Dialog
To create a new method, click New Validator Method, and then complete the New Method dialog that Figure 5 shows.

Figure 5. New Method Dialog
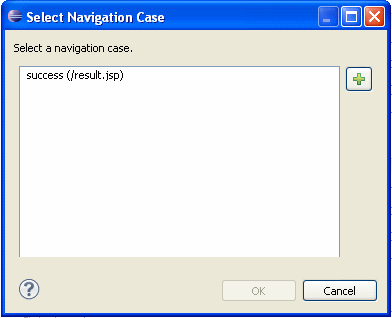
Figure 6. Select Navigation Case Dialog
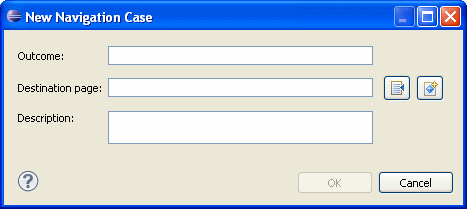
Figure 7. New Navigation Case Dialog
You use the File Selection dialog (see Figure 8, Figure 9, and Figure 10) to select the source of a file, such as an image, CSS, or a JSP file. To open the dialog, click Select File.
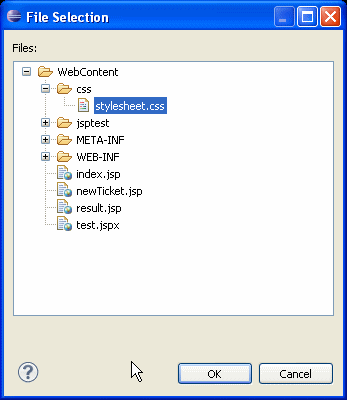
Figure 8. File Selection Dialog
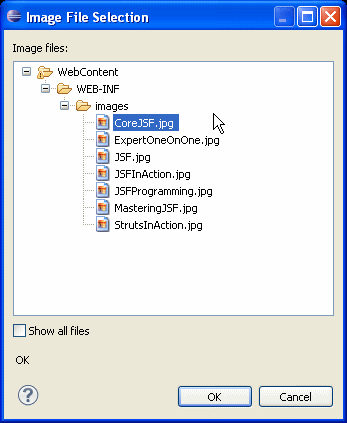
Figure 9. Image File Selection Dialog

Figure 10. File Selection (JSP) Dialog
You use the Choose Style Class dialog that Figure 11 shows to select a style class for the selected tag.

Figure 11. Choose Style Class Dialog
You use the CSS Style Definition dialog that Figure 12 shows to define a CSS to apply to the tag. Using this dialog, you can define all elements of a style sheet.
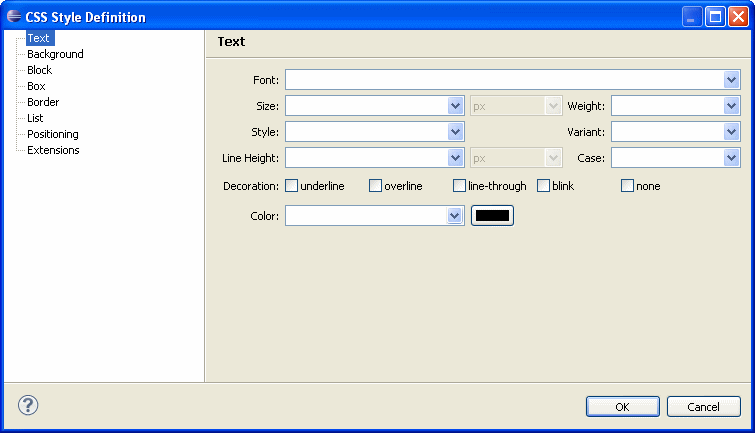
Figure 12. CSS Style Definition Dialog
Note that for the style to be applied, you need to register it with the application.
basename attribute). The dialog displays a list of available resource bundles including the following:
src directory.WEB-INF/lib directory.
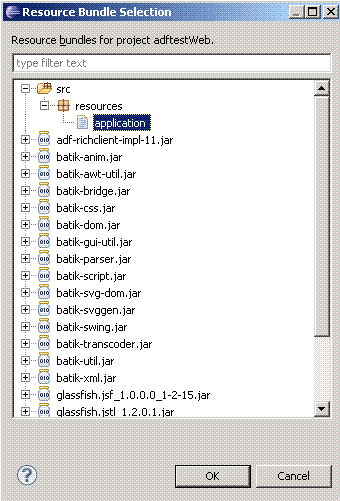
Figure 13. Resource Bundle Selection Dialog
Note that this dialog allows you to set the resource bundle defined by the basename attribute of the JSF Core loadBundle and JSTL Formatting setBundle tags.
basename attribute contains a valid value, it will be selected in the dialog by default.
faces-config.xml file. Note that through this dialog you set the value of the validatorId attribute of the JSF Core validator tag.

Figure 14. Validator Id Selection Dialog
If the validatorId attribute already contains a valid value, this value is displayed separately at the top of the dialog, as Figure 15 shows.
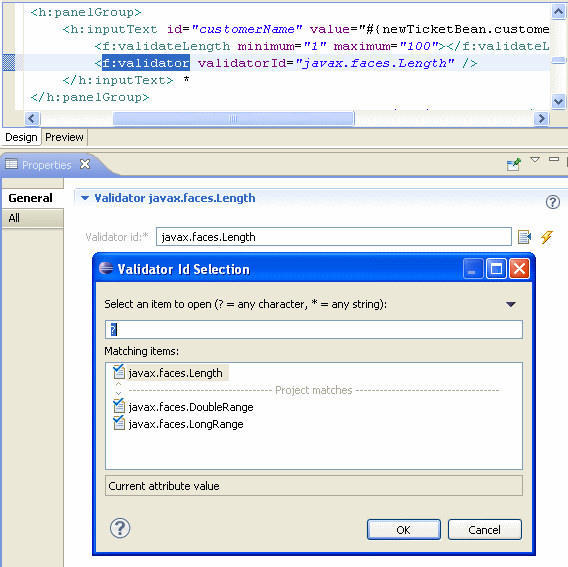
Figure 15. Validator Id Selection Dialog with Valid Value
You use the Converter Id Selection dialog that Figure 16 shows to choose a converter from a list of available converters, which includes the standard JSF converters and any converters that are defined in the faces-config.xml file. Note that through this dialog you set the value of the following attributes:
converterId attribute of the JSF Core converter tag.converter attribute of JSF HTML inputText and outputText tags.

Figure 16. Converter Id Selection Dialog
If the converterId or converterId attribute already contains a valid value, this value is displayed separately at the top of the dialog, as Figure 17 shows.
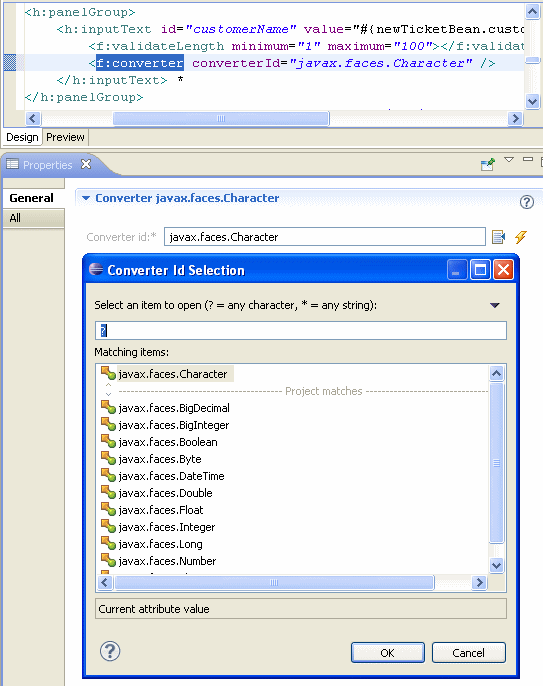
Figure 17. Converter Id Selection Dialog with Valid Value
