Web Application Development: Configuring JSF Projects
This document describes the following:
- 1 Configuring Projects for JSF
- 2 Creating and Configuring the Faces Configuration Resource File
- 3 Understanding JSF Resource Bundles
- Related Information
1. Configuring Projects for JSF
OEPE provides a JSF project facet with the following functionality that you can use to configure your JSF projects:- Support for Oracle WebLogic Server shared library
- Support for downloadable user library
- Library version validation
- JSP templates
- Notification that files will be deleted during uninstall of the facet
You add JSF capabilities to your Web project with Oracle Weblogic Server runtime support as follows:
- Right-click your Web project in Project Explorer, select Properties from the drop-down menu, and then select Targeted Runtimes from the list on the Properties dialog. Ensure that you are using Oracle WebLogic Server 11gR1 (10.3.2) or later as your target runtime.
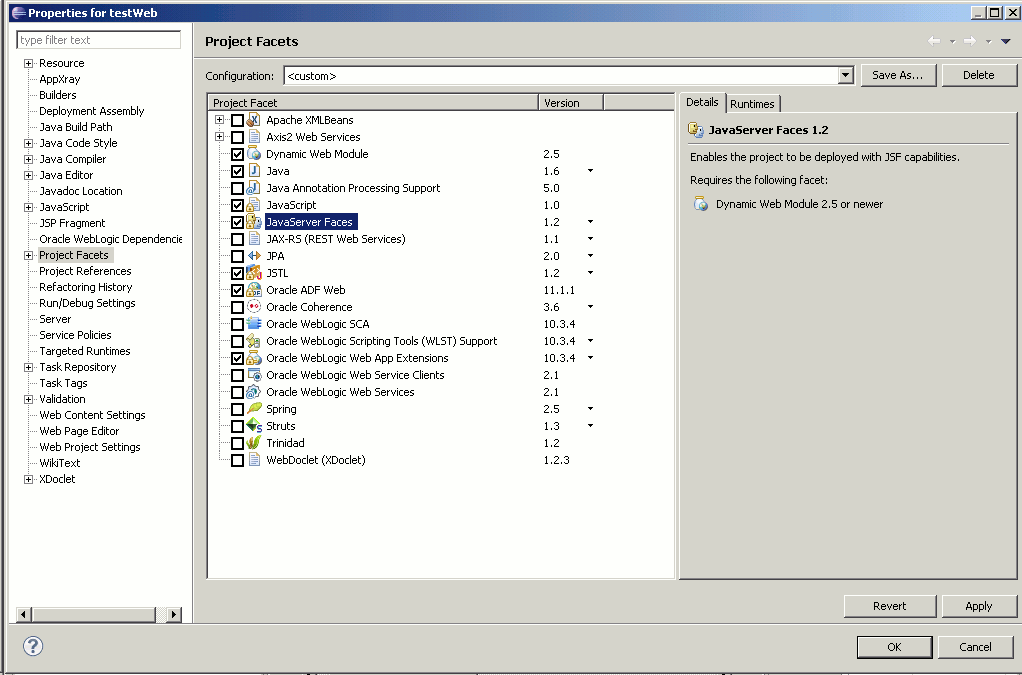
- On the Properties dialog, highlight Project Facets node and select JavaServer Faces facet from the list, specifying either version 1.2 or 1.1, as Figure 1 shows.
- On the same Properties dialog, ensure that WebLogic Web App Extensions facet with one of 1.3.2, 1.3.1 or 1.3 versions is selected, and then click Further configuration available. This opens the Modify Faceted Project > JSF Capabilities dialog that Figure 2 shows.

Figure 2. JSF Capabilities Dialog
Complete this dialog by specifying JSF implementation library information, as well as configuration file name and servlet parameters.
When competing the Modify Faceted Project > JSF Capabilities dialog, you have the following two options with regards to which JSF implementation library to add to your project:
- WebLogic Shared Library (see Figure 2) - this option is available only when your project is configured with WebLogic Web App Extensions facet. If you click Manage WebLogic Shared Libraries, a Preferences > Shared Libraries dialog opens allowing you to modify library information, as well as to remove existing and add new libraries to your project.

Figure 3. Shared Libraries Dialog
- User Library (see Figure 4) - allows you to either download a specific version of the JSF library (you will be prompted to accept an appropriate license), or add the library from a local install (JAR file).
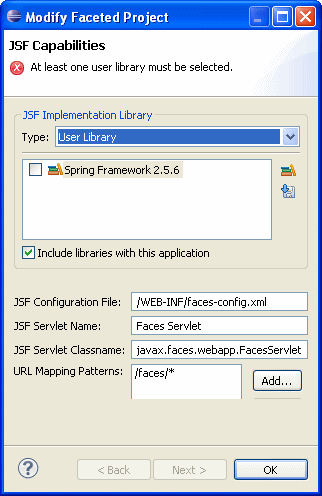
Figure 4. JSF Capabilities Dialog - User Library Configuration
The system validates the selected library and will notify you if any of the following occurs:
- the required JSF class cannot be found in the library (for example, if you select a non-JSF user library);
- the selected library version and the facet version are not compatible (for example, if a JSF 1.1 library is selected for a JSF 1.2 facet);
- the library version cannot be read.
You can click Download library to initiate the download of the user library of your choice. Note that if your machine is located inside of a network, which requires a proxy to access outside resource such as the Internet, the download may fail. In this case, reconfigure your Eclipse IDE proxy settings using Window > Preferences > General > Network Connections, and try again.
If you select Include libraries with this application, the libraries will be copied to your project'sWEB-INF/libdirectory at publish time.
- WebLogic Shared Library (see Figure 2) - this option is available only when your project is configured with WebLogic Web App Extensions facet. If you click Manage WebLogic Shared Libraries, a Preferences > Shared Libraries dialog opens allowing you to modify library information, as well as to remove existing and add new libraries to your project.
- Click OK on the Modify Faceted Project > JSF Capabilities dialog to save your changes.
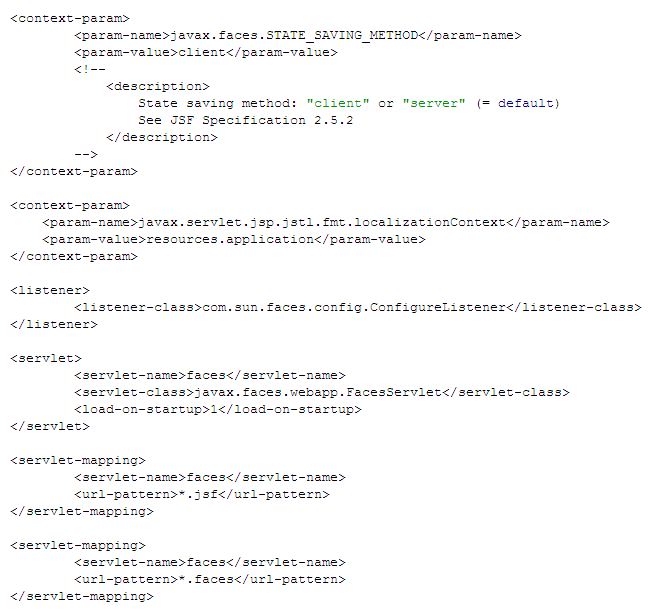
web.xmlhas been configured depending on whether you chose Sun-RI (see Figure 5) or Apache MyFaces implementation;
- the following JSF templates are installed (see Figure 6):
faces-config.xmlconfiguration file in your project'sWebContent/WEB-INF/configdirectory;index.jspJSP file in your project'sWebContentdirectory;application.propertiesresource bundle in your project'ssrc/resourcesdirectory.
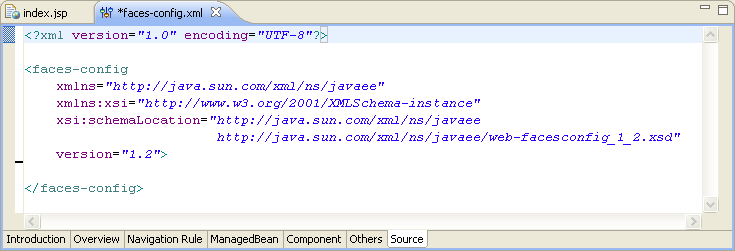
faces-config.xmlfile is configured as follows:
1.1 Supported JSF Libraries and Versions
OEPE provides support for JSF 1.2 and 1.1 versions.The following table maps the supported JSF versions to three types of libraries:
| Supported JSF Version | Oracle WebLogic Server Shared Library | Downloadable Library | User Library |
|---|---|---|---|
| JSF 1.2 | Supported | Supported: MyFaces, Sun-RI | Supported |
| JSF 1.1 | Supported | Supported: MyFaces, Sun-RI | Supported |
2. Creating and Configuring the Faces Configuration Resource File
OEPE provides support for Faces configuration resource file by allowing you to create and edit this file.2.1 Creating a Faces Configuration File
You can create a new Faces configuration file for your JSF dynamic Web project as follows:- Right-click the Project Explorer and select New > Other from the drop-down menu. Alternatively, you may select New > Other from the top-level menu's File or from the AppXplorer view drop-down menu. This opens the New dialog, as Figure 7 shows.
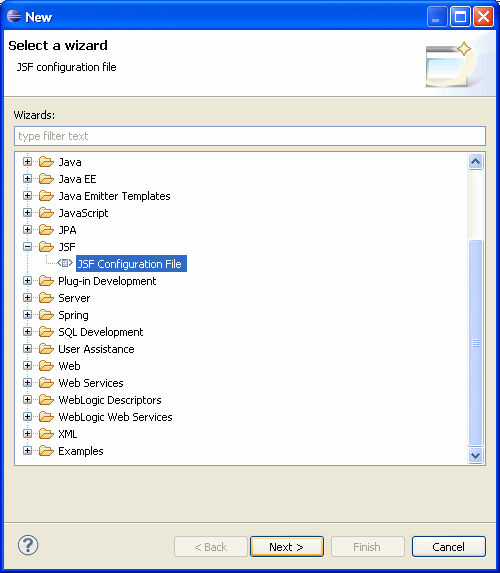
Figure 7. Selecting JSF Configuration File
- On the New JSF Configuration File > JSF Configuration File Properties dialog specify the location for your new file (in the
WebContent/WEB-INFfolder) and provide a file name, as Figure 8 shows.
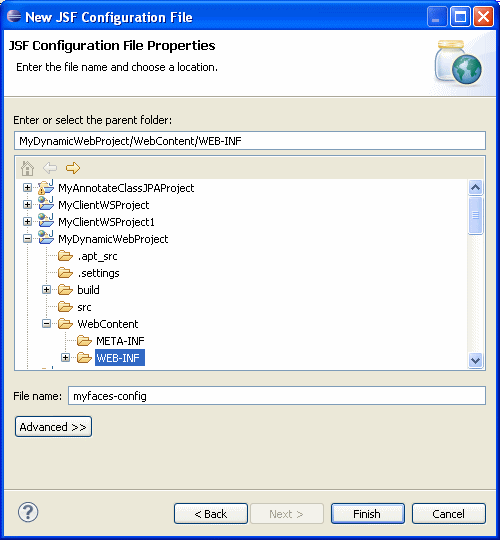
Figure 8. JSF Configuration File Properties Dialog
- Click Finish to save your changes.
- A new Faces configuration XML file containing the
faces-configdeclaration is created with the given name and in the specified location, as Figure 9 shows.
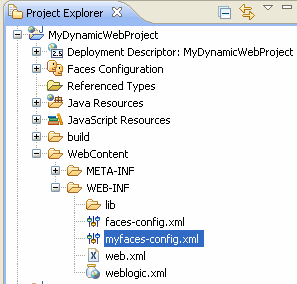
Figure 9. New JSF Configuration File in Project Explorer
- The project's
web.xmlfile is updated with a new path string in the value of thejavax.faces.CONFIG_FILEScontext parameter. If thejavax.faces.CONFIG_FILEScontext parameter does not exist, it is created.
Faces Configuration directory and select New JSF Configuration File from the drop-down menu, as Figure 10 shows. 
Figure 10. Creating New JSF Configuration File
2.2 Using the Faces Configuration Node
Using your JSF dynamic Web project's Faces Configuration node that Figure 11 shows, you can create the following: 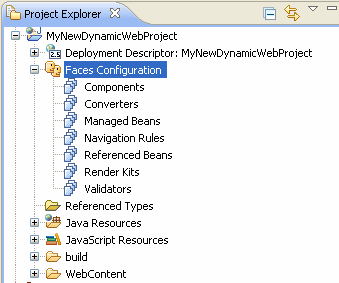
Figure 11. Faces Configuration Node
2.2.1 Creating a New Managed Bean
You create a managed bean in your Web application to bind the bean properties and business logic to the user interface components as follows:-
In Project Explorer, expand your JSF dynamic Web project's Faces Configuration node (see Figure 11), right-click Managed Beans, and then select New Managed Bean. This opens the New Managed Bean Wizard dialog that Figure 12 shows. This dialog allows you to create a managed bean from an existing or a newly created Java class.
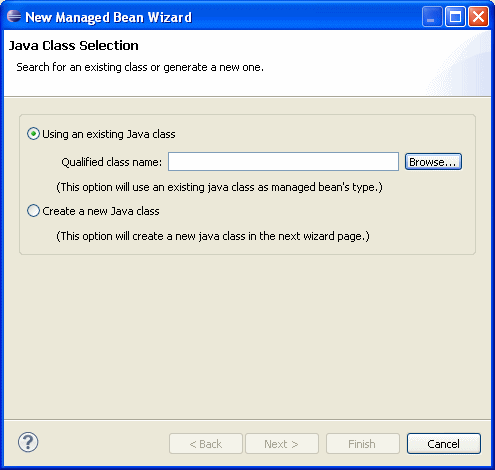
Figure 12. New Managed Bean Wizard
- If you choose to create a managed bean from an existing class, on the New Managed Bean Wizard > Java Class Selection dialog click Browse to open the Select Type dialog that Figure 13 shows. In this dialog, start typing the bean class name in the Select entries field, then select the class from the list and click OK.
Proceed by clicking Next on the New Managed Bean Wizard > Java Class Selection dialog to open the New Managed Bean Wizard > Managed Bean Configuration dialog that Figure 14 shows.
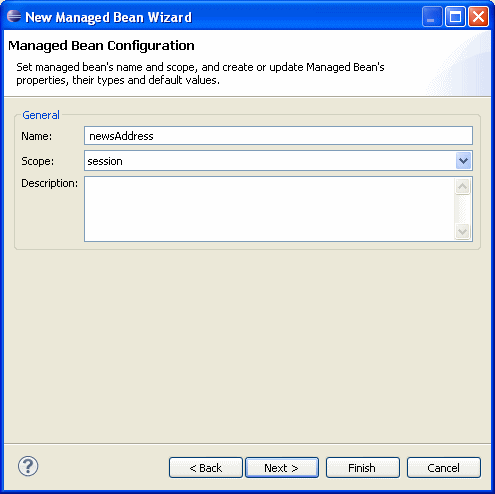
Figure 14. New Managed Bean Wizard - Java Class Selection
Click Next to review the summary page, and then click Finish. Notice that your new bean has been added under the Faces Configuration > Managed Beans node. - If you choose to create a new Java class for your managed bean, on the New Managed Bean Wizard > Java Class Selection dialog select Create a new Java class, and then click Next to open the New Managed Bean Wizard > Java Class dialog that Figure 15 shows.
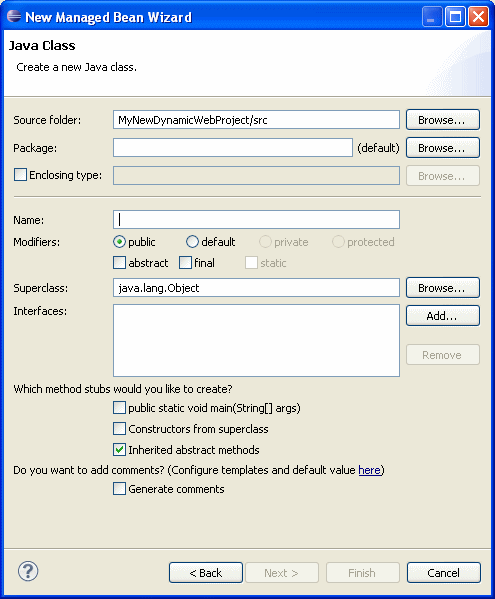
Figure 15. New Managed Bean Wizard - Java Class
Complete this dialog, and then click Next to open the New Managed Bean Wizard > Managed Bean Configuration dialog that Figure 13 shows. On this dialog, click Next to proceed to the summary page, and then click Finish. Notice that your new bean has been added under the Faces Configuration > Managed Beans node, as Figure 16 shows.
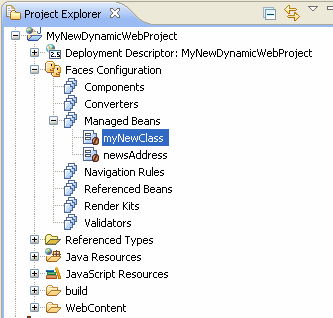
Figure 16. New Managed Beans in Project Explorer
- If you choose to create a managed bean from an existing class, on the New Managed Bean Wizard > Java Class Selection dialog click Browse to open the Select Type dialog that Figure 13 shows. In this dialog, start typing the bean class name in the Select entries field, then select the class from the list and click OK.
2.2.2 Creating a New Navigation Case
You create navigation rules to link Web pages. Each navigation rule can contain one or more navigation cases. To define navigation rules and cases, follow this procedure:- In Project Explorer, expand your JSF dynamic Web project's Faces Configuration node (see Figure 11), right-click Navigation Rules, and then select New Navigation Rule. This opens the New Navigation Rule dialog that Figure 17 shows. This dialog allows you to create a new navigation rule by providing an either new or existing JSP source page, and then defining destination pages.
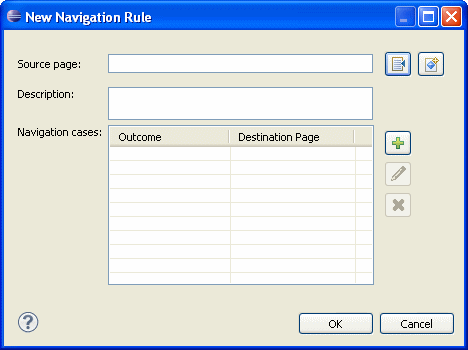
Figure 17. New Navigation Rule Dialog
- If you choose to create your navigation rule using an existing JSP page as a source page, on the New Navigation Rule dialog click Browse for JSP to open the Select JSP File dialog and select the page.
Define one or more navigation cases from the source page by clicking New on the New Navigation Rule dialog to open the New Navigation Case dialog that Figure 18 shows.
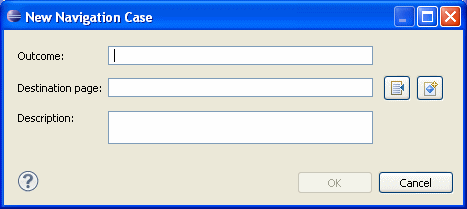
Figure 18. New Navigation Case Dialog
Note that the destination page for your new navigation case can be an exising JSP page that you select using the Select JSP File dialog, or a new JSP page that you create as follows:
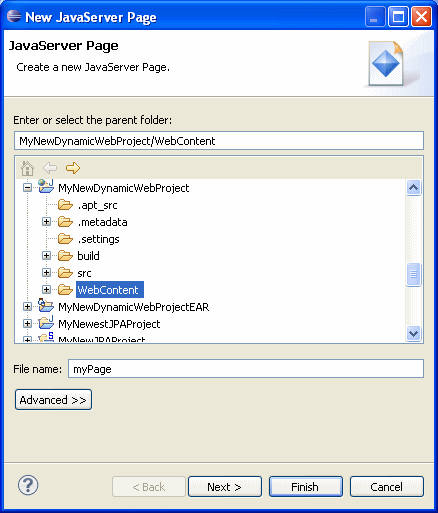
- Click Create a New JavaServer Page on the New Navigation Case dialog to open the New JavaServer Page > JavaServer Page dialog that Figure 19 shows. Using this dialog, select a package and provide a name for your new JSP page, and then click Next.
- On the next New JavaServer Page > Select JSP Template dialog that Figure 20 shows select a template to serve as initial content of your new JSP page, and then click Finish.
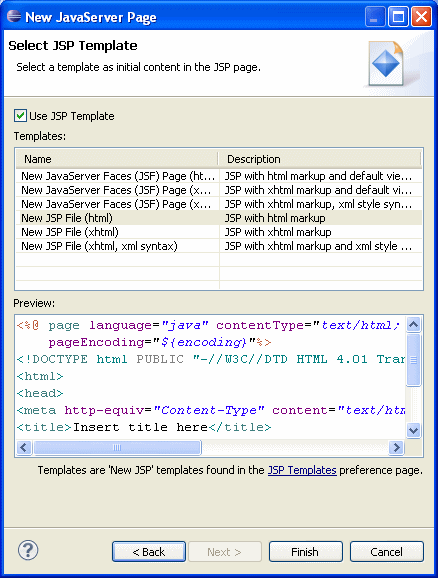
Figure 20. New JSP Dialog - Select Template
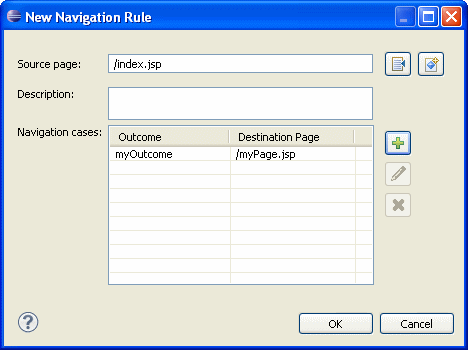
Figure 21. New Navigation Rule - Completed Dialog
- Click Create a New JavaServer Page on the New Navigation Case dialog to open the New JavaServer Page > JavaServer Page dialog that Figure 19 shows. Using this dialog, select a package and provide a name for your new JSP page, and then click Next.
- If you choose to create your navigation rule using a newly create JSP page as a source page, click Create a New JavaServer Page on the New Navigation Rule dialog to open the New JavaServer Page > JavaServer Page dialog and follow the procedure description of Figure 19 and Figure 20.
- If you choose to create your navigation rule using an existing JSP page as a source page, on the New Navigation Rule dialog click Browse for JSP to open the Select JSP File dialog and select the page.
2.2.3 Creating a New Converter
You can create a converter for your Web application. A converter is used in the conversion model, where each component can be associated with the server-side model object data. The component data can have two views: model and presentation. You can enable conversion of the data between the model view and the presentation view. To create a converter, proceed as follows:- In the Project Explorer, expand your JSF dynamic Web project's Faces Configuration node (see Figure 11), right-click Converters, and then select New Converter. This opens the New Converter dialog that Figure 22 shows.
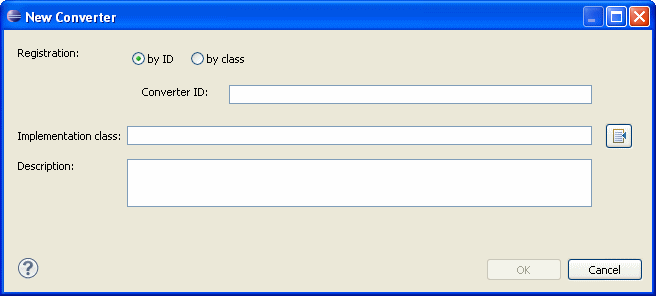
Figure 22. New Converter Dialog
javax.faces.convert.Converter. 2.2.4 Creating a New Validator
You create a validator for your JSF project as follows:- In the Project Explorer, expand your JSF dynamic Web project's Faces Configuration node (see Figure 11), right-click Validators, and then select New Validator. This opens the New Validator dialog that Figure 23 shows.

Figure 23. New Validator Dialog
javax.faces.validator.Validator.2.3 Using the Faces Configuration Editor
The Faces configuration editor allows you to modify thefaces-config.xml file to define and edit page navigations, managed beans, components, converters, validators, render-kit, as well as to perform other element configurations.
You use the editor as follows:
- In the Project Explorer, right-click your JSF dynamic Web project's
Faces Configurationnode, and select Open, as Figure 24 shows. This opens the Faces Configuration Editor' start page that Figure 25 shows. This page enables access to useful resources such as documentation and help topics.
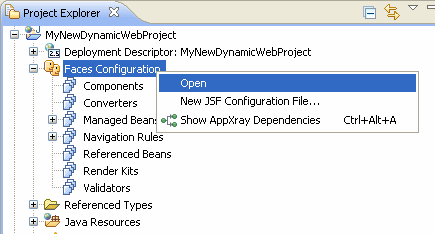
Figure 24. Opening the Faces Configuration Editor
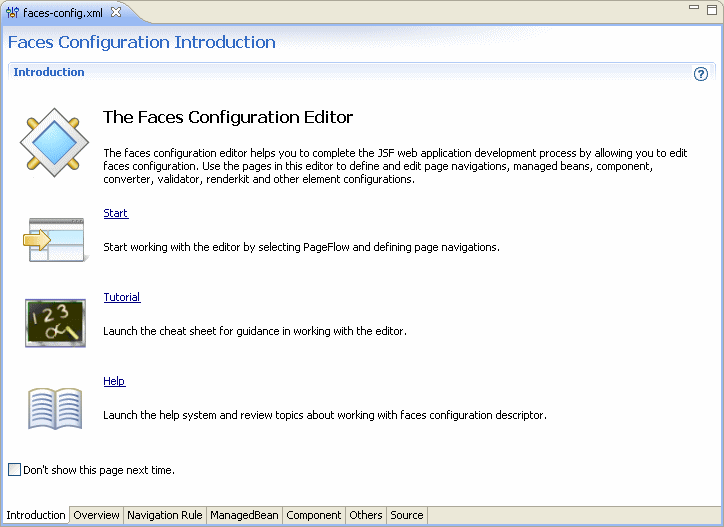
Figure 25. Faces Configuration Editor Start Page
- Use the following tabs to edit the Faces configuration:
- Overview tab that Figure 26 shows offers the compact presentation of all editable information. Double-clicking an element opens a relevant editor tab to enable editing.
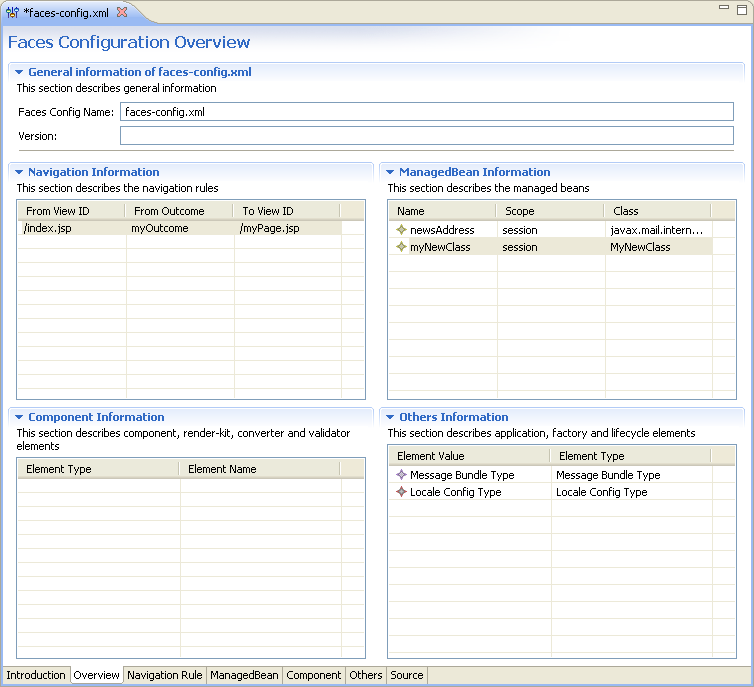
Figure 26. Faces Configuration Overview
- Navigation Rule tab that Figure 27 shows represents a canvas that allows you to define new and modify existing navigation rules for your application.

Figure 27. Faces Configuration Editor - Navigation Rule Tab
You can create navigation rules by dragging and dropping JSP pages onto the canvas in one of the following ways:- Directly from the Project Explorer.
- From the Palette by selecting Nodes > Page to open the Select JSP File dialog that Figure 28 shows.

Figure 28. Select JSP File Dialog
You can reposition elements on the canvas. In addition, you can modify the elements' properties using the Quick Edit editor that displays properties of the selected element. - Managed Bean tab that Figure 29 shows allows you to modify configuration of managed beans in your project.

Figure 29. Faces Configuration Editor - Managed Bean Tab
- Component tab enables editing of information about components, converters, validators, and render kits that you defined for your project.
- Others tab lets you edit various Faces configurations that are not covered in any of the other tabs.
- Source tabs provides access to the
faces-config.xmlfile itself.
- Overview tab that Figure 26 shows offers the compact presentation of all editable information. Double-clicking an element opens a relevant editor tab to enable editing.
3. Understanding JSF Resouce Bundles
If you would like your JSF application to use a resource bundle, you need to register it with the application. For JSF projects, when they are configured with the JSF facet, anapplication.properties file is automatically created in the src/resources folder. As one of the uses of a resource bundle is to enable localization, a loadBundle tag is typically added to each JSP page you want to localize:
- JavaServer Faces Technology
- Dynamic Web Projects
- Using the Web Page Editor
- Configuring Projects for Apache Trinidad
- Configuring Projects for JSTL
- Editing Tags with Property Sheets
- Creating JSF HTML Tags
- Using the Web Page Editor Palette
- Enabling Localization in the Web Page Editor
- Choosing a Resource Bundle
- Choosing a Validator
- Choosing a Converter
