4 Managing the Sales Force
This chapter contains the following topics:
4.1 Understanding the Sales Force
Many organizations sell products and services to different industries in diverse geographic locations. These geographic locations are typically referred to as territories. To better serve customers, organizations typically specify which territories and industries each sales team member supports.
By defining territory and industry information for the sales force, you can allow the system to automatically assign sales team members to customers based on territory and industry information. This process is known as aligning the sales force.
When you align the sales force, the system automatically assigns sales team members to all of the customers in the system, based on territory and industry groupings. You can realign the sales force as often as the business demands.
You can also specify whether a customer should be excluded from the automatic alignment process. For example, the organization might have a customer that works with a specific sales team and will not work with any other sales team. In this instance, you can exclude that customer from the automated alignment process and manually assign the appropriate sales team members to the customer.
4.2 Adding Sales Team Members to Territories and Industry Groupings
This section provides an overview of sales team territories and industry groupings, list prerequisites, and discusses how to:
-
Add sales team members to a territory.
-
Add sales team members to an industry grouping.
4.2.1 Understanding Sales Teams by Territory and Industry Groupings
Before you can align the sales force, you must define which territories and industries each sales team member supports. You can add individual employees and partners, along with sales groups, to a territory and to an industry grouping. You can then specify the dates during which each sales team member is effective, or active, on those territories and industry groupings.
4.2.1.1 Territories
You use the Territory Application program (P90CA140) to add sales team members to a territory. When you assign a sales team member to a territory, the system creates a record in the F90CA14A table.
You can add employees, partners, sales team members, or sales groups to a territory. You can add a sales team member to multiple territories. You can also enter effective dates for each member that you attach to a territory. These dates specify when the sales team member is actively supporting the specified territory. If you do not enter effective dates, the system uses the system date as the beginning effective date, and 12/31/2015 as the default expiration date.
|
Note: If you want to assign sales groups to a territory, you must first create sales groups. You can set up sales groups using search types of E, C, and SG. We recommend that you select one search type to use for all sales groups that are used by the CRM Sales Force Automation system. Then you must specify that search type in the processing options for the Territory Application program (P90CA140). |
For example, if a sales team member has just begun employment with the organization, he might be responsible for supporting a small territory, Territory A, during his first month of employment. After he successfully completes the month, you might also assign him to Territory B and C.
This example illustrates how you might add the employee to territories:
| Territory | Beginning Effective Date | Expiration Date |
|---|---|---|
| Territory A | 01/01/2005 | 12/31/2015 |
| Territory B | 02/01/2005 | 12/31/2015 |
| Territory C | 02/01/2005 | 12/31/2015 |
If the employee moved, or due to resource, territory, or industry group reorganization, was no longer supporting on of the territories, you can enter an expiration date on the territory. After the expiration date, the employee would no longer be considered an active sales team member in that territory.
4.2.1.2 Industry Groupings
You use the Industry Grouping Application program (P90CA12A) to add sales team members to an industry group. When you assign a sales team member to an industry group, the system creates a record in the F90CA12B table.
You can add employees, partners, and sales groups to one or more industry groupings. You can also enter effective dates for each sales team member that you attach to an industry grouping. These dates are used to specify when the sales team member is actively supporting the specified industry grouping. If you do not enter effective dates, the system uses the system date as the beginning effective date, and 12/31/2015 as the default expiration date.
For example, a sales team member might initially be responsible for supporting only Industry 1 during his first month of employment. After he successfully completes the first month of employment, he is then responsible for supporting Industry 1 and Industry 2.
This example illustrates how you might add the sales team member to industry groupings:
| Industry Grouping | Beginning Effective Date | Expiration Date |
|---|---|---|
| Industry 1 | 01/01/2005 | 12/31/2015 |
| Industry 2 | 02/01/2005 | 12/31/2015 |
4.2.2 Prerequisites
Before you complete the tasks in this section:
-
Enter sales team members into the system.
Sales team members can be employees, partners, or sales groups.
-
Create sales territories.
-
Set up industry groupings.
|
See Also: |
4.2.3 Forms Used to Add Sales Team Members to Territories and Industry Groupings
| Form Name | FormID | Navigation | Usage |
|---|---|---|---|
| Search for Territories | W90CA140K | Sales Force Automation Setup (G90CA03), Territory | Select a territory. |
| Territory - Manage {Territory Name} | W90CA140A | Select the territory on the Search for Territories form. | Select the territory to which you want to add sales team members. |
| Search for Industry Grouping | W90CA12AA | Sales Force Automation Setup (G90CA03), Industry Grouping | Select an industry grouping. |
| Industry Grouping - Manage {Industry Grouping Name} | W90CA12AA | Select the industry grouping on the Search for Industry Groupings form. | Add sales team members to an industry grouping. |
4.2.4 Adding Sales Team Members to a Territory
Access the Territory - Manage {Territory Name} form. Select the Sales tab. Click the Sales Team link.
To add sales team members to a territory:
-
Click the Assign Sales Team button.
-
On the Sales Team Search and Select form, search for the employees, partners, or sales groups that you want to add to the territory, select each sales team member by placing a check mark next to their record, and then click Select.
The sales team members that you selected now appear in the detail area on the Sales tab of the Territory - Manage {Territory Name} form.
-
To remove a member, you can select that member and then click the Remove button.
We suggest that you only remove members if you have accidentally added them to the territory. If they are no longer active on the territory, you can enter an expiration date for the employee, partner, or sales group.
-
To set the beginning effective and expiration dates for a member of the sales team, click that employee, partner, or sales group's name.
-
On the Sales Team Detail Power Edit form, enter the dates during which the sales team member is actively supporting the territory.
4.2.5 Adding Sales Team Members to an Industry Grouping
Access the Industry Grouping- Manage {Industry Grouping Name} form. Select the Sales tab. Click the Sales Team link.
To add sales team members to an industry grouping:
-
Click the Assign Sales Team button.
-
On the Sales Team Search and Select form, search for the employees, partners, or sales groups that you want to add to the industry grouping, select each sales team member by placing a check mark next to their record, and then click Select.
The sales team members that you selected now appear in the detail area on the Sales tab of the Industry Grouping - Manage {Industry Grouping Name} form.
-
To remove a member, you can select that member and then click the Remove button.
We suggest that you only remove members if you have accidentally added them to the territory. If they are no longer active on the industry grouping, you can enter an expiration date for the employee, partner, or sales group.
-
To set the beginning effective and expiration dates for a member of the sales team, click that employee, partner, or sales group's name.
-
On the Sales Team Detail Power Edit form, enter the dates during which the sales team member is actively supporting the industry grouping.
4.3 Assigning Sales Team Members to Customers
This section provides an overview of assigning sales teams to customer records and discusses how to:
-
Entering customer overrides for sales alignment.
-
Run the Sales Team Alignment TC program (R90CA18A).
-
Manually assign sales team members to customers.
-
Manually assign sales team members to opportunities.
4.3.1 Understanding Sales Force Alignment
You can set up the system to automatically assign sales team members to customers based on their territory and industry groupings. Allowing the system to automatically align the sales force can assist the organization in assigning the sales representatives in the closest geographic proximity, and with the most industry knowledge, to each account, which can improve the likelihood of a successful sales transaction.
The alignment process is based on territory and industry groupings. Therefore, after you set up sales team members in the system, you must assign each sales team member to territories and industry groupings. You use effective dates to determine when a sales team member is active in a specific territory or industry grouping.
After you enter territory and industry grouping information for the sales force, when you enter new customer records, or change industry, primary address, or territory information on existing customer records, the system automatically assigns all active sales team members with the appropriate industry and territory classifications to those records. Alternatively, you can update the sales teams associated with customer records using a batch process.
After the sales team has been assigned to a customer, when you create opportunities for that customer, the system assigns the active sales team members from the sold to, ship to, or both customer's sales team to the opportunities that are created for that customer based on the CRM System Constants. When you convert the opportunity to a quote or a sales order, the system copies all active sales team members, whose Apply Commission option is selected, from the opportunity record to the quote or sales order.
|
Note: Once an opportunity, quote, or sales order has sales team members assigned to it, the alignment process does not change that sales team, even if the sales team of the related customer is changed. To add or remove members from the sales team of an opportunity, quote, or sales order, you must manually change the sales team. |
4.3.1.1 Territory Assignment
When you enter a customer record, you specify the address for that customer. You can enter multiple addresses for each customer. The system compares the customer's primary address to the address information associated with each sales territory. The system then assigns the appropriate territory to customer record. If necessary, you can manually override the territory that the system assigns using customer override options.
When assigning a territory to a customer, the system first tries to match the postal code from the customer address, including the four-digit extension, to the postal codes assigned to a territory. If the customer's postal code is not associated with any of the territories, the system then tries to match the first five digits of the customer's postal code to the postal codes assigned to a territory. If no match is found, the system then tries to match the city and state from the customer address to the city and state assigned to a territory. If the customer's city and state combination is not associated with any of the territories, the system then tries to match the city from the customer address to the city associated with a territory. If no match is found, the system then tries to match the customer's state to the state associated with a territory. Lastly, if the customer's state does not exist on any of the territories, the system tries to match the country from the customer's address to the country assigned to a territory. If no matches are found, the system does not assign a territory to the customer record.
4.3.1.2 Industry Grouping Specification
When you enter customers, you must specify the industry classification associated with that customer. The system uses this information to determine which industry grouping the customer belongs to, and to determine which sales team members are actively supporting that grouping at the time the record is added or changed.
You can enter only one industry for each customer record. If the industry is not associated with an industry grouping, the system does not assign an industry grouping to the customer record.
4.3.1.3 The Automatic Alignment Process
After you set up sales team members, territories, and industry groupings, you can then align the sales force. The alignment process happens automatically each time a customer record is added or changed. The system assigns sales team members to each customer record when the record is added or changed, based on the territory and industry grouping. After the sales team is assigned to a customer, the active members of that sales team are copied to opportunity records that are created for that customer. However, once a sales team has been added to an opportunity, the sales force alignment process does not change the opportunity's sales team. The alignment process affects only customer sales team records.
When sales team members are assigned to a customer, the system creates a record in the F42140 table.
The automatic alignment process consists of these steps:
-
You enter a new customer record, or change the industry, territory, or primary address of an existing customer record.
-
If the customer's existing sales team includes members who are no longer active in both the territory and the industry grouping, the system adds an expiration date to those members, which removes them from the active sales team.
-
If the customer's existing sales team includes members whose beginning effective date is greater than the system date, the system does not remove that member from the sales team or change the effective dates for that member.
-
The system retrieves the customer's primary address information to determine which territory to assign to the record.
-
The system identifies all sales team members who are active in the specified territory.
A sales team member is considered active if their beginning effective date is on or before the system date, and their expiration date is on or after the system date.
-
The system retrieves the customer's industry grouping code.
-
The system identifies all sales team members who are active for the specified industry grouping.
A sales team member is considered active if their beginning effective date is on or before the system date, and their expiration date is on or after the system date.
-
The system adds all of the sales team members who are active in both the specified territory and the specified industry grouping to the customer's sales team.
The system assigns the system date as the begin date for all newly added members of the sales team.
4.3.1.4 The Batch Alignment Process
At times, the organization might find it necessary to use a batch process to realign the sales force. For example, if members of the sales force leave the organization, you can use a batch process to update records rather than manually updating each customer sales team on which the employees worked. Similarly, if you add new territories or change existing territories, you can use a batch process to update records.
To process batch alignment, you run the Sales Team Alignment TC program (R90CA18A, version XJDE0007). This program performs all of the steps that the automated alignment process performs, with one exception. You do not need to physically change the customer record in order to update the sales team. When you run the Sales Team Alignment TC program, the system determines whether any changes have been made to territories or industry groupings since the program was run last. If a territory or industry grouping changed, the system updates all customer records associated with those territories or industry groupings. The system also looks at customer records whose Industry Grouping or Territory fields are blank to determine if the changes to the industry groupings or territories might affect those customers.
4.3.1.5 Remove a Member from a Sales Team
If an employee leaves the organization, you can remove them from the sales team by entering an ending effective date on the sales team member record. By entering an ending effective date, as opposed to deleting the member from the sales team, you can keep an audit trail of all of the sales team members that worked on an account at any given time.
We recommend that you use the Delete option only if you accidentally add an employee to a sales team.
4.3.1.6 Exclude Accounts from Automated Alignment
In certain instances, you might decide that you do not want the system to automatically assign the sales team to a customer. Using customer overrides, you can exclude an account from the sales alignment process.
For example, if a valuable customer has decided that they will work only with certain sales members, you can set up their account so that the system does not assign sales team members based on territory and industry grouping. When the Sales Team Override flag is selected, all modifications to the sales team must be done manually.
When you specify that a customer should not be included in the alignment process, the system does not make any changes to the sales team members associated with that record, even if the territories or industry groups associated with the customer change.
4.3.1.7 Manually Assign Sales Team Members
At times, the organization might want to manually assign sales team members to customers and opportunities rather than using the automated alignment process.
For example, several customers might have developed a strong relationship with a particular sales member or sales team. To satisfy these customers you might decide to assign these sales team members to those accounts, even though the sales team members to not actively support the territories or industry groupings associated with their accounts.
Similarly, you might want to add a product or industry expert to a particular customer to help win a sale, even though that person might not actively support the territory in which the customer resides. In this situation, you can manually add the expert to the opportunity sales team. You can also exclude the accounts from the automated alignment process to ensure that the sales team does not change each time the account is updated or each time the Sales Team Alignment TC program is processed.
4.3.1.8 Sales Team Roles
After you assign sales team members to a customer, you can assign each member of the team a role. Valid role types are stored in UDC H42/RT. Role types are informational codes that specify the job that each member of a sales team should perform. Examples of role types include:
-
Account Manager
-
Sales Representative
-
Sales Support
4.3.2 Forms Used to Assign Sales Team Members to Accounts
| Form Name | FormID | Navigation | Usage |
|---|---|---|---|
| Search for Customers | W90CA080D | Daily Sales Force Automation Processing (G90CA01), Customer | Select a customer. |
| Customer - Manage {Customer Name} | W90CA080A | Select a customer on the Search for Customers form. | Access customer information, enter customer overrides, and manually assign sales team members. |
| Sales Team Revisions | W90CA08AB | Click a sales team member on the Sales Team section of the Customer - Manage {Customer Name} form. | Assign roles to sales team members. |
| Search for Opportunities | W90CB020D | Daily Sales Force Automation Processing (G90CA01), Opportunity | Select an opportunity. |
| Opportunity - Manage {Opportunity Name} | W90CB020A | Select an opportunity on the Search for Opportunities form. | Access opportunity information and manually assign sales team members. |
4.3.3 Entering Customer Overrides for Sales Alignment
Access the Customer - Manage {Customer Name} form. Select the Customer tab. Click the Detail link.
Figure 4-1 Customer - Manage {Customer Name} form: Customer tab: Detail link
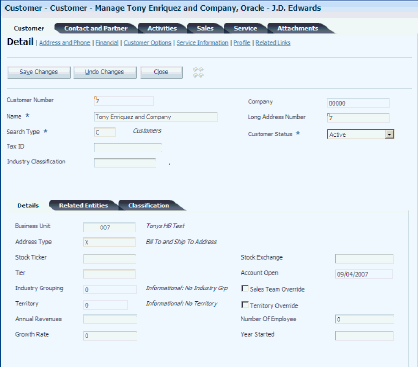
Description of ''Figure 4-1 Customer - Manage {Customer Name} form: Customer tab: Detail link''
- Sales Team Override
-
Select this option if you do not want the system to automatically assign sales team members to the customer based on the territory and industry grouping. If you select this option, any changes to the sales team must be done manually.
- Territory Override
-
Select this option if you want to manually override the territory that is assigned to the account. The system determines the territory by comparing the specified customer address to the address information of each sales territory.
If you select this option, the system enables the Territory field, which enables you to enter an override value. The system uses this value when performing sales team alignment.
- Territory
-
Enter the territory in which the customer belongs. You can enter a value in this field only if you select the Territory Override option. If you do not select the Territory Override option, the value in this field is supplied by the system, and the field is disabled.
4.3.4 Running the Sales Team Alignment TC program (R90CA18A)
Sales Force Automation Setup menu (G90CA03), Sales Team Alignment UBE.
4.3.5 Manually Assigning Sales Team Members to Customers
Access the Customer - Manage {Customer Name, Company}. Select the Sales tab. Click the Sales Team link.
To manually assign sales team members to a customer:
-
Click the Assign Sales Team button.
-
On the Sales Team Search and Select form, search for the employees, partners, or sales groups that you want to add to the sales team, select each sales team member by placing a check mark next to their record, and then click Select.
The sales team members that you selected now appear in the detail area of the Sales tab.
-
To remove a member, you can select that member and then click the Remove button.
We suggest that you only remove members if you have accidentally added them to the sales team. If they are no longer active on the team, you can enter an expiration date for the employee, partner, or sales group.
-
To set the beginning effective and expiration dates for a member of the sales team, click that employee, partner, or sales group's name.
-
On the Sales Team Revisions form, enter the dates during which the sales team member is actively supporting the customer.
4.3.6 Manually Assigning Sales Team Members to Opportunities
Access the Opportunity - Manage {Opportunity Name}. Select the Sales tab. Click the Sales Team link.
To manually assign sales team members to an opportunity:
-
Click the Assign Sales Team button.
-
On the Sales Team Search and Select form, search for the employees, partners, or sales groups that you want to add to the sales team, select each sales team member by placing a check mark next to their record, and then click Select.
The sales team members that you selected now appear in the detail area of the Sales tab.
-
To remove a member, you can select that member and then click the Remove button.
We suggest that you only remove members if you have accidentally added them to the sales team. If they are no longer active on the team, you can enter an expiration date for the employee, partner, or sales group.
-
To set the beginning effective and expiration dates for a member of the sales team, click that employee, partner, or sales group's name.
-
On the Sales Team Revisions form, enter the dates during which the sales team member is actively supporting the opportunity.
4.4 Reviewing Sales Team Information
This section provides an overview of sales team information and discusses how to:
-
Review customers associated with sales team members.
-
Review partners associated with sales team members.
-
Review opportunities associated with sales team members.
4.4.1 Understanding Sales Team Information
After you enter sales team members into the system, you can assign those members to customer accounts. Hopefully, as the members of the sales team progress, they generate additional customers, opportunities, and partner relationships.
You can review sales information for each sales team member, such as:
-
The customers that are associated with sales team members.
-
The partners that are associated with sales team members.
-
The opportunities that are associated with sales team members.
When you view this information, you have the option of viewing information in two formats:
-
Employee only
-
Employee and subordinates
The employee only view is the default view. To view information about the employee and their subordinates, click the Expand Hierarchy button on any of the review forms. To return to the employee-only view, click the Collapse Hierarchy button.
For example, Jane Ryan has 12 employees who report to her. When you initially view information for Jane, you see only the customers, partners, or opportunities that she is directly associated with. If you click the Expand Hierarchy button, you can view all of the customers, partners, and opportunities for Jane and the 12 employees who report to her. When you click the Collapse Hierarchy button, you return to viewing only Jane's information.
4.4.1.1 Customer Information
Click the Customer link to review the list of customers with which a sales team member is associated. This information can help you to determine the number of customers each member of the sales team is currently working on. This type of information can assist the organization with resource planning and shifting. For example, you might determine that one sales representative is currently supporting 20 customers, while another representative is supporting only three. Therefore, it might be necessary to reassign sales representatives from one territory or industry to another.
4.4.1.2 Partner Information
You can review a list of partners with whom a sales representative is working.
4.4.1.3 Opportunities
You can review all of the current opportunities with which a sales representative is involved. This information can be useful in assessing the sales representative's work load and sales productivity. When you click the Opportunity link, you can see at a glance this information for all of the active opportunities associated with the sales representative:
-
Customer
-
Role
-
Sales cycle
-
Probability
-
Close date
-
Potential amount
4.4.2 Forms Used to Review Sales Team Information
| Form Name | FormID | Navigation | Usage |
|---|---|---|---|
| Search For Employees | W90CA040F | Periodic Sales Force Automation Processing (G90CA02), Employee | Select existing employees for review or revision. |
| Employee - Manage {Employee Name} | W90CA040A | Select an employee from the Search for Employees form. | Review basic employee information. |
4.4.3 Reviewing Customers Associated with Sales Team Members
Access the Employee - Manage {Employee Name} form. Select the Customer and Partner tab. Click the Customer link.
Figure 4-2 Employee - Manage {Employee Name} form: Customer and Partner tab: Customer link
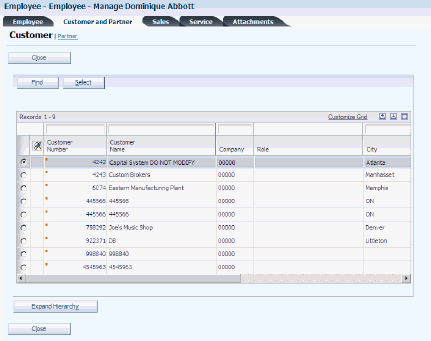
Description of ''Figure 4-2 Employee - Manage {Employee Name} form: Customer and Partner tab: Customer link''
- Select a Query
-
Specify whether you want to view all, current, expired, or future partners associated with the employee by selecting a value in this field. Selecting a query before you click Find enables you to minimize the number of records that appear on the form. To clear the form and begin a new search, select Clear, and then click Find.
4.4.4 Reviewing Partners Associated with Sales Team Members
Access the Employee - Manage {Employee Name} form. Select the Customer and Partner tab. Click the Partner link.
Figure 4-3 Employee - Manage {Employee Name} form: Customer and Partner tab: Partner link
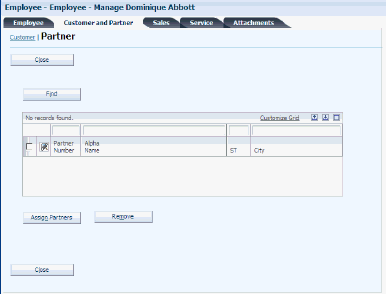
Description of ''Figure 4-3 Employee - Manage {Employee Name} form: Customer and Partner tab: Partner link''
4.4.5 Reviewing Opportunities Associated with Sales Team Members
Access the Employee - Manage {Employee Name}. Select the Sales tab. Click the Opportunity link.
Figure 4-4 Employee - Manage {Employee Name} form: Sales tab: Opportunity link
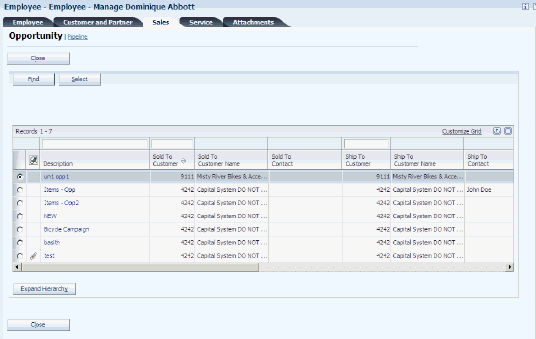
Description of ''Figure 4-4 Employee - Manage {Employee Name} form: Sales tab: Opportunity link''