47 Sales Order Counts Mobile Applications
This chapter discusses these topics:
-
Section 47.1, "Sales Order Counts Mobile Applications Overview"
-
Section 47.2, "Setting Up the Sales Order Counts Mobile Applications"
-
Section 47.3, "Using the Sales Order Counts Mobile Tablet Application"
-
Section 47.4, "Using the Sales Order Counts Mobile Smartphone Application"
|
Important Note: Before using the mobile applications, Oracle strongly recommends that users have a complete understanding of how to use the associated processes and applications in the JD Edwards EnterpriseOne base software.For additional information about the processes and applications associated with the mobile applications discussed in this chapter, see: Holding, Releasing, and Reviewing Orders in the JD Edwards EnterpriseOne Applications Sales Order Management Guide. |
47.1 Sales Order Counts Mobile Applications Overview
You use the Sales Order Counts enterprise mobile applications to inquire on the orders associated with a specific branch/plant in your organization. The intended user of these applications is a branch or warehouse manager who needs to determine what orders are awaiting fulfillment at their branch, plant, or location. However, the application can be used by any authorized personnel with a need to review order counts and information.
Using these applications, users can review details about orders, and can add text notes to the order. Besides the notes, all information for the orders is read-only.
Using these applications, you can select the different tabs to view order information based on the following criteria:
-
Orders by status.
-
Orders by hold code.
-
Orders by promised ship date.
-
Orders by item.
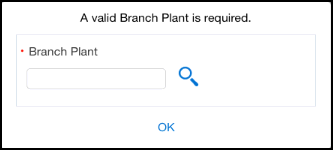
When you set up the applications, you specify in the processing options which version of the Sales Order Entry (P42101) and Customer Service Inquiry (P4210) programs that the system uses to retrieve and display sales orders. The mobile applications use the values in the specified versions of the processing options to determine the branch/plant of the selected user. If the system cannot determine a branch/plant, the application prompts the user to enter a branch/plant value upon entry. All inquiries done with these applications are specific to a branch/plant.
After installing the application, users can set up user preferences to specify how they want to view data on the Orders by Promised Ship tab. In addition to the 3 standard values shown on the tab (Past Due, Due Today, and Due Tomorrow), users can specify up to 3 additional due date values. These additional values are configurable, and can be used to show orders that are due within a specified number of days. For example, you might choose to set up the following 3 additional due date values:
-
Due in 5 Days
-
Due in 10 Days
-
Due in 30 Days
This table lists the applications that are available to review sales order information:
| Type of Application | Additional Information |
|---|---|
| Base EnterpriseOne Application | Use the Sales Order Entry (P42101) application in the JD Edwards EnterpriseOne system to review sales orders.
See Holding, Releasing, and Reviewing Orders in the JD Edwards EnterpriseOne Applications Sales Order Management Guide. |
| Tablet Application | Mobile Sales Order Counts - Tablet (M42062)
To download the application to your tablet, search on the following text in the application store:
|
| Smartphone Application | Mobile Sales Order Counts - Phone (M42063)
To download the application to your device, search on the following text in the application store:
|
Before using the Sales Order Counts tablet or smartphone application, you must perform the following setup tasks:
-
Set up processing options for the Mobile Sales Order Counts - Tablet application.
-
Set up processing options for the Mobile Sales Order Counts - Phone application.
-
Set up user preferences to control the display of data on the Orders By Promised Ship tab.
47.1.1 Differences and Limitations: Sales Order Counts Mobile Applications
Mobile applications are intended to be a simplified version of the applications that are available in the base software. In most cases, these applications provide a subset of the functionality available in the base software.
The Sales Order Count mobile enterprise applications are intended to provide users with review capabilities for sales orders. With the exception of the ability to add a note to an order, these applications do not support the entry or update of sales orders.
Pie Chart Pieces Too Small to Tap
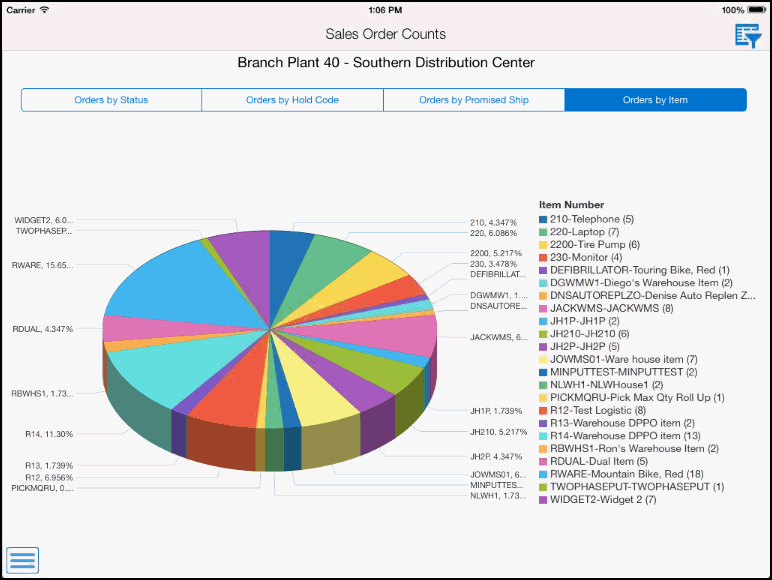
If the charts you are viewing with this application include data for many different types of orders, the pieces of the charts might be small and it might be difficult to tap the correct piece of the chart. To view the information that you want, tap any piece of the chart, and then select the type of information from the drop down menu on the next screen. The drop down menu will contain all values displayed in the chart, enabling you to select the correct value.
Language Support
Additionally, you should be aware of how a user's language preference can affect the search functionality for business unit and branch/plant records. See Section 1.2.2.1, "Language Support for Business Unit and Branch Plant Searches"
47.2 Setting Up the Sales Order Counts Mobile Applications
Before using the Sales Order Counts mobile applications, you must set processing options and user preferences. Processing options are typically set by the system administrator before the mobile application is rolled out to the organization. User preferences can be set by each individual user of the application.
47.2.1 Setting Processing Options for the Mobile Sales Order Counts - Tablet Application (M42062)
You use processing options to specify default processing information for a program.
47.2.1.1 Versions
- 1. Manage Existing Orders (P42101) Version
-
Use this processing option to specify the version of the P42101 that the Order Counts mobile tablet application uses when retrieving and processing order information. If you leave this option blank, the system uses version ZJDE0001.
- 2. Sales Order Detail (P4210) Version
-
Use this processing option to specify the version of the P4210 that the Order Counts mobile tablet application uses when retrieving and processing order information. If you leave this option blank, the system uses version ZJDE0001.
- 3. User Defined Codes (P0004A) Version
-
Use this processing option to specify the version of the P0004A that the Order Counts mobile tablet application uses when retrieving and processing order information. If you leave this option blank, the system uses version ZJDE0001.
- 4. Business Units (P0006) Version
-
Use this processing option to specify the version of the P0006 that the Order Counts mobile tablet application uses when retrieving and processing order information. If you leave this option blank, the system uses version ZJDE0001.
47.2.2 Setting Processing Options for the Mobile Sales Order Counts - Phone Application (M42063)
You use processing options to specify default processing information for a program.
47.2.2.1 Versions
- 1. Manage Existing Orders (P42101) Version
-
Use this processing option to specify the version of the P42101 that the Order Counts mobile smartphone application uses when retrieving and processing order information. If you leave this option blank, the system uses version ZJDE0001.
- 2. Sales Order Detail (P4210) Version
-
Use this processing option to specify the version of the P4210 that the Order Counts mobile smartphone application uses when retrieving and processing order information. If you leave this option blank, the system uses version ZJDE0001.
- 3. User Defined Codes (P0004A) Version
-
Use this processing option to specify the version of the P0004A that the Order Counts mobile smartphone application uses when retrieving and processing order information. If you leave this option blank, the system uses version ZJDE0001.
- 4. Business Units (P0006) Version
-
Use this processing option to specify the version of the P0006 that the Order Counts mobile smartphone application uses when retrieving and processing order information. If you leave this option blank, the system uses version ZJDE0001.
47.2.3 Setting User Preferences for the Sales Order Counts Mobile Applications
After installing the application, users can set up user preferences to specify how they want to view data on the Orders by Promised Ship tab. In addition to the 3 standard values that appear on the Orders by Promised Ship tab (Past Due, Due Today, and Due Tomorrow), users have 3 additional values that they can configure to display different due date ranges on the screen.
For example, a user might choose to display these six due date values on the Orders by Promised Ship Date tab:
-
Past Due (hard coded)
-
Due Today (hard coded)
-
Due Tomorrow (hard coded)
-
Due in 5 Days (configurable)
-
Due in 10 Days (configurable)
-
Due in 30 Days (configurable)
|
Note: When you enter your user preference information for the additional date values, you must enter the number of days in ascending order. For example, to show orders due in the next 5, 10, and 30 days, you must enter 5 in the Due in X Days (1) preference, 10 in the Due in X Days (2) preference, and 30 in the Due in X Days (3) preference. Entering the numbers out of order, for example 5, 30, 10, would result in unreliable data.Also note that these ranges are not cumulative. For example, if you set up the additional due date values as due in 5, 10, and 30 days, your application would display the following:
|
To set user preferences on your device:
-
Access the Settings on your mobile device, and select the Order Counts application.
For instructions about accessing the settings on your mobile device, see the user documentation for your device.
-
Complete the following fields with a numeric value:
-
Due in X Days (1):
-
Due in X Days (2):
-
Due in X Days (3):
If you leave any of these options blank, the system does not display that category on the Orders by Promised Ship screen.
-
47.3 Using the Sales Order Counts Mobile Tablet Application
The Sales Order Counts mobile tablet application enables you to view sales orders for a specified branch/plant. You can also add notes to a sales order using this application.
Before you can use the application, you must download and install the Sales Counts application from the application store on your device.
To open the application, tap the Sales Counts icon and log in.
47.3.1 Reviewing Sales Orders Using a Mobile Tablet
To view sales order information on your mobile tablet device:
-
Open the application by tapping the Sales Counts icon on your device, and then log in.
See Chapter 3, "Logging Into Mobile Enterprise Applications"
-
The application determines which branch/plant to use based on the processing options. If the application cannot determine which branch/plant to use, you must enter a valid branch/plant, and then tap OK.
-
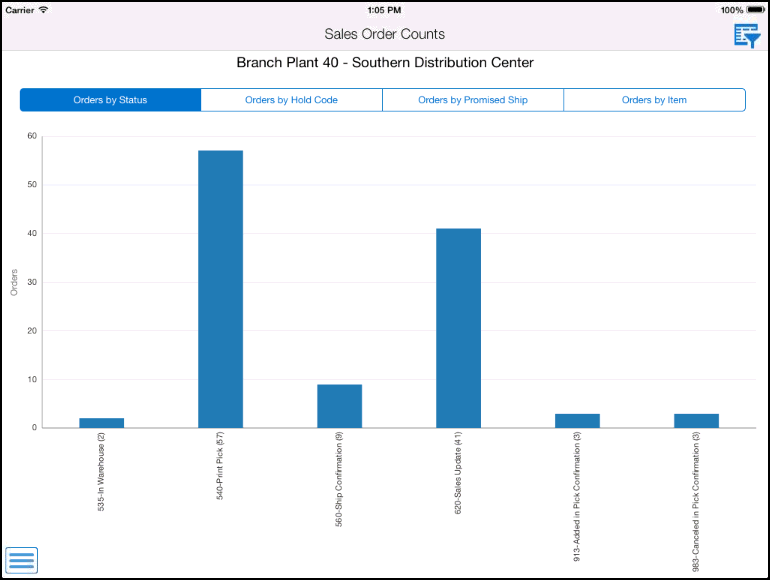
The system loads the order information for the specified branch/plant. On the Orders by Status tab, you can review the chart to see the number of orders in the specified branch/plant that are at each status.
-
You can also view charts for sales orders by the following criteria by tapping the corresponding tab on the screen:
-
Orders by Hold Code
-
Orders by Promised Ship Date
-
Orders by Item
-
-
To filter your list of orders, tap the Filter button, enter your filter criteria, and then click Apply. The list of orders is updated to reflect your filter criteria.
-
From any of the chart screens, tap and hold a bar or wedge in the chart to view a pop up of information about that set of orders. Notice that the piece of the chart, and the corresponding entry in the legend are highlighted.
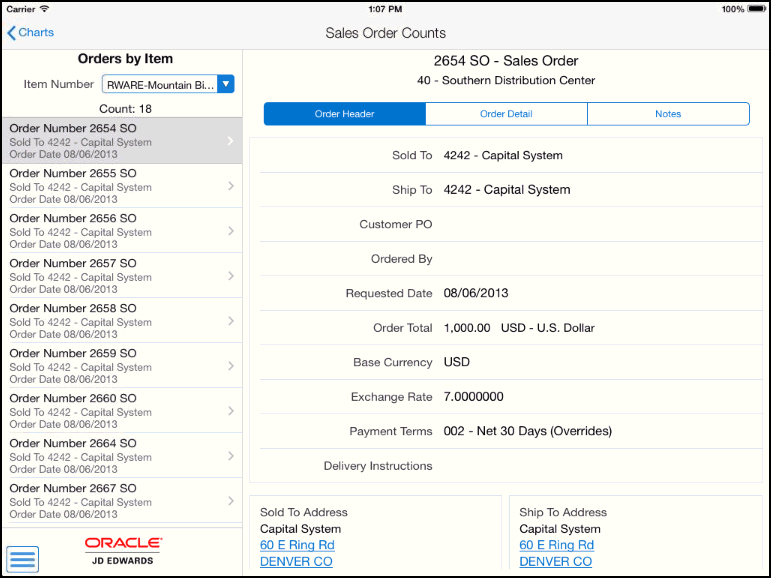
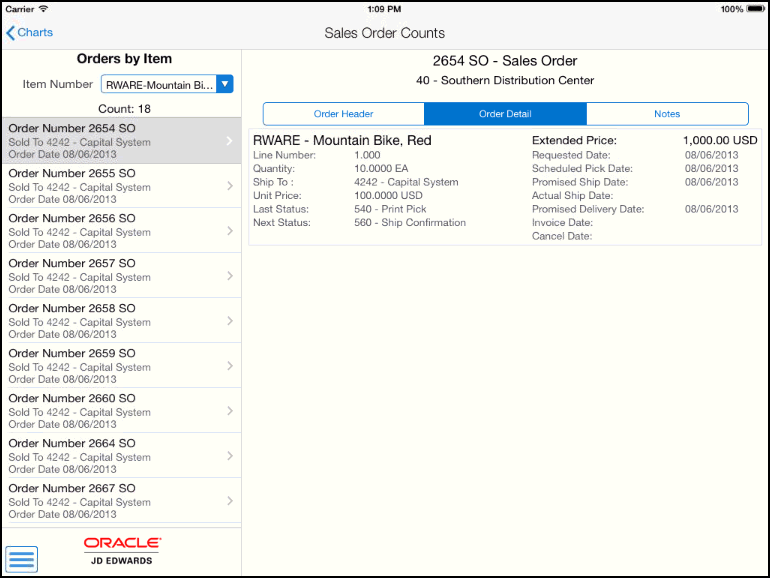
To view additional details about the orders associated with that piece of the chart, tap the bar or wedge in the chart. The system displays a list of orders based on the selected piece of the chart. The first order is automatically selected, and the order header information is displayed on the right side of the screen.
-
To view the details of the order, tap the Order Detail tab. The system displays each line of the order.
-
To review or add notes for the order, tap the Notes tab. Note that you cannot update existing notes. You can only append additional notes to the order.
-
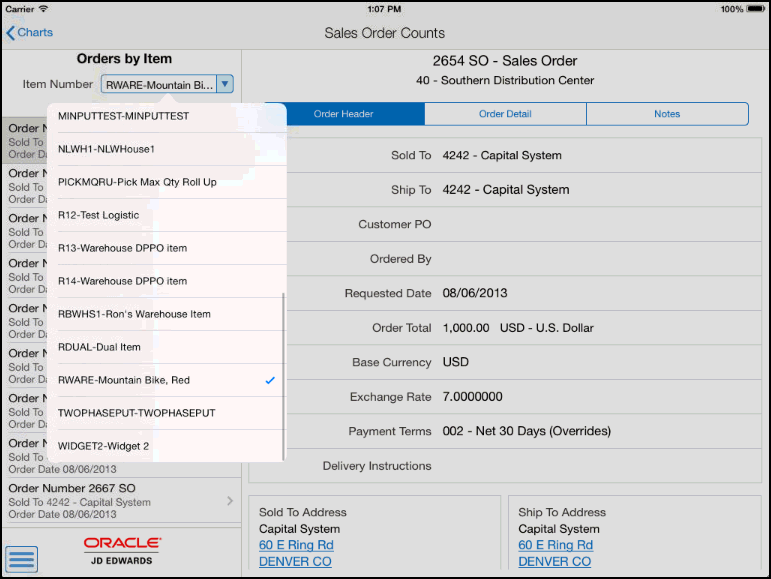
To view a different set of orders, select a different value from the drop down menu.
-
To return to the previous screen, tap the Charts button at the top left of the screen.
-
To log out of the application, tap the Menu button at the bottom left of the screen, and then tap Logout.
47.4 Using the Sales Order Counts Mobile Smartphone Application
The Sales Order Counts mobile smartphone application enables you to view sales orders counts for a specified branch/plant. You can also add notes to a sales order using this application.
Before you can use the application, you must download and install the Sales Counts application from the application store on your device.
To open the application, tap the Sales Counts icon and log in.
47.4.1 Reviewing Sales Orders Using a Mobile Smartphone
To view sales order information on your mobile smartphone device:
-
Open the application by tapping the Sales Counts icon on your device, and then log in.
See Chapter 3, "Logging Into Mobile Enterprise Applications"
-
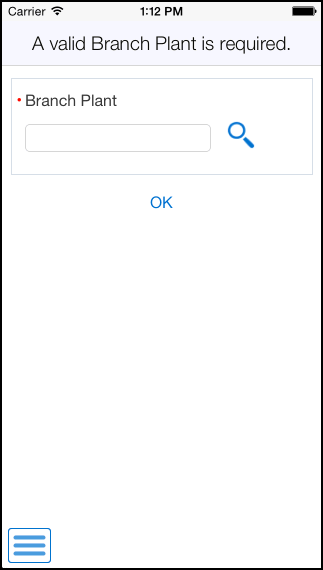
The application determines which branch/plant to use based on the processing options. If the application cannot determine which branch/plant to use, you must enter a valid branch/plant, and then tap OK.
-
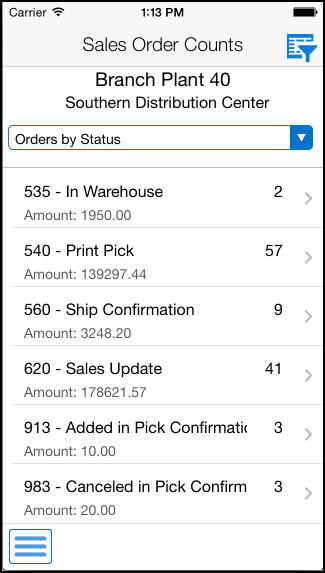
The system loads the order information for the specified branch/plant. By default, the Orders by Status tab is selected, and a list of order statuses, and their associated order counts appears on the screen.
-
To filter your list of orders, tap the Filter button, enter your filter criteria, and then click Apply. The list of orders is updated to reflect your filter criteria.
-
You can change your view by selecting one of these tabs from the drop down menu at the top of the screen:
-
Orders by Hold Code
-
Orders by Promised Ship Date
-
Orders by Item
-
-
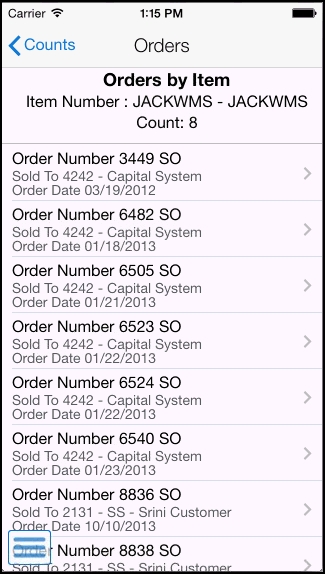
To view a list of orders in a selected category, tap a record in the bottom part of the screen. The system displays a list of orders in that category.
-
To view the details of an order, tap the record. The system displays the Details screen with the Order Header tab selected.
Figure 47-10 Order Details: Order Header
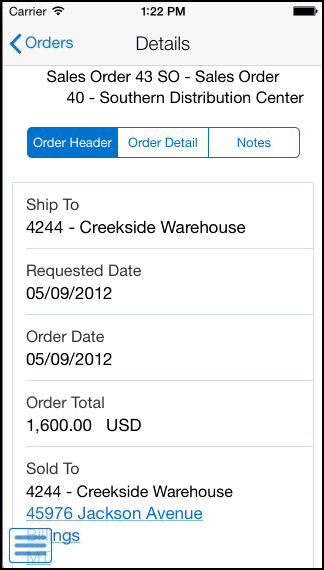
Description of ''Figure 47-10 Order Details: Order Header''
-
To view details of the order, tap the Order Detail tab.
-
To review or add notes to the order, tap the Notes tab. Note that you cannot update existing notes, you can only append new notes to the order.
-
To return to the previous screen, tap the Order button at the top left of the screen.
-
Tap the Counts button at the top left of the screen to return to the Home screen.
-
To log out of the application, tap the Menu button at the bottom left of the screen, and then tap Logout.
