2 Installing and Upgrading Exachk for Exalogic
This chapter contains the following sections:
2.1 Prerequisites
This section describes the following prerequisites:
2.1.1 Prerequisites for Installing Exachk
Oracle recommends that you install Exachk on the pre-existing share /export/common/general on the ZFS storage appliance on the Exalogic machine. You can then run Exachk and access the Exachk-generated HTML reports from a compute node on which the /export/common/general share is mounted. For Exalogic machines in a virtual configuration, Oracle recommends that you mount the /export/common/general share on the vServer that hosts the Enterprise Controller component of the Exalogic Control stack, and run Exachk from that vServer.
To be able to install Exachk on the /export/common/general share, you must complete the following steps:
Enable NFS on the /export/common/general Share
Before installing Exachk on the pre-existing share export/common/general, ensure that the NFS share mode is enabled on the share.
-
In a web browser, enter the IP address or host name of the storage node as follows:
https://ipaddress:215or
https://hostname:215 -
Log in as the
rootuser. -
Click Shares in the top navigation pane.
-
Place your cursor over the row corresponding to the share
/export/common/general. -
Click the Edit entry button (pencil icon) near the right edge of the row.

-
On the resulting page, select Protocols in the top navigation pane.
-
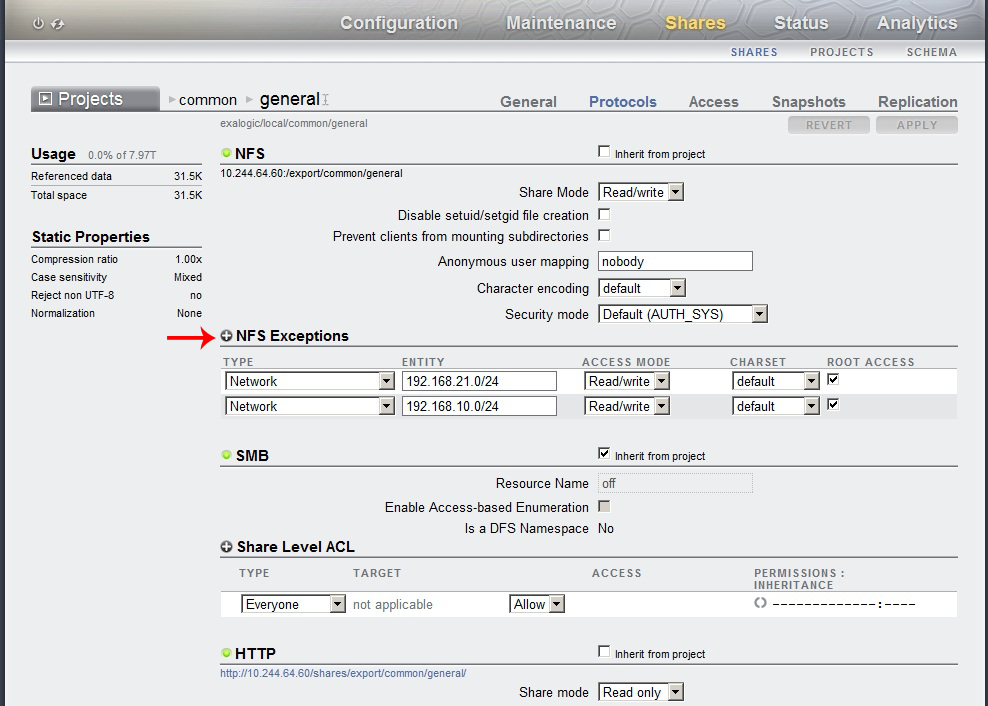
In the NFS section, deselect Inherit from project, and click the plus (+) button located next to NFS Exceptions.
-
Edit the following in the NFS Exceptions section:
Element Action/ Description TYPE Select Network. ENTITY Enter the IP address of the host that will access the share. Example:
192.168.10.0/24
ACCESS MODE Select Read/write CHARSET Keep the default setting. ROOT ACCESS Select the check box. -
Click APPLY.
-
Log out.
Mount the /export/common/general Share
Note:
-
In this section, compute node
el01cn01is used as the example of the host on which the/export/common/generalshare is mounted.For an Exalogic machine in a virtual configuration running EECS 2.0.6, mount the
export/common/generalShare on the vServer that hosts the Enterprise Controller component of the Exalogic Control stack. So substitute compute nodeel01cn01in this procedure with the host name or IP address of that vServer.For an Exalogic machine running EECS 2.0.4 (virtual), if traffic from the
eth-adminnetwork cannot be routed to theEoIB-external-mgmtnetwork, when you run Exachk from the Enterprise Controller vServer, health checks will not be performed for the switches and the storage appliance. On such racks, to perform health checks on the physical components, you must mount theexport/common/generalshare on a compute node as well. -
Note that, in a virtual configuration, if you run Exachk from a compute node, Exachk will not perform health-checks for the Exalogic Control components.
-
Check whether the
/export/common/generalshare is already mounted at the/u01/common/generaldirectory on compute nodeel01cn01.You can do this by logging in to
el01cn01as therootuser and running the following command:# mount
If the
/export/common/generalshare is already mounted on the compute node, the output of themountcommand contains a line like the following:192.168.10.97:/export/common/general on /u01/common/general ...In this example, 192.168.10.97 is the IP address of the storage node,
el01sn01. -
Mount the
/export/common/generalshare at a directory on compute nodeel01cn01.-
Create the directory
/u01/common/generalto serve as the mount point onel01cn01.# mkdir -p /u01/common/general
-
Depending on the operating system running on the host on which you want to mount the
/export/common/generalshare, complete the following steps:Oracle Linux:
Edit the
/etc/fstabfile by using a text editor likevi, and add the following entry for the mount point that you just created:el01sn01-priv:/export/common/general /u01/common/general nfs4 rw,bg,hard,nointr,rsize=131072,wsize=131072,proto=tcp
Oracle Solaris:
Edit the
/etc/vfstabfile by using a text editor likevi, and add the following entry for the mount point that you just created:el01sn01-priv:/export/common/general - /u01/common/general nfs - yes rw,bg,hard,nointr,rsize=131072,wsize=131072,proto=tcp
-
Save and close the file.
-
Mount the volumes by running the following command:
# mount -a
-
2.1.2 Prerequisite for Viewing the Exachk HTML Report in a Web Browser
Enable Access to the /export/common/general Share Through the HTTP/WebDAV Protocol
To enable access to a share through the HTTP/WebDAV protocol, complete the following steps:
-
In a web browser, enter the IP address or host name of the storage node as follows:
https://ipaddress:215or
https://hostname:215 -
Log in as the
rootuser. -
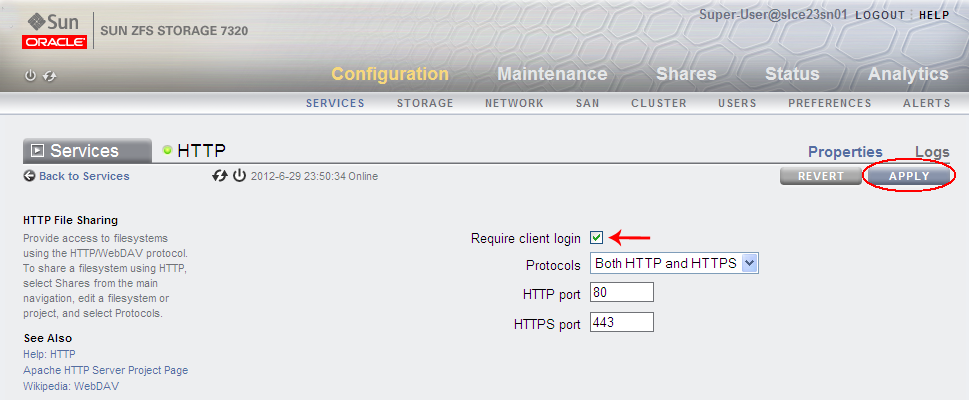
Enable the HTTP service on the appliance, by doing the following:
-
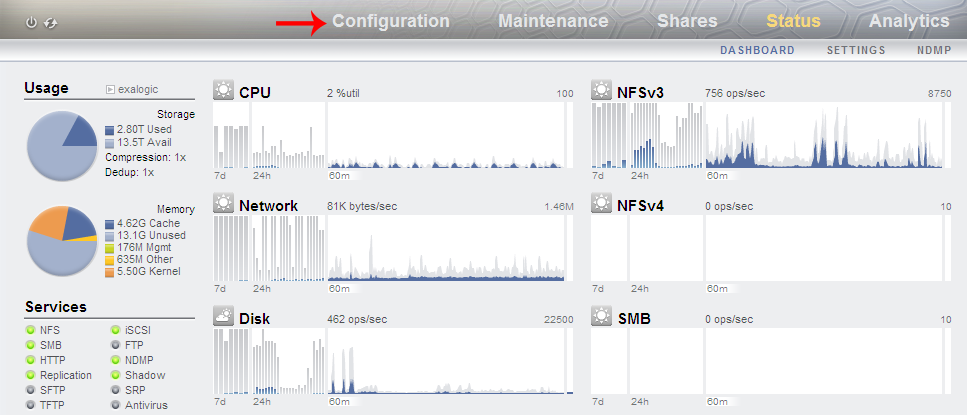
Click Configuration in the top navigation pane.
-
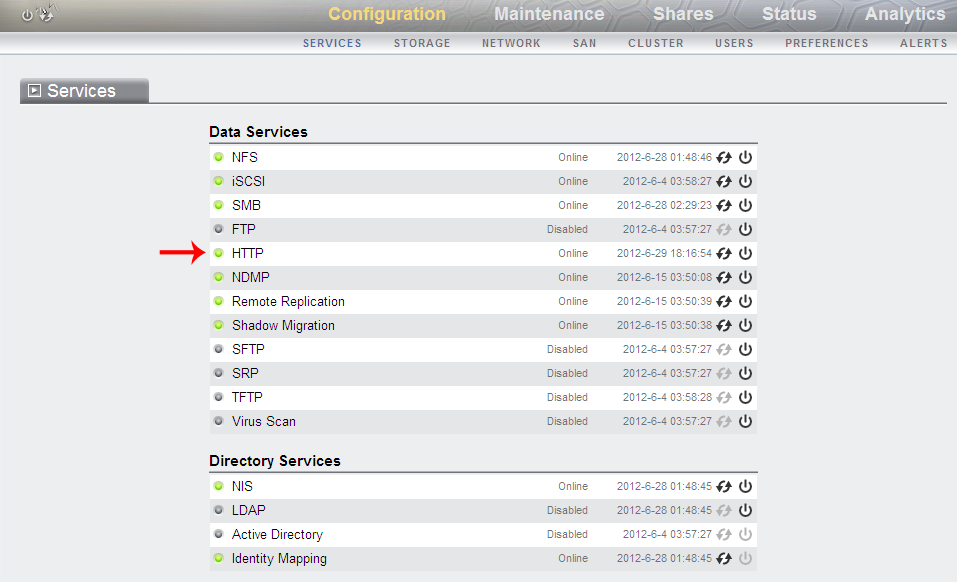
Click HTTP under Data Services.
-
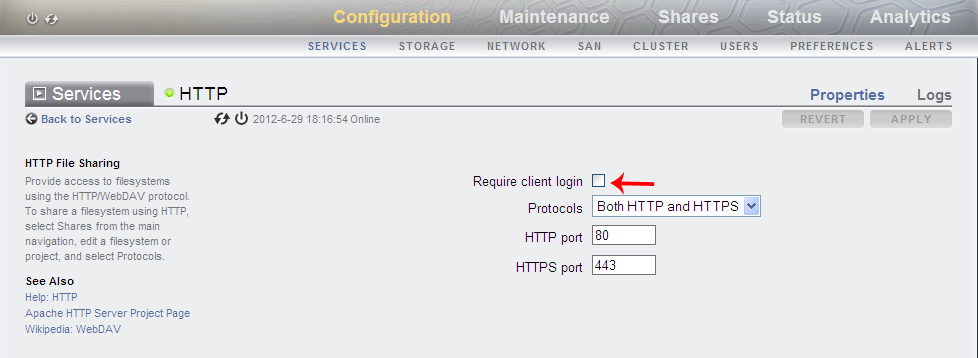
Ensure that the Require client login check box is not selected.
-
Click APPLY.
If the button is disabled, select and deselect the Require client login check box.
-
-
Enable read-only HTTP access to the
/export/common/generalshare by doing the following:-
Click Shares in the top navigation pane.
-
Place your cursor over the row corresponding to the
/export/common/generalshare. -
Click the Edit entry button (pencil icon) near the right edge of the row.
-
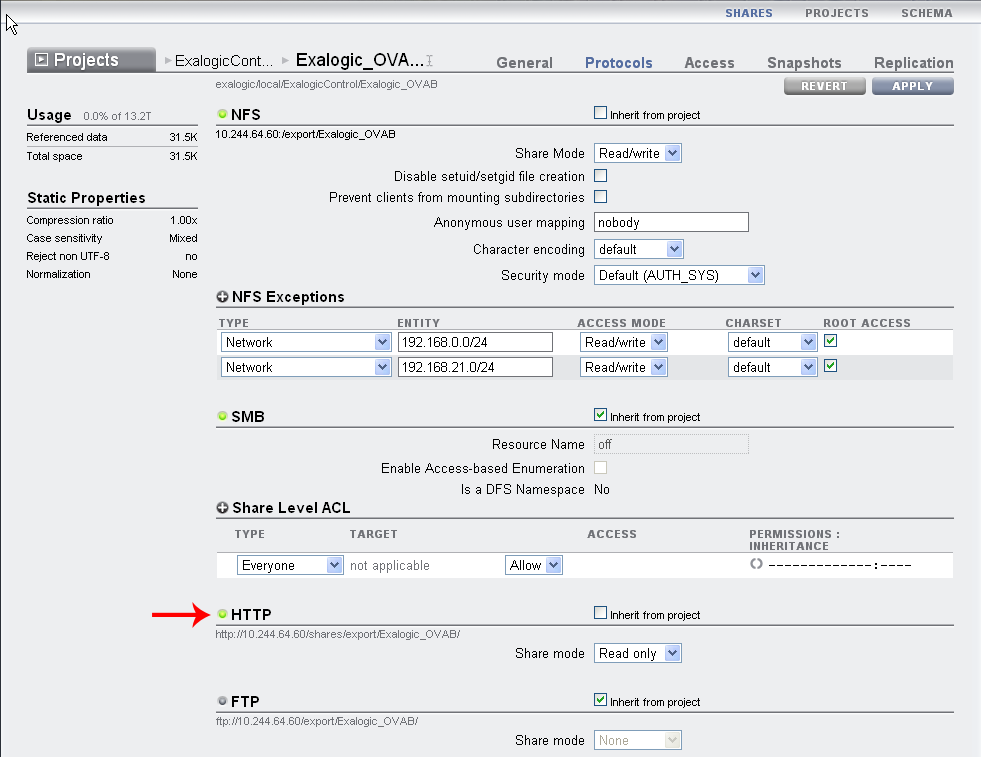
On the resulting page, click Protocols in the navigation pane.
-
Scroll down to the HTTP section.
-
Deselect the Inherit from project check box.
-
In the Share mode field, select Read only.
-
Click APPLY located at the top right of the page.
-
-
Log out.
2.2 Installing Exachk
Install Exachk in the /export/common/general share by completing the following steps:
-
This step varies depending on whether you are installing Exachk on an Exalogic machine in a physical or virtual configuration:
-
For Exalogic machines in a physical configuration:
a. Ensure that
/export/common/general share is mounted on the compute nodeel01cn01as described in "Mount the /export/common/general Share".b. SSH to the compute node
el01cn01.c. Create a subdirectory named
exachkin/u01/common/general/to hold the Exachk binaries:# mkdir /u01/common/general/exachk
-
For Exalogic machines in a virtual configuration:
a. Ensure that
/export/common/general share is mounted on the vServer that hosts the Enterprise Controller, as described in "Mount the /export/common/general Share".Note:
For an Exalogic machine running EECS 2.0.4 (virtual), if traffic from theeth-adminnetwork cannot be routed to theEoIB-external-mgmtnetwork, when you run Exachk from the Enterprise Controller vServer, health checks will not be performed for the switches and the storage appliance. On such racks, to perform health checks on the physical components, you must mount theexport/common/generalshare on a compute node as well.b. SSH to the vServer.
c. Create a subdirectory named
exachkin/u01/common/general/to hold the Exachk binaries:# mkdir /u01/common/general/exachk
Note:
If the vServer is down or otherwise inaccessible, you can run Exachk from a compute node, but in this case, the health checks will not be performed for the Exalogic Control components.
-
-
Go to the
/u01/common/general/exachkdirectory. -
Download the
exachk_version_exalogic_bundle.zipfile from the link provided in the following My Oracle Support document.https://support.oracle.com/epmos/faces/DocumentDisplay?id=1449226.1 -
Extract the contents of the
exachk_version_exalogic_bundle.zipfile.# unzip exachk_version_exalogic_bundle.zipThe result is another zip file,
exachk.zip. -
Extract the contents of
exachk.zip.# unzip exachk.zip
The Exachk tool is now available at the following location on compute node
el01cn01:/u01/common/general/exachk/exachk
2.3 Upgrading Exachk
You can obtain the latest release of Exachk from the following My Oracle Support document:
https://support.oracle.com/epmos/faces/DocumentDisplay?id=1449226.1
To upgrade to the latest release of Exachk, complete the following steps:
-
Back up the directory containing the existing Exachk binaries by moving it to a new location.
For example, if the Exachk binaries are currently in the directory
/u01/common/general/exachk, move them to a directory named, say,exachk_05302012, by running the following commands:# cd /u01/common/general # mv exachk exachk_05302012
In this example, the date when Exachk is upgraded (
05302012) is used to uniquely identify the backup directory. Pick any unique naming format, like a combination of the backup date and the release number, and use it consistently. -
Create the
exachkdirectory afresh.$ mkdir /u01/common/general/exachk
-
Install the new version of Exachk by following steps 2 onward in Section 2.2.