Release 12.1 (12.1.1)
Part Number E12842-04
Contents
Previous
Next
| Oracle E-Business Suite Installation Guide: Using Rapid Install Release 12.1 (12.1.1) Part Number E12842-04 | Contents | Previous | Next |
You use Rapid Install to install new or updated software components as a part of a technology stack upgrade. This chapter describes the procedures involved, and the associated Rapid Install screen flow.
This chapter covers the following topics:
You can use a special Rapid Install startup option to upgrade an existing database node or Applications node to a new technology stack, without having to perform a complete system upgrade. With this option, you can install new Oracle Homes and generate configuration files (using AutoConfig) that will switch your existing system to use the upgraded components. Upgrade options will be provided as new components become available and are certified.
In addition to running Rapid Install, there are additional tasks associated with a complete technology stack upgrade. These steps are documented in the My Oracle Support knowledge documents referenced in this chapter.
You can use Rapid Install to install the new Oracle Home for an upgrade to a later version of the Oracle database.
Start the Rapid Install wizard
When instructed to do so, start the Rapid Install wizard by entering the following command (the same syntax is used for both UNIX and Windows):
$ rapidwiz -techstackThe Select Technology Stack screen appears.
Select Technology Stack Component - Database Technology Stack
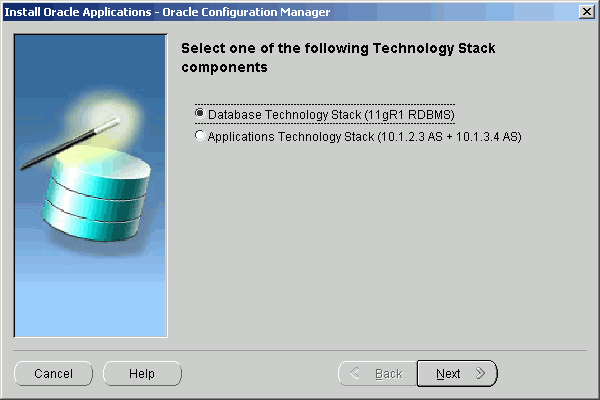
This screen lists the Technology Stack components that the wizard can install. To install a new Oracle Home for an Oracle 11gR1 database, select the Database Technology Stack (11gR1 RDBMS) option. Click Next.
Provide details for the RDBMS Technology Stack
On the RDBMS Inputs Page, you provide the information the wizard needs to install a new Oracle Home for the Oracle 11gR1 database.
Provide RDBMS Installation Details
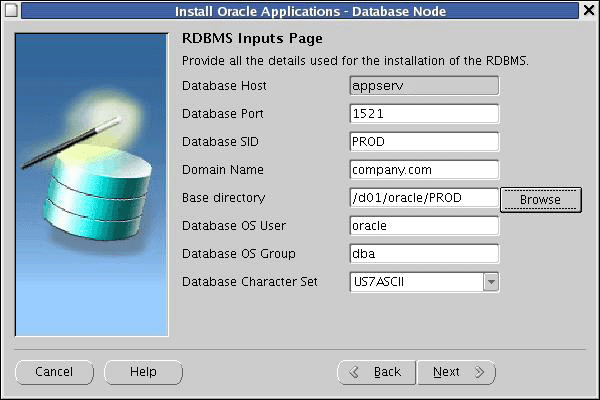
Complete the information on this screen as follows:
Database Port: The port setting for the Net Services Listener port that receives requests from the various servers for processing on the RDBMS.
Database SID: The name for the local database instance. This name must be alphanumeric, not exceed eight characters in length, and not contain any spaces. The database must be accessible by the wizard during installation of the database technology stack components.
Domain Name: The fully-qualified domain name (FQDN) for the machine.
Base directory: The top-level directory that Rapid Install uses to install the RDBMS. Subdirectories (mount points) associated with the RDBMS are derived from this directory.
Database OS User: The operating system account that will own the Oracle files. Typically called oracle.
Database OS Group: The operating system group to which the Database OS User must belong. Typically called DBA.
Database Character Set: initially shows US7ASCII as the default. Use the drop-down list to choose a new value if you want to specify a different character set.
Click Next to continue.
Begin the Technology Stack upgrade
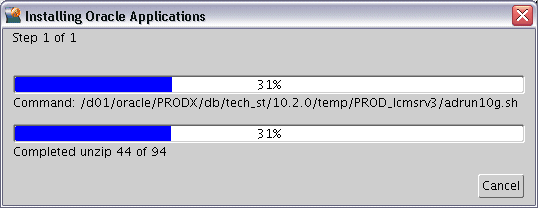
The Component Installation Review screen lists the components that the wizard will install.
Review Components

If this information is correct, click Next to start the installation. The wizard prompts you to begin. Click Yes to continue. Rapid Install begins the installation and displays a progress bar to inform you of the status.
Installation Progress
Once the components are installed, Rapid Install displays the Post-Install Checks screen.
Post-Install Checks
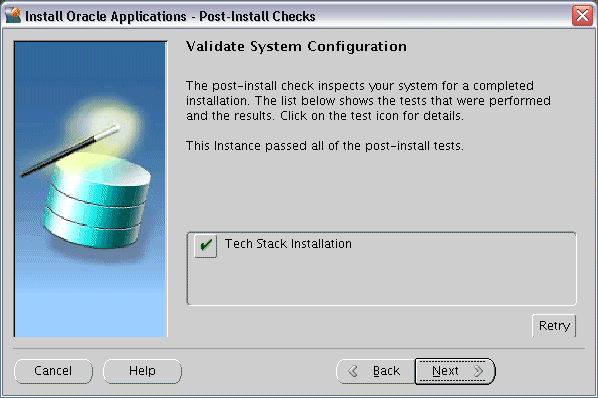
This screen verifies that the configuration is correct. Click Next to continue. The finishing screen lists the components installed.
Finish Installation
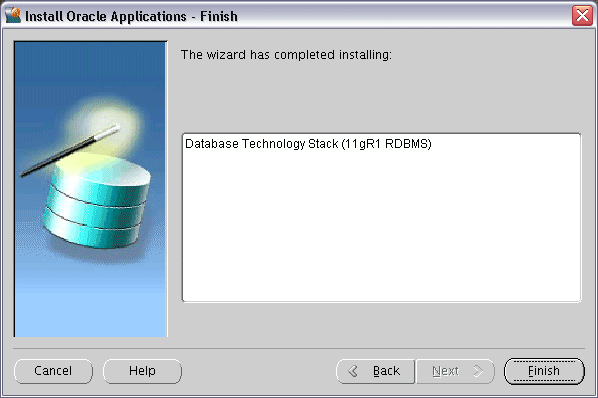
Click Finish to end the Rapid Install session.
Complete the database upgrade
You must now perform the remaining tasks necessary to complete the database upgrade. They may include applying patches and verifying initialization parameters.
Refer to My Oracle Support Knowledge Document 452783.1, Oracle Applications Release 11i with Oracle 11g Release 1 (11.1.0), and complete the following sections and subsections:
Section 1: Complete the Database Upgrade and After the Database Upgrade subsections.
Section 2: Complete all the steps in this section.
Applications Tier Installations
You can upgrade an existing Applications tier node to utilize Oracle 10g Application Server. This is accomplished by running Rapid Install to install only the technology stack components, as follows.
Complete the pre-install steps
Follow the relevant instructions in My Oracle Support Knowledge Document 376811.1, Installing Oracle Application Server 10g with Oracle E-Business Suite Release 12.
Start the Rapid Install wizard
When instructed to do so, start the Rapid Install wizard by entering the command rapidwiz -techstack at the command prompt. The Select Technology Stack screen appears.
Select Technology Stack Component - Applications Technology Stack
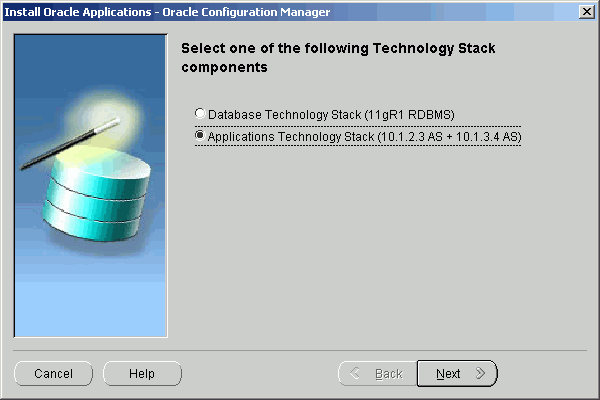
This screen lists the Technology Stack components that the wizard can install. To install a new Applications node Technology Stack, select the Applications Technology Stack (10.1.2.3 AS + 10.1.3.4 AS) option. Click Next.
Select the context file
As a part of the Technology Stack installation, you must add new parameters to the Applications tier context file. Use the Read Application Context File screen to identify the context file that Rapid Install is to use.
Read Application Context File
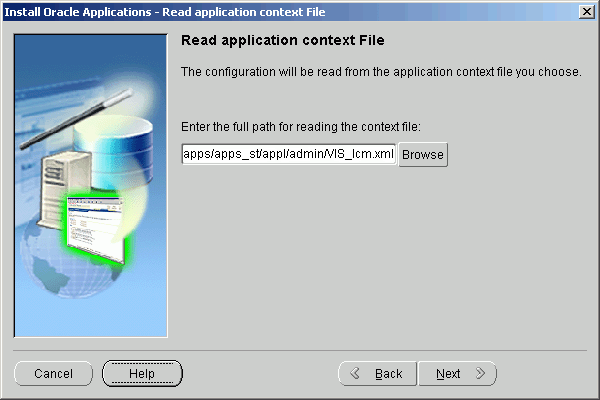
AutoConfig has previously stored configuration parameters in a context file. To modify this configuration, you need to change the parameters so that they point to the new Oracle Homes.
Enter the path and file name directly in the text box, or click Browse and navigate to the file. Highlight the file and click OK to return to the Read Application Context File screen. Click Next to continue.
Enter locations for Oracle Homes
On the Define New Oracle Home Locations screen, provide the location of the Oracle Homes associated with the updated Applications tier technology stack.
Define New Oracle Home Locations
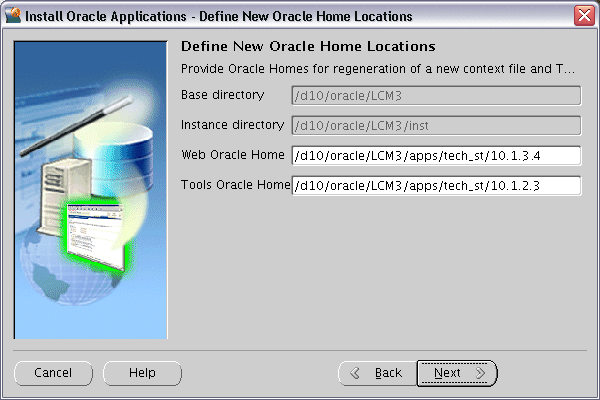
Enter the location for the new Oracle Homes that will be associated with the upgraded Oracle Application Server technology stack and stored in the regenerated context file.
Web (10.1.3.4) Oracle Home - Enter the directory path to specify the new OracleAS 10.1.3.4 Oracle Home.
Tools (10.1.2.3) Oracle Home - Enter the directory path to specify the new OracleAS 10.1.2.3. Oracle Home.
Click Next to continue.
Start the installation
The Component Installation Review screen lists the components that the wizard will install.
Review Components
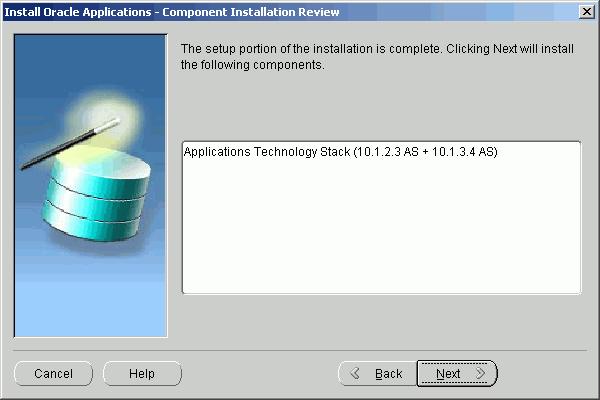
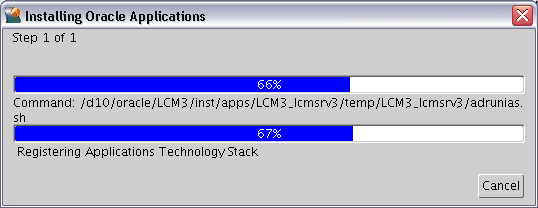
If this information is correct, click Next to start the installation. The wizard prompts you to begin. Click Yes to continue. Rapid Install begins the installation and displays a progress bar to inform you of the status.
Installation Progress
Once the components are installed, Rapid Install displays the Post-Install Checks screen.
Post-Install Checks
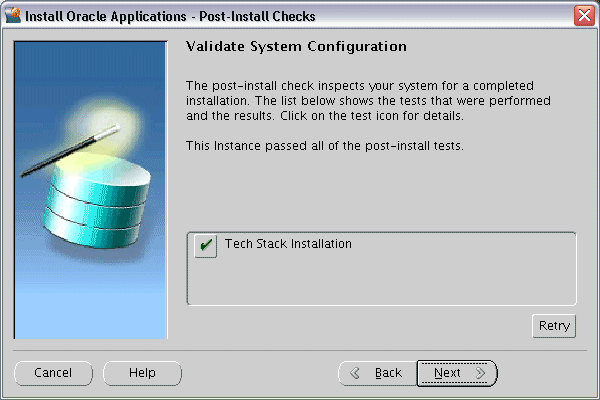
This screen verifies that the configuration is correct. Click Next to continue. The Finish screen displays the components installed.
Finish Installation

Click Finish to end the Rapid Install session.
Complete the post-install steps
After the installation is complete, complete the remaining Applications tier installation steps. These may include applying patches and updating context file parameters. Return to My Oracle Support Knowledge Document 376811.1, Installing Oracle Application Server 10g with Oracle E-Business Suite Release 12, and follow the applicable instructions.
![]()
Copyright © 2000, 2009, Oracle and/or its affiliates. All rights reserved.