Release 12.1 (12.1.1)
Part Number E12842-04
Contents
Previous
Next
| Oracle E-Business Suite Installation Guide: Using Rapid Install Release 12.1 (12.1.1) Part Number E12842-04 | Contents | Previous | Next |
Rapid Install is used in both the pre-upgrade and post-upgrade processing during an upgrade from Oracle E-Business Suite Release 11i to Release 12.1.1. This chapter gives an overview of the upgrade process, and then describes in detail the upgrade steps that rely on Rapid Install.
This chapter covers the following topics:
As part of an Oracle E-Business Suite upgrade, you enter configuration parameters in the Rapid Install wizard and run Rapid Install as one of the pre-upgrade tasks. It uses the parameters to lay down the file system and install the new technology stack. You must also migrate or upgrade your existing database to Oracle 11g Release 1 (11gR1) as another pre-upgrade task.
After you complete the pre-upgrade tasks, you run AutoPatch to apply the upgrade driver that updates the database to the most current release level. After you have completed the database upgrade, you run Rapid Install a second time, to configure and start the servers and services.
Important: The instructions in this chapter apply only to an upgrade from Oracle E-Business Suite Release 11i. If you are using an earlier release, you must upgrade to Release 11i before you can upgrade to Release 12.1.1.
In general, you must perform the following tasks as described in the specified documentation:
Read and understand all the documentation associated with the current release, including Oracle E-Business Suite Release Notes, Oracle E-Business Suite NLS Release Notes, Oracle E-Business Suite Installation Update Notes, Oracle E-Business Suite Upgrade Guide: Release 11i to Release 12.1.1, and this book. All documentation is available either in the Oracle E-Business Suite Documentation Library or from My Oracle Support.
Review the functional changes information in the appendixes of Oracle E-Business Suite Upgrade Guide: Release 11i to Release 12.1.1, plus the suggestions for reducing downtime and validating your upgraded data.
Complete the pre-upgrade steps listed in Oracle E-Business Suite Upgrade Guide: Release 11i to Release 12.1.1.
When instructed to do so, run Rapid Install using the Create Upgrade File System option as described in this chapter. Rapid Install creates the new Oracle E-Business Suite file system, the new Oracle Home for the RDBMS, and installs the other technology stack components.
After you complete the pre-upgrade tasks in the Oracle E-Business Suite Upgrade Guide: Release 11i to Release 12.1.1, continue with the instructions in Chapter 3 to apply any required pre-upgrade patches, and then run the upgrade driver to upgrade your products.
Continue with the post-upgrade instructions in the Oracle E-Business Suite Upgrade Guide: Release 11i to Release 12.1.1. When instructed to do so, run return to this chapter for instructions on running Rapid Install a second time to configure and start the server processes.
Complete any remaining tasks in the Oracle E-Business Suite Upgrade Guide: Release 11i to Release 12.1.1.
When the instructions in Oracle E-Business Suite Upgrade Guide: Release 11i to Release 12.1.1 direct you to do so, run Rapid Install as described below. The main description is followed by further details of a multi-node upgrade, including an example.
Set Up the Configuration
As described in the previous section, Rapid Install performs two functions during an upgrade. This section describes the first of these functions, specifying the configuration values that Rapid Install needs to lay down a new file system and install the new technology stack.
Note: See the Oracle E-Business Suite File System chapter in Oracle E-Business Suite Concepts.
Follow the instructions in the Before You Begin section in Getting Started. Then complete the following tasks.
Start the Rapid Install wizard
Start the wizard by entering the command rapidwiz at the command prompt. The Welcome screen appears.
Welcome Screen
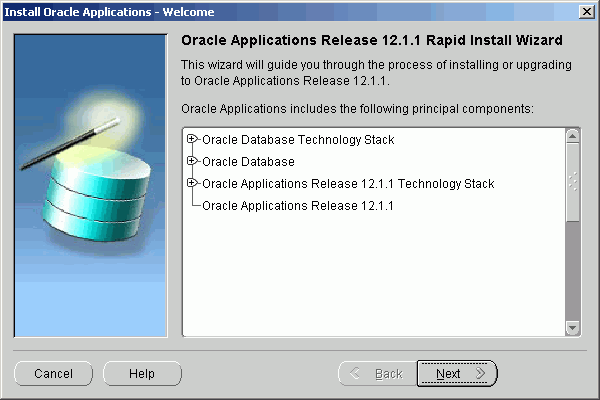
This screen lists the components that are included in, or supported by, this release of Oracle E-Business Suite. Use the scroll bar to bring all the components into view.
For an upgrade, Rapid Install creates an Oracle 11gR1 Database Oracle Home without a database. You can use this Oracle Home to upgrade or migrate your existing database to Oracle 11gR1.
This screen is for information only. No action is required. Click Next to continue.
Select a wizard operation
Use the Select Wizard Operation screen to indicate the action you want Rapid Install to perform. You begin both new installations and upgrades from this screen. Based on the action you choose, the Rapid Install wizard continues with the appropriate screen flow.
Select Wizard Operation
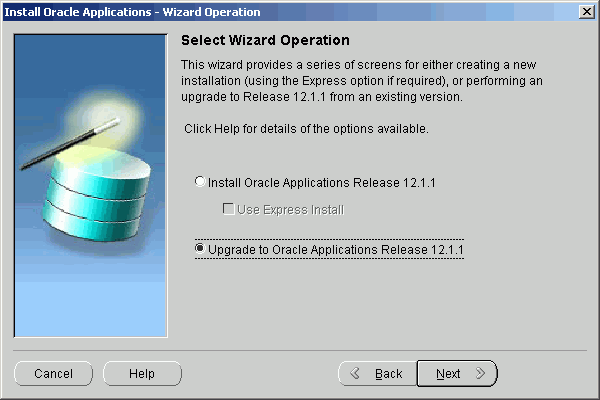
The available actions are as follows:
Install Oracle Applications Release 12.1.1
This action sets up a new, fully configured system, with either a fresh database or a Vision Demo database. The configuration is derived from the system-specific configuration parameters you enter in the Rapid Install wizard and save in the configuration file (conf_<SID>.txt).
Note: The steps in Standard Installations describe a new installation.
Express Configuration
This action sets up a fully configured, single-user, single machine system with either a fresh database or Vision Demo database. You supply a few basic parameters, such as database type and name, top-level install directory, and increments for port settings. The remaining directories and mount points are supplied by Rapid Install using default values.
Note: The steps in Setting Up an Express Installation in Standard Installations describe this option.
Upgrade to Oracle Applications Release 12.1.1
Choose this option to indicate that you are upgrading your Oracle E-Business Suite products to the current version of Oracle E-Business Suite. The wizard screen flow presents two paths: one that lays down the file system and installs the new technology stack, and one that configures servers and starts services.
In subsequent steps, you will enter information in the wizard for upgrading a system. Select Upgrade to Oracle Applications Release 12. Then click Next to continue.
Supply Oracle Configuration Manager details
Oracle Configuration Manager (OCM) is a component that is designed to facilitate support for your Oracle products. Use of Oracle Configuration Manager is optional, but recommended.
A lightweight agent that consumes minimal CPU resources, OCM supports automatic discovery of installed components and configuration information, and provides continuous tracking of key Oracle and system statistics of the machine it is running on.
Data collected is sent via HTTPS (secure HTTP) to Oracle Support, who can thereby maintain an up-to-date view of your Oracle installation, facilitating pro-active problem avoidance and helping to reduce the time needed for resolution of support issues.
Note: For further details of OCM, click the View details link on the OCM screen.
Specify Oracle Configuration Manager Details
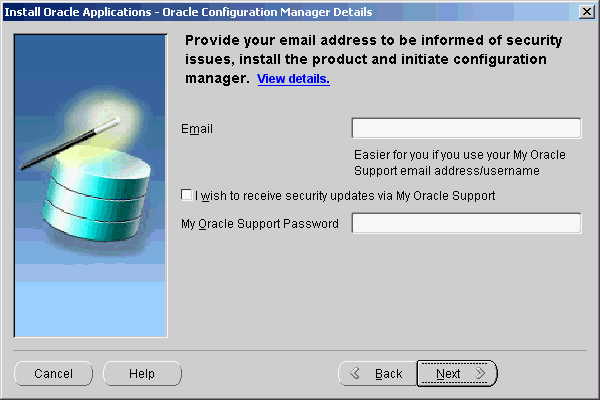
If submission of your details fails because no connection can be made, you are presented with a pop-up screen prompting for proxy server information:
Oracle Configuration Manager Proxy Server [Shown After Failed Connection Attempt]
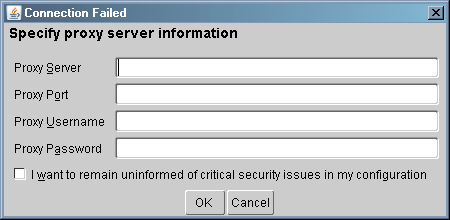
If this screen appears, respond appropriately and then click OK.
Choose upgrade option
On the Select Upgrade Action screen, you can choose to create an upgrade file system for your upgraded system, or configure the upgraded instance.
Select Upgrade Action
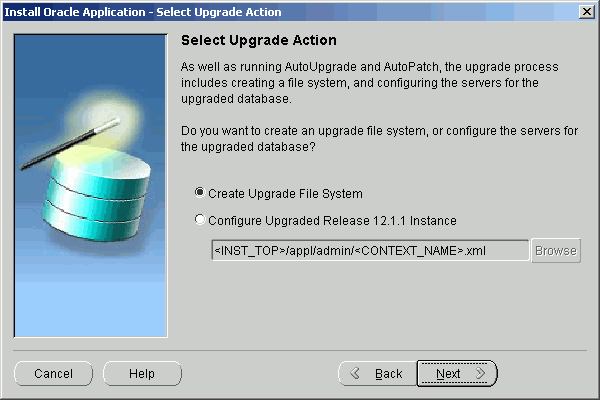
The actions associated with an upgrade are performed in separate Rapid Install sessions, as follows:
Create Upgrade File System
You choose this option when prompted to run Rapid Install as a pre-upgrade step in the Oracle E-Business Suite Upgrade Guide. In the screen flow associated with this option, the wizard collects configuration parameters for your system and stores them in the Oracle E-Business Suite database. When you run Rapid Install, AutoConfig uses these values to lay down the file system structure and technology stack components for your configuration. When it runs, it also creates a context file (<CONTEXT_NAME>.xml) that contains all the parameters that describe your system. This context file is created and managed by AutoConfig.
Configure Upgraded Release 12.1.1 Instance
You choose this option when prompted to run Rapid Install as a post-upgrade task in the Oracle E-Business Suite Upgrade Guide. In the associated screen flow, you specify the name of the context file (<CONTEXT_NAME>.xml) that AutoConfig created when you initially ran Rapid Install. This time, AutoConfig uses the values in the context file to configure the servers and start the services.
Choose Create Upgrade File System and click Next
Specify Global System Settings
On the Global System Settings screen, you indicate required port usage for your system, selecting the port pool and (if required) individual port values.
Global System Settings
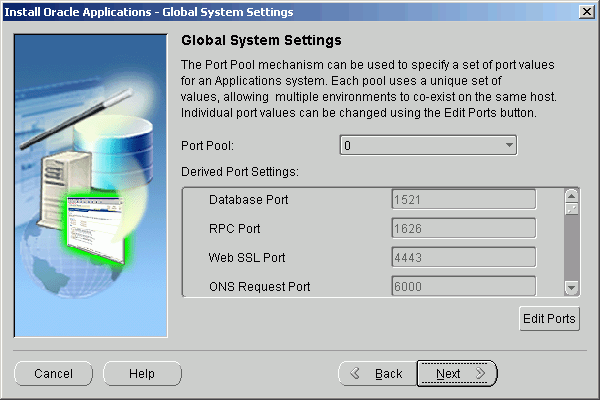
After making your selections, click Next to continue.
Specify database node configuration
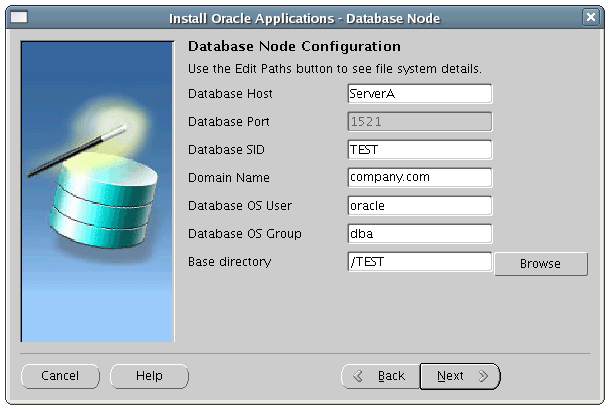
On the Database Node Configuration screen, describe your existing database.
Database Node Configuration
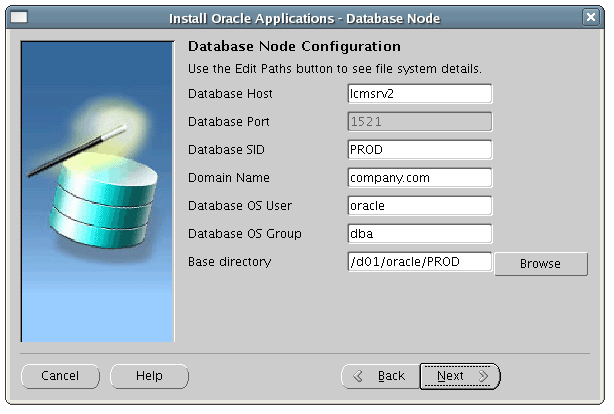
Enter the name that you want Rapid Install to use to identify your existing database in the Database SID field. The name must be alphanumeric, not exceed eight characters in length, not start with a number, and contain no spaces. Rapid Install records this name in the Net Services configuration and in the init<SID>.ora file.
Enter a valid domain name. This value, when combined with a host (machine) name, must produce a fully qualified domain name (FQDN). For example, a host name of apps1 and domain name of company.com make up an FQDN of apps1.company.com
After completing all required details, click Next to continue.
Review username and password information
The Review Application User Information screen lists usernames and the default passwords assigned by the wizard for the Application user.
Important: Record the actual passwords for your existing system before you continue.
Review Application User Information
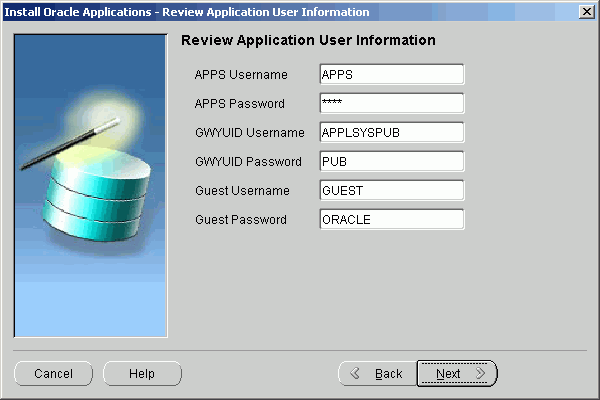
As shown on the screenshot, the usernames and their respective default passwords are: APPS Username (APPS), APPS password (APPS), GWYUID username (APPLSYSPUB), GWYUID Password (PUB), Guest username (GUEST), and Guest password (ORACLE).
Complete the text fields to change all the passwords on this screen to match those in your existing system. The wizard stores this information in the configuration file.
Warning: Failing to record this information accurately could compromise the upgrade.
Click Next to continue.
Specify Internationalization settings (conditional)
The Select Internationalization Settings screen displays settings for systems that require NLS functionality.
Select Internationalization Settings
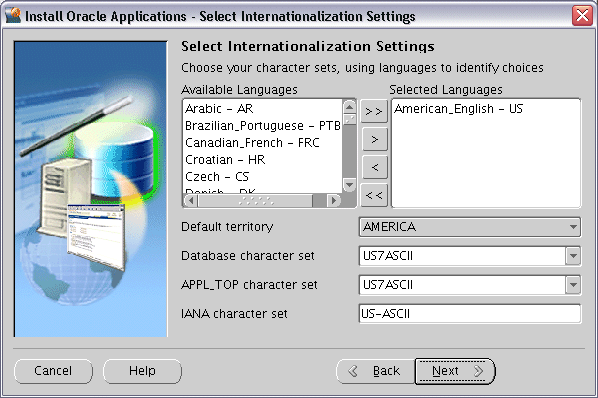
The languages you select determine the available options for the other NLS-related configuration parameters (such as base language, territory, and character set) that your system requires.
Double-click a language in the Available Languages box to move it into the Selected Languages box or highlight it and click the right arrow (>). Highlight a language in the Selected Languages box and click the left arrow (<) to remove it. To select or deselect all languages in a single action, use the double arrows, >> or <<.
Note: You cannot remove American English from the Selected Languages box.
You may need to perform additional tasks to finish the language installation. See Oracle E-Business Suite NLS Release Notes for details. You can register additional languages any time after the initial installation or upgrade. See Registering Languages in Oracle E-Business Suite System Administrator's Guide - Configuration.
This screen displays Rapid Install defaults, as described in the following paragraphs.
Selected Languages: If you have other active languages in your existing system, you can change the default, and add languages to reflect the existing database character set.
Default Territory: This field is set to AMERICA, and should remain so during the upgrade. Your system administrator can change this value after the upgrade, if necessary.
Database character set and APPL_TOP character set: Defaults to a common character set that is compatible with the active languages indicated on the Select Additional Languages screen. If they are not the character sets in your existing system, select the correct ones from the drop-down list.
IANA character set: The Internet Assigned Numbers Authority character set is the Internet-assigned standard used by the Web server. For more information, see http://www.iana.org/assignments/character-sets.
If necessary, change this value to indicate the one used in your existing system. Click Next to continue.
Enter Primary Applications Node information
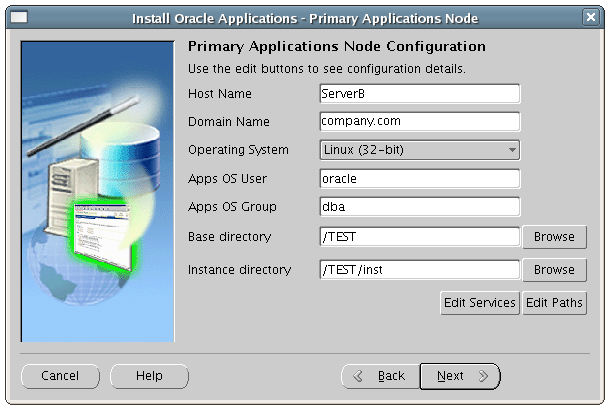
You have already specified the top-level directory and the mount points for the RDBMS. Now you must specify top-level directory and subdirectories associated with the primary Applications node.
Primary Applications Node Configuration
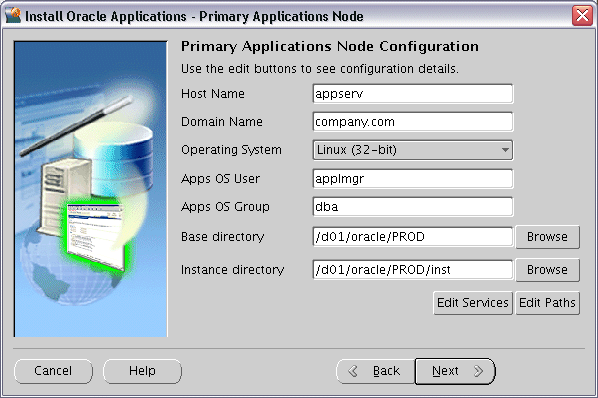
The default directories use the syntax of the operating system on which you are running Rapid Install. You can either accept the defaults, or enter new values.
Some of the fields are operating system dependent: for example, the UNIX Toolkit directory and Visual Studio directory are specific to Windows. If using a Windows platform, enter the location of the MKS (or Cygwin) tools in the UNIX Toolkit directory field, and the location of the Visual C/C++ executables and DLLs in the Visual Studio directory field. If using a UNIX system, complete the information for the Apps OS User (the account that owns the Applications node file system and technology stack) and Apps OS Group (the group to which the Apps OS User belongs).
The Base directory is the top-level directory that Rapid Install will use to derive the mount points for the Applications node. You can accept the default or enter a new value. Click Browse to navigate to a new path, and double-click the required directory to select it.
The Instance directory (new in Release 12) stores instance-specific files, including runtime generated files, log files, and configuration files. It can be a local directory (for better access speed). It does not have to be in a shared location.
Clicking the Edit Services button enables you to choose which services are enabled on this Applications node. Clicking the Edit Paths button opens a window where you can specify a new value for one or more of the Applications node paths.
Review global settings
Rapid Install uses the values specified on the Global Settings screen to identify a qualified domain name and to derive port settings that your system will use to connect services and listeners.
Review Node Information
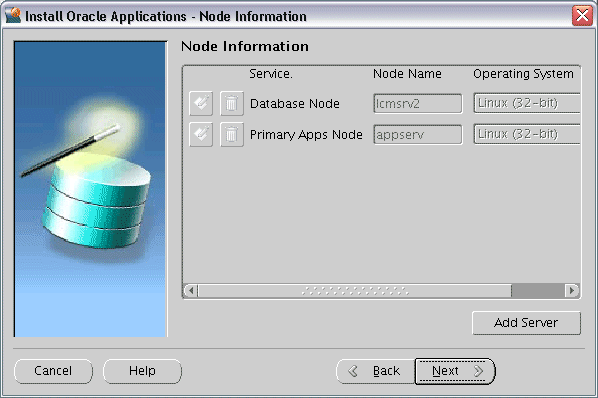
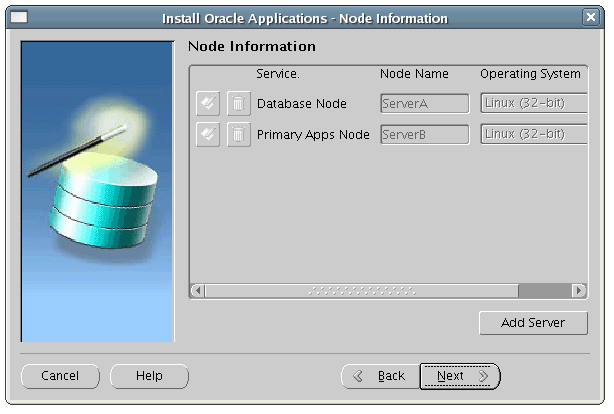
Click on the Add Server button, supply details of any other Applications nodes you wish to add, and click Next when complete.
Review pre-install test results
Rapid Install begins to validate the configuration described by your configuration file. It lists the tests performed on the Pre-Install Checks screen and marks each one with an indication of whether it succeeded or failed.
Pre-Install Checks
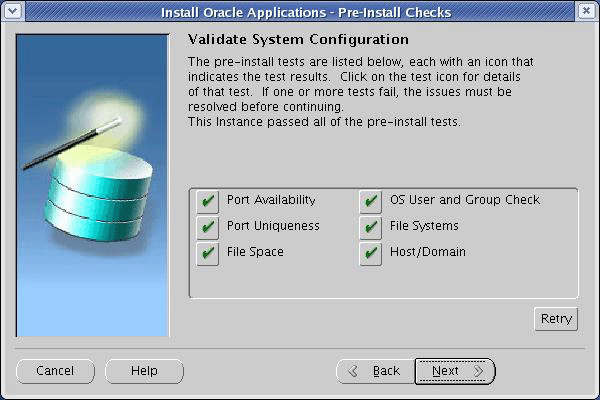
The parameters that Rapid Install validates include:
The results of each test are labeled using an icon. There are three types:
Check (tick) mark
The test succeeded. Click the mark to obtain details of the test performed.
Exclamation mark (!)
The configuration requires review. Click the ! to obtain information from the system test review. Rapid Install alerts you if you continue without resolving the issues.
An x mark
All issues marked x must be resolved before you continue with the installation. Click the x to see the errors. If you can resolve an issue by fixing the values provided on the settings screen(s), click Back until you reach the appropriate screen, and re-enter the values. Some tests must be resolved in the operating system. In that case, you may have to restart the Rapid Install wizard after the problem has been fixed.
Note: See Restart the Installation in Standard Installations.
When there are no further issues to resolve, click Next to continue.
Rapid Install lists the actions it will take during the installation process. The content of the list varies, depending on your installation choices.
Review Components
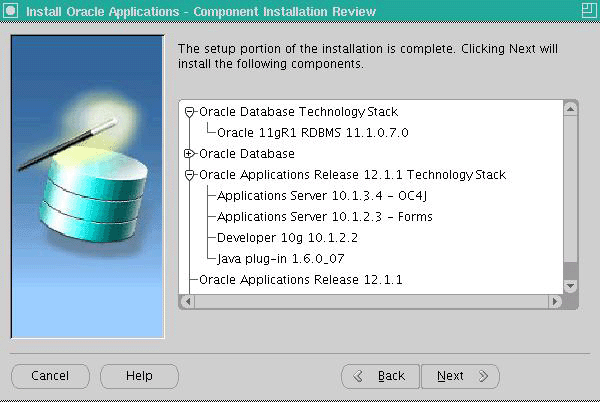
Click Next to continue. Rapid Install displays another alert screen asking you to verify that you are ready to begin the installation. Click Yes to continue.
Rapid Install creates new file systems for the Applications tier, and the 11gR1 Oracle Home for the database.
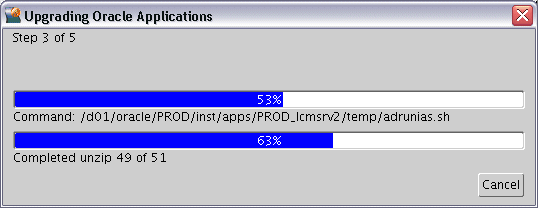
Monitor Installation Progress
Check progress bars
During an installation, Rapid Install displays a main progress bar and an individual progress bar. The main progress bar reports on the completion percentage of the installation as a whole. The individual progress bar reports on the progress of each individual step.
Important: The installation is not complete until all progress bars have disappeared from your screen.
Installation Progress
Review post-install checks
When the processing is complete, Rapid Install displays the Post-install Checks screen.
Post-Install Checks
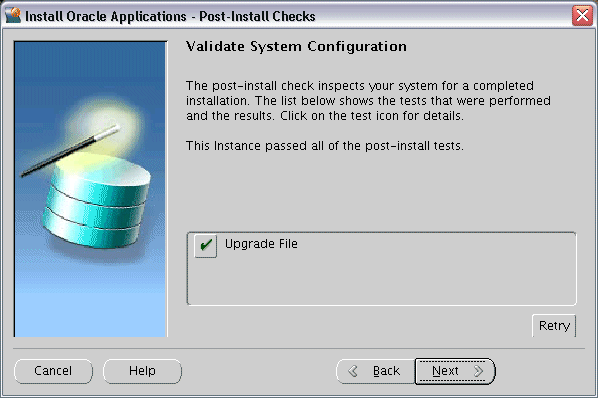
If the test does not succeed, review the errors listed on the screen. Click the Back button to return to the appropriate screens and make corrections as needed. Then click the Retry button.
If there are no errors, click Next. Rapid Install displays a Finish screen that lists the components that it has installed, and describes any steps you need to perform to complete the upgrade. Review the information on this screen, and click Finish to exit Rapid Install.
Restart the Upgrade (only if required)
If the installation process terminates before completion, you can restart it and carry on, after correcting any problems.
Run the Rapid Install wizard from the command line, adding -restart to the rapidwiz command
When the initial Rapid Install screen appears, select the same operation you chose originally, then click Next.
Rapid Install has stored the configuration in the Oracle E-Business Suite database and conf_<SID>.txt file, so on the Load Configuration screen, choose Load configuration file. There is no need to complete the wizard screens a second time.
Continue the Upgrade Tasks
Return to the Oracle E-Business Suite Upgrade Guide and complete any remaining pre-upgrade, upgrade, and post-upgrade tasks for each machine in your system. When instructed to run Rapid Install to configure and start the server processes, follow the instructions in the next section.
Multi-Node Upgrade Procedure
If you want to upgrade a Release 11i system that has more than one Applications node (for example, with Batch Processing Services and Web Services located on different servers), you have to enter the information for the Database and Application nodes for the first server, then add the remaining nodes by clicking on the Add Server button on the Applications node information screen.
The following example illustrates the upgrade of a three-node system, running services as shown:
Server A: Database Node: None
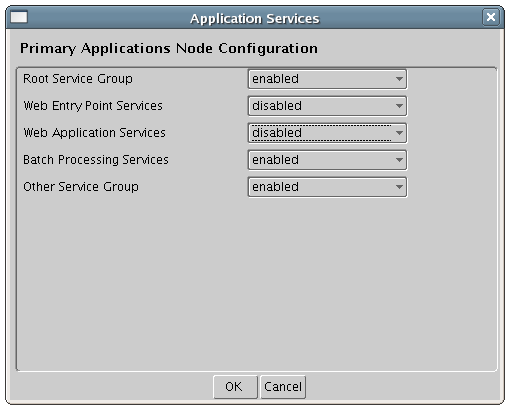
Server B: Primary Applications node: Batch Processing Services
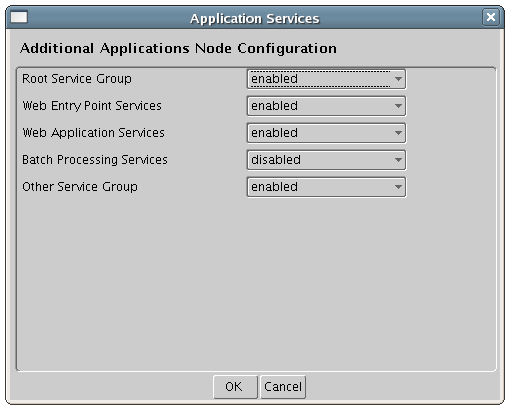
Server C: Additional Applications Node: Root Services, Web Entry Point Services, Web Application Services, Other Service Group
Run Rapid Install on Server A (Database Node), and select the Upgrade File System option:
Select Upgrade Action
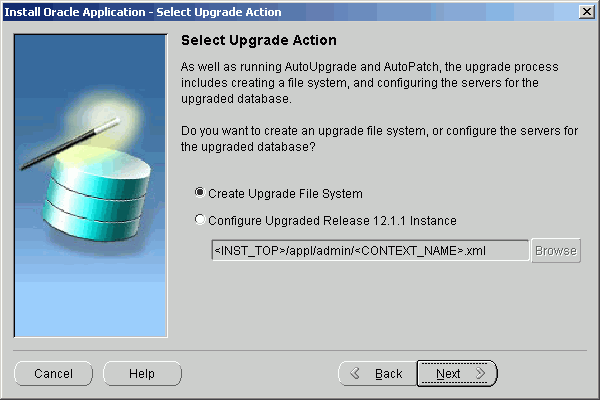
Enter the required information for Server A:
Database Node Configuration
Enter the required information for the primary Applications node (Server B). Since this node resides on a different machine, you will need to modify the hostname accordingly:
Primary Applications Node Configuration
Click on the Edit Services button to enable the required services for Server B. In this example, you will need to enable Batch Processing Services only.
Specify Services to be Enabled
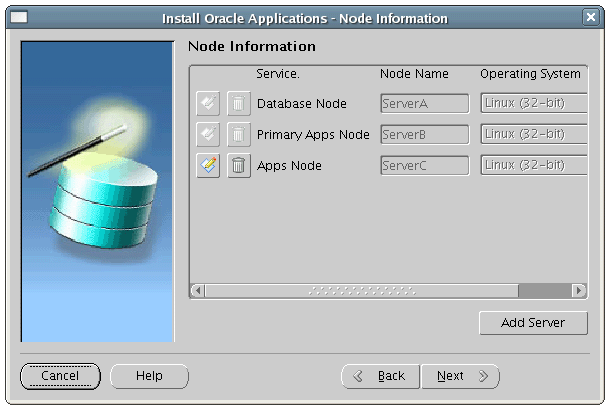
On the Applications node information screen, add another Applications node by clicking the Add Server button:
Review Node Information
Enter the information for the additional Applications node, Server C:
Specify Additional Applications Node - Initial Screen
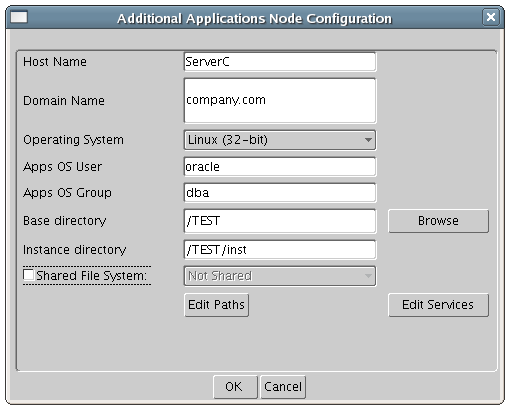
Click on the Edit Services button to enable the required services for Server C. In this example, you will need to enable Root Services, Web Entry Point Services, Web Application Services, and Other Service Group:
Specify Services to be Enabled
Continue the Rapid Install run:
Review Node Information
The result on Server A's file system will be a Database 11gR1 Oracle Home. No Oracle E-Business Suite components will be installed on this server at this point.
Using ftp, copy the <11gR1 ORACLE_HOME>/appsutil/conf_<SID>.txt configuration file to each Applications node (i.e. Server B and Server C).
Run Rapid Install on Server B as follows:
rapidwiz -silent -config <configuration file>
For example:
rapidwiz -silent -config /u01/PROD/conf_PROD.txt
Server B's file system will then contain top-level directories for Oracle Application Server 10.1.2.3, Oracle Application Server 10.1.3.4, APPL_TOP, COMMON_TOP, and INST_TOP.
Run Rapidwiz on Server C as follows:
rapidwiz -silent -config <configuration file>
For example:
rapidwiz -silent -config /u01/PROD/conf_PROD.txt
Server C's file system will then contain top-level directories for Oracle Application Server 10.1.2.3, Oracle Application Server 10.1.3.4, APPL_TOP, COMMON_TOP, and INST_TOP.
To upgrade a two-node system (database node and a single Applications node) you would carry out a similar procedure, omitting Steps 5, 6, 7, and 11.
Tip: If for some reason, conf_<SID>.txt is no longer available, you can run Rapid Install again on the additional Applications nodes, and enter different hostnames for Servers A, B and C.
You will now run Rapid Install to configure and start all server processes.
Configure an Existing Instance
When you ran Rapid Install previously, it created and stored an instance-specific context by replacing system variables you entered on the wizard screens with the specific values you saved in the configuration file (config.txt). In this section, you point Rapid Install to the Applications context file, so that it can use the values there to complete the process of configuring your system.
First, ensure that the database and Net Services listeners are started. Then start Rapid Install as instructed in Start the Rapid Install wizard.
On the Select Wizard Operation screen, choose the Upgrade to Oracle Applications 12.1.1 option to indicate you are performing an upgrade. This displays the Select Upgrade Action screen.
Select Upgrade Action
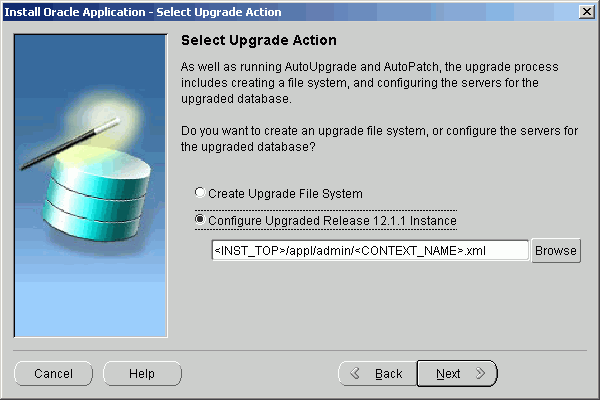
On this screen, select Configure Upgraded Release 12.1.1 Instance to indicate that you want to configure and start the servers for the upgraded database.
Indicate name and location of context file
When you ran Rapid Install previously, it configured your system by replacing system variables you entered on the wizard screens with the specific values you saved in the configuration file (config.txt). It stored this information as an Applications context file named <CONTEXT_NAME>.xml.
Note: See AutoConfig in Oracle E-Business Suite Concepts.
Complete the directory path to point Rapid Install to the Applications context file, <.INST_TOP>/appl/admin/<CONTEXT_NAME>.xml. Enter the path directly in the box, or click Browse and select the path.
Click Next to continue.
Begin the configuration process
For security reasons, the APPS password is not saved in the context file, so you will be prompted to re-enter it on the Review Application User Information screen. See Enter passwords for details. Click Next.
Rapid Install notifies you of the components and processes it will configure and start. Click Next to continue. At the prompt about beginning the installation now, click Yes.
Rapid Install creates server process control scripts and starts all server processes, including the current managers. When this process is complete, it displays a screen that shows you the steps completed. Click Finish to exit Rapid Install. This phase of the upgrade is complete.
You now need to carry out required post-upgrade tasks.
After you have completed the steps in this chapter, return to Oracle E-Business Suite Upgrade Guide: Release 11i to Release 12.1.1 and complete the remaining steps.
Return to this book and carry out all the actions in Finishing Tasks that apply to your upgraded system.
![]()
Copyright © 2000, 2009, Oracle and/or its affiliates. All rights reserved.