Assigning Compensation Plans, Pay Groups, and Payment Plans
This chapter covers the following topics:
- Overview of Assigning Compensation Plans, Pay Groups, and Payment Plans
- 360 Degree View of the Resource
- Customizing a Compensation Plan for a Resource
- Assigning a Compensation Plan to a Role
- Assigning a Role to a Resource
- Assign Pay Groups
- Assigning a Pay Group to a Role
- Assigning a Pay Group to a Resource
- Define Payment Plans
- Assign Payment Plans
- Assigning a Payment Plan to a Role
- Assigning a Payment Plan to a Resource
Overview of Assigning Compensation Plans, Pay Groups, and Payment Plans
In Oracle Incentive Compensation, compensation plans are not assigned directly to resources. A role is assigned to one or more individual resources, and then compensation plans are assigned to roles. The Compensation Manager can assign a compensation plan to a role using the Setup menu. The Compensation Manager or Compensation Analyst can create and assign roles to a resource by using the Resource tab of the 360 degree view of the resource. The correct profiles must be enabled for the responsibility (System Administrator > Security > Profiles) to make the 360 degree view of the resource tab updateable.
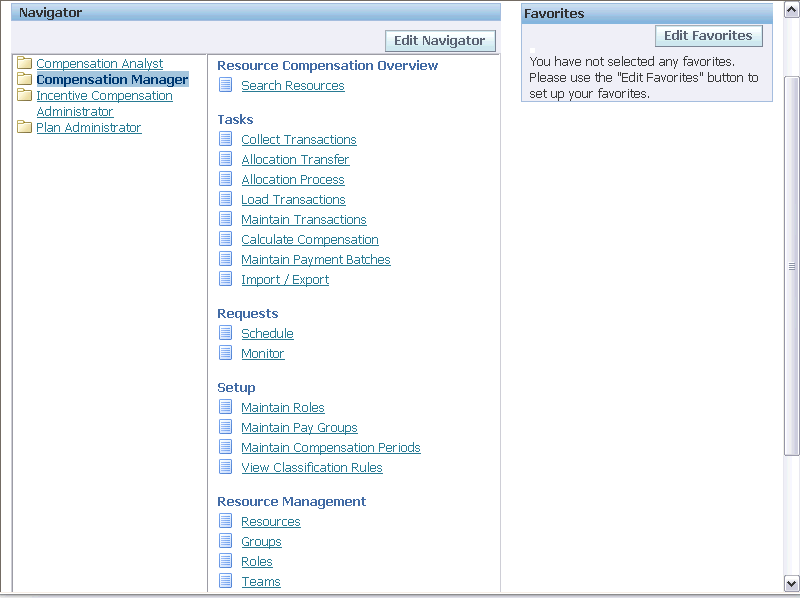
Compensation Manager and Analyst Navigator
The Compensation Manager or Compensation Analyst also can create, update, or add members of a team or group by using the Compensation Overview, 360 Degree View menu if the correct profiles are enabled for the responsibility (System Administrator > Security > Profiles).
A resource must be assigned to a Pay Group using a resource role. Generally, resources are grouped together in Pay Groups based upon the frequency of payments. A recommended best practice is to use a different role, separate from the compensation plan role, to assign resources to Pay Groups. This way if the job (role) changes, the resource's new plan assignment can occur without removing the resource from the Pay Group. This helps to avoid conflicts for unpaid paysheets and overlapping Pay Group assignment issues.
Optionally, you can assign a payment plan to a resource. Payment plans are created by the Plan Administrator to set up Draw and Recovery options and to define minimum (draw amount) and maximum (cap amount) payments. Both of these functions are part of the Setup section of the Navigator, along with maintenance of the compensation periods that measure achievement.
Warning: Do not open a new window during a browser session and navigate to the same page in the two windows simultaneously while you are assigning compensation plans, pay groups and payment plans to resources.
360 Degree View of the Resource
Oracle Incentive Compensation provides the Compensation Manager with an in context view of all resource setups and transactions. This enables quick reference and easy maintenance of this information in a single place.
The four sections of this area comprises four main sections:
-
Resource Setup
-
Plan Setup
-
Compensation
-
Notes
The Resource Setup tab displays data directly from Resource Manager and supports maintenance of resource compensation type of data.
The Plan Setup tab supports the management of resource plan customizations, payment plan assignments and customizations, and pay groups. For more information on compensation plan management, see Maintaining Compensation Plans. For more detail about payment plans, see Assign Payment Plans.
For help with pay groups, see Assign Pay Groups.
The Compensation tab gives access to current and historical compensation reports, provides viewing and maintenance of compensation transactions, and enables Compensation Managers to view and work on paysheets, without leaving the resource view or context. For more about reports, see Overview of Reports. For paysheet information, see Working with Paysheets.
The Notes tab provides the ability to add and review notes associated with resources or notes associated with changes to objects such as the compensation plan at a higher level. Notes are automatically generated by the system for changes made to most objects within Oracle Incentive Compensation, and are very useful for auditing and for complying with the Sarbanes-Oxley mandates.
Navigation
Compensation Manager > Search Resources
Customizing a Compensation Plan for a Resource
You can make changes to the plan elements of a compensation plan for a specific resource. You can customize:
-
Commission rates
-
Transaction modifiers
-
Target, Performance Goal, and Fixed Amount
-
Distributed amounts
Navigation
Compensation Manager > Resource Compensation Overview > Search Resources > Plan Setup > Compensation Plans
Notes
-
You must select the compensation plan and check the Customized box for any plan that you want to customize for a resource.
-
Click each subtab under Update Plan Element to make changes for a resource. Click the Details icon to expose the areas you can change, such as rate table rates. Click Apply after making changes.
Assigning a Compensation Plan to a Role
A role describes a set of salespeople who share a common compensation structure, for example, marketer, broker, and sales manager. Roles are created in Oracle Resource Manager using the Sales Compensation type.
After you have created a compensation plan, you can assign it to multiple roles. A compensation plan must be assigned to a role in order for the resources assigned to the role to receive compensation.
Navigation
Compensation Manager > Setup > Maintain Roles
Steps
-
Search for the role you need.
-
On the Compensation Plan subtab, add another row, and then select the compensation plan that you want to assign from the list of values.
-
Enter a start date and an end date.
-
Click Apply.
Resources who are assigned a role must also be assigned a pay group (see Assign Pay Groups.
The date range used to assign a compensation plan to a sales role must be within the start and end dates of the compensation plan itself.
Assigning a Role to a Resource
After you assign the compensation plan to a role, you can assign the role to a resource using Resource Manager.
More typically, resources are imported into Resource Manager where the roles are either mapped from the Jobs or created specifically in Resource Manager to be used for compensation plans and pay groups. In this case, the roles are assigned to the resources first. Then, after the compensation plan is created and tested, it is assigned to the role. When the assignment occurs the associated records are created by the system for the compensation plan for the resource.
The procedure below can be performed in the 360 Degree View.
Navigation
Compensation Manager > Resource Management > Resources
-
Search for a resource.
-
Click the Update icon next to the resource's name.
-
Under Active Roles, click Add Another Row.
-
Select the Sales Compensation role type.
-
Select a role name from the list of values.
-
Add start and end dates and click Apply.
Assign Pay Groups
Pay groups are used to group the resources together for payment processing who have the same frequency of payment and type, such as monthly calculation and payment integration to Oracle Payroll. A resource must be assigned to a pay group to receive compensation.
You can assign a pay group to a role or to an individual resource. If you assign a pay group to a role, every resource who is assigned the role receives that pay group automatically. See Assigning a Pay Group to a Role. The different methods of performing this procedure are detailed below.
Without pay group assignment, compensation setup is considered incomplete by the Oracle Incentive Compensation system because there are a number of dependencies on it. Pay group assignment is needed for paysheet creation and for successful opening of new periods. It is also required by Oracle Incentive Compensation to complete role-based setup data population at the resource level. Therefore, make sure that all resources have a pay group assigned before performing any of the aforementioned operations.
Assigning a Pay Group to a Role
You can assign a pay group to a role. Resources inherit the pay group when the role is assigned to them. After the pay group is assigned to the role, you can customize the pay group for individual resources, for example, changing the start and end dates. For an individual resource, locking makes it a direct assignment.
The Compensation Manager or Compensation Analyst can assign a pay group to a role in two different ways. The first way is to go to Setup > Maintain Pay Groups and assign a role to the pay group. You may also assign individual resources to the pay group using the Resources subtab in the pay group (recommended). Resources who have different roles used for compensation plan assignment may be mixed and matched easily using the Resource assignment tab. This is also the place where pay groups are created, so this way is convenient for assigning a newly created pay group to a role without having to navigate elsewhere. The second way is to open a role in the Maintain Roles area and assign a pay group to the role.
Using the Administration Tab
Navigation
Setup > Maintain Pay Groups
Prerequisites
- The pay group must be defined before it can be assigned to a role or resource.
Steps
-
Query for a pay group, or click Go to view all pay groups.
-
Click the Pay Group link to modify the pay group.
-
Click Add Another Row.
-
Select a role and enter start date and end dates.
-
Click Apply.
Assign a Pay Group to a Role
Just as you can assign a role to a pay group, you can assign a pay group to a role.
The pay group must already be defined.
Navigation
Compensation Manager > Setup > Maintain Roles
-
Query for a role.
-
Select the Pay Groups subtab.
-
Select Add Another Row.
-
Select a pay group name, along with start and end dates.
-
Click Apply.
You must enter a valid start date and end date for the assignment of a pay group to a role. An error message displays if the dates are not valid. A role cannot have more than one pay group assigned at a time.
Assigning a Pay Group to a Resource
Assigning a pay group to a role can be very efficient, but sometimes you want to assign a pay group individually to a resource, or customize a pay group that was assigned to the resource's role.
Pay group assignment is necessary for a resource to be paid, and is also required in order for the compensation plan that is assigned to the role to appear when you query for the compensation plan assignment.
There are two methods of assigning a pay group to a resource. The easiest is to query the resource in the Resource Compensation Overview (360 Degree View), click the Plan Setup tab and the Pay Groups subtab, and add the pay group there. The other method is to use the Maintain Pay Groups location. Instructions for that way follow.
Navigation
Setup > Maintain Pay Groups
Prerequisites
- The pay group must be defined.
Steps
-
Query for a pay group, or click Go to view all pay groups.
-
Scroll to the right and click the name link of the pay group you want to assign.
-
Click the Roles subtab.
-
Click Add Another Row.
-
Select a role and enter start date and end dates.
-
Click Apply.
A resource can be assigned multiple pay groups, but only one pay group can be active at a time.
Pay groups can be assigned to multiple resources at the same time and you can start and end pay group assignments by individual resource at any time within the duration of the pay group.
When you assign a pay group to a resource, the application automatically checks to see if there are any conflicts between the start and end dates of the pay group and the start and end dates for every resource to which the pay group has been assigned. For example, if you define a pay group starting Jan 1 and ending on Mar 31 and you have assigned it to a resource, the application will not let you change the end date for the pay group assignment beyond Mar 31.
In order to preserve the pay group assignment for a resource when their role is deleted from a pay group assignment, a Prevent Automatic Override check box has been added to the Update Pay Groups page (Setup > Maintain Pay Groups). This feature can be used to prevent individual resources assigned to a pay group from leaving their pay group, even if the other resources assigned to a role are assigned to a new pay group. The check box also prevents manual updates to the resource's pay group.
Define Payment Plans
Payment plans are an optional way to set up advance or deferred payments (sometimes referred to as draws) and to define minimum and maximum payments. The Plan Administrator can create payment plans to set rules governing how, when, and how much is paid and at what frequency.
The Plan Administrator can set amounts paid for a minimum to be recoverable (paid back by the resource) or non-recoverable (the resource does not have to pay them back). For maximum settings, he or she can set whether to pay compensation earned above the maximum to the resource at a later time.
The recovery schedule can be set up independently of the earnings for the period. For example, you can set the payment interval to Period (monthly) and the recovery schedule to Quarter. If the Recovery interval is greater than the payment interval, then the minimum amount is paid until the end of the recovery interval. Earnings are trued up at the end of the recovery interval.
Payment Groups enable you to set up multiple payment plans for a resource during a specific time period, as long as the payment plans are in different groups. The payment group codes are customizable; the default setting is Standard. Payment Group Codes are used to pay and recover adjustments made for the Payment Plan using the Payment Group Codes setup in Plan Elements.
If you want to prevent negative payments to resources, you can create a payment plan with a minimum payment amount of 0 and assign it to any resource who should not have a negative payment amount in the payment batch. If you want to recover any adjustments made to offset a negative balance in the payment batch, then make the zero minimum amount recoverable. This solution will not necessarily prevent a negative payment amount on an off-cycle payment batch. This is because the payment plan minimum is applied against period earnings, not payment batch earnings. To prevent a negative payment for off-cycle payment batches, you can either use a manual hold or a manual payment adjustment.
Here are two examples of payment batches, showing how the total period earnings determines if a payment batch is zeroed out or not.
-
Example 1: If payment batch 1 is for $1,000 and payment batch 2 is for -$200, the payment plan will not zero out the payment batch 2 amount. This is because period earnings are still greater than zero--in this case $800.
-
Example 2: If payment batch 1 is for $1,000 and payment batch 2 is for -$1,200, then the payment plan will zero out the payment batch 2 amount. In this case, period earnings are still less than zero--in this case -$200.
Navigation
Plan Administrator > Component Library > Payment Plans
Notes
-
Click Create to create a new payment plan or Go to display existing plans.
-
You must select an operating unit.
-
The default payment group setting is Standard. Period is the default payment interval. You can select other entries for these fields if they have been created separately during implementation.
-
For Recoverable, select Yes if you want the minimum amount to be recovered from later earnings. If you select No, the resource does not have to make up for the amount paid.
-
For the Recovery Option, select Immediate Recovery if you want the payment plan to apply its rules using earnings that have been collected during the accumulation period interval. If you select Delay Recovery, the application calculates recovery at the end of the interval.
-
For Pay Excess Later, select Yes if you want any amounts over the maximum to be rolled over and paid in future periods. Select No is you do not want to pay excess amounts to the resource.
-
The default recovery interval setting is Period. Based on the recovery interval, the 'true-up' of payments against compensation occurs at the end of the interval assigned.
-
For example, the Recovery Option is set to Delay Recovery, the Payment interval is Period, and the Recovery interval is Quarter. The quarters are Jan-Mar, Apr-Jun, Jul-Sep, and Oct-Dec. If a resource has a payment plan that is valid from February to May, recovery occurs in March. In June, at the end of the quarter, there is no recovery, because the payment plan is no longer in effect. The resource is paid all earnings.
-
After the payment plan is created, the Plan Administrator can immediately assign it to a role. See Assign Payment Plans for details.
Assign Payment Plans
Payment plans can be assigned at the role level, so that all of the resources to whom the role is assigned receive the same payment plan at the same time. See Assigning a Payment Plan to a Role for more information.
You can also assign payment plans at the resource level using the Resource 360 Degree View. This second approach is the recommended method in order to avoid conflicts later because the role is changed and a different compensation plan is assigned. Conflicts may arise when the role is updated but the payment plan cannot be changed because existing of unpaid pay sheets
You must decide which method of assigning payment plans works best for your organization. However, even if you decide to assign payment plans in mass at the role level, you can still assign and modify payment plans for individual resources as needed.
You can lock a payment plan assignment at the resource level to prevent it from being deleted if the payment plan assignment is changed subsequently at the role level.
When assigning a role to a payment plan, when you click the Apply button, an impact warning page displays, listing all resources who have the role. You can export resources who will be impacted and then can either select the Yes or No button to continue or cancel the assignment. If a resource is already assigned to another active payment plan, a separate region displays the resource and does not create the new Payment Plan assignment if you continue with the assignment by selecting Yes. If a resource has an unpaid paysheet, you must delete it before creating the assignment, or an error message displays.
When you assign a payment plan to an individual resource, if there is an overlapping payment plan or existing unpaid paysheet, an error message displays.
Assigning a Payment Plan to a Role
For speed and efficiency, you can assign a payment plan to a role. The resources who are assigned the role receive the payment plan automatically. A payment plan is assigned to the sales role with specific dates.
You can customize the payment plan for an individual resource for settings such as minimums, maximums, and start and end dates.
You can assign a payment plan to a role in two different ways. The first way, the Plan Administrator makes the assignment while creating or updating the payment plan. This method is convenient for assigning a newly created payment plan to a role without having to navigate to another tab. The second way, the Compensation Manager uses the Maintain Roles feature of the Setup area of responsibility.
Assigning a Role to a Payment Plan
Navigation
Plan Administrator > Component Library > Payment Plans
Steps
-
Search for the payment plan that you want to assign to the role.
You can also create a new payment plan before making the assignment.
-
Click the Name link.
-
In the Eligibility section, click Add Another Row.
-
Enter the role information and click Apply.
Assigning a Payment Plan to a Role
The Compensation Manager can assign a payment plan to a role using Resource Manager.
The payment plan must already be defined by the Plan Administrator.
Navigation
Compensation Manager or Compensation Analyst > Setup > Maintain Roles
-
Query for a role.
-
Click the Role Name link.
-
Click the Payment Plan subtab.
-
Click Add Another Row.
-
Enter the role information and click Apply.
Assigning a Payment Plan to a Resource
As part of maintaining resources, Compensation Managers or Compensation Analysts can assign a payment plan to a resource. Although a payment plan is often assigned to a role, and, thereby, automatically to a resource, it can be customized for date range, minimums or maximums as needed for the specific resource. You can prevent automatic overrides to the customized payment plan by checking a box.
Navigation
Compensation Manager > Search Resources
Prerequisites
- The payment plan must already be defined by the Plan Administrator.
Steps
-
Query for a resource.
-
Click the Plan Setup tab.
-
Click the Payment Plans subtab.
-
Click Add Another Row.
-
Select a payment plan. Some or all of the data fields may populate with data.
-
Customize the dates and the minimum or maximum amounts if needed.
-
Check the Prevent Automatic Override box if you want to maintain any custom settings you make.
-
Click Save.