Oracle® Insurance Rules Palette 9.4.0.0 E18894_01
New plans are added to companies through the Main Explorer tab. Once a new plan is added, security must be assigned to it or it will not be visible in OIPA. You can also edit a plan once it has been created. When a plan is created, the plan information is written to the AsPlan table.
Some business rules are automatically created and attached to a new plan. In OIPA, the Plan Screen, Segment Screen, Policy Screen, Policy Values Screen, Values Screen, EligibleTransactionsByPolicyStatus and Allocation Screen business rules are automatically created and can be found in the Plan Rules folder under the new plan. Any other business rules needed by the plan must be added by creating rule overrides from the Global Rules Explorer folder.
Note: A plan cannot be deleted once it has been created.
Right-click on the plan folder where you want to add the new plan.
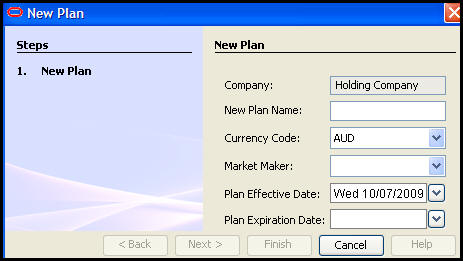
Select New Plan. The New Plan wizard will appear.
Enter the plan information.
Company Name: You will not be able to change the company name.
New Plan Name: Enter the name of your plan.
Currency Code: Select the default currency for monies applied to this plan. If the currency code is not listed, go to Admin Explorer and open the Currency folder. Add the new currency code to the Currency Editor. Refer to the Currency section for detailed steps on adding a new currency code.
Market Maker: Select the Market Maker you plan to use for any currency conversions. If the Market Maker is not listed, go to Admin Explorer and expand the Market Maker folder. Open the Market Maker Editor and add the new Market Maker. Refer to the Market Maker section for more details.
Plan Effective Date: Select the date when this plan will take effect.
Plan Expiration Date: Select the date when this plan will expire.
Select Finish when you have entered all of the plan information. The Finish button will only become enabled when you have entered all of the required plan information.
Note: The AsPlan table has a column called PointInTimeValuation, which needs to be set to Y if Point In Time valuation will be used for the plan. This must be inserted directly into the database.
New Plan Wizard
Copyright © 2009, 2011, Oracle and/or its affiliates. All rights reserved. Legal Notices