| Skip Navigation Links | |
| Exit Print View | |

|
Oracle GlassFish Server Message Queue 4.5 Administration Guide |
| Skip Navigation Links | |
| Exit Print View | |

|
Oracle GlassFish Server Message Queue 4.5 Administration Guide |
Part I Introduction to Message Queue Administration
1. Administrative Tasks and Tools
Starting the Administration Console
Adding a Broker to the Administration Console
To Add a Broker to the Administration Console
To View Available Connection Services
Working With Physical Destinations
Creating a Physical Destination
To Add a Physical Destination to a Broker
Viewing Physical Destination Properties
To View or Modify the Properties of a Physical Destination
Purging Messages From a Physical Destination
To Purge Messages From a Physical Destination
Deleting a Physical Destination
To Delete a Physical Destination
To Add an Object Store to the Administration Console
Working With Administered Objects
To Add a Connection Factory to an Object Store
To Add a Destination to an Object Store
Viewing Administered Object Properties
To View or Modify the Properties of an Administered Object
Deleting an Administered Object
To Delete an Administered Object
Running the Sample Application
3. Starting Brokers and Clients
6. Configuring and Managing Connection Services
8. Configuring Persistence Services
9. Configuring and Managing Security Services
10. Configuring and Managing Broker Clusters
11. Managing Administered Objects
12. Configuring and Managing Bridge Services
13. Monitoring Broker Operations
14. Analyzing and Tuning a Message Service
17. Broker Properties Reference
18. Physical Destination Property Reference
19. Administered Object Attribute Reference
20. JMS Resource Adapter Property Reference
21. Metrics Information Reference
22. JES Monitoring Framework Reference
A. Distribution-Specific Locations of Message Queue Data
B. Stability of Message Queue Interfaces
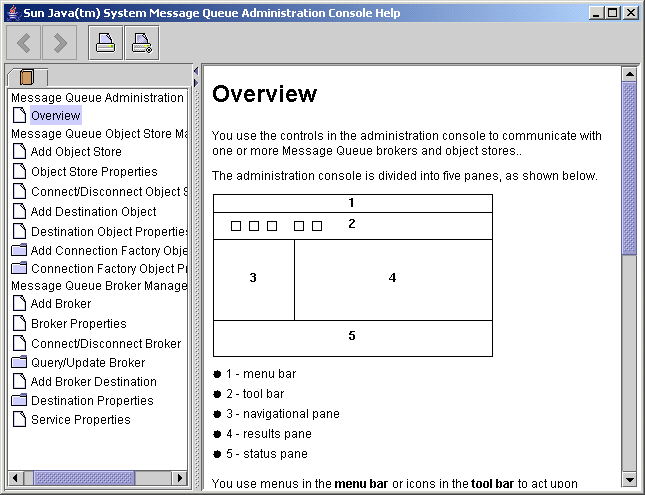
The Administration Console provides a help facility containing complete information about how to use the Console to perform administrative tasks. To use the help facility, pull down the Help menu at the right end of the menu bar and choose Overview. The Administration Console’s Help window (Figure 2-2) will be displayed.
Figure 2-2 Administration Console Help Window

The Help window’s navigation pane, on the left, organizes topics into three areas: Message Queue Administration Console, Message Queue Object Store Management, and Message Queue Broker Management. Within each area are files and folders. The folders provide help for dialog boxes containing multiple tabs, the files for simple dialog boxes or individual tabs. When you select an item in the navigation pane, the result pane to the right shows the contents of that item. With the Overview item chosen, the result pane displays a skeletal view of the Administration Console window identifying each of the window’s panes, as shown in the figure.
Your first task with the Administration Console will be to create a reference to a broker. Before you start, however, check the Help window for information. Click the Add Broker item in the Help window’s navigation pane; the contents of the result pane will change to show text explaining what it means to add a broker and describing the use of each field in the Add Broker dialog box. Read through the help text, then close the Help window.