 Read more...
Then you will generate a data control from the XML schema.
Next you will design a databound web page that displays the RSS feed contents by dragging objects from the Data Controls panel.
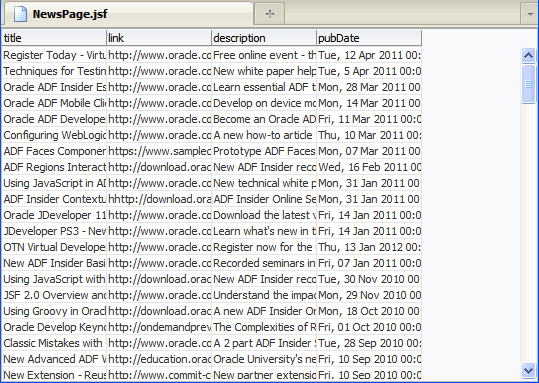
When you test run the page, the page in the browser will look something like this:
| Purpose | Duration | Application |
|---|---|---|
This tutorial shows you how to create a URL data control from an XML schema that defines the structure of an RSS feed. To see the complete application you will create, click the Download button to download a zip of the final application, and then unzip it in your JDeveloper mywork folder. |
40 minutes |  |
 Read more...
do the following before you run the application:
-
Open the application in JDeveloper. In the Application Navigator, Model project, double-click DataControls.dcx to open the file. Click Source to use the XML editor. Change the SchemaLocation setting to the directory where your JDeveloper is installed.
-
Follow the instruction in Step 2: Create an XML Schema, substep #2 only.
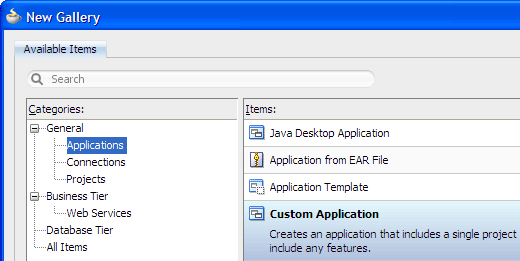
From the main menu, choose File > New. In the New Gallery, expand the General category and select Applications. Then in the Items list, select Custom Application and click OK.
To follow along with the example, enter
URLDataControlAppas the application name and click Next.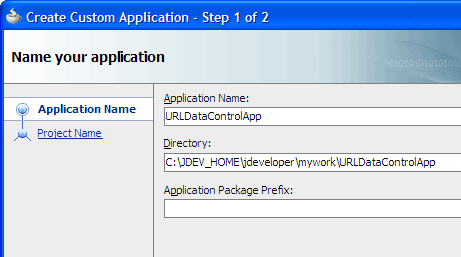
Enter
Modelas the project name.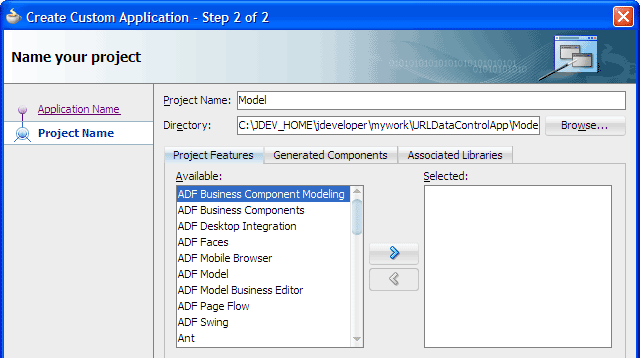
Click Finish.
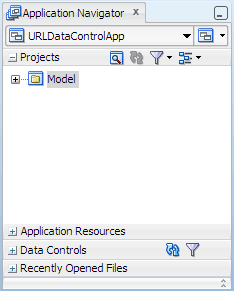
The Projects panel in the Application Navigator should look like this:
 Read more...
At the same time, it keeps track of your projects and all
environment settings.
Read more...
At the same time, it keeps track of your projects and all
environment settings.Based on prebuilt templates, a JDeveloper application allows you to specify a predefined type of environment, depending on the type of application you want to create (web application, Java application, and so on). Application templates provide you with a quick way to create the project structure for standard applications with the appropriate combination of features already specified. The application template also filters the work you do in JDeveloper such that the choices available are focused only on the features you are working with.
In this tutorial, you will use the Custom Application template, which makes available objects associated with all the features that JDeveloper supports in a single project.
Once you have created an application using a suitable template, you can still add new projects to the application and specify what features are to be included. To do this, in the Application Navigator, right-click the application name and choose New Project. In the New Gallery, you can select any type of project in the Items list.
 Read more...
The project or projects in the application define the associated features.
A JDeveloper project, which is used to logically group files that are related, keeps track of the source files, packages, classes, images, and other elements that your program may need. Projects manage environment variables such as the source and output paths used for compiling and running your program. Projects also maintain compiler, runtime, and debugging options so that you can customize the behavior of those tools per project.
You can add multiple projects to your application to easily access, modify, and reuse your source code. Different projects might contain files representing different tiers of a multi-tier application, for instance, or different subsystems of a complex application. These files can reside in any directory and still be contained within a single project.
 Read more...
Projects are displayed as the top level in the hierarchy in the Application Navigator. The Custom Application template
that you used for your application creates one project using a default project name (or the project name you entered).
In the Application Navigator you can collapse and expand any panel. You adjust the size of panels by dragging the splitter between two panels. To group and sort items in the Projects panel, use the
JDeveloper has the capability of recognizing many different file types, displaying each in its appropriate viewer or editor when you double-click the file in the Application Navigator. Closing an application or project closes all open editors or viewers for files in that application or project and unloads the files from memory.
Note: Nodes in italics in the Application Navigator mean that the elements have not yet been saved. A project node is bold when a file in the project is selected.
From the main menu, choose Application > Show Overview. The Application Overview window opens in the editor window area.
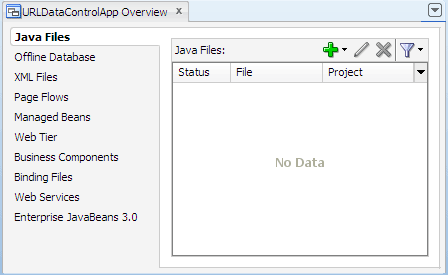
All objects that you create within JDeveloper appear in the Application Overview file summary pages, arranged by object type. As you create new files and artifacts, you can view them filtered by status and project.
You can optionally close the Application Overview window, since you will not be using it to create objects for this application.
Before creating a URL service data control, you have to determine the URL service to use, and define the XML schema for the URL service. To be able to follow the steps exactly as written, enter values as shown in the instructions throughout the tutorial. Read the information below to learn about the URL service you're going to use in the example.
Click XML next to JDeveloper News to open the RSS feed page.
Take note of the URL (for example,
http://www.oracle.com/ocom/groups/public/@otn/documents/webcontent/132361.xml).-
From the main menu, choose Tools > Preferences. In the Preferences dialog, click Web Browser and Proxy on the left, then select Use HTTP Proxy Server on the right to have the server use a proxy to access the internet. Enter the URL or DNS name of your organization's proxy server, and the port number your machine uses to access the proxy server.
-
Before you create the XML schema, you will open the HTTP Analyzer in JDeveloper to view the XML contents behind the URL. Then you use the XML elements in the contents returned to define the structure of the XML schema. You may skip ahead to #10 in this step, if you wish.
-
From the main menu, choose Tools > HTTP Analyzer.
-
In the HTTP Analyzer tool window, click
 Start HTTP Analyzer.
 -
Click
 Create New Request to open a test window. In the HTTP Analyzer test window, click HTTP Content at the bottom of the window.
 Enter
http://www.oracle.com/ocom/groups/public/@otn/documents/webcontent/132361.xmlin the URL field. Then select GET from the Method dropdown list.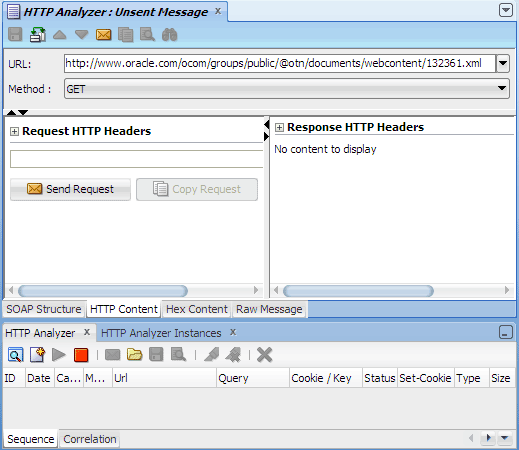
-
Click
 Send Request. When you see the Message Content Warning dialog, click Yes.
You should see the XML contents of the news page in the Response pane.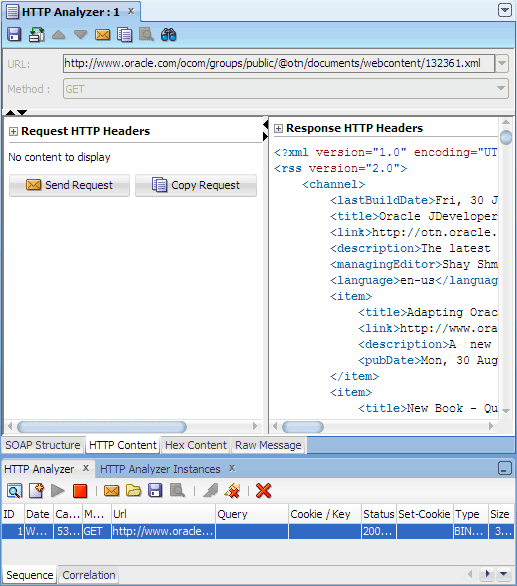
Click
 Stop to terminate the HTTP Analyzer.
Then close the HTTP Analyzer windows, since you will not be using them in the rest of the tutorial.
Stop to terminate the HTTP Analyzer.
Then close the HTTP Analyzer windows, since you will not be using them in the rest of the tutorial.-
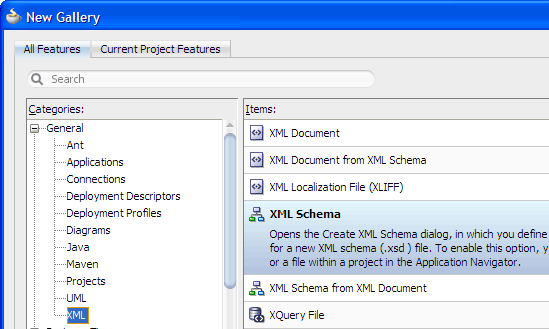
In the Application Navigator, right-click the Model project and choose New > General > XML > XML Schema, then click OK.
-
In the Create XML Schema dialog, enter
newsrssfeed.xsdas the file name. In the Directory field, append
\srcafterModel(for example,<JDEVELOPER_HOME>\jdeveloper\mywork\URLDataControlApp\Model\src). Then click OK.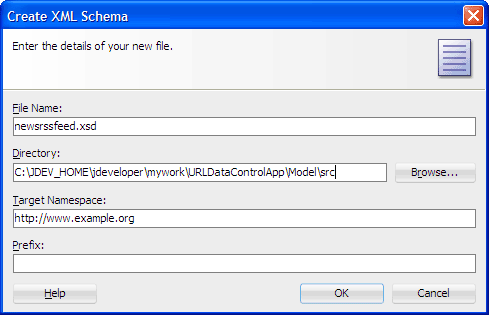
In the XSD schema editor, click Source at the bottom of the editor window to switch to the XML editor.
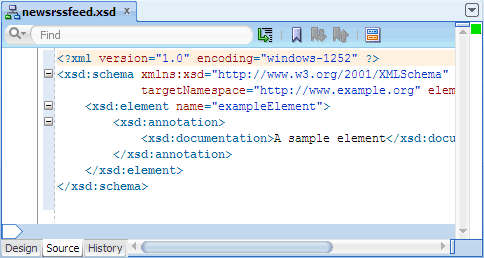
After the first line, replace the entire
<xsd:schema>element and its children elements with the following code:Click
 Save All to save your work.
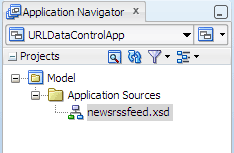
When you complete the steps for creating an XML Schema, the Projects panel in the Application Navigator should look like this:
 Read more...
The live RSS feed you will use is the Oracle JDeveloper RSS feed that is available from the JDeveloper page on the
Oracle Technology Network (OTN) web site.
Use your web browser to go to the JDeveloper page on OTN:
http://www.oracle.com/technetwork/developer-tools/jdev/overview/index.html
Then do the following:
 Read more...
By default, JDeveloper uses the proxy settings from the default browser on the same machine. If you are having connection problems, you might need to modify the settings.
By default JDeveloper also picks up the proxy exceptions set for your browser the first time JDeveloper is started. You can amend the list to add exceptions to proxy servers for accessing internal sites using "|" to separate entries.
 Read more...
When you first open the HTTP Analyzer, by default JDeveloper displays the HTTP Analyzer tool window and instances window. When you initiate a new request, the HTTP Analyzer test window displays in the center of JDeveloper (in the same place where other editors appear).
By using the HTTP Analyzer against the URL of the RSS feed page, you can get the XML contents behind the URL, and also verify that the data source of the URL service is working as expected.
 Read more...
using all the elements shown in the response
(for example,
 rss, channel, item, and so on).
To create an XML schema from the RSS feed XML contents, you define an XSD element for each unique XML element that you find, enclosing them within XSD complex and sequence elements as needed.
 Read more...
To create an XML schema from the RSS feed XML contents, you define an XSD element for each unique XML element that you find, enclosing them within XSD complex and sequence elements as needed.
For complete information on the XML Schema, see the W3C XML Schema page at
http://www.w3.org/XML/Schema
For your convenience, we have provided the XML schema that you will use. You can copy and paste the sample code into the XML editor.
xmlns="http://www.example.org"
targetNamespace="http://www.example.org"
elementFormDefault="qualified">
<xsd:element name="rss">
<xsd:complexType>
<xsd:sequence>
<xsd:element name="channel" type="channel"></xsd:element>
</xsd:sequence>
</xsd:complexType>
</xsd:element>
<xsd:complexType name="channel">
<xsd:sequence>
<xsd:element name="lastBuildDate" type="xsd:string"></xsd:element>
<xsd:element name="title" type="xsd:string"></xsd:element>
<xsd:element name="link" type="xsd:string"></xsd:element>
<xsd:element name="description" type="xsd:string"></xsd:element>
<xsd:element name="managingEditor" type="xsd:string"></xsd:element>
<xsd:element name="language" type="xsd:string"></xsd:element>
<xsd:element name="item" type="item" minOccurs="0" maxOccurs="100"></xsd:element>
</xsd:sequence>
</xsd:complexType>
<xsd:complexType name="item">
<xsd:sequence>
<xsd:element name="title" type="xsd:string"></xsd:element>
<xsd:element name="link" type="xsd:string"></xsd:element>
<xsd:element name="description" type="xsd:string"></xsd:element>
<xsd:element name="pubDate" type="xsd:string"></xsd:element>
</xsd:sequence>
</xsd:complexType>
</xsd:schema>
 Read more...
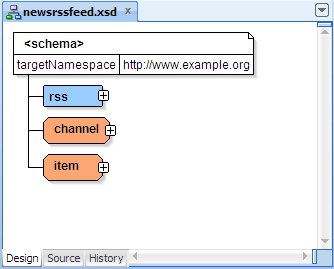
You can optionally close the XSD schema editor, since you won't be using it later.
-
In the Application Navigator, right-click the Model project and choose New > Business Tier > Web Services > URL Service Data Control, then click OK.
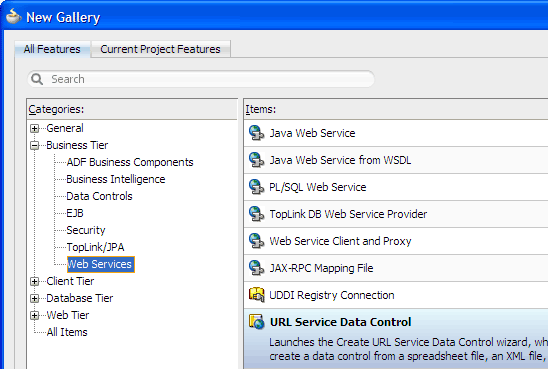
On step 1 of the wizard, Data Source, enter the data control name
News. Click Next.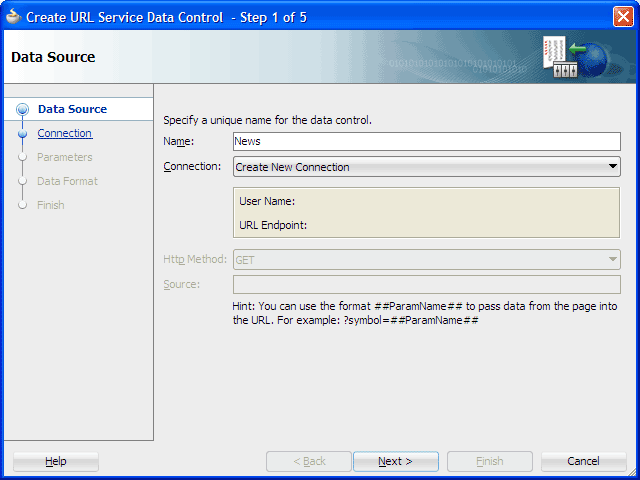
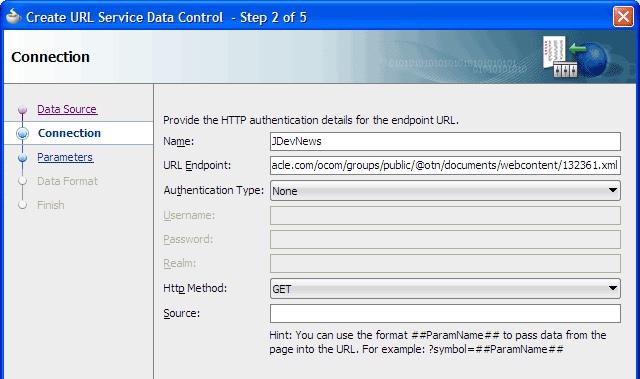
On step 2, Connection, enter the connection name
JDevNewsin the Name field.In the URL Endpoint field, enter the URL to the live RSS feed.
For example:http://www.oracle.com/ocom/groups/public/@otn/documents/webcontent/132361.xml.Confirm that Authentication Type is None and Http Method is GET. Then click Next twice.
On step 4, Data Format, select XML from the dropdown list.
-
In the XSD URL field, enter
file:///C:/<JDEVELOPER_HOME>/jdeveloper/mywork/URLDataControlApp/Model/src/newsrssfeed.xsd, where<JDEVELOPER_HOME>is the location of your JDeveloper install. Click Next.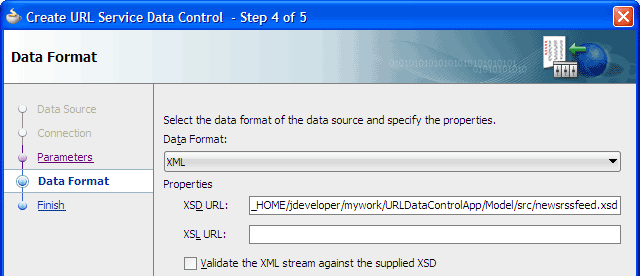
-
On step 5 of the wizard, click Test URL Connection.
You should see the textURL Test:URL Successfulin the dialog.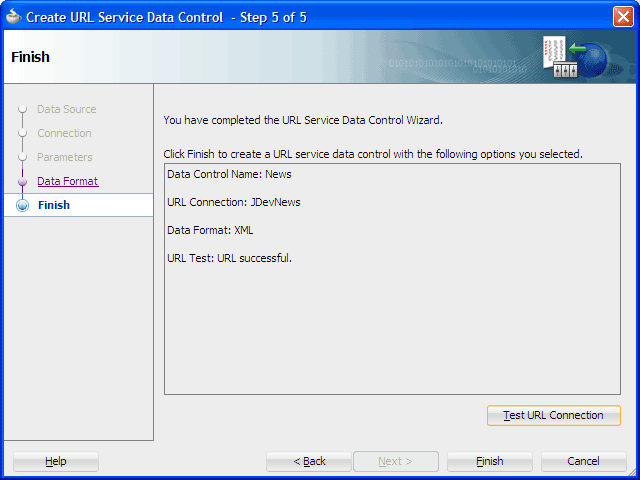
-
Click Finish, then click
 Save All to save your work.
JDeveloper adds the data control definition file (DataControls.dcx) to the project, and opens the file in the overview editor.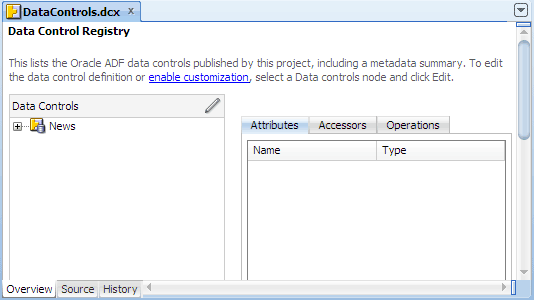
-
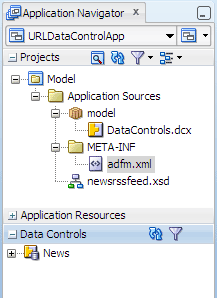
In the Application Navigator, expand the Data Controls panel.
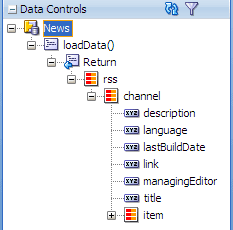
You should see the News data control you have created and made available to the application. If you don't see the data control you created, click Refresh
on the panel toolbar.
-
DataControls.dcx: Serves as a "table of contents" listing all the data controls in the project. The DCX file is created the first time you register a data control on a business service. The DCX file contains information to initialize data controls to work with session beans. adfm.xml: Is the registry used by the Data Controls panel in JDeveloper to locate the data controls that appear in the application. This file is not used at runtime.
 Read more...
The URL data control supports two data stream formats: XML data and spreadsheet data (delimiter separated values).
By creating a URL service data control, you can access and consume the URL data stream in your application.
 Read more...
When the data source is formatted as XML, you need to specify the URL that identifies the XSD schema definition. The XML data control relies on the XSD schema definition to be able to validate the format of the XML data stream.
In a previous step, you created the XSD schema definition in
<JDEVELOPER_HOME>/jdeveloper/mywork/URLDataControlApp/Model/src.
To specify the location of the XSD schema definition on your local machine, prefix the location with file:///. For example:
file:///C:JDevInstall/jdeveloper/mywork/URLDataControlApp/Model/src/newsrssfeed.xsd
 Read more...
-
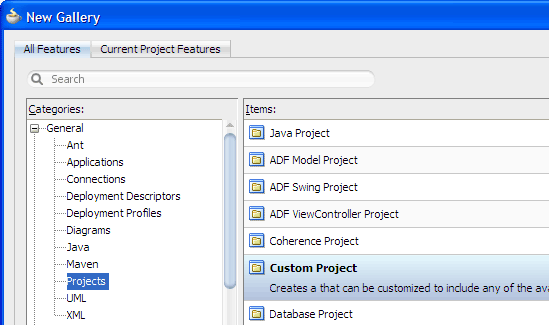
From the main menu, choose File > New > General > Projects > Custom Project, then click OK.
Enter
Viewas the project name. Then select ADF Faces from the Available list and shuttle it to the Selected list.
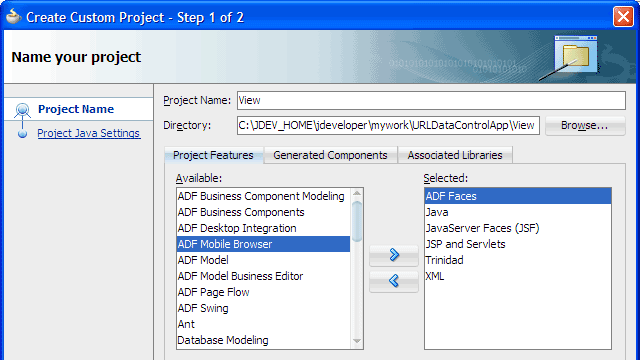
Click Finish.
You should see the View project in the Application Navigator.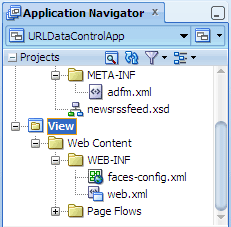
In the Application Navigator, right-click the View project and choose New > Web Tier > JSF/Facelets > Page, then click OK.
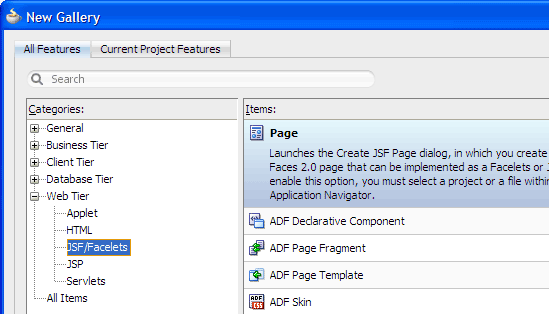
-
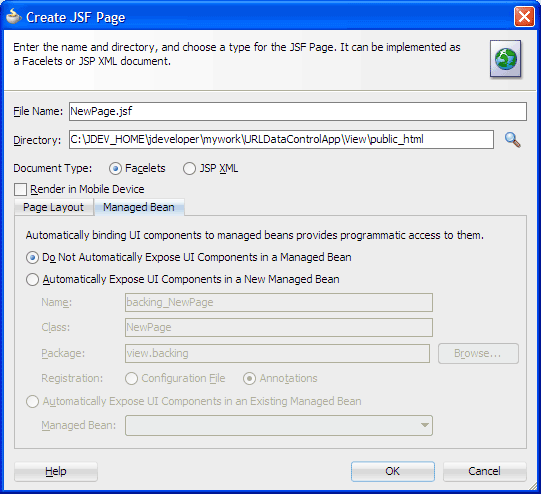
In the Create JSF Page dialog, enter
NewsPage.jsfas the file name. Make sure Facelets is the selected document type.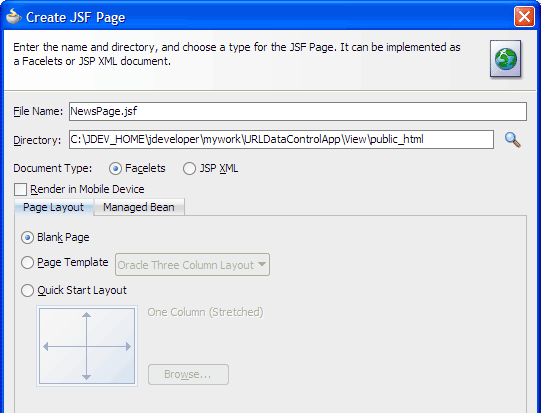
The New Gallery
The JSF navigation diagrammer
The ADF task flow diagrammer (available only in the Studio edition of JDeveloper)
On the Page Layout page, select Blank Page. On the Managed Bean page, select Do Not Automatically Expose UI Components in a Managed Bean.
Click OK.
By default JDeveloper displays the new JSF Facelets page in the visual editor.
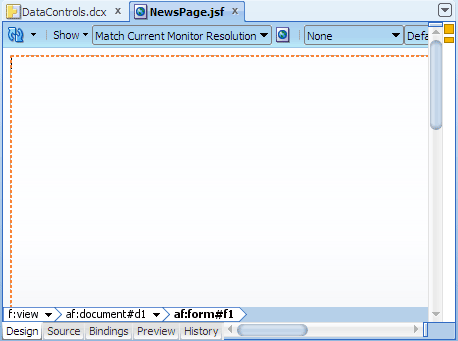
In the Component Palette, ADF Faces page, Layout panel, drag
 Panel Stretch Layout and drop it on the blank page in the
visual editor.
When you drag the component to the visual editor, you should see a target rectangle with the name Form on the page; this means the component you are dragging will be inserted inside that target component.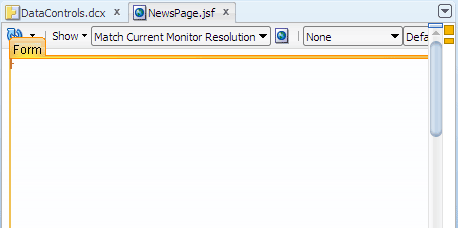
Click
 Save All to
save your work.
Save All to
save your work.Web Content folder: Contains the pages you create, along with other files that must be visible to the client browser (such as stylesheet files and images) for your application.
/WEB-INF/ folder: Contains the required Web Application Deployment Descriptor (
web.xml) and the JSF configuration file (faces-config.xml).web.xml file: The web application deployment descriptor for your application. This is an XML file describing the components that make up your application, along with any initialization parameters and container-managed security constraints that you want the server to enforce for you.
faces-config.xml file: Where you register the JSF application's configuration resources, such as validators, converters, managed beans, and navigation rules.
trinidad-config.xml file: Where you configure ADF Faces features such as skin family and level of page accessibility support.
 Read more...
Features are set per project. They are used only within JDeveloper to assist you as you work, and have no effect on the
data in the project itself. Adding ADF Faces automatically propagates the required associated features in the
Selected pane.
jsf) or JSP documents written in XML syntax (which have file extension .jspx).
 Read more...
You can create both types of JSF pages with the Create JSF Page dialog, opening it from:
 Read more...
By default components are not exposed to managed beans. If you wish to bind components to managed beans, select one of the automatic binding options on the Managed Bean page in the dialog. When you use an automatic binding option, JDeveloper automatically creates a backing bean for any new JSF page that you create, and associates every UI component in the page to a corresponding property in the backing bean for eventual programmatic manipulation.
But if you intend to add ADF bindings to a page, do not use the automatic binding feature. If you use the automatic binding feature, you will have to remove the managed bean bindings later, after you have added the ADF bindings.
.jsf), JDeveloper automatically
creates a starter page structure
 Read more...
with one
 xmlns attribute for the JSF Core tag library and one
xmlns attribute for the ADF Faces tag library.
The other elements included in a starter file are elements for laying out a page,
specifically everything else within <f:view> and </f:view>.
To view the page code, click the Source tab to switch from the visual editor to the XML editor. For example, the following code is generated for the new page:
<!DOCTYPE html PUBLIC "-//W3C//DTD XHTML 1.0 Transitional//EN"
 "http://www.w3.org/TR/xhtml1/DTD/xhtml1-transitional.dtd">
<f:view xmlns:f="http://java.sun.com/jsf/core"
        xmlns:af="http://xmlns.oracle.com/adf/faces/rich">
  <af:document title="NewsPage.jsf" id="d1">
    <af:form id="f1"></af:form>
  </af:document>
</f:view> Read more...
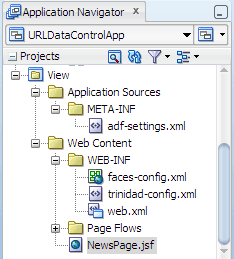
In the project, the folders and files that conform to the Java EE Web module directory structure are:
In the Data Controls panel, expand News | loadData() | Return | rss | channel.
-
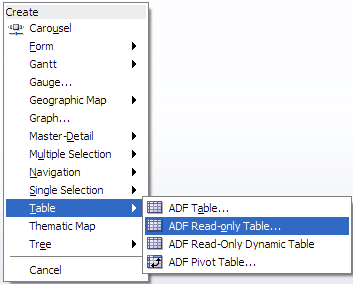
Click and drag item to the center facet on the page in the visual editor. From the Create context menu, choose Table > ADF Read-only Table.
-
In the Edit Table Columns dialog, select Enable Sorting.
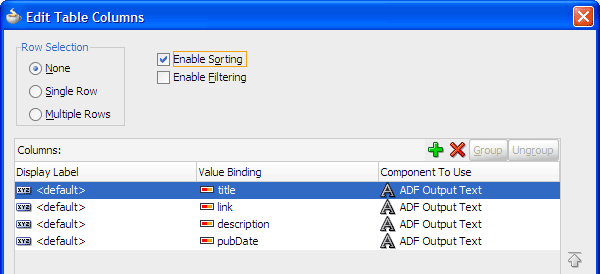
Accept the remaining default values and click OK.
The page in the visual editor should look similar to this: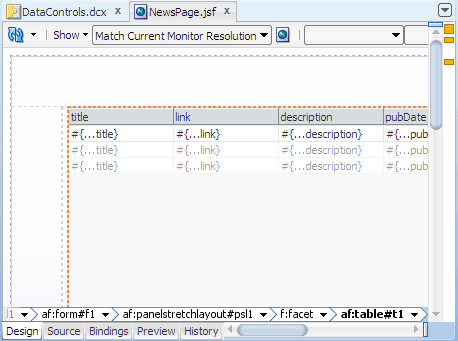
<af:messages>used at the top of an application page to give users important messaging information.<af:table>, used to display tabular data.<af:column>, used to create separate columns in the table.<af:outputText>, which supports styled text.-
In the Application Navigator, right-click NewsPage.jsf and choose Run.
If the Create Default Domain dialog displays, enter the default password, for exampleweblogic1, in the Password and Confirm Password fields, then click OK.
The page in the browser should look similar to this:

Starts Integrated WebLogic Server, if not already running.
Compiles and deploys the application to Integrated WebLogic Server.
-
Launches the application in your default browser using the following default address:
http://<your_machine_IP_address>:<http_port>/<your_application_name>-<your_project_name>-context-root>/faces/<path_to_the_page> NewsPagePageDef.xml: The page definition file for the JSF page. A page definition file defines the binding objects that populate the data in UI components at runtime. The binding objects defined by a page definition file are instantiated in a binding container, which is the runtime instance of the page definition file.DataBindings.cpx: The file defines the binding context for the entire application and provides the metadata from which the binding objects are created at runtime. It also maps individual pages to page definition files and declares which data controls are being used by the application.
 Read more...
You use the Data Controls panel to insert databound components into your JSF page in the visual editor.
With the aid of the Data Controls panel, UI design is a series of drag-and-drop steps. The list of available UI controls appears when you drop the data object selection from the panel into the page. Only the UI controls that are appropriate to display the chosen data object will appear in the list.
When you insert a component from the Data Controls panel, JDeveloper automatically creates the various code and objects needed to bind the component to the data control you selected. A new Oracle ADF binding will be defined in the page's UI model and the inserted component will contain references to Oracle ADF bindings, using EL (expression language) syntax.
 Read more...
To see the ADF data bindings defined for the page,
click Bindings at the bottom of the editor window.
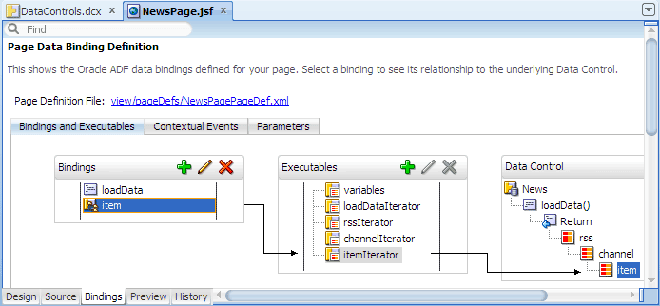
When you create a databound table using the Data Controls panel, JDeveloper adds the following ADF Faces tags to your page:
A typical ADF data binding EL expression uses the following syntax to reference any of the different types of binding objects in the binding container:
#{bindings.BindingObject.propertyName}
where
bindings is a variable that identifies that the binding object being referenced by the expression
is located in the binding container of the current page. All ADF data binding EL expressions must start with the bindings variable.
At runtime, the EL expression is evaluated and a value is pulled from the binding object to populate the component with data when the page is displayed.
 Read more...
Integrated WebLogic Server is a Java EE runtime service for packaged archive deployment. Based on zero-copy deployment,
Integrated WebLogic Server lets you run and test an application and its projects as a Java EE application in a Java EE container.
No special connection setup is required to use Integrated WebLogic Server. You can run the entire application, a project, or
individual JSF pages.
When you run a JSF application in the IDE, JDeveloper automatically:
Note: Terminating the application stops and undeploys the application from Integrated WebLogic Server but it does not terminate Integrated WebLogic Server.
When you complete the steps for adding the data control to the JSF page, the View project in the Application Navigator, should now look like this:
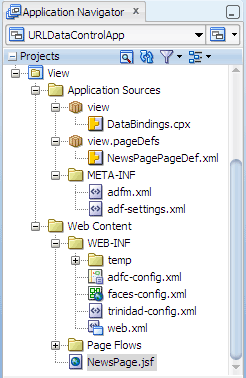
The new files added to the Application Sources folder in the View project include:
 Read more...
To improve the user experience, you will convert the column of news titles into links. This lets end users view a news
topic by clicking the title text.
The JSP/HTML visual editor is integrated with other tools in the IDE such as the Structure window, Component Palette, and Property Inspector. When you make a change to a page in one of these tools, the change is reflected in the other tools as well.
In the Application Navigator, View project, select NewsPage.jsf. In the Structure window, expand the hierarchy of components until you see the af:table component.
-
Expand af:table, and then expand the first column component af:column - #{bindings.item.hints.title.label}.
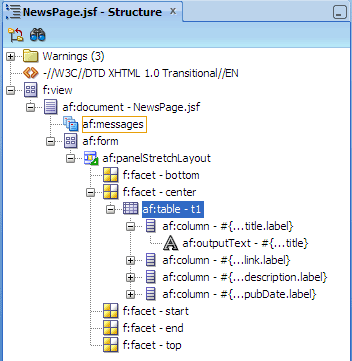
-
In the Component Palette, ADF Faces page, General Controls panel, drag
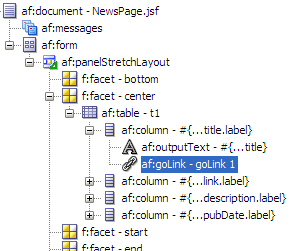
 Link (Go) and drop it into the first af:column component in the Structure window.
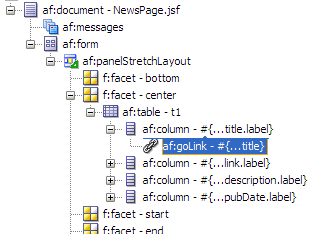
This inserts af:goLink below af:outputText in the Structure window:
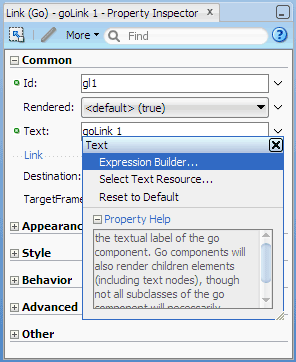
In the Property Inspector of the Go Link component you just added, choose Expression Builder from the
 dropdown menu at
the end of the Text field.
-
In the Expression box, delete the default text of
goLink 1. Then in the box under Variables, expand JSP Objects | row and select title.
You should see the expression#{row.title}.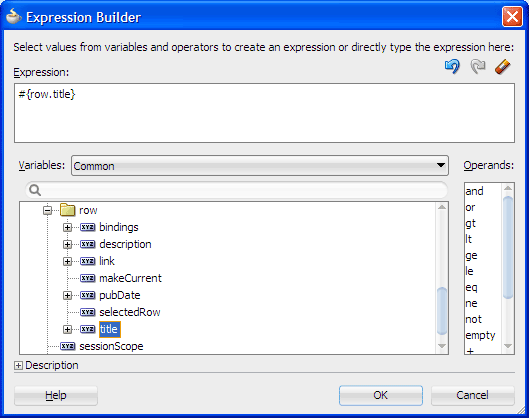
Click OK.
The expression#{row.title}should be populated in the Text field in the Property Inspector.-
In the Property Inspector of the same Go Link component, choose Expression Builder from the
 dropdown menu at the end of the Destination field.
 -
In the Variables box, under JSP Objects | row, select link and then click OK.
The expression#{row.link}should be populated in the Destination field in the Property Inspector.
The Go Link component is now bound to the same attribute values as the OutputText components in the first and second columns (title and link, respectively).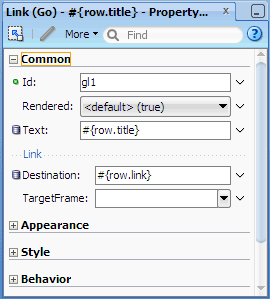
In the Property Inspector of the same Go Link component, select _blank from the TargetFrame dropdown list.
This opens a new browser tab or window when the link is selected at runtime.In the Structure window, select af:outputText that is above af:goLink, then press the Delete key to delete the selected component since you no longer need the OutputText component.
The first af:column component should now look similar to this:
-
In the Structure window, select the second column component af:column - #{bindings.item.hints.link.label}, then press Delete to delete the selected column since a column for links is no longer needed.
There should now be only three af:column components:
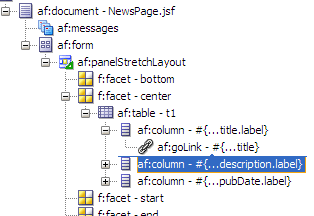
In the Structure window, confirm that the column component af:column - #{bindings.item.hints.description.label} is selected. In the Property Inspector, Appearance section, change the Width value to
200.In the Structure window, select the first column component af:column - #{bindings.item.hints.title.label}. In the Property Inspector, Appearance section, change the Width value to
300.
The table in the visual editor should now look like this: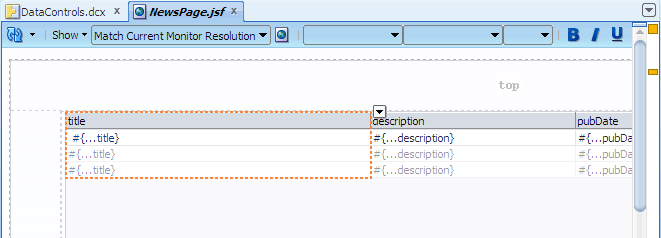
In the Application Navigator, View project, right-click NewsPage.jsf and choose Run.
The page in the browser should look similar to this: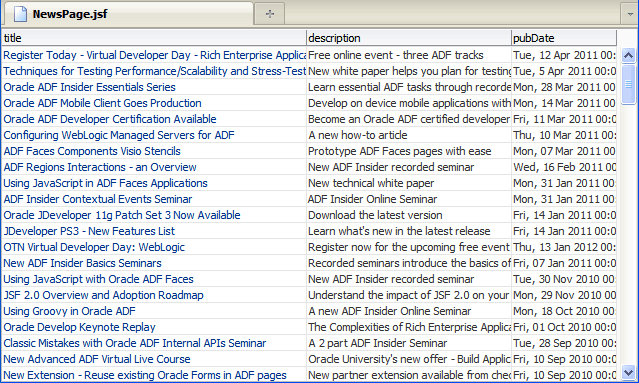
 Read more...
As shown in the Structure window, the Table component contains an ADF Column component for each attribute named in the table
binding. Each Column component contains another component that is bound to the attribute's value in order to display data.
 Read more...
You will use the Expression Builder to bind the Go Link component to the same attribute value as the original Output Text component.
To make the title text a link, you will set the Destination attribute on the Go Link component.
 Read more...
In the browser page, you can also expand the width of a table column by dragging one end of the column header.
In the editor window, click the DataControls.dcx tab to bring the DCX overview editor forward.
If the DCX file is not already open, double-click DataControls.dcx in the Model project in the Application Navigator to open the file.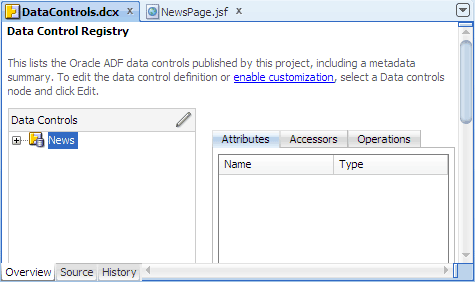
Expand News | loadData() | Return | rss | channel. Then select item and click
 Edit
to open another overview editor.
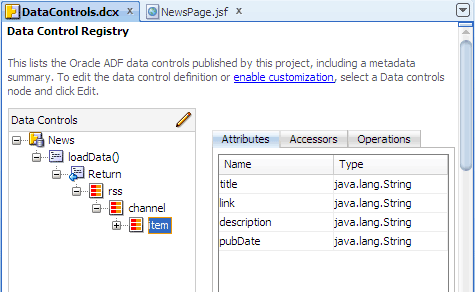
-
In the loadData_Data_item.xml overview editor, click Attributes on the left.
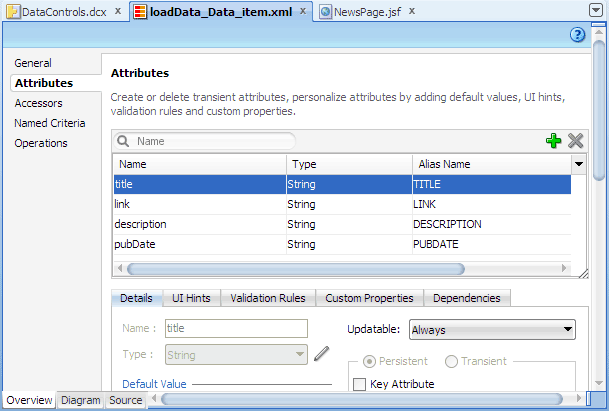
-
With title selected in the Attributes table, click the UI Hints tab. Then enter
News Titlein the Label field.
Display Hint: Determines whether the attribute will be displayed or not.
Label: The text used in prompts or table headers that precede the value of a data item.
Tooltip: The text used in tooltips or flyover text. In web applications, it appears as the value of the HTML ALT attribute.
-
Format Type: Defines the formatter to use when the data item is displayed. Formatters are basically a collection of format masks that you can define in the
<JDeveloper_Install>/jdeveloper/systemn.n.n.../o.BC4J/formatinfo.xmlfile. Format: The particular format mask used by the selected formatter.
Control Type: The control type used to display the data item in the client UI: Edit makes the control editable, Date displays a calendar picker, and Default is interpreted by the client to select the most appropriate control.
Display Width: Defines the character width of the control that displays the data item.
Display Height: Defines the number of character rows of the control that displays the data item.
Form Type: Determines whether the attribute will be displayed in Detail or Summary mode. Detail mode produces a long form, Summary mode a short one. This property is supported for ADF Swing applications only; it is not available for Business Components web applications.
Field Order: Defines the numeric order in which you want the attribute to render within a category
Category: The identifier to be used by the dynamic rendering user interface to group attributes for display. The user interface will render the attribute with other attributes of the same category. You can use the category hint to aid the user interface to separate a large list of view object attributes into smaller groups related by categories. This control hint will be utilized by any dynamic rendering user interface that displays the attribute.
Auto Submit: Triggers a partial submit on value changes in the user interface when set to true (enabled).
-
Repeat the procedure to add ui hint labels for the attributes description and pubDate, using the label text
DescriptionandDate, respectively. -
In the Application Navigator, View project, right-click NewsPage.jsf and choose Run.
You should see the new labels you entered on the page in the browser:
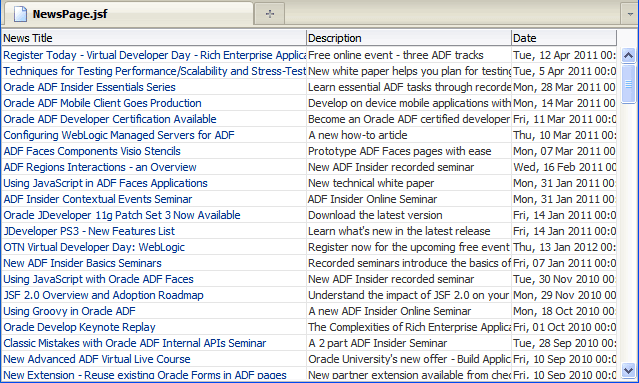
 Read more...
This mechanism, known as control hints, permits application developers to centralize
certain UI settings across clients and thereby control many aspects of the way the UI interacts with the data item. Because the
control hints are set at the level of the business service, it can also reduce the amount of UI coding.
The ADF control hints mechanism supports these control hint properties that you can customize:
.properties file for you that
contains the text resources for the project.
 Read more...
The file that defines the value for the control hints you set depends on the specific business service used for the project. In the case of beans-based business services, (including JavaBeans, Enterprise JavaBeans, and Oracle TopLink), by default JDeveloper generates a standard
.properties file for the project's text resources and saves the control hint definitions as
translatable strings.
Notice in the Application Navigator that the file
ModelBundle.properties has been added to the Model project in the model package:
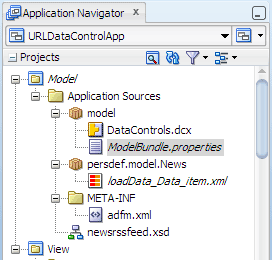
The project-level resource bundle option JDeveloper uses to save control hints is determined by the Resource Bundle page of the Project Properties dialog. By default JDeveloper sets the Resource Bundle Type option to Properties Bundle, which produces a
.properties file.
The first time you customize a control hint in the project, JDeveloper creates the
ModelBundle.properties file. The ModelBundle.properties file contains translatable key strings for the control hint definitions you added. For example, if you open ModelBundle.properties in the source editor, you should see the following code that identifies the translatable string:
#

model.News.loadData_Data_item.title_LABEL=News Title
 Read more...
 Try the column sorting feature by selecting the Sort Ascending or Sort Descending icon on a column header. The sorting feature is enabled when you selected the Enable Sorting checkbox in the Edit Table Columns dialog.
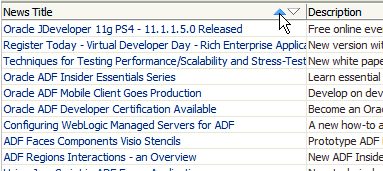
- Use JDeveloper wizards and dialogs to create applications, starter pages and starter XSD documents
- Use the visual editor, Component Palette, and Property Inspector to create UI pages
- Use a wizard to create a URL service data control in XML format
- Use the Data Controls panel to create databound UI components without writing any code
- Set labels at a centralized location for the business service
- Use Integrated WebLogic Server to run an ADF Faces application
- Using a Bean Data Control
- Consuming a Web Service from a Web Page
- Using a Placeholder Data Control
- Fusion Developer's Guide for ADF
- Web UI Developer's Guide for ADF

